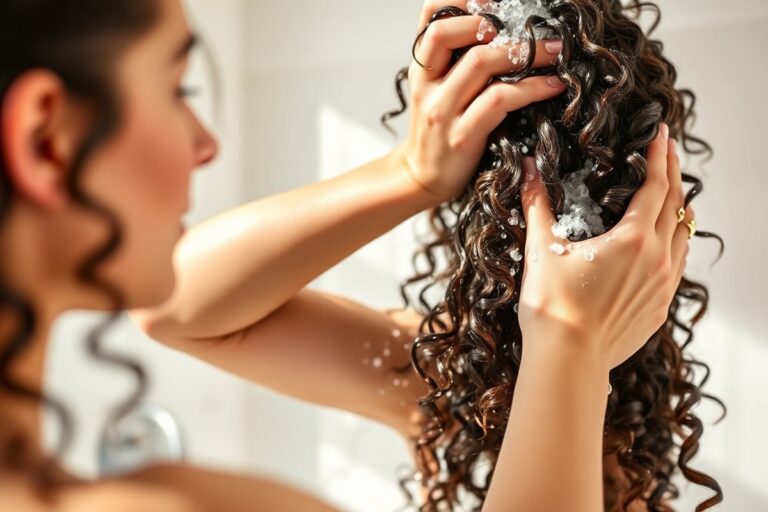
How to Make Shampoo at Home with Natural Ingredients: Complete Guide for All Hair Types
Making shampoo at home with natural ingredients takes just a few steps. Use gentle cleansers, herbs, and oils that are easy to find. Mixing these carefully creates shampoo without harsh chemicals or additives.
Choose ingredients that fit your hair type and scalp. Clay or baking soda works for oily hair.
Moisturizing oils like coconut or jojoba help dry hair. These natural elements clean and nourish while protecting your scalp.
Heat some ingredients and let herbs infuse in warm water. Keep the water below boiling to preserve nutrients.
Pay close attention to mixing temperatures to keep ingredients active. Refrigerate your shampoo because it contains no preservatives.
Store your shampoo in a clean, tight container. Use it within one to two weeks to avoid spoilage. Adjust the recipe over time to find what suits your hair best.
Key Takeaways
- Simmer dried herbs in water for 10 to 15 minutes to make herbal infusions.
- Heat phase B ingredients in a water bath to 185°F before mixing.
- Cool mixtures below 104°F before adding delicate ingredients like essential oils.
- Add 1 to 3 teaspoons baking soda or clay for oily or clarifying shampoos.
- Let homemade shampoo sit in the fridge to extend shelf life up to one month.
- Pour shampoo mixture into molds and cure for 2 to 3 days for shampoo bars.
How to Make Natural Shampoo at Home Step-by-Step

Making your own natural shampoo at home uses simple ingredients and tools you likely have. You’ll need liquid castile soap, water, and an oil like olive or jojoba to start. These basics clean hair gently and add moisture without chemicals.
Use a clean bowl or jar to mix ingredients. A spoon or whisk for stirring. A funnel and empty bottle help with storage.
Pick a container with a lid that seals well. This keeps your shampoo fresh. It also stops spills.
Follow these simple steps to mix your ingredients. Make a natural shampoo. It works for all hair types.
Adjust the oil if your hair is oily or dry. Stir well to get a smooth, watery texture that’s easy to pour and apply.
- Measure 1/2 cup water and pour into a mixing bowl or jar.
- Add 1/2 cup liquid castile soap to the water. This acts as the gentle cleanser.
- Stir in 1 teaspoon of light vegetable or olive oil. This adds moisture. It’s perfect for dry hair.
- Whisk the mixture slowly but thoroughly to combine ingredients without creating foam.
- Pour shampoo into a clean bottle using a funnel to avoid spills.
- Seal the bottle and shake gently before each use to mix ingredients fully.
- Apply a small amount to wet hair, lather gently, then rinse thoroughly with water.
Choosing Ingredients Based on Hair Type and Scalp Needs

Choose shampoo ingredients based on your hair and scalp type. Oily hair needs a deep-clean base like liquid castile soap. You can mix it with baking soda or natural clay for better results.
These ingredients help remove excess oils effectively. These ingredients absorb excess oil without stripping the scalp harshly. For dry hair, add moisturizing oils such as jojoba or light butters.
They hydrate without weighing hair down. Sensitive scalps benefit from gentle bases like shikakai powder, which cleans without irritation.
Scalp concerns like dandruff or hair thinning need specific natural additives. Carrot seed oil and maple syrup support scalp health and hair growth. Carrot seed oil has antifungal properties that help reduce dandruff.
Maple syrup nourishes and fights bacteria that may cause scalp issues. Add these in small amounts, about ½ teaspoon per cup of shampoo base. Avoid too many essential oils if your scalp feels itchy or oily.
Use this table as a guide to picking natural shampoo ingredients for your hair needs:
| Hair Type / Scalp Need | Base Ingredient | Oils / Butters | Additives / Extras |
|---|---|---|---|
| Oily Hair | Liquid castile soap + 1-3 tsp baking soda or clay | Minimal jojoba oil (½ tsp or less per cup) | Tea tree oil (few drops), carrot seed oil (½ tsp) |
| Dry Hair | Liquid castile soap + water (1:1 ratio) | Jojoba oil (½ tsp or more), light shea butter | Maple syrup (½ tsp), vitamin E oil (optional) |
| Sensitive Scalp | Shikakai powder or mild castile soap | Light jojoba or almond oil (¼ to ½ tsp) | Aloe vera gel, carrot seed oil (small amount) |
| Dandruff or Scalp Issues | Castile soap + water | Minimal oils to avoid buildup | Carrot seed oil, maple syrup, tea tree oil (small doses) |
| Hair Growth Support | Castile soap + water base | Jojoba or castor oil (¼ to ½ tsp) | Carrot seed oil, caffeine extract, biotin (small amount) |
To make shampoo, blend equal parts castile soap and water first. Add oils and extras using the provided chart for guidance.
Use about half a teaspoon of jojoba oil per cup of shampoo, adjusting for hair type. Essential oils can scent the shampoo; add 10 to 15 drops if you want.
Watch your scalp’s reaction, too many oils can make it greasy or itchy. So reduce them step by step.
Making Herbal Infusions and Using Essential Oils Safely
To add herbal or essential oils safely, first make herbal infusions. Use dried herbs and water for the infusion. This prepares a safe base for your shampoo.
Then pick essential oils known for scalp health and hair growth, like lavender and rosemary. Use small amounts of essential oils to avoid irritation and allergic reactions.
Preparing Herbal Infusions
Herbal infusions pull nutrients and scent from plants into water. They add natural goodness to your shampoo mix. This boosts the shampoo’s benefits and aroma.
Using dried herbs is best because they have more concentrated properties than fresh ones. You can infuse herbs like chamomile for soothing or nettle for scalp strength.
To make an herbal infusion, steep dried herbs in hot water to extract their benefits. Making herbal infusions takes a few hours to complete.
It creates a flavorful base for your shampoo. Use this instead of plain water in your recipe.
- Measure 1 to 2 tablespoons of dried herbs per cup of boiling water.
- Pour boiling water over the herbs in a heat-safe jar or bowl.
- Cover to keep heat and let the herbs steep for 4 to 8 hours.
- Strain the herbs out using a fine mesh strainer or cheesecloth.
- Cool the infusion completely before using it in your shampoo.
- Store any leftover infusion in the fridge and use within 3 to 5 days.
Choosing Essential Oils by Property
Lavender essential oil calms the scalp and may promote hair growth due to its antimicrobial properties. Rosemary oil increases blood flow in the scalp, which can stimulate new hair growth. Peppermint oil is cooling and may reduce itchiness and irritation.
You can combine essential oils to suit your hair needs but keep the total amount low. For example, add 5 drops lavender oil to your shampoo. Then mix in 3 drops rosemary oil per 8 ounces of shampoo.
This combination adds a pleasant scent. Adjust scent strength but never add more than 20 drops per 8 ounces to avoid sensitivity.
Safety Guidelines for Essential Oil Use
Essential oils are very concentrated and can cause allergic reactions or irritation if used carelessly. Always dilute them properly in shampoo, keeping the concentration below 1%. Use no more than 5 to 10 drops of oils per 8 ounces.
This limit applies whether using pure oil or infused water. Staying within this keeps your shampoo safe.
Test for allergies by rubbing a small diluted amount on your wrist. Wait 24 hours before using the shampoo on your scalp. This helps avoid skin reactions.
Avoid essential oils if you are pregnant or nursing. Also skip them if you have health problems unless a doctor agrees. Safety comes first with natural products.
Store oils in dark glass bottles to keep them fresh. Keep them away from heat and sunlight. Don’t use oils past their expiration date.
Adjusting Shampoo pH and Using Natural Thickeners
Maintaining the right pH for your homemade shampoo keeps your scalp healthy and hair strong. Shampoos with high pH can dry out hair and irritate skin. Aim for a pH between 4.5 and 5.5 to match your scalp’s natural acidity.
Test your shampoo pH using pH strips or a digital pH meter. Dip the strip into a small sample and wait 15 seconds.
Match the color with the chart provided. If your shampoo is too alkaline, add a few drops of apple cider vinegar or lemon juice to bring it down gradually.
Start with 1/2 teaspoon of apple cider vinegar per cup of shampoo. Mix well and retest.
Repeat until the pH reaches the right level. Avoid adding too much because low pH can also cause dryness or irritation.
To improve your shampoo’s texture, natural thickeners work better than synthetic ones. They give your shampoo a nice body and feel, making it easier to apply. Some common natural thickeners include:
- Aloe vera gel for gentle thickening and soothing scalp.
- Guar gum, which thickens quickly with a small amount.
- Xanthan gum, a little goes a long way for a smooth texture.
- Arrowroot powder, adds mild thickness and shine.
- Flaxseed gel, which you can make by boiling flaxseeds and straining.
Use small amounts, usually 0.2 to 1 percent of your total shampoo volume. Mix the thickener into water or your shampoo base slowly while stirring.
Let it sit a few minutes to fully swell and thicken. Too much thickener makes shampoo slimy or sticky; too little leaves it runny.
Different hair types may need different thickness levels. For instance, thick hair benefits from creamier shampoo. But fine hair works best with lighter textures.
Experiment with small batches of your recipe to find what feels right. Keep notes on how much thickener you used and the results for next time.
How to Make and Cure Shampoo Bars with Natural Ingredients
Making shampoo bars involves heating and mixing ingredients, then pouring the mix into molds. After cooling, the bars must cure for several weeks. This process gives you solid shampoo that lasts longer and is easier to store.
Heating and Mixing Ingredients (Phases a, B, C)
Start by dividing your ingredients into phases: A, B, and C. Heat phase B ingredients in a water bath until they reach about 185°F (85°C). This temperature helps them blend properly without burning. Phase A and C ingredients usually mix separately or at room temperature.
Use a glass or stainless steel bowl for heating to avoid reactions with the mix. Stir gently while heating. Mix phase B ingredients well.
Do this before combining with others. This helps make a smooth shampoo base.
Pouring, Molding, and Cooling the Shampoo Bar
Once the mix is smooth and uniform, pour it into clean molds. Silicone molds work best for easy removal later. Fill each mold evenly to avoid air pockets, which weaken the bars.
Let the mixture cool at room temperature until it solidifies. This usually takes a few hours, depending on the size of the bars. Avoid moving the mold during this time to keep the shape clean.
Curing Time and Storage Tips
After unmolding, set the shampoo bars on a drying rack or paper towel. Let them cure for at least 4 to 6 weeks. Curing dries out the bars completely and helps them last longer during use.
Store bars in a cool, dry place between uses. Using a breathable container, like a box with holes or a wooden dish, prevents moisture buildup. This keeps the shampoo firm and stops it from softening too soon.
- Heat phase B ingredients in a water bath to 185°F (85°C).
- Mix phases A and C in separate containers at room temperature.
- Combine all phases gently to form a smooth, uniform mixture.
- Pour the mixture evenly into silicone molds or similar.
- Allow the bars to cool and harden for several hours at room temperature.
- Carefully unmold the shampoo bars to avoid cracks.
- Place bars on a drying rack and cure for 4 to 6 weeks.
- Store bars in a dry container with good air circulation.
Handle hot ingredients carefully and ensure good ventilation during heating.
Storage, Shelf Life, and Safety Tips for Homemade Shampoo
Homemade shampoo usually lasts about two weeks because it lacks preservatives. You can label your bottle with the date you made it to keep track.
To make it last longer, keep your shampoo in the fridge. It can stay good for up to one month there.
Keep shampoo in a clean, airtight container to prevent air and bacteria from spoiling it. Using containers designed for shampoo or soap bars helps maintain freshness. Avoid leaving your homemade shampoo in warm places, as heat speeds up spoilage.
Adding a preservative like Geogard 221 or linatural cosmetic preservative can extend your shampoo’s shelf life. These cost a bit more but keep your shampoo safer for several weeks. Follow the preservative’s instructions closely for the right amount to add.
Wash your hands before handling your shampoo to avoid contamination. Use clean utensils and containers every time you make or scoop out shampoo. Throw out your shampoo right away when it smells sour, looks cloudy, or has mold.
To reduce irritation, test your shampoo on a small skin patch before full use. This checks for allergic reactions to your natural ingredients. Also, use essential oils carefully, as some can cause skin sensitivity without proper dilution.
Every time you make shampoo, write down the date and ingredients you used. That way you know when it’s time to toss it or try a new recipe. Stop using your shampoo when you see changes in smell, texture, or color.
Common Mistakes When Making Natural Shampoo and How to Fix Them
Homemade shampoo can separate if it has too much water. It may turn very thin without a natural thickener. Use less water or add a thickener to stop this.
Natural oils and butters may also split from water when not mixed well. Try adding small amounts of xanthan gum or guar gum, about 0.1 to 0.5%, to improve thickness and prevent separation.
Scalp irritation often happens when the shampoo pH is off. Your scalp prefers a pH between 4.5 and 5.5 to stay balanced. Use a pH test strip to check your shampoo.
Adding a few drops of apple cider vinegar helps lower its pH. Lemon juice works too when diluted.
It balances the shampoo’s acidity. Be careful not to add too much, as a pH below 4 can irritate skin.
Natural shampoos often have low lather. They use gentle cleansers like castile soap. These don’t foam as much as synthetic ones.
Adding a little natural cocamidopropyl betaine or decyl glucoside can boost foaming. Also, rinse your hair well before shampooing. Using cooler water helps keep natural oils that aid lathering.
- Add xanthan gum gradually, mixing to check thickness
- Test pH regularly and adjust with vinegar or lemon juice
- Use mild foaming agents to improve lather without drying hair
- Mix oils into the shampoo base slowly to avoid separation
- Store homemade shampoo in a cool, dark place to keep scent fresh
- Keep essential oils under 1% to avoid skin reactions
Texture problems sometimes mean your oils aren’t blending well with the soap base. Warm the oil and castile soap gently before mixing. Avoid heating above 120°F to protect nutrient quality.
For scent issues, essential oils can lose strength over time. So use fresh oils and store shampoo in airtight bottles. Use about 10 to 15 drops of essential oil per cup.
This gives a nice, natural scent to your shampoo. Too much can be overpowering.
Correcting these common issues takes patience and small tweaks. Testing each batch for pH, consistency, and scent before use saves frustration. Remember that homemade shampoo can behave differently than store-bought formulas.
So expect some trial and error. With care, you’ll get a shampoo that cleans well, feels good, and smells great.
Switching to Homemade Shampoo: What to Expect and How to Transition
Switching to homemade shampoo takes a few weeks for your scalp to adjust. You may notice changes like dryness or oiliness during this time. Adjust how often and how much shampoo you use to find what works best for you.
Understanding the Adjustment Period
Your scalp’s oil production might change as it adapts. Commercial shampoos often strip oils, so your scalp may overproduce at first. Expect this adjustment to last about two to four weeks.
During this time, natural ingredients in homemade shampoo help rebalance your scalp. The absence of harsh detergents means less irritation but slower buildup removal. You’ll need patience to see steady improvement in hair texture and scalp health.
Signs Your Scalp Is Responding Well
Good signs include less itching, fewer flakes, and more natural shine. Your hair may feel softer without synthetic buildup weighing it down. Scalp oiliness should start to balance out, showing healthier moisture levels.
You might also notice better hair manageability and less scalp dryness. These changes usually come after two to three weeks of consistent use. Listen to how your hair responds to decide if your shampoo formula needs tweaking.
Managing Common Transition Challenges
Dry scalp may happen if you wash too often or use too much shampoo. Try cutting shampoo frequency to every other day or smaller amounts. Adding a natural oil rinse once a week can help reduce dryness.
If your scalp gets oily quickly, increase washing frequency but use gentle strokes. Avoid harsh scrubbing to prevent irritation. Sometimes adjusting water temperature to lukewarm instead of hot calms oil production.
Testing small batches of your homemade shampoo helps you find the right ingredients and pH. Make changes gradually and keep notes on how your scalp behaves. This way, you avoid sudden reactions and can perfect the recipe over time.
Use less shampoo at first and wash every other day to ease scalp adjustment.
Step-by-Step Action Plan to Start Making Your Shampoo Today
This plan helps you make your first batch of natural shampoo at home. Follow each step to see how your hair responds.
- Day 1: Gather all natural ingredients based on your hair type. Check for freshness and purity to ensure quality.
- Day 2: Prepare an herbal infusion or mix your base liquid carefully. Smell and clarity are good signs.
- Day 3: Combine your ingredients with natural thickeners and adjust pH using vinegar or lemon juice. Your shampoo should feel smooth, not sticky.
- Day 4: Test your shampoo on a small hair section. Watch for cleansing and scalp comfort.
- After 1 week: Store your shampoo in a cool, dark place. Check for any changes in smell or texture; those indicate spoilage.
- After 2 weeks: Use your homemade shampoo every time you wash. Watch for softer hair and a healthier scalp. Keep track of any changes you notice.
- After 1 month: Review your recipe and tweak ingredients if needed based on your hair’s response.
- Ongoing: Keep experimenting with essential oils or herbal infusions cautiously. Always patch test first.
Frequently Asked Questions
What Natural Oils Work Best in Homemade Shampoo?
Jojoba, coconut, and olive oils add moisture without weighing hair down. Each oil offers different benefits depending on your hair type and needs.
Can I Use Everyday Kitchen Ingredients to Make Shampoo?
Yes, ingredients like apple cider vinegar, honey, and baking soda are common. They clean and condition gently but use sparingly as they may alter scalp pH.
How Long Does Homemade Natural Shampoo Last?
Homemade shampoos usually last 1 to 3 weeks when stored in a cool, dry place. Use airtight containers and avoid water contamination to keep it fresh longer.
What Is the Safest Way to Add Essential Oils to Shampoo?
Dilute essential oils in a carrier oil like jojoba before adding. Use only a few drops per batch to avoid irritation or allergic reactions on your scalp.
How Do I Know If My Homemade Shampoo Is Working Well?
Notice if your hair feels clean and soft without excess dryness or oiliness. Adjust ingredients if your scalp feels itchy or hair appears dull after use.
Can Children Use Homemade Natural Shampoo Safely?
Yes, if you use gentle ingredients like castile soap and mild oils. Avoid strong essential oils and always do a patch test before full use on kids.
Wrapping Up
Making your own shampoo lets you control what touches your hair. Start small and adjust your recipe as you learn. Try crafting one batch today and see the difference natural ingredients make.