How to Clean Hair Dryer for Best Performance: 8 Essential Steps
Figuring out how to clean hair dryer is easier than you think. You only need 5 to 10 minutes and simple tools to do a safe, effective job. The key is to unplug it first and clean parts gently to avoid damage.
Start by removing the filter and clearing lint and hair from vents. If your dryer has a self-cleaning mode, use it to blow out dust inside. Let any wet parts dry fully before putting the dryer back together.
Cleaning regularly helps your dryer work better and lasts longer. Avoid overheating and hair damage by keeping airflow clear and motors dust-free. Simple steps now save you from costly replacements later.
Key Takeaways
- Unplug your hair dryer before cleaning to stay safe.
- Remove and clean the filter every 1-2 months to keep airflow clear.
- Use a soft brush or cloth to remove lint and hair from vents.
- Try the dryer’s self-cleaning mode if it has one.
- Let all parts dry completely before reassembling to avoid damage.
- Clean professional dryers weekly; home dryers every 3-6 months.
1. How to Clean a Hair Dryer Safely and Effectively

Cleaning your hair dryer safely means avoiding water inside the electrical parts. Never spray water or cleaning sprays directly onto or into the dryer. Wait until the dryer cools down fully before cleaning it.
This helps avoid burns and device damage. Be patient and careful. Unplug it every time before you touch it or open any parts.
Using a lightly damp cloth is safe for the outside surfaces. But make sure to dry it well before plugging it back in. Pay special attention to the vents and filter areas, where dust and hair tend to cluster.
Don’t use harsh cleaners on your dryer. Avoid soaking any part in water. Water can ruin the motor or wiring inside.
- Unplug the hair dryer and let it cool down fully for 10 to 15 minutes.
- Remove any detachable parts like the filter cover or nozzle.
- Use a dry cloth or a soft brush to clean vents. Remove dust and hair carefully. Check the filter too.
- Use a slightly damp cloth for the outside if needed. Dry it quickly afterward with a towel.
- Check the power cord for damage or fraying and don’t use the dryer if damaged.
- Let all parts dry completely before reassembling and plugging the dryer back in.
- Store the dryer in a clean, dry space or protective case to avoid buildup.
Cleaning your hair dryer should take about 5 to 10 minutes. This keeps it running well and avoids overheating or electrical faults. Don’t try to clean the motor inside without tools or skills.
This can cause damage or void your warranty. Stick to basic cleaning to keep your dryer safe and working smoothly.
2. Tools and Materials Needed to Clean Your Hair Dryer

You need just a few simple tools and materials to clean your hair dryer well. Basic household items usually do the job.
But some extras can help for deep cleaning. Picking the right tools protects your hair dryer from damage and keeps it working longer.
Basic Tools for Every Hair Dryer Cleaning
A soft brush is your best friend for removing dust and hair from vents. Use a clean, dry cloth to wipe the outside surfaces gently without scratching. Cotton swabs help you reach small crevices and corners where lint collects.
These tools are inexpensive and often found at home or in cleaning kits. You need about 10 to 15 minutes to clean a hair dryer. This basic clean helps prevent dirt buildup.
It keeps the dryer working well. Most people find these basics enough for regular maintenance every few months.
- Soft-bristle brush or an old toothbrush
- Clean, dry microfiber or cotton cloth
- Cotton swabs for corners and crevices
- Small vacuum cleaner with brush attachment (optional)
- Isopropyl alcohol or mild soap solution for stubborn spots
These tools keep your hair dryer free of dust and oils that reduce airflow. A light touch prevents damage to delicate parts like the filter mesh or plastic coils.
Optional Tools for Deep or Professional Cleaning
Use compressed air cans to blast dust inside the motor area. The strong air clears out hidden dirt. This method is quick and effective.
Some professionals add a small screwdriver to remove the casing for a thorough clean. These tools help if your hair dryer overheats or sounds clogged.
Deep cleaning takes about 20 to 30 minutes and needs care. Avoid touching electrical parts to prevent damage. Take your time for a thorough clean.
Use a vacuum with a nozzle no bigger than ½ inch. This small size pulls lint from tight spots gently. It prevents damage to the dryer parts.
Not everyone needs it, but white vinegar spray can help. It kills bacteria on brush attachments and vents.
Use a gentle cleaner to keep parts fresh. Only use such solutions sparingly and avoid getting them on electrical parts to prevent shorts.
How to Choose Safe Cleaning Products
Basic cleaning rarely requires commercial products; water and mild soap usually work. Avoid harsh chemicals or abrasive cleaners that can harm plastic and the motor. A small amount of isopropyl alcohol kills germs without leftover moisture.
Test any liquid cleaner on a hidden spot first. Use sprays lightly on cloths instead of spraying the dryer directly to protect electrical parts. This helps avoid rust and corrosion inside the dryer.
Always unplug your hair dryer before cleaning it to prevent electric shock or damage.
Cleaning well extends your hair dryer’s life and keeps it running efficiently. Using the right tools and cleaning products prevents overheating and costly repairs.
3. How Often Should You Clean Your Hair Dryer?
How often you clean your hair dryer depends on how much you use it. For most home users, cleaning once a month works well. This schedule keeps dust, hair, and product buildup from clogging vents and damaging parts.
Professional stylists and salons clean hair dryers more often. Many check and clean their tools weekly or even daily since they use them constantly.
Drying many clients or thick hair? Clean every one or two weeks to avoid overheating and motor strain.
Cleaning too rarely lets dirt block airflow. This causes the dryer to overheat, cutting its life and possibly starting small fires.
On the other hand, cleaning too often takes time but usually doesn’t harm the dryer. A light wipe or quick brush every few uses can help if you want extra caution.
One way to decide is by watching inside the vents and filter. Notice dust or hair buildup? Time to clean your hair dryer.
Also, pay attention to how the dryer works. Feel hotter air or less airflow? Cleaning may solve this issue.
Regular care costs little. You mainly need a soft brush or cloth.
The time spent is usually five to ten minutes. Keeping to a reasonable timeline lets you avoid costly repairs or replacements.
4. Cleaning Different Hair Dryer Filters and Vents
Cleaning the filter and vents keeps your hair dryer safe and working well. Lint, dust, and hair block airflow and cause overheating. Different filters need different cleaning steps to avoid damage.
Removing and Cleaning Mesh or Screen Filters
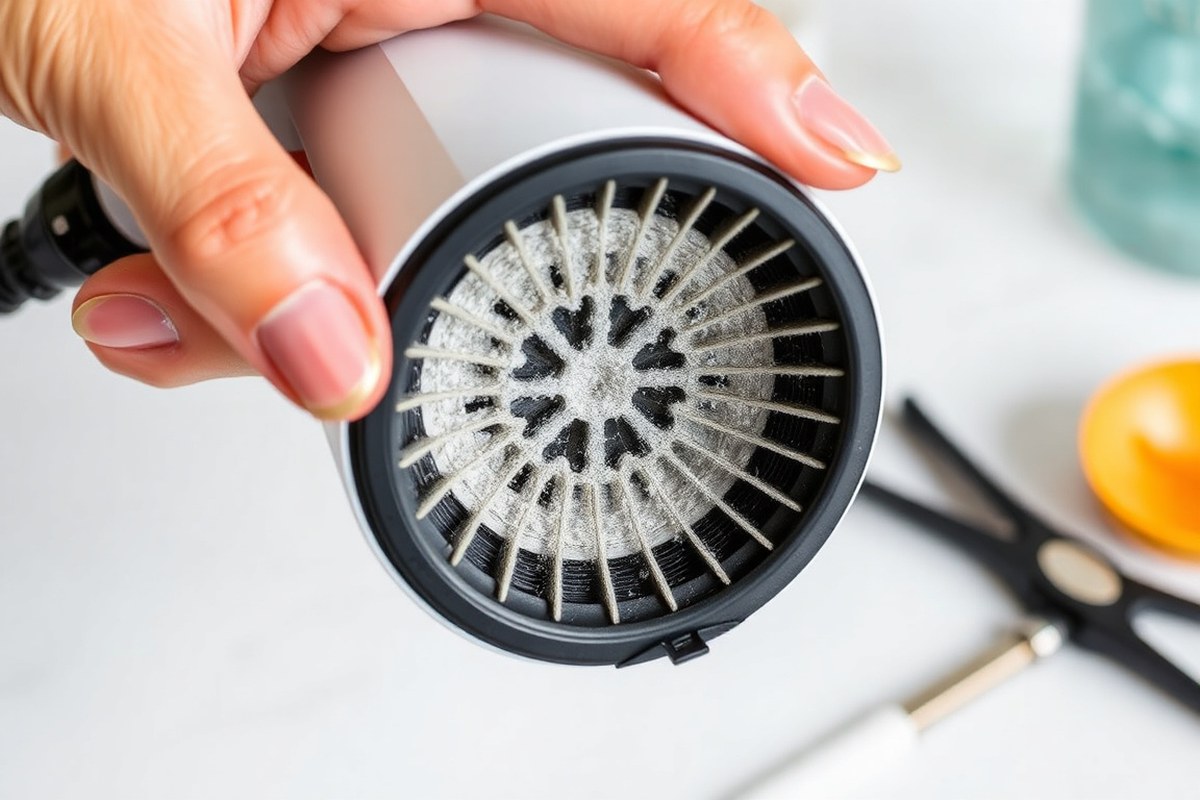
Mesh or screen filters usually cover the back vent of your hair dryer. They stop hair strands and dust from getting inside the motor and heating parts. Gently removing and cleaning them keeps airflow clear and prevents overheating.
Follow these steps for cleaning a mesh or screen filter:
- Unplug the hair dryer and let it cool down completely.
- Carefully twist or pull off the mesh or screen filter from the back vent.
- Use a soft-bristle brush or old toothbrush to remove lint, dust, and hair.
- If needed, rinse the mesh under lukewarm water to remove stubborn buildup.
- Let the filter air dry fully before reinstalling it to avoid moisture inside the dryer.
- Snap or screw the filter securely back on, ensuring it fits snugly.
Cleaning Foam or Fabric Filters Gently
Some hair dryers have foam or fabric filters inside the vent area. These catch fine dust and styling product buildup. They are delicate and need gentle cleaning to avoid tearing or shrinking.
Use this step-by-step method to clean foam or fabric filters:
- Unplug the dryer and remove the foam or fabric filter carefully.
- Brush off loose dust and lint with a soft brush or cloth.
- Dampen a cloth with warm, soapy water and gently wipe the filter.
- Rinse the cloth with clean water and wipe the filter again to remove soap.
- Press the filter between dry towels to absorb water without wringing it.
- Leave the filter in a warm, ventilated area until fully dry.
- Return the filter into place when dry, making sure it fits properly.
Clearing Dust from Air Intake Vents
Air intake vents take in air to keep your hair dryer cool. Dust and lint build up here and slow airflow. Cleaning vents regularly prevents overheating and extends your dryer’s life.
Do these steps to clear dust from vents safely:
- Unplug the hair dryer and place it where dust won’t blow into your eyes or mouth.
- Use a dry, soft cloth to wipe the vent area’s exterior gently.
- Run a small brush or an old toothbrush over the vent slats to dislodge dust.
- Use a vacuum cleaner hose with a brush attachment to suck dust from the vents.
- Optional: Blow compressed air through the vent to clear stubborn dust, keeping the dryer cool.
- Check that no debris remains stuck between vent openings.
| Filter Type | Cleaning Tools | Cleaning Steps | Drying Time |
|---|---|---|---|
| Mesh/Screen | Soft brush, toothbrush, water | Remove, brush, rinse, air dry, reattach | At least 1 hour air dry |
| Foam/Fabric | Soft brush, damp cloth, mild soap | Remove, brush, wipe soapy, wipe clean, towel dry, air dry, reattach | Several hours until fully dry |
| Air Intake Vents | Soft cloth, brush, vacuum, compressed air (optional) | Wipe, brush, vacuum, optional compressed air | None needed |
5. Cleaning the Interior Motor Area Using Compressed Air
You can clean dust inside your hair dryer’s motor area with compressed air. This helps improve airflow and keeps your dryer running cooler. Avoid opening the dryer; just blow the air through vents carefully to prevent damage.
Using a Can of Compressed Air Safely
Hold the hair dryer in a stable position before starting. Use short bursts of compressed air to avoid moisture buildup inside. Keep the can upright to prevent spray of liquid propellant that can harm parts.
Wear a dust mask to avoid inhaling particles during cleaning. Make sure to unplug the dryer before you begin. Using compressed air without these precautions might damage the motor or your health.
Targeting Dust Areas Without Opening the Dryer
Focus on the air intake and vents where dust mostly collects. Blow the compressed air in quick pulses through these openings from different angles. This loosens debris without touching sensitive internal components.
Use a soft brush first to remove visible lint before using air pressure. Direct the airflow away from delicate wiring inside. Avoid pressing air directly into the dryer’s motor area for more than a few seconds.
- Unplug the hair dryer and place it on a flat surface.
- Hold the can of compressed air upright about 6 inches from the vents.
- Spray short bursts into the intake vent for 2, 3 seconds each.
- Repeat from different sides to cover all vent openings.
- Use a soft brush to loosen stubborn dust before another air blast if needed.
- Inspect vents for remaining dust and repeat carefully as needed.
- Wipe the exterior with a dry cloth after cleaning.
Never shake the compressed air can before use; it can release liquid inside.
When to Avoid Internal Cleaning
Do not try to open or dismantle the hair dryer yourself. Internal parts are sensitive and can break easily or cause electric shock. Leave any internal repairs or deep cleaning to a professional technician.
If the dryer shows signs of overheating or electrical issues, stop cleaning and seek service. Overusing compressed air or forcing it too long inside may push dust deeper or damage wiring. Also avoid cleaning while the dryer is hot.
6. Signs Your Hair Dryer Needs Cleaning or Replacement
Hair dryers often show signs when they need cleaning or replacement. You might notice weaker airflow, longer drying times, or excessive heat. These symptoms signal clogged air vents or filter buildup, affecting performance and safety.
Clogged parts make your dryer work harder. This can raise electricity use by 20 to 30 percent and increase overheating risk.
Overheating may damage internal parts or even cause burns or fires. Dirt and germs also build up inside, which is unhygienic and could irritate your scalp.
You can decide whether to clean or replace your hair dryer by checking these key signs:
- Reduced airflow or weaker heat output
- Unusual smells or burning odors when running
- Cracks in the casing or frayed power cords
- Excessive noise or rattling sounds
- Appliance shuts off suddenly or won’t heat properly
When your hair dryer has cracked plastic or frayed cords, do not clean it. Those issues require repair or replacement to avoid safety hazards.
Clean the vents and motor area first. If airflow or heat stays weak, replace the dryer.
Cleaning usually takes just a few minutes and costs nothing but time. A clean dryer will blow strong, steady air and warm evenly without strange smells.
That’s a sign it runs efficiently and safely. Continued poor performance after cleaning usually shows worn or broken internal parts.
7. Tips for Removing Pet Hair and Disinfecting Your Hair Dryer
Pet hair often gets stuck in the hair dryer’s vents and filter screen. Use a soft brush or lint roller to gently lift hair from these spots. Avoid pushing hair deeper inside as that can clog the motor.
To loosen stubborn pet hair, you can use a small vacuum cleaner with a brush attachment. Hold the dryer upside down to help hair fall out. This takes a few minutes but keeps buildup from overheating your dryer.
Disinfect your hair dryer by wiping external parts with a cloth dampened in a mild solution. Mix one part rubbing alcohol with one part water. Avoid soaking the cloth; excess moisture risks damaging the electrical parts.
Spray disinfectant directly on vents or buttons is not safe. Use cotton swabs dipped lightly in the alcohol solution for small areas. Let the dryer air dry fully before plugging it back in to prevent short circuits.
Avoid harsh chemicals like bleach or ammonia, they can degrade plastic and metal parts. Rubbing alcohol around 70% concentration works well to kill germs without harming your dryer. Do not use water alone because it won’t sanitize effectively.
Pet hair that’s thick or greasy needs a gentle wipe first. Use a cloth dampened with warm, soapy water for cleaning.
Dry the surface before disinfecting to avoid water damage. Never submerge your hair dryer in liquid.
Store your hair dryer off the floor. Keep it away from areas pets use. This helps stop pet hair from building up.
Regular cleaning every few weeks keeps your dryer working safely. Neglecting pet hair can cause overheating or strange smells during use.
8. Extending Hair Dryer Life with Proper Maintenance
Store your hair dryer in a dry, cool place with no dust or moisture. Avoid bathrooms where steam can damage internal parts over time. Use a soft cloth to cover the dryer between uses.
This keeps dust off. It also reduces how often you need to clean it.
Check the power cord regularly for damage or frays. Bent cords or exposed wiring can cause shorts or drops in performance. Replace or repair cords right away to keep your dryer safe and working well.
Give the dryer time to cool after each use. Setting it aside immediately after use prevents overheating. Overheating wears out the motor faster and can shorten your dryer’s lifespan.
Occasionally tap your dryer gently to dislodge small dust or lint trapped inside vents. This stops blockages that reduce airflow and strain the motor. Avoid using sharp tools that could damage the casing or fan blades.
Make unplugging the dryer a habit when you finish styling. Power surges or leaving it on standby may stress internal components slowly. Unplugging also protects you from electrical hazards and lowers energy use.
Clean the filter monthly to keep airflow strong and prevent motor damage.
Heavy hair dryer use means cleaning more often. Clean and check it every month. That helps avoid damage or buildup.
Light users can do this less often, every two to three months. Regular checks find problems early and maintain peak performance.
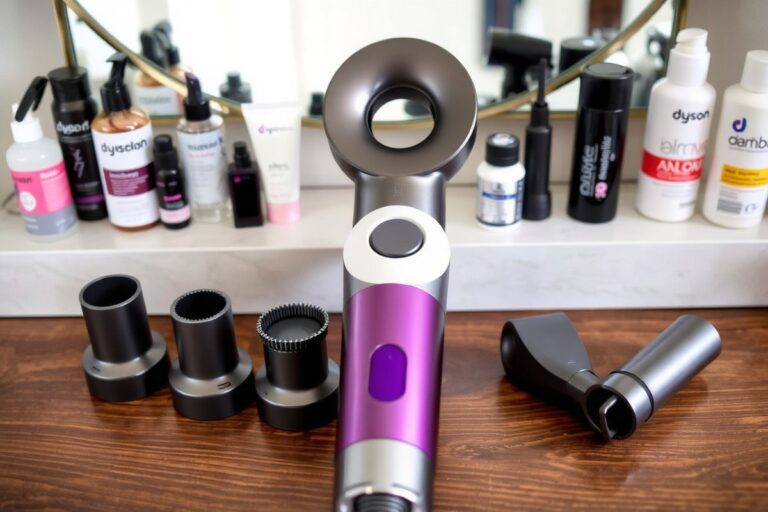
Some models, like Dyson Supersonic, require removing the filter for deeper cleanings. Follow the manufacturer’s instructions for your specific dryer to avoid voiding warranties.
Thoughtful designs like the Laifex P1C make maintenance easier. So try giving special attention to these parts.
Finally, don’t forget to clean your styling brushes and attachments often. Hair and product buildup slow airflow and force your dryer to work harder.
Clean attachments with warm soapy water, then dry completely before use. Healthy tools help your hair dryer last at least 3 to 5 years or more.
Step-by-Step Action Plan to Clean Your Hair Dryer
Follow this easy plan to keep your hair dryer working well. Each step tells you what to do and how to check it helped.
- Before you start: Unplug the dryer. Check the filter for hair or dust build-up.
- Day 1: Remove and wash the filter with soapy water. Let it dry fully. Your filter should look clear with no dust.
- Day 2: Use a soft brush to clean outside vents carefully. Look for free airflow when you finish.
- Week 1: Use compressed air briefly to blow out dust inside the air intake. You’ll hear less noise and feel better airflow.
- Week 2: Wipe down the handle and buttons with a disinfectant wipe. Surfaces should feel clean and dry.
- Month 1: Check cords and the plug for damage or fraying. Replace the dryer if you see exposed wires.
- Every two months: Repeat filter cleaning, vent brushing, and interior dust removal to keep performance steady.
- Every six months: Look for overheating signs or unusual sounds. Call a technician or think about replacing the dryer.
Frequently Asked Questions
How Do I Clean the Interior of My Hair Dryer?
First, unplug the dryer and let it cool fully. Use compressed air to blow dust out from inside without touching the motor parts. This prevents damage and keeps airflow smooth, which helps your dryer work better and last longer.
How Can I Avoid Damaging My Hair Dryer While Cleaning?
Always unplug and cool your dryer before cleaning. Use soft brushes or cloths gently without harsh chemicals to avoid harming the vents or motor. Being careful stops scratches and keeps the device safe and working well.
What’s the Best Way to Get Dog Hair Off My Hair Dryer?
Use a dry cloth to remove pet hair from vents and surface. Gently wipe or use a soft brush for stuck hair.
Avoid harsh scrubbing to protect your hair dryer. This keeps the motor from clogging and stops extra lint from building up and lowering performance.
Do I Really Need to Clean My Hair Dryer?
Yes, cleaning is important for safety and performance. Dirt and hair buildup can cause overheating and damage. A regular cleaning schedule prolongs its life and keeps it working efficiently.
How Often Should I Clean My Hair Dryer to Keep It in Good Shape?
Clean your hair dryer every 1 to 2 months with regular use. Clean more often if you use it daily or in a salon.
This helps keep it working well and safe. Frequent cleaning reduces motor wear and prevents clogging, so your dryer runs smoothly longer.
Can Water Damage My Hair Dryer If I Clean It with a Damp Cloth?
Yes, water can harm the motor if it seeps inside the dryer. Wipe the outside with a slightly damp cloth only and never soak or spray water directly. This avoids short circuits and extends your dryer’s life.
Wrapping Up
Keeping your hair dryer clean helps it work better and last longer. Take a few minutes regularly to check filters and vents. Your next step is to grab a brush and start cleaning your filter today.