How Does Dyson Airwrap Work: A Complete Guide for Perfect Styling
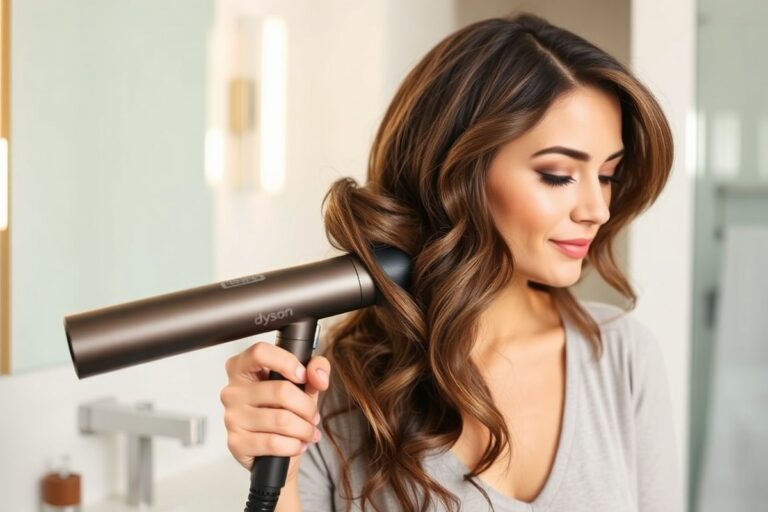
How does Dyson Airwrap work to give you perfect hair styling? It uses airflow powered by a digital motor to style hair without extreme heat. The Airwrap pulls your hair using the Coanda effect, wrapping it around the barrel smoothly.
This method styles hair at temperatures no higher than 302°F, which helps prevent heat damage. For best results, dry your hair until it’s 80 to 90 percent dry. Start styling only when your hair reaches this dryness level.
This helps your hair shape better and hold longer. You can rough dry with the Airwrap’s dryer attachment or any regular hair dryer.
The Airwrap comes with different attachments designed for curling, smoothing, and drying. These tools all connect to the base unit, which houses the powerful Dyson V9 motor. That motor drives the airflow for all styling functions.
Key Takeaways
- Start styling when hair is about 85% dry for smooth results.
- Use the dryer attachment to rough dry hair before styling.
- The Airwrap limits heat to 302°F to protect hair from damage.
- Its motor powers all six styling attachments for versatile use.
- The Coanda effect pulls hair onto the barrel without clamping.
- Use the soft smoothing brush attachment to tame frizz and flyaways.
How the Dyson Airwrap Styles Hair with Airflow

The Dyson Airwrap styles hair with a unique airflow mechanism that uses the Coanda effect. This effect makes air follow a curved surface. It attracts your hair toward the barrel.
Then, it wraps the hair around the styling barrel. Instead of harsh heat, the airflow curls or smooths hair gently, reducing damage risk.
The Airwrap pulls damp hair to the barrel with curved airflow. This method avoids using extreme heat. It helps you create curls gently.
It then uses controlled, lower heat to set the curl as drying finishes. This method prevents direct hot contact. So your hair doesn’t get blasted by temperatures above 302°F (150°C), which helps keep it healthy.
Built-in sensors measure airflow temperature over 40 times each second. This intelligent heat control makes sure the Airwrap stays below the maximum safe heat level. It stops temperature spikes to protect your hair.
This avoids burning or drying out your hair. You stay safe even during long styling sessions.
Understanding Dyson Airwrap Attachments and Their Uses

The Dyson Airwrap comes with several attachments, each designed for different styling needs and hair types. Knowing what each does helps you pick the right one. Some attachments come with every Airwrap, while others you can buy separately.
Curling Barrels: Sizes and Effects
The Airwrap offers curling barrels in two main sizes: 1.2 inch and 1.6 inch. Both sizes use airflow to wrap your hair around the barrel without clamping it. This technique creates natural curls and waves with more volume than traditional irons.
These barrels suit most hair types, especially medium to long hair. Choose smaller barrels for tighter curls and larger ones for loose waves. To get good results, start with hair about 80% dry and work in small sections.
The barrels come in sets with both directions included. Use them to make curls that look the same.
You can also create a natural, messy style easily. The styling is gentler on hair, reducing heat damage compared to standard curlers.
Brush Attachments: Smoothing and Volumizing
Smoothing brushes help straighten and tame frizzy or unruly hair. There are two kinds: soft and firm.
The soft brush works well for fine or thin hair. The firm brush handles thicker, coarser strands better.
The round volumizing brush adds body and shape, great for flat or fine hair. It can curl slightly but mainly lifts roots for volume. This brush is popular for blowouts that need movement without tight curls.
The firm smoothing brush works well on curly or coily hair. It helps you get a sleek, straight hairstyle.
This brush keeps hair smooth and under control. It smooths as you style, saving time and effort.
Dryer and Comb Attachments for Prep and Finishing
The pre-styling dryer attachment helps bring your hair from wet to damp before styling. Drying hair to about 80% moisture is best for the Airwrap to work smoothly. Using this attachment shortens overall styling time.
You can buy the wide tooth comb attachment for $40 separately. It’s made for curly and coily hair to help shape and stretch. This comb also reduces frizz and keeps curls defined.
Some Airwrap versions include the Coanda smoothing dryer, useful for prepping hair and controlling flyaways. Using the right dryer attachment first sets you up for better curling or smoothing results.
| Attachment | Function | Hair Type Suitability |
|---|---|---|
| Curling Barrels | Creates curls and waves | All hair types, especially medium to long hair |
| Smoothing Brushes | Smooths and straightens hair | Frizzy, unruly hair |
| Round Volumizing Brush | Adds volume and shape | Fine, flat hair |
| Pre-styling Dryer | Dries hair from wet to damp, prepping for styling | All hair types |
| Wide Tooth Comb | Shapes and lengthens curly/coily hair | Coily and tightly curled hair |
Use the pre-styling dryer to get hair about 80% dry before curling for best results.
Preparing Your Hair for Optimal Airwrap Styling
Start with your hair mostly dry but still a little damp to get great results. Use some good styling products before you begin. Section your hair into manageable pieces for easier and faster styling.
Achieving the Ideal Damp Hair Condition
The Airwrap works best on hair that’s about 80 to 90 percent dry. Fully wet hair is too heavy and hard to wrap around the barrels. Use a towel to blot away excess water after washing.
Rough-dry your hair using a dryer or the Airwrap’s own pre-styling attachment. Focus on the roots and the back of your head, where hair takes longest to dry. This step usually takes 10 to 15 minutes depending on hair thickness and length.
Selecting Suitable Styling Products
Apply a styling cream or a lightweight mousse on damp hair for better hold. Avoid heavy products that can weigh the hair down or make it greasy. A heat protectant spray helps protect hair from heat damage.
Use it even with low heat settings. It shields your hair every time you style.
Using a frizz control spray can also help keep your style smooth and shiny. Spray it evenly over your hair before styling, especially if your hair tends to frizz.
Don’t overload your hair with product. A little goes a long way for the Airwrap to work properly.
Sectioning Hair for Efficient Styling
Divide your hair into small, workable sections before styling. This makes the Airwrap grab your hair better. It wraps hair gently for smooth curls or waves.
You get even results each time. Larry King, Dyson’s hair ambassador, recommends this to avoid tangled hair and to speed up styling.
Start by clipping the top half of your hair away. Work on the lower layers first, then gradually release the top sections as you move along. Picking sections around 1 inch wide works well for most hair types and lengths.
Here’s a straightforward way to prepare your hair:
- Wash your hair as usual and towel dry gently.
- Rough dry your hair to about 80-90% dryness, focusing on roots and back.
- Apply a lightweight styling cream or heat protectant spray to your hair.
- Use a frizz control spray if your hair is prone to flyaways.
- Divide your hair into small sections about 1 inch wide.
- Clip the top half of your hair away to start with the bottom layers.
- Begin styling with the Airwrap on the bottom sections, releasing new sections as you finish.
Step-by-Step Styling Guide Using the Dyson Airwrap
Styling with the Dyson Airwrap starts by drying hair to the right moisture level. Then, choose your barrel or brush attachment based on the style you want.
Adjust heat and airflow settings as you go. Finish with a cool shot to lock your look.
Starting with the Pre-Styling Dryer Attachment
Begin by using the pre-styling dryer to get your hair damp, not dripping wet. The Airwrap’s dryer attachment dries hair gently, protecting it from heat damage. Set the airflow to medium power for best drying speed without overdoing heat.
Dry your hair until it’s about 80% dry before switching to styling attachments. This keeps hair from being too wet. Wet hair slows styling down.
Too dry hair risks heat damage. This step usually takes 5 to 10 minutes depending on hair thickness and length.
Curling and Wrapping Technique with Barrels
Select the barrel size based on the curls you want: use 1.2-inch barrels for tight curls or 1.6-inch barrels for looser waves. The barrels attach with a simple click. Use the clockwise or anticlockwise barrel to control curl direction.
Wrap a 1 to 1.5-inch hair section loosely onto the barrel, starting at the ends near the airflow center. Hold it gently for about 8 to 10 seconds. Release the hair.
Then press the cool shot button. Hold for 5 seconds to set curls.
Curls last longer if cooled while wrapped, so don’t skip the cool shot. For fine hair, use low heat and medium airflow to avoid frizz or limp curls. Thick hair may need higher heat, but never above 302°F (150°C).
Smoothing and Volumizing with Brush Attachments
Use the firm smoothing brush to straighten waves. Use the softer firm brush for fine hair. It reduces frizz without flattening hair.
Click the brush into place. Pick medium heat and airflow. Style gently to avoid damage.
Brush hair slowly from roots to ends, guiding strands gently to smooth while adding volume. Use the cool shot at the end over sections to lock the shape. A typical pass over each section takes about 10 seconds.
The brush attachments help tame flyaways and create polished styles quickly. Avoid rushing, as moving too fast reduces smoothing effect.
Finishing Touches and Setting Your Style
Once your curls or smooth style is shaped, let hair cool fully before touching it. Run fingers gently through curls to loosen, if desired. Finish with a light mist of hairspray to hold the style.
After the final set, use the cool shot button. Hold it for 10 to 15 seconds. Cover your whole head this way.
This sets the style and can help curls bounce longer. Styling hair while warm risks losing shape early.
- Attach the pre-styling dryer and dry hair to 80% dryness on medium airflow.
- Choose the right curling barrel or brush and click it onto the Airwrap.
- Wrap 1 to 1.5-inch hair sections onto barrels; hold 8 to 10 seconds.
- Release curls and hit the cool shot for 5 seconds to set.
- Smooth or volumize hair with brush attachments on medium heat and airflow.
- Use slow, gentle strokes with the brushes, then cool shot to lock.
- Let hair cool fully before final styling; bust curls with fingers or style.
- Finish with a hairspray mist to keep your look all day.
Common Mistakes When Using the Airwrap and How to Avoid Them
One common mistake is using the Dyson Airwrap on soaking wet hair. Your hair should be damp, about 80% dry, before styling. Too much water stops the airflow from shaping your hair smoothly.
Choosing the wrong attachment also limits results. The smaller 1.2-inch barrel creates tight curls, while the 1.6-inch barrel suits loose waves.
Using a brush attachment instead of a barrel won’t give you curls. But can add volume or smoothness.
Improper wrapping technique causes hair to tangle or slip off the barrel. Let the airflow catch your hair and gently guide strands towards the barrel’s edge. Moving too fast or trying to wind hair yourself can create knots or uneven curl shapes.
- Always section hair before styling for easier handling
- Use a detangling brush before airflow styling
- Apply a heat protectant or styling product to damp hair
- Hold the Airwrap close but not pressing into hair
- Let the airflow wrap hair naturally, don’t force it
- Choose barrel size based on curl tightness desired
- Finish with a light hairspray if curls need extra hold
Do not rush the styling process. Curls take time to form and set with airflow.
The Airwrap can replace traditional curling irons and blow dryers for many. It uses controlled airflow at lower temperatures, reducing heat damage risk. Unlike curling irons that reach over 400°F, it styles hair without burning or burning-hot contact.
You might see it takes more time than your curling iron. It also needs more product to keep your hair shaped. Some people still use a blow dryer to start their style fast.
Others use it to finish their look. The Airwrap excels when you want gentler heat and smooth curl shaping without manual winding.
How Hair Type and Length Affect Airwrap Styling Results
Your hair’s texture shapes which Airwrap attachments work best. Thin or straight hair looks great with barrels that make waves. They wrap hair smoothly.
This helps curls last longer. Coarse or curly hair needs the firm brush attachment most times. It smooths strands without changing texture.
Hair length changes how you handle styling. Short hair styles faster and needs less curl time. Normally, it takes 5 to 7 seconds per section.
Long hair takes longer to curl, about 10 to 15 seconds each. Thicker strands need more heat and airflow.
Thicker hair demands stronger airflow and longer hold times. Hold curls for 15 seconds or more, especially near roots.
That’s where volume matters most. Thin hair styles quicker but needs gentle airflow to avoid flattening volume or causing frizz.
To add volume using the Airwrap, try the round volumizing brush on damp hair. This brush lifts roots as you dry, perfect for straight or fine hair needing body.
Use the pre-styling dryer first on curly or coarse hair. Follow with a firm brush to keep shape and volume.
For short hair, lift roots with the brush attachment. Curl smaller sections for better control. With long hair, wrap larger sections around the barrel for loose waves that last longer.
Change heat and airflow settings based on hair thickness. Low heat suits fine hair. Use medium or high for thick hair.
The Airwrap suits nearly all hair types because its attachments adjust for texture and length. Switch fast between brushes and barrels to make curls or smooth styles. This avoids harsh heat damage.
Styling takes 10 to 30 minutes depending on sections and hair thickness. More thick hair means more time.
Cleaning and Maintaining Your Dyson Airwrap for Longevity
You should clean your Dyson Airwrap regularly to keep it working well. The filter is important because it can clog with dust and hair. Check it often to keep your tool working well.
Cleaning prevents problems and extends its life. Clean it every few weeks or sooner if you see less airflow or hear unusual sounds.
To clean the filter, first unplug the Airwrap. Then, twist and remove the filter cage at the base. Use the small cleaning brush that comes with your device to clear away dirt and dust.
Rinse the filter cage gently under cool water if it looks very dirty. Let it dry completely before reassembling to avoid damage.
- Unplug your Airwrap before cleaning
- Remove the filter cage by twisting it at the base
- Brush away dust and hair with the supplied cleaning brush
- Rinse the filter cage under cool water if heavily soiled
- Let the filter cage air dry fully before putting it back
- Clean every few weeks or when airflow drops noticeably
- Check attachments for buildup and wipe them gently as needed
Cleaning regularly keeps the airflow strong and the motor cool. Neglecting this can cause the Airwrap to overheat or stop working properly. Keeping attachments clean helps create a smooth styling experience without snagging hair.
This easy job usually takes under 10 minutes. It helps protect your expensive tool from damage. Doing it often saves money in the long run.
Living in a dusty place or styling daily means clean more often. Regular cleaning keeps your tool performing its best. Don’t skip this step if you use it a lot.
Watch for Dyson’s filter cleaning reminder as a helpful prompt. Avoid using harsh chemicals or submerging the main machine in water. Regular upkeep saves you money by preventing costly repairs or replacements later.
Choosing the Right Dyson Airwrap Model for Your Needs
The latest Dyson Airwrap Complete model offers better airflow control. It also has smart heat management. These upgrades improve hair styling results.
It includes six attachments designed for various styling needs, especially work well for longer hair. Its price is higher, around $550 to $600. But it promises faster styling and less heat damage.
Older Airwrap models still work great and support most attachments. So you can mix and match tools regardless of the base. This option gives you flexibility if you already own an Airwrap.
It also lets you customize your tool over time. The price difference between an older model and the newest is often $100 or more. So weigh upgrades against your hair goals and budget.
| Model | Included Attachments | Ideal Hair Type | Price Range (USD) |
|---|---|---|---|
| Dyson Airwrap Complete (Latest) | 6 attachments including barrels, brushes, pre-styling dryer | All hair types, excels on long, thick hair | $550 – $600 |
| Earlier Dyson Airwrap Models | Varies, usually fewer attachments | Medium to long hair | $400 – $500 |
| Additional Kits | Brush sets, curling barrels, smoothing brushes | Specific hair types like short or curly | $70 – $150 |
Picking the right Airwrap model depends on your hair type and styling habits. Long or thick hair benefits most from the newest Complete kit.
It comes with six attachments to choose from. For shorter or fine hair, a basic model or adding specific attachments can handle most styles.
You can expand your toolset over time with add-on attachments, which fit any Airwrap base. That means you don’t need to buy the most expensive kit upfront if budget is tight. Match attachments to your hair length and texture for simpler, better results.
Let your hair dry 80% before using the Airwrap. This helps create the best curls and waves.
Step-by-Step Action Plan to Master Your Dyson Airwrap
Follow this plan to get comfortable with your Dyson Airwrap and style your hair confidently.
- Day 1: Read the user manual fully to understand safety and attachments. This helps you avoid common mistakes.
- Day 2: Wash and towel-dry your hair to about 80% dry. You want damp hair for the best airflow styling.
- Day 3: Attach the barrel or brush that suits your hair type and desired style. Check the airflow direction before switching it on.
- Week 1: Practice a simple curl or smooth style on one section of hair. Use medium heat and airflow to avoid damage.
- Week 2: Try different attachments and temperature settings. Notice how each option changes your style’s hold and bounce.
- Ongoing: Keep cleaning the filter weekly to maintain airflow. Look for less suction as a sign it needs cleaning.
- Month 1: Assess your hair’s response after several styles. Adjust heat and attachment use based on what keeps your hair healthy and styled well.
Frequently Asked Questions
How Does the Dyson Airwrap Use the Coanda Effect for Styling?
The Airwrap uses the Coanda effect to attract and wrap hair using airflow. This lets hair curl or smooth without extreme heat. It’s a smart way to style gently and reduce heat damage.
Can I Use Dyson Airwrap on Fully Dry Hair?
Use it on hair that’s almost dry, about 90% dry. It’s best on damp hair for better results. Damp hair helps the airflow shape and hold styles better than dry hair.
How Does the Pre-Styling Dryer Attachment Function?
The pre-styling dryer helps get your hair to the perfect dampness for styling. It’s designed to speed up drying without overheating or damaging hair.
What Heat Level Does the Dyson Airwrap Reach?
It heats up to 302 degrees Fahrenheit, which is cooler than many traditional styling tools. The lower heat helps protect hair from damage while still styling effectively.
How Does the Dyson Airwrap Adapt to Different Hair Lengths?
It uses various barrel sizes and attachments that work better with specific hair lengths. Choosing the right attachment ensures better styling control and results.
Why Is the Dyson Airwrap’s Motor Important?
The Dyson V9 motor powers airflow for styling and suction for curling your hair. A strong motor keeps airflow steady, helping style hair smoothly and quickly.
Before You Go
The Dyson Airwrap works by using airflow and heat carefully to style your hair without damage. You gain the best results by matching attachments and technique to your hair type. Try one simple style today to start seeing how it changes your routine.