How to Use a Dyson Airwrap: A Complete Guide for Easy Styling Success
How to use a Dyson Airwrap is a common question for new users. The key is starting with damp hair, around 75% dry.
So the tool styles and dries at once. This way, you get smooth curls or volume without damage from heat.
Begin by roughly drying your hair to about 80% with the Airwrap’s dryer attachment. Then, switch to the styling barrels or brushes depending on the look you want. The airflow technique helps style hair by wrapping it gently, reducing heat damage.
Watch out for heat settings and hair type. Use lower heat for fine hair and higher for thick or coarse hair. Taking these steps lets you style your hair quickly while protecting its health and shine.
Key Takeaways
- Start with damp hair, about 75% to 85% dry for best results.
- Use the dryer attachment first to rough dry to 80% before styling.
- Choose barrel size based on your desired curl size or volume.
- Use lower heat settings for fine hair, higher for thicker hair.
- Switch attachments to brush or barrel depending on style choice.
- Style hair in sections for even curls or smoothing.
How to Use the Dyson Airwrap for Quick Styling

Using the Dyson Airwrap starts with fresh, damp hair. The tool works best when your hair is about 80% dry, not soaking wet. This helps the airflow shape your hair without blast heat that can cause damage.
You’ll first attach the pre-styling dryer to dry your hair roughly. After drying, swap the attachment to the curling barrel or brush you want to use.
The Airwrap draws hair to the barrel automatically. Holding the hairs at the right point and timing is key to a good curl.
- Attach the pre-styling dryer. Turn on your Airwrap to medium airflow. Dry your hair until mostly dry.
- Select the styling attachment you want. Twist it onto the handle and listen for a click to lock it in place.
- Take a 1-inch section of damp hair. Hold the ends about 4 inches from the Airwrap barrel or brush.
- Turn the Airwrap on and place the barrel near your hair end. The tool pulls hair up gently with air.
- Wrap the hair around the barrel using the airflow. Hold each wrapped section for about 8 to 10 seconds. This sets the curl without heat damage.
- Press the cool shot button for 10 seconds after wrapping. The cool air locks the curl faster for longer hold.
- Ease the barrel away gently to release each curl. Avoid pulling or tugging to keep nice shape and shine.
- Repeat the wrapping process on all sections. For loose waves, hold less time; for tighter curls, hold closer to 10 seconds.
Changing attachments is easy. Twist each tool head to remove it.
Click on a new one. This makes it easy to go from curls to smoothing brushes.
Be patient at first. Practice wrapping each hair section smoothly. The curls should feel firm but flexible when cool.
Curls falling fast? Hold them longer or use the cool shot more.
Choosing and Using Dyson Airwrap Attachments
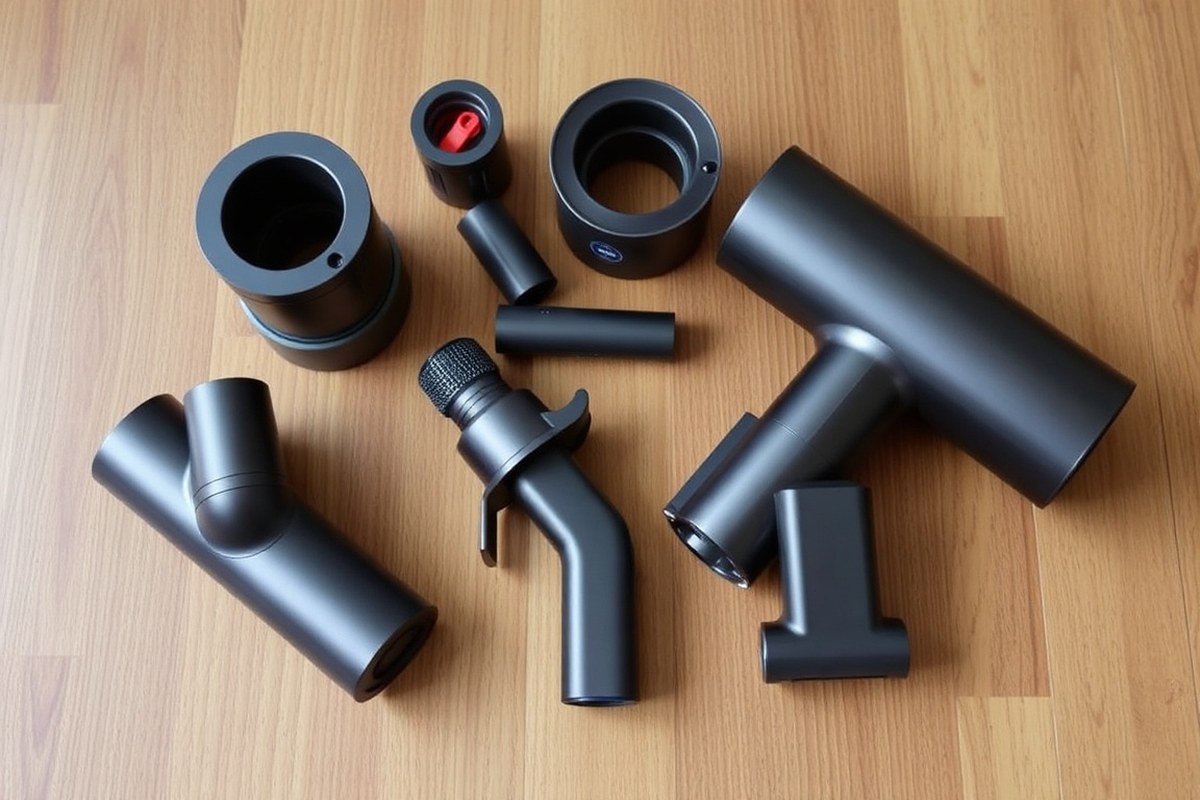
You can choose from several Dyson Airwrap attachments, each made for different styles and hair lengths. Curling barrels come in 30mm and 40mm sizes.
The 30mm barrel works best for smaller, tighter curls. The 40mm barrel creates looser waves or volume.
The curling barrels have arrows showing the hair wrap direction. Clip your hair section near the barrel and let the airflow wrap your hair automatically. Curl about 10-15 seconds per section for best hold, then cool to set the curl.
| Attachment | Best For | Hair Length | Styling Tips |
|---|---|---|---|
| 30mm Curling Barrel | Smaller curls, defined ringlets | Short to medium | Use on damp hair, 10-15 seconds per curl |
| 40mm Curling Barrel | Loose waves, volume | Medium to long | Use on 80-100% dry hair for waves |
| Firm Smoothing Brush | Straightening, smoothing frizz | Short to long | Brush down slowly, moderate heat |
| Large Round Brush | Adding volume, styling ends outward | Medium to long | Use with near-dry hair, roll brush at ends |
| Flyaway Dryer Attachment | Quick roots drying, taming flyaways | Any length | Use on damp hair, short bursts |
Smoothing brushes help tame frizz and straighten hair pretty fast. Use the firm smoothing brush on dry or slightly damp hair. Slowly pull the brush down your hair while the airflow smooths and shapes.
Dryer attachments speed up drying at your roots and control flyaways. The flyaway dryer works well on damp hair to smooth fine or flyaway hairs without over-drying. For best use, apply short bursts focused on problem areas.
The arrow on each barrel guides the curl direction. Make sure to follow it to avoid uneven curls.
Choosing the right barrel size really sets the curl’s style. Smaller barrels give tighter curls good for short hair.
Larger barrels flatter longer hair with waves or volume. Practice curling in sections and setting each with a cool shot for lasting style.
Preparing Hair Before Using the Dyson Airwrap
Use the Dyson Airwrap when your hair is mostly dry, about 80%. Avoid styling hair that is soaking wet or completely dry. Start with good detangling and suitable products to protect your hair and style better.
Drying Hair to the Right Dampness
The Dyson Airwrap works best on hair that is damp but not wet. Hair that is 80% dry lets heat style without damage.
This level stops your hair from getting too hot. It also helps reduce frizz during styling.
Use a towel to blot excess water first. Blow-dry your roots fully before styling with the Airwrap. Stop when the length feels just a little damp.
Avoid drying the whole hair completely. This stops styles from falling out quickly.
Choosing Effective Pre-Styling Products
Apply heat protection before you start styling. Look for sprays or serums labeled “heat protectant.”
They usually cost between $10 and $40. A popular choice is a frizz shield spray that also smooths hair.
Apply light mousse, volumizing sprays, or smoothing creams first. Choose products based on the look you want to achieve.
This step helps your style last longer and look better. Spray or smooth product evenly, then comb it through to spread it down your hair shafts.
Sectioning and Detangling Techniques
Detangle your hair carefully before styling. Use a wide-tooth comb or a detangling brush to avoid breaks. The Wet Brush Detangler (£8) helps spread product evenly and removes knots.
Divide your hair into small sections, about 1 inch wide. Smaller sections let the Airwrap attach heat and airflow evenly, which speeds drying and styling. Clip away sections you aren’t working on.
Follow these steps to prep your hair:
- Blot hair gently with a towel to remove excess water.
- Blow-dry the roots fully and the rest until about 80% dry.
- Apply a heat protectant spray or serum evenly through your hair.
- Add styling products like mousse or smoothing cream if desired.
- Detangle your hair using a wide-tooth comb or a detangling brush.
- Divide hair into small, manageable sections for styling.
- Clip away sections you’re not working on to keep hair tidy.
Selecting Heat and Power Settings for Best Styling
Thick hair needs high heat and strong airflow to style well. Set the Dyson Airwrap to high heat and full power for best results. Use the Firm smoothing brush to get through thick strands without struggling.
Fine or damaged hair needs gentler settings to avoid extra stress. Choose low or medium heat and lower airflow to protect delicate strands. The Soft smoothing brush is better here for a smooth finish without roughing up your hair.
Use low heat if you want to avoid over-drying or damage. This setting works well when your hair is almost dry or if you have fine hair.
High heat is good for styling thicker hair or finishing a strong curl quickly. But keep an eye on your hair to avoid overheating.
To lock in your style, use the cool shot button at the end. Slide the power switch upward and hold it for 10 to 15 seconds.
This cool air helps the hair’s hydrogen bonds reset. So your curls or waves last longer.
For curls, leave the barrel in place for 15 seconds. Use high heat and power. Keep it until your hair feels dry.
Then push the cold shot button to set the style with cool air. Release the power button before removing the Airwrap to avoid pulling your hair.
Use the cold shot after styling each section. This keeps curls sharp. It also helps reduce frizz.
It works for all hair types and styling goals, from smooth blowouts to bouncy curls. Just remember to hold the button until the hair cools enough to hold its shape.
Curling and Styling Techniques with the Airwrap Barrels
To curl hair with the Dyson Airwrap, pick the right barrel. Match the barrel size to your hair length and curl type. Smaller barrels make tight curls, bigger barrels give loose waves.
Wrap hair around the barrel. Hold each section for about 15 seconds.
This helps the curl set well. Use the 1.2 inch barrel for tighter curls and the 1.6 inch barrel for soft waves and volume.
Using the 1.2 Inch Barrel for Tight Curls
The 1.2 inch barrel is perfect for tighter curls or shorter hair. It creates well-defined curls that hold better and give your hair a full look.
This barrel has a rotating tip. So you can switch the direction of curls for a natural finish.
Grab a section of about 1 inch width and wrap it around the barrel. Hold the hair here for 15 seconds to let the heat set your curl. After curling, press the cold shot button.
This cools the curl in place. Cooling helps the curl last longer.
- Divide your hair into manageable sections.
- Turn on the Airwrap with the 1.2 inch barrel attached.
- Place a 1-inch section near the barrel.
- Let the Coanda effect draw the hair onto the barrel.
- Hold for 15 seconds to shape the curl.
- Press the cold snap button to set the curl.
- Repeat on all sections and style as desired.
Hold the curl at least 15 seconds; shorter times weaken the shape.
Creating Soft Waves with the 1.6 Inch Barrel
The 1.6 inch barrel gives you softer, looser curls that look like natural waves. It’s best for longer hair or when you want gentle, flowing styles. You also get clockwise and counterclockwise curls for more movement and less uniformity.
Wrap bigger sections of hair for a looser look. Hold the barrel for 15 seconds as usual. This creates a relaxed style.
Use the cold button to lock the wave before moving to the next section. Finishing tips include gently running fingers through your hair to loosen waves.
Adding Volume While Curling
Volume is more than just curls. Use the round volume brush attachment to lift roots and add bounce. This brush curls hair slightly but focuses more on body and fullness.
Start by sectioning off the top layers near your roots. Roll the brush in and hold for several seconds to warm and lift the hair. For extra volume, curl ends up on the barrels to create flicked-out shapes that boost height.
Smoothing and Straightening Hair with Airwrap Brushes
Use the firm smoothing brush to get sleek, smooth hair. For more volume, choose the round brush. Both help fight frizz and control flyaways with the right technique.
Using the Firm Smoothing Brush for Sleek Looks
The firm smoothing brush works best on hair prone to frizz. It smooths and lifts hair strands, creating a sleek finish. This brush isn’t for full straightening but adds shine and tame flyaways.
Start with your hair about 80% dry. The brush dries hair while stretching it gently.
It’s like a paddle brush that smooths as you dry. You can finish the style using the Airsmooth attachment for extra hold and shine.
Use slow, steady strokes to avoid creating too much volume. The goal is smooth, sleek hair, not big blowouts. This brush helps refresh and tame second-day hair that’s a little wild.
Volumizing with the Round Brush
The round brush adds great volume, especially to fine, straight hair. It lifts hair at the roots and shapes the ends. This brush is perfect when you want bounce and body instead of flat hair.
Keep hair 80 to 90% dry before using the round brush. Section your hair and brush from underneath to lift roots. Roll hair around the brush at the ends for a softly curled finish.
Finish each section with a 5 to 10 second cool shot. This locks volume and curl in place. For bangs, pull them up and forward using the round brush to shape them.
Controlling Frizz and Flyaways
Frizz and flyaways often appear as hair dries or gets older. Use smoothing brushes that match your hair texture for better control. The firm smoothing brush suits coarse hair, while softer bristles help fine hair.
Don’t overdry hair; leave some moisture for styling flexibility. Finish styles with cool air to seal strands and reduce static. Using slow brush strokes helps smooth the hair cuticle to fight frizz.
For stubborn flyaways, gently brush with the paddle brush or the Airsmooth attachment. Avoid touching hair too much after styling to keep your look sleek. Little passes with the brush can keep flyaways in check through the day.
- Section your hair to work in manageable parts.
- Use the firm smoothing brush on wet hair for sleekness.
- Brush hair slowly from roots to ends while drying.
- For volume, switch to the round brush on 80% dry hair.
- Brush from underneath to lift roots and roll hair at ends.
- Hold each section on the brush, then finish with a cool shot.
- Use the Airsmooth attachment to finish and control frizz.
- Lightly brush flyaways with the paddle brush as needed.
Maintaining and Troubleshooting Your Dyson Airwrap
Keeping your Dyson Airwrap clean helps it work right and last longer. The most important part to clean is the filter at the base of the handle. Take off the filter cover.
Pull out the filter. Use the small brush Dyson gives you to wipe away dust or hair. Do this once a month or more if you use it daily.
A blinking white light usually means the Airwrap detects a blocked filter or it’s overheating. Turn off the device and unplug it.
Check the filter area for dust, debris, or hair. Clean it carefully, then let the Airwrap cool for 10 minutes before turning it back on.
Low airflow or heat can happen if the filter is clogged or the vents are blocked. Clean the filter first. Also, look at the air intakes around the handle and the barrel attachments.
Make sure nothing is stuck or tangled. Try different power or heat settings. Some hair types need lower or higher levels for best results.
- Remove the filter cover by twisting it counterclockwise
- Pull out the filter and brush off dust or hair
- Use a clean, dry cloth to wipe outer surfaces
- Check vents on barrels for hair buildup
- Let the device cool before cleaning or troubleshooting
- Plug out before removing or cleaning parts
- Store in a dry place to avoid moisture damage
Contact Dyson support if the device still doesn’t work after cleaning and resetting. They can help with warranty questions or repairs. Don’t open or fix inside parts yourself.
It can void your warranty. It might also cause damage.
Doing regular maintenance takes just a few minutes but helps avoid big problems. Your Airwrap should run smoothly and heat evenly after cleaning.
Clean your tool every month. Regular care keeps styling quick and easy.
Adjusting Dyson Airwrap Use for Hair Type and Length
Your hair type and length change how you should use the Dyson Airwrap. For short hair, the smaller barrels work best.
They curl easier and give volume near your scalp. Long hair benefits from bigger barrels and smoothing brushes since they handle more strands at once.
Thick or curly hair needs more heat and longer styling time. You can use higher heat settings but keep the airflow medium. Fine or thin hair needs less heat to style safely.
It also takes less time to avoid damage and frizz. Always finish by using a cold shot to lock your style. Do this as you wrap the hair around the attachment.
The table below pairs hair types and lengths with suitable Airwrap attachments. It also notes key styling tips you should try for best results.
| Hair Type | Hair Length | Best Attachment | Styling Tips |
|---|---|---|---|
| Short | Above chin | 1.2″ or 0.8″ barrels | Work in small sections, use medium heat |
| Thick/Curly | Any length | Firm smoothing brush, bigger barrels | Medium to high heat, longer styling time |
| Fine/Thin | Any length | Soft smoothing brush, 1.2″ barrels | Low heat, short styling time |
| Long | Below shoulders | Firm smoothing brush, 1.2″ barrels | Section hair, style bottom to middle |
You want to section your hair carefully. For thick hair, style in smaller parts to reduce heat exposure.
In fine hair, avoid multiple passes over the same spot to prevent damage. With long hair, start styling the middle and lower parts first, then the roots.
Use the cold shot while your hair is wrapped around the barrel. This helps set curls or waves firmly.
The way you wrap hair around barrels matters. For short hair, wrap less hair around the barrel. Reduce hold time to avoid creating tight curls.
Longer hair needs to wrap fully with gentle tension for uniform curls. Paying attention to these small steps improves your styling without extra heat or damage.
Step-by-Step Action Plan for Using Your Dyson Airwrap
Follow these clear steps to get confident with your Airwrap fast. Watch your hair improve as you practice each phase.
- Before you start: Wash and towel-dry your hair until it’s damp but not wet. Your hair should feel cool and slightly moist to the touch.
- First styling session: Attach the barrel or brush that matches your desired style. Check that it locks firmly onto the base before turning it on.
- First 5 minutes: Begin styling one small section at a time. You’ll know it works when your hair wraps smoothly around the barrel or brushes without slipping.
- After 10 minutes: Adjust heat and airflow settings based on your hair’s reaction. Lower heat on fine hair; higher for thick or coarse strands. Your curls or smooth sections will hold better.
- After styling: Let your hair cool for 5 to 10 minutes without touching it. This locks your style and adds lasting hold.
- After one week: Experiment with different attachments and settings for variety. Note which tools give your hair the best volume or smoothness.
- Every use: Clean the Airwrap’s filter after styling sessions. It keeps the airflow strong and extends your device’s life.
Frequently Asked Questions
Do You Use Dyson Airwrap on Wet Hair?
Use the Dyson Airwrap on hair that is about 80% dry for best results. Start with towel-dried hair and use the pre-styling dryer attachment to rough dry it first.
What Does a Blinking White Light Mean on MyDyson Airwrap?
A blinking white light usually means the Airwrap needs to cool down. Let it rest for a few minutes before using it again to avoid overheating.
What Are the Disadvantages of Using the Dyson Airwrap?
The Dyson Airwrap is pricey and can feel heavy after long use. You need some practice to learn the styling.
Thick or curly hair can make it harder. Keep trying, and you’ll get the hang of it.
What Should I Put in My Hair Before Using the Dyson Airwrap?
Apply a heat protectant spray before styling with the Airwrap. It helps protect hair from heat while keeping your style smooth and shiny.
Can You Use the Dyson Airwrap on Dry Hair Only?
Yes, you can use it on dry hair but starting with damp hair gives longer-lasting styles. Dry hair styling may not hold as well.
How Long Does It Take to Style Hair with the Dyson Airwrap?
Styling usually takes about 20 to 30 minutes depending on hair length and texture. Don’t rush, and use the cold shot to set each style.
Final Thoughts
The Dyson Airwrap can style many hair types with the right steps and tools. Try a simple style today and feel the difference. Keep practicing to master your favorite looks efficiently.