How to Straighten Hair: 8 Essential Methods with Tips for All Hair Types
How to straighten your hair starts with choosing the right method for your hair type. You can use heat tools like flat irons and blow dryers.
You can also try natural methods without heat. Using the right tools and products protects your hair from damage while giving a smooth finish.
Before straightening, your hair should be clean and fully dry to prevent breakage. Heat protection spray is a must to shield hair from high temperatures.
First, rough dry your hair if you blow dry. Then, finish straightening it carefully with a brush or flat iron.
Always adjust your heat setting depending on the thickness and condition of your hair. Fine or color-treated hair needs cooler heat.
Thick or coarse hair can handle hotter temperatures. By matching your method and care to your hair type, you’ll get better, longer-lasting results.
Key Takeaways
- Start straightening only when your hair is 100% dry to avoid damage.
- Use a heat protection spray evenly on dry hair before applying heat.
- Set flat iron or blow dryer temperature based on your hair thickness.
- Rough dry hair about 80% before finishing with a paddle brush.
- Thick hair requires higher heat, fine or damaged hair needs lower temperatures.
- Choose a straightening method that matches your hair’s natural texture and health.
1. What Are the Main Ways to Straighten Hair?

Straightening hair usually fits into two categories: heat and non-heat methods. Heat methods like flat ironing or blow drying change your hair’s shape. They do this by breaking hydrogen bonds in the strands.
This change is temporary. Non-heat methods work without breaking these bonds but take longer, offering gentler options for your hair.
Chemical straightening changes the hair’s structure permanently or semi-permanently. Treatments like keratin, Japanese thermal straightening, or rebonding can give you lasting straight hair. However, these need professional application and special care afterward to avoid damage.
Natural and heatless methods include hair wrapping, banding with hair ties, or using large rollers overnight. They stretch curls or waves gently to reduce frizz and loosen curls without heat damage. These methods take practice and time but leave hair healthier.
| Method | Type | Duration of Effect | Time Needed | Pros | Cons |
|---|---|---|---|---|---|
| Flat Iron | Heat | Temporary (until wet) | 10-30 minutes | Quick, very straight results | Heat damage risk, requires heat protection |
| Blow Dryer | Heat | Temporary (until wet) | 15-45 minutes | Adds volume and smoothness | Heat stress, less straight than flat ironing |
| Chemical Treatments | Chemical | Permanent to semi-permanent | 2-4 hours (salon) | Long-lasting straight hair | Expensive, needs professional care |
| Hair Wrapping / Banding | Non-heat | Temporary (until wet) | Several hours to overnight | Gentle, protects hair health | Less straight, time-consuming |
| Large Rollers | Non-heat | Temporary (until wet) | Several hours to overnight | Less damaging, curls loosened | Needs drying time, less sleek |
| Natural Masks | Non-heat | Temporary, subtle effect | 30 minutes to 1 hour | Improves hair texture | Minimal straightening, slow effects |
Using heat tools means you’ll see your hair turn very straight fast. But it wears off after a wash. Always use heat protectant sprays to reduce damage.
Non-heat ways don’t give pin-straight hair but help reduce curl and frizz safely. They fit those wanting a more natural look or avoiding heat stress.
Chemical straightening permanently alters hair but requires a salon visit and careful upkeep. These treatments can last several months but might weaken your hair over time. People with coily or kinky hair need strong moisture when using heat.
They also need heat protection to prevent breakage. This helps protect their hair better.
2. How to Choose the Best Straightening Method for Your Hair Type

Choosing the right straightening method depends strongly on your hair type and condition. Fine or damaged hair needs lower heat to avoid breakage. Thick or coarse hair requires higher heat for better results.
Color-treated hair is more fragile and should always be treated gently with heat protectants. Make sure your hair is completely dry before starting any heat styling to minimize damage.
Below is a decision table that matches hair type to recommended straightening methods and heat settings. It includes safe temperature ranges and notes on treatment types.
Use this article to choose a method that suits your hair. Pick a way that won’t harm your locks.
| Hair Type & Condition | Recommended Method | Heat Settings (°F) | Notes |
|---|---|---|---|
| Fine or Damaged Hair | Flat Iron or Blow Dryer + Heat Protectant | 200, 300 | Use gentle heat and always apply a protectant spray |
| Color-Treated Fine Hair | Low-Heat Flat Iron or Natural Methods (Wrap Drying) | 280, 320 | Avoid high heat to prevent color fading |
| Wavy Hair (Type 2) | Flat Iron, Blow Dryer, or Natural Straightening | 300, 350 | Moderate heat to loosen waves but prevent damage |
| Coarse or Curly Hair (Type 3 & 4) | Higher Heat Flat Iron, Professional Treatments | 350, 400 | Deep hydration before straightening reduces damage risk |
| Color-Treated Coarse Hair | Professional Keratin or Brazilian Blowout | Custom heat | Visit a professional; treatments can weaken hair if done wrong |
Permanent options like relaxers provide total straightening but can weaken hair over time. Choose a professional to reduce damage risk. Natural methods like wrap drying are gentle on hair.
You can also try DIY masks with coconut oil and lemon juice. These are good for low-heat or no-heat straightening. They require patience and multiple applications but reduce heat damage.
Heat protectants like Aussie Total Miracle Heat Protectant Spray are essential when using hot tools. They shield your hair’s cuticle from damage.
Deep conditioning treatments help maintain moisture, especially with coarse or color-treated hair. Adjust temperatures carefully based on your hair type for the safest and most effective straightening experience.
Always wait until your hair is completely dry before using heat tools to avoid fry damage.
3. How to Prepare and Protect Hair Before Straightening
Always start with clean hair for the best straightening results. Use a shampoo and conditioner designed for smoothing or moisture.
These types help prepare your strands to withstand heat without drying out. Avoid regular shampoos that strip moisture as they make hair frizzier when straightened.
After washing, make sure your hair is completely dry before using heat tools. Wet hair can blister and break under direct heat, damaging your cuticle.
Toweling gently and then air drying until no moisture remains is best. Before blow drying, apply a heat protectant to lock in moisture.
- Use a smoothing shampoo and conditioner for moisture
- Rinse thoroughly and squeeze out excess water
- Towel-dry hair gently to remove most moisture
- Apply heat protectant evenly on dry hair, 6 inches away
- Brush or comb to detangle before heat
- Dry hair completely before starting heat styling
- Avoid applying heavy oils right before straightening
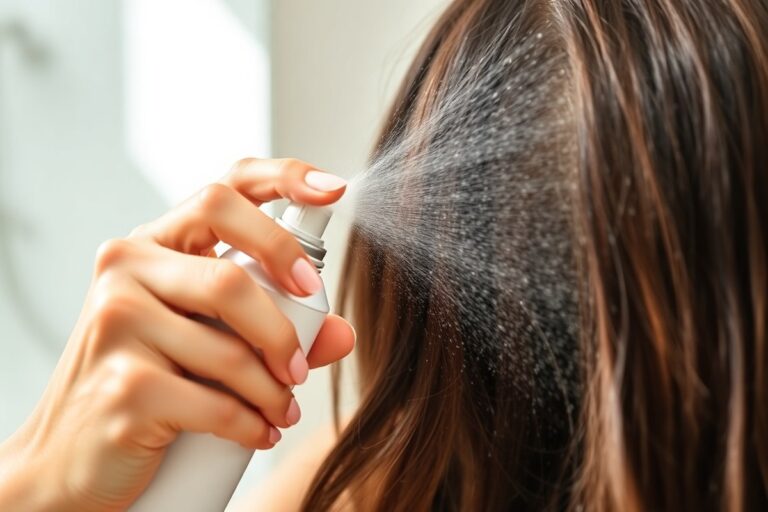
Applying a heat protectant is a must every time you straighten. Use a spray or cream that coats each strand evenly.
Hold the spray 6 inches from your head and mist lightly but thoroughly. This keeps hair hydrated and protects against heat damage.
For curly or thick hair, use a pea-sized amount of straightening balm or light oil after conditioning to smooth strands. Avoid heavy oils before heat, since they can cause uneven straightening or make your hair greasy. Follow these steps for safer, shinier, and smoother straight hair every time.
4. Step-by-Step Guide to Straighten Hair with a Blow Dryer
Blow drying your hair straight needs a clear plan. Section your hair evenly.
Use the right brush and dryer setting to get smooth results. Finish with cool air to keep hair frizz-free and shiny.
Prepare by Rough Drying 70-80% of Hair
Start by drying most of your hair on a medium heat setting. Rough drying reduces time under the blow dryer and limits heat damage. Stop when hair feels damp but not wet, about 70 to 80% dry.
Use your fingers or a wide brush to gently lift hair at the roots while drying. This step sets a good base for your sleek finish. It usually takes 5 to 10 minutes, depending on hair thickness.
Divide Hair into Manageable Sections
Split your hair into four to six sections using clips or hair ties. Smaller sections mean better control and more even heat distribution. This makes hair easier to smooth out.
Thicker hair may need more sections. Work on one section at a time to avoid missing spots. This step ensures each strand gets straightened properly.
Use a Wide Paddle or Boar Bristle Brush
Pick a wide paddle brush for thick or long hair to hold hair taut while drying. Use a boar bristle brush for fine or medium hair.
It helps smooth the cuticle. Both brushes guide hair straight and reduce frizz.
The brush adds tension, which helps the hair dry straight. Move the brush slowly from root to tip for best control. Keep the hair pulled tight but not stretched too much.
Dry Each Section Pointing Air Downwards
Direct the dryer nozzle down the hair shaft while you pull the brush straight. This reduces frizz and helps the cuticle lay flat. Keep the dryer about 6 inches away for even heat.
Work in small subsections, drying completely before moving on. Spray dry hair lightly with water or serum if it feels dry while you work. This helps maintain smoothness and shine.
Finish with Cool Air and Polishing Serum
Let the section air dry completely. Then, use cool air to blast it. Brush through with a boar bristle brush as you do this.
The cool shot seals the cuticle and locks in smoothness. This step also helps hair stay frizz-free longer.
Apply a small amount of polishing serum or lightweight oil to your ends. It adds shine and tames any flyaways. Avoid using too much product, or hair may look greasy.
- Rough dry hair until about 75% dry, using fingers or a paddle brush.
- Divide hair into 4-6 sections with clips or ties for easier work.
- Choose a wide paddle or boar bristle brush depending on hair type.
- Point the dryer downward and brush each section from root to tip slowly.
- Lightly mist or apply serum if hair feels dry while blow drying.
- After drying each section, use a blow dryer’s cool setting. Brush it with a boar bristle brush to smooth it out.
- Apply a small amount of polishing serum to ends for shine and frizz control.
5. How to Straighten Hair Safely Using a Flat Iron
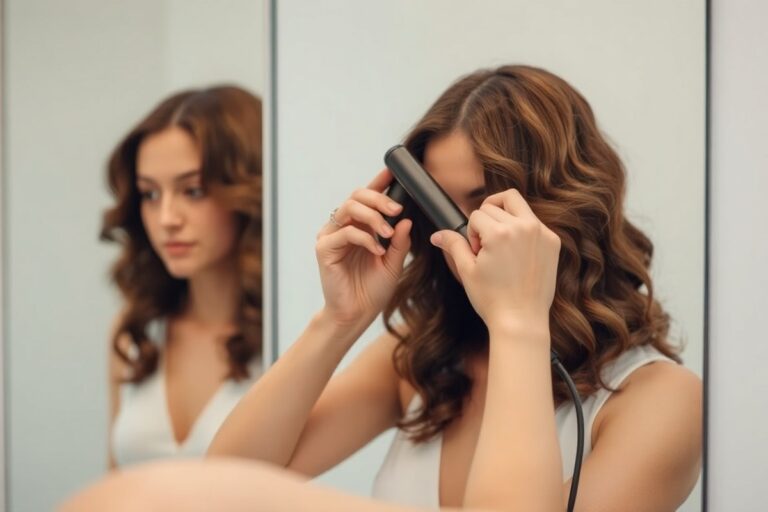
Using a flat iron to straighten hair takes care and the right steps. Setting the right heat, sectioning hair properly, and gliding the iron slowly help avoid damage.
Set the Correct Temperature for Your Hair
Choose a flat iron temperature that matches your hair type. Fine or damaged hair needs lower heat to prevent breakage. Thicker or curly hair often requires higher temperatures for a smooth finish.
Set the iron between 250°F and 300°F for fine hair. For medium hair, 300°F to 350°F works well. Curly or coarse hair usually needs 350°F to 400°F for effective straightening.
Section Hair into Thin, Even Strands
Sectioning hair in thin, even parts helps heat reach all strands evenly. Start with four to six large sections and clip them up. Then, take smaller subsections about 1-inch wide for each pass with the iron.
This method reduces the chance of missing spots or having to overheat one area. It also makes the process faster and more manageable.
Clamp and Glide the Iron Smoothly
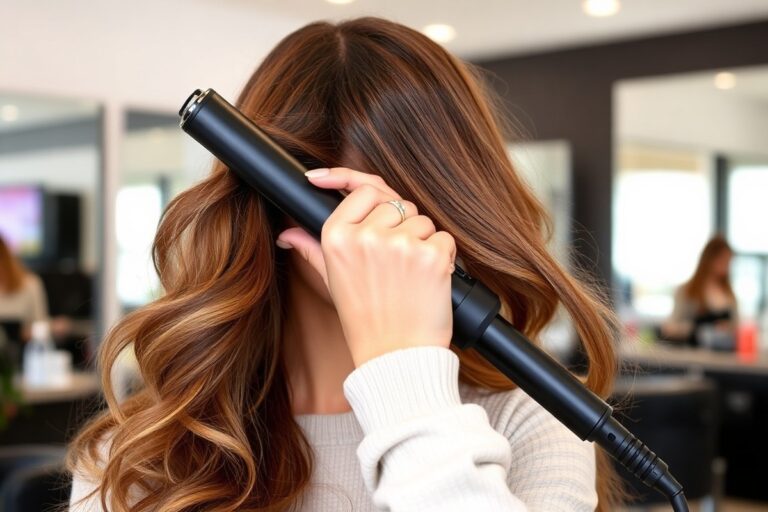
Clamp the flat iron close to your roots without touching your scalp. Hold the section taut, then glide the iron down slowly to the ends. One smooth pass usually works better than multiple quick passes.
Slow gliding helps straighten hair evenly and reduces extra heat damage. For curly hair, you might have to repeat the motion two or three times gently.
Repeat If Needed Without Overheating
Check each section after the first pass to see if it’s smooth. Repeat straightening on spots that need extra work.
But don’t keep applying heat too long. Moving on quickly avoids drying out your hair.
Use the lowest heat possible for repeated passes. Overheating can cause split ends and dryness over time.
Use Finishing Products to Lock Style
Apply a light serum or heat protectant spray after straightening to keep hair shiny. These products help block humidity and maintain smoothness. Avoid heavy gels that can weigh hair down or look greasy.
Finish with a gentle mist of hairspray to keep your look lasting all day. This step adds hold without stiffness or flaking.
- Set the flat iron to the right temperature for your hair type.
- Divide hair into large sections and clip them up.
- Take 1-inch wide subsections from each larger section.
- Clamp the iron near the roots, avoiding your scalp.
- Slowly glide the iron down the hair shaft.
- Repeat the pass if necessary, keeping the heat low.
- Apply finishing products to smooth and protect hair.
Don’t use the highest heat setting on fine or damaged hair to avoid burning strands.
6. How to Straighten Hair Naturally Without Heat
Straightening your hair without heat takes patience and gentle methods. Using rollers, wrapping, and natural masks can relax curls safely. These ways stretch and smooth hair over time without damage.
Stretch Hair Overnight with Large Rollers
Use about six jumbo plastic rollers to stretch and straighten your hair. Plastic rollers create a smoother effect than Velcro or foam ones. Roll damp hair around the rollers, secure them, and leave overnight.
Before rolling, spray your hair lightly with water. Apply a small amount of lightweight oil, like argan or coconut oil, to lock in moisture. In the morning, gently remove the rollers and finger-comb your hair for a soft, wavy finish.
Use Hair Wrapping Techniques Before Bed
Wrapping hair tightly around your head can flatten curls and elongate strands. Start with damp hair and use a wide-tooth comb to detangle gently. Then, smooth hair around your head and secure it with hair pins or a silk scarf.
Banding is a heat-free way to straighten hair. You place soft hair bands every few inches along wet hair. This method helps set your hair smoothly without heat.
This stretches curls until dry, helping hair stay straighter longer. These overnight techniques avoid heat damage and feel comfortable while you sleep.
Apply DIY Straightening Masks with Natural Ingredients
Using natural masks like coconut milk, honey, aloe vera, or olive oil can relax curls. They nourish your hair while adding weight to smooth waves. This helps lower frizz and keep hair manageable.
Try mixing 1 cup coconut milk, 2 tablespoons honey, and 1 tablespoon olive oil. Put the mask on damp hair. Then cover it with a shower cap.
Leave it on for 30 to 60 minutes. Rinse with cool water and shampoo gently once a week for the best effect.
Another mask option is aloe vera gel with a tablespoon of olive oil. This mix helps hydrate and smooth your hair.
Apply it to add moisture and softness. Keep using these masks to see a gradual but noticeable straightening effect.
Brush Wet Hair to Encourage Straightness
After washing, gently brush through your hair with a wide-tooth or detangling brush. This helps distribute natural oils and reduce curls while hair is wet and pliable. Brushing downward also encourages strands to lie flat.
Using a boar bristle brush can tighten hairs and smooth cuticles. For extra hold, apply a small amount of smoothing serum or leave-in conditioner after brushing. Avoid brushing dry curls aggressively, as this causes frizz and breakage.
Combine Methods for Improve Effect
You can mix several techniques to get straighter hair without heat. For example, spread a DIY mask on your hair. Next, roll your hair in plastic rollers.
Then wrap your head with a scarf and leave it overnight. Finish with gentle brushing in the morning for smooth results.
Using lightweight oils or serums after these methods helps keep hair sleek and frizz-free. These methods work best with regular use. Avoid getting your hair wet after treatment.
Moisture can bring back curls and undo the straightening. Results last longer when hair is kept dry and protected.
- Spray damp hair lightly before styling.
- Use jumbo plastic rollers for overnight stretching.
- Wrap hair tightly with pins or silk scarves.
- Apply nourishing masks weekly to gradually relax curls.
- Brush wet hair gently with a wide-tooth brush.
- Use lightweight oils to lock in moisture and smooth.
- Repeat methods regularly for lasting straightness.
7. Common Mistakes When Straightening Hair and How to Fix Them
Straightening damp hair is a common mistake that leads to heat damage. Using a flat iron or blow dryer on wet hair causes breakage and dryness. Let your hair dry fully before straightening to protect the strands.
Another problem is over-straightening your hair. Repeatedly running a flat iron over the same section dries it out and makes it brittle. Try working in ½-inch sections, going over each only once or twice for better results.
Frizz after straightening often means your hair cuticle isn’t sealed properly. Using a flat iron with tourmaline or negative ions helps smooth and lock in moisture. Also, apply a heat protectant before styling to reduce frizz and damage.
- Straighten only dry hair, never damp or wet
- Use a temperature setting under 400°F to avoid burning
- Apply heat protectant spray before every session
- Limit straightening to 1-2 times a week maximum
- Work in small, ½-inch sections with slow, smooth passes
- Choose shampoo and conditioner that repair and smooth hair
- Give hair regular deep conditioning treatments to restore moisture
Signs of damaged hair include excessive breakage, split ends, and rough texture. Repair starts with cutting off split ends and reducing heat styling frequency. Use products with ingredients like keratin or argan oil to rebuild strength and softness.
Deep conditioning masks, applied once a week for 20 minutes, help restore hydration. Avoid chemical straightening that combines harsh treatments with heat, it often causes long-term damage. Keeping a consistent, gentle hair care routine brings back shine and health.
8. How to Maintain Straight Hair and When to Visit a Professional
Using a light serum after straightening keeps hair smooth and shiny. Avoid applying products close to your roots to prevent flatness. At night, twist your hair into a loose bun or wrap it to preserve the style.
Touching up your straight hair depends on your hair type and daily activities. For slightly wavy hair, a gentle touch-up with a flat iron every few days should suffice. More resistant curls may require daily straightening or special treatments to maintain sleekness.
Professional treatments like keratin or Japanese thermal straightening suit those who want longer-lasting results. Keratin treatments smooth the hair using safe chemicals, lasting several weeks. Japanese straightening offers permanent straight hair but comes at a higher cost and risk of damage.
Go for a professional service if daily styling takes too long. It also helps if heat damages your hair often. This choice saves time and protects your hair.
It could save time and reduce your hair’s exposure to heat and styling tools. Always consult a licensed stylist about your hair’s condition and the best treatment for your needs.
Avoid overusing heat tools. This can cause dryness and breakage, use a thermal protectant every time.
Step-by-Step Action Plan to Straighten Your Hair
Follow these steps to get smooth, straight hair safely and effectively.
- Day Before: Wash and condition your hair with smoothing products. Your hair should feel clean but not heavy.
- Before You Start: Apply heat protectant spray evenly on dry hair. A light mist means better protection without grease.
- During Straightening: Use a flat iron set for your hair type (usually 300°F to 400°F). Test a small strand to avoid damage.
- Immediately After: Finish with a serum or light oil on the ends. This adds shine and tames flyaways.
- Next Day: Sleep with a silk or satin pillowcase. It helps keep hair smooth longer without friction.
- Every Few Days: Use a hydrating mask to keep hair nourished. Look for ingredients like coconut oil or keratin.
- After One Week: Check your hair for dryness or breakage. If you see damage, cut back heat use and add more conditioning.
Frequently Asked Questions
How Do I Avoid Hair Damage When Straightening Frequently?
Use a heat protectant and keep the flat iron below 350°F. Avoid straightening daily to let your hair recover. This reduces breakage and dryness over time.
Can I Straighten Hair That Is Freshly Washed, or Should It Be Dry First?
Hair should be damp to wet for blow-drying but fully dry before flat ironing. This prevents frying and helps the straightener work better.
What’s the Best Section Size for Straightening Thick Hair?
Divide thick hair into small, manageable sections of about 1 inch. This helps the heat reach all strands evenly and avoids missing spots at the back.
Can I Sleep with Straightened Hair and Still Keep It Smooth?
Use a silk or satin pillowcase to reduce friction that causes frizz. You can loosely wrap your hair or use soft scrunchies to hold it overnight.
How Often Should I Clean My Flat Iron for Best Results?
Clean your flat iron every 1 to 2 weeks if used regularly. Wipe off product buildup with a damp cloth to avoid uneven heating and damage.
Is It Possible to Straighten Hair with a Natural Oil Treatment?
Oils alone won’t straighten but will smooth frizz and add shine. Combine with a wrapping method or gentle blow-dry for better straightening results.
Final Thoughts
Straightening your hair can look great when done right and with care. Always protect your hair from heat damage before styling. Try a simple heat-free method next time to give your hair a rest.