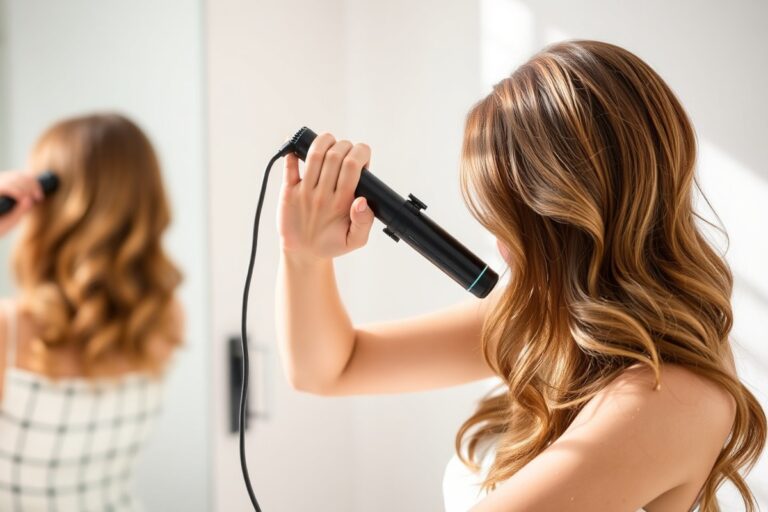
How to Make Curly Hair with Flat Iron: Complete Guide with Expert Tips
How to make curly hair with flat iron is easier than it sounds. Use a flat iron to wrap sections of hair and create curls with heat. This curls hair longer than regular curling irons thanks to even heat distribution.
Start by brushing hair completely to avoid tangles and uneven curls. Always apply a heat protectant spray to keep your hair safe from damage. Use the right temperature: lower for fine hair, higher for thick or coarse hair.
Clamp a 1-inch section of hair at the roots. Twist the flat iron. Pull the iron down slowly.
Don’t leave the flat iron on the same spot longer than 10 seconds to avoid burning. Practice steady motion to get smooth, defined curls.
Key Takeaways
- Use 300°F for fine hair, 350°F-370°F for medium, 370°F-400°F for thick hair.
- Apply heat protectant spray thoroughly before any heat styling.
- Section your hair into 1-inch pieces for even curls.
- Clamp the flat iron near the roots, twist, then slide down slowly.
- Limit flat iron contact to 7-10 seconds per section to prevent damage.
- Brush hair fully before curling to remove tangles and smooth strands.
How to Curl Hair with a Flat Iron Step-by-Step

Start by dividing dry hair into 1-inch-wide sections. Smaller sections help create tighter curls and keep heat even. Use clips to keep the rest of your hair out of the way.
Clamp your flat iron at the roots of one section, around eyebrow level. Hold it tightly to grip the section firmly. Twist the wrist one full turn away from your face while sliding the iron down slowly.
Don’t hold the flat iron still for too long. About 5 seconds is enough to shape the curl without damaging hair.
Release the clamp and use your finger to spin the curl into place immediately. This helps form a smooth, rounded curl instead of a kink.
- Section hair into 1-inch wide parts for consistent curls.
- Clamp flat iron at the root near the scalp.
- Twist the iron 180 degrees away from your face.
- Gently glide the iron down the section to the tips.
- Hold the iron for around 5 seconds while twisting.
- Release the clamp and spin the curl using your finger.
- Repeat steps until all sections are curled.
Using single passes limits heat damage and keeps curls smooth. If you want looser curls, take wider sections or don’t twist as tightly.
For permed-style curls, clamp the iron vertically and twist or flick outward. Practice controls how even and tight curls will turn out.
Choosing the Right Flat Iron Temperature and Size

Start by matching your flat iron temperature to your hair type. Fine hair needs about 300°F to avoid burning or drying out.
Medium hair works well between 350°F and 370°F for good curl hold without damage. Thick or coarse hair often needs hotter settings, up to 400°F, to shape curls effectively.
Next, pick the right plate size for your desired curl look. Narrow plates (about 1 inch wide) are best for tight, spiral curls or short hair. Wider plates (1.5 to 2 inches) work better for loose waves on longer hair.
Rounded edges or irons with rotating plates curl hair smoothly. They help stop pinch marks. This also prevents creases in your hair.
| Hair Type | Temperature Range (°F) | Plate Width | Plate Type |
|---|---|---|---|
| Fine or damaged hair | 300 | 1 inch | Rounded or rotating plates |
| Medium hair | 350, 370 | 1 to 1.5 inches | Rounded edges preferred |
| Thick, coarse hair | 370, 400 | 1.5 to 2 inches | Rotating or curved plates |
| Color-treated or damaged | Max 375 | 1 inch recommended | Rounded edges; use heat protectant |
Always use a heat protectant spray, especially on color-treated or weak hair. It adds a barrier against heat damage and helps curls last longer. Avoid temperatures above 375°F on damaged or color-treated hair, since it causes breakage and fading.
Flat irons with rounded edges let you wrap hair without sharp creases or lines. Rotating plate models offer more control, smoothly twisting hair into curls or waves. These irons usually cost more but make curling simpler, especially if you’re still learning.
Never use a flat iron on wet hair; it risks serious heat damage.
Choosing your iron size and temperature right can cut curling time in half. Smaller plates mean tighter curls that look more defined.
Larger plates give gentle waves and work great for long hair. Match heat to texture for less damage and better curls.
Preparing Your Hair for Curling with a Flat Iron
You need dry, detangled hair before curling with a flat iron. Apply heat protectant products to avoid damage and frizz. Section your hair into thin parts for better control and consistent curls.
Drying and Detangling Hair
Start with clean, dry hair to get smooth, lasting curls. Damp hair doesn’t curl well and can get damaged by heat. Use a hair dryer on a low or medium setting to dry completely.
Brush your hair gently to remove all tangles before curling. Wet or tangled hair can pull and break under heat. Dry, smooth hair also helps spread heat evenly across strands.
Applying Heat Protectant Sprays
Spray a heat protectant evenly on dry hair before using your flat iron. This creates a barrier to prevent frizz and heat damage. Focus on mid-lengths to ends where hair is more fragile.
Choose a thermal spray or serum designed to block heat up to at least 450°F (232°C). Use enough to lightly coat each section without making hair heavy or sticky.
- Shake the spray bottle well before use.
- Hold the sprayer about 6 to 8 inches from your hair.
- Spray all hair sections evenly for full coverage.
- Comb through to distribute product gently if needed.
- Wait 1 to 2 minutes for the product to dry before curling.
Always apply heat protectant to prevent frizz and keep curls healthy. Never skip this step to avoid heat damage or dry, brittle hair.
Dividing Hair into Sections
Section your hair to control the curl size and speed the process. Divide dry hair into 1-inch sections for even, consistent curls. Smaller sections create tighter curls while bigger ones make loose waves.
Clip away the parts you’re not using with lightweight hair clips. This keeps the hair from tangling and makes curling safer and faster. Work from the bottom to the top for better reach and control.
- Create a bottom layer across the nape of your neck.
- Separate the next layer about an inch above the first.
- Keep each section around one inch wide and manageable.
- Clip the unworked hair out of the way.
- Repeat until all hair is sectioned and ready.
Thin, even sections let you apply heat safely and get curls that last. Trying to curl large or uneven chunks leads to missed spots and uneven heat.
Optional Pre-Straightening Step
You don’t have to straighten your hair before curling with a flat iron. Pre-straightening can make curling easier if your hair is very wavy or frizzy. This step helps the flat iron glide smoothly for neat curls.
If your hair is silky and fine, skip straightening to save time. Just apply heat protectant and start curling small sections. Use a flat iron with smooth plates to reduce dents or marks in curls.
Techniques for Different Curl Types with a Flat Iron
Loose waves need wider sections of hair, about 2 inches across. Use a slower flat iron glide, twisting the iron just halfway while pulling down. Keep the hair wrapped loosely around the iron to avoid tight curls.
Creating beachy curls works best with medium sections, around 1 to 1.5 inches wide. Twist the iron fully but rotate it quickly and smoothly. Change curl direction each time by turning the iron one way.
Twist it clockwise on one section. Then twist it counterclockwise on the next. This creates a natural, undone look.
Tight spirals require smaller sections, 0.5 inch or less. Clamp each section near the scalp, then twist the iron 360 degrees and glide down slowly.
This gives springy, bouncy curls that hold shape well. Using this method takes more time but creates voluminous curls that last.
Start the iron facing inward on the first section. On the next, face it outward. This switches the curl direction for each section.
This stops curls from clumping into a uniform pattern. When you start near the back, lower where you spin the iron.
This avoids harsh lines and adds softness. It helps the curls look natural.
Adjusting the section size changes curl size and volume noticeably. Wider sections make more relaxed, natural waves but less curl definition.
Smaller sections produce tight curls but can feel heavy if overdone. You control how much twist and how fast you pull the iron to tweak curl tightness.
Using texturizing spray before curling helps add grit and volume. It keeps loose waves from falling flat and makes tight curls appear fuller. Lower the heat setting for fine hair or loose waves.
This prevents overheating and hair damage. Keeping the temperature down protects your hair.
Cooling and Setting Your Flat Iron Curls for Longer Wear
After you curl your hair with a flat iron, wait 10 minutes. Let the curls cool completely before touching them. This helps the curls stay in place longer.
This step locks in the shape before you touch them. Touching too soon can loosen the curls and shorten their life.
Hold each curl gently in your hand as it cools to keep the shape intact. Avoid rough handling or pulling, which can make curls frizzy or uneven. Clip your curls up with small hair clips after curling.
This helps the curls set better. Leave the clips in until your hair cools down.
Using the right products helps your curls last longer. A light spritz of hairspray right before you curl protects and holds the waves. After cooling, a curl-improving cream or mousse adds volume and definition without stiffness.
- Spray a tiny bit of hairspray before curling each section
- Hold each curl in your hand for 10 seconds after releasing flat iron
- Clip curls up while cooling for extra hold
- Apply curl cream or mousse once curls are cool
- Comb curls gently with fingers for a natural look
- Use a finishing light-hold hairspray to set everything
Refresh your curls without re-curling by lightly misting hair. Use water or a curl refresher spray for best results. Avoid soaking your hair to keep the curls intact.
Then scrunch your hair with your hands to wake up the shape. This technique works for a few hours but doesn’t create new curls.
Don’t rush the cool-down time; letting curls fully set stops early droop.
Common Mistakes When Curling with a Flat Iron and How to Fix Them
Curling your hair with a flat iron often comes with a few frequent mistakes. These include using too much heat, curling uneven sections, and ending up with flat curls. Fixing these errors can improve your curls’ shape, hold, and health.
Overheating and Timing Errors
Using too much heat damages your hair and causes curls to look lifeless. Keep your flat iron between 300°F and 350°F to avoid heat damage. For fine or damaged hair, go as low as 300°F to protect strands.
Leaving the flat iron on your hair too long flattens curls and dulls shine. Slide the iron through each section in about 4 to 6 seconds. Pause only briefly to let the heat shape the curl without burning the strand.
Improper Sectioning and Technique
Curling uneven or too-large sections creates messy, inconsistent curls. Divide your hair into uniform 1-inch sections for smooth, defined curls. Smaller sections hold curls better and last longer.
Applying the iron at the wrong angle can produce flat, unnatural curls. Start curling by clamping the flat iron near the hair roots. Then slowly twist the iron away from your face while pulling it down.
Product and Preparation Mistakes
Skipping heat protectant leaves your hair vulnerable to heat damage. Always spray a heat protectant before curling. It forms a barrier and adds shine that keeps curls healthy-looking.
Curling damp or oily hair causes frizz and curls that won’t last. Make sure your hair is fully dry and clean before using the flat iron. Lightweight styling mousse can improve hold on fine hair without weighing it down.
Simple Fixes for Curling Problems
To revive limp curls, mist them lightly with water or styling spray, then scrunch. Using a light hairspray can add hold without stiffness. Avoid heavy sprays that weigh curls down.
If curls feel damaged or look frizzy, lower your heat setting and deep condition your hair weekly. Regular trims keep split ends from ruining the curl shape. Consistent care restores bounce and smoothness.
Maintaining and Refreshing Flat Iron Curls Throughout the Day
Keeping your curls intact all day takes some care and the right moves. Refreshing curls without heat helps you avoid damage and keeps your hair healthy. Adding volume and reducing frizz keeps your hairstyle looking fresh longer.
Daily Curl Care
After curling, avoid touching your hair too much. Oils from your hands can weigh down curls and cause frizz.
Let your hair cool fully before styling or brushing. This helps the curls set tighter.
Sleeping on a silk pillowcase or wrapping your hair in a silk scarf protects curls overnight. This reduces friction that flattens curls and creates frizz. You can loosely pineapple your hair on top of your head.
This helps keep your curls from getting crushed. It’s a quick way to protect curls overnight.
Refresh Techniques Without Heat
You can reshape curls using your fingers or a wide-tooth comb. Lightly spritz water or a curl refresher spray, then scrunch your hair. This wakes up curls without needing heat.
Another way is to use a damp T-shirt instead of a towel. Gently scrunch curls with the fabric to soften any frizz or flattening.
To tame flyaways, put a little serum or oil on your fingertips. Gently pat it over your hair to smooth it out.
Use just a small amount for best results. Avoid using too much to prevent curls from falling flat.
Product Recommendations
Use a lightweight curl refresher spray for quick fixes. You can also mix water with leave-in conditioner. Spray lightly to revive curls without weighing hair down.
Volumizing mousse or hairspray with mild hold helps maintain volume and shape. Avoid heavy products that weigh curls down.
For frizz control, pick a serum with silicone or natural oils like argan or jojoba. Products with infrared heat technology help lock moisture and reduce frizz when styling. Choose formulas that suit your hair type to prevent greasiness or dryness.
Volume Boosting Tips
To add volume, flip your head upside down and gently shake your curls at the roots. This lifts hair and creates natural bounce. Use your fingers to lift curls instead of a brush, which can flatten them.
Try a light mist of volumizing spray on dry roots. Avoid applying too close to curls to keep texture intact. Clip your hair roots with small clips while air drying.
Do this also when getting ready to set curls. It gives your curls more lift and shape.
- Don’t overuse heavy products that weigh curls down
- Let hair cool completely before touching curls
- Use a silk pillowcase or scarf at night
- Scrunch curls gently with a damp T-shirt
- Refresh curls with spray-on conditioner or water
- Lift roots by flipping your hair upside down
- Apply light volumizing spray only at roots
When to Consult a Professional Stylist for Curling Advice
Seek a professional stylist if your hair is very damaged or broken. Flat iron curling can worsen weak hair and cause breakage. A stylist can recommend treatments or safer heat options suited to your hair’s health.
For color-treated hair, consulting a pro helps avoid fading or uneven tone. Professionals know which heat settings work best with different dyes and damage levels. They also use products that protect color while styling curls with a flat iron.
Complex curls like tight spirals or layered waves often need a stylist’s skill. Pros handle tricky sections and use tools that might be hard to use at home. They also know finishing touches that make curls last longer and look polished.
Pick a trusted stylist by checking reviews and asking for before-and-after photos of curly styles. Communicate clearly about your hair type and goals during a consultation. This ensures you get advice and curls that match your needs.
Cost varies widely but budget $50 to $150 for a curling session with a professional. Time can be 45 minutes to 2 hours depending on hair length and style complexity. A good result looks like natural, smooth curls that hold without frizz or heat damage.
Never push your flat iron above 350°F on fragile or color-treated hair. It increases damage risk. A stylist can safely adjust heat and technique for your hair type.
Step-by-Step Action Plan to Curl Hair with a Flat Iron Today
Follow these steps to get curls with your flat iron safely and easily. Check your results at each step to make sure you’re on track.
- Before you start: Wash and dry your hair completely. Hair feels smooth and dry, no damp spots.
- 10 minutes before curling: Apply heat protectant spray evenly. Hair feels slightly coated but not sticky.
- Right now: Set your flat iron to 300°F for fine hair or 350°F for thick hair. Temperature feels warm when you touch the metal carefully.
- Next 15 minutes: Take 1-inch sections and curl by twisting the iron away from your face. Curls form right after you slide the iron down.
- After curling each section: Let curls cool undisturbed for 5 minutes. Cool curls feel firm when you touch them gently.
- Finishing up: Run fingers softly through curls to loosen them or use a wide-tooth comb. Curls look natural and bouncy, not stiff.
- Later today: Spray a light hold hairspray. Hair holds curls but still moves freely.
Frequently Asked Questions
Can You Use Any Flat Iron to Curl Hair?
You can curl hair with most flat irons. Narrow plates work best for tight curls, while wider plates create loose waves.
How Do I Avoid Frizz When Curling with a Flat Iron?
Use a heat protectant spray before curling. Finish with a light hairspray or serum to control frizz.
Is It Better to Curl Hair on Damp or Dry Hair?
Curl your hair only when it’s completely dry. Damp hair won’t hold curls well and can get damaged.
How Long Can Flat Iron Curls Last Without Touch-Ups?
Flat iron curls usually last up to a day. Using a cool setting and setting spray can help them last longer.
Can I Sleep with Flat Iron Curls?
Sleeping with curls can cause them to flatten. Use a silk pillowcase or loosely tie hair to protect curls overnight.
Does Hair Type Affect the Flat Iron Temperature for Curling?
Yes, fine hair needs lower heat (around 300°F). Thick hair can handle 370°F to 400°F for better curl hold.
The Bottom Line
Using a flat iron to curl your hair takes practice but gets easier fast. Keep testing different section sizes and heat settings to find your perfect style. Start curling small sections today and watch your skills grow.