How to Use an Automatic Curling Iron: A Complete Step-by-Step Guide
How to use an automatic curling iron starts with the right hair prep. First, make sure your hair is dry and tangle-free. Insert small sections, about 1 to 1.5 cm wide, into the curler’s chamber.
Press the rotation button and hold for 8 to 13 seconds for tight, lasting curls. Slide the iron down carefully to release the curl straight without snagging. Using the right heat setting helps too: thicker hair needs 375, 400°F. Fine hair should stay around 300, 325°F.
Start with dry hair that’s been unwashed for about 24 hours. This helps curls last longer and avoids heat damage.
The curling iron’s automatic rotation does the tricky wrap work. So you don’t have to fuss over every twist.
Key Takeaways
- Feed 1, 1.5 cm dry, detangled hair into the curling chamber.
- Hold the rotation button for 8 to 13 seconds per section.
- Use 375, 400°F for thick hair; 300, 325°F for fine or color-treated hair.
- Slide the curler straight down to release curls softly.
- Start with hair that’s about 80% dry and unwashed for 24 hours.
- Section hair into small pieces for even, lasting curls.
What Is an Automatic Curling Iron and How It Works

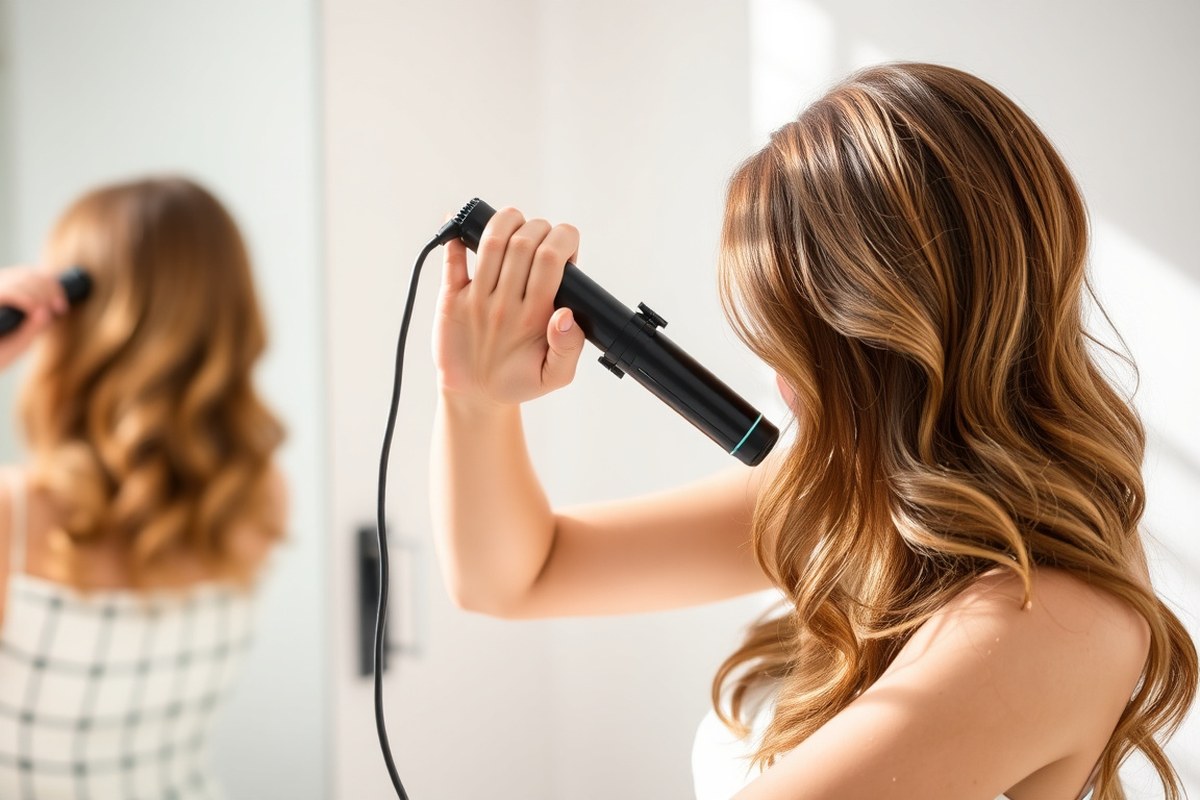
An automatic curling iron is a styling tool that wraps your hair for you. Unlike a traditional curling iron, it has a rotating barrel inside a chamber. When you put a section of hair in the tool, press a button.
The barrel spins and curls your hair automatically. It does the work for you.
This rotating action saves you from twisting the iron yourself. You only need to feed a thin section of dry, detangled hair, about 1 to 1.5 centimeters wide, into the chamber. Hold the button to turn the barrel for 8 to 13 seconds.
Time depends on your hair type and curl tightness. Longer for tighter curls.
These irons often have settings to control rotation direction to change curl patterns. You can also adjust the temperature, which usually runs from around 250°F to 400°F. This helps protect fragile or fine hair and ensures the curls last longer.
Automatic curling irons tend to cost more than basic curlers, often between $50 and $150. But they make curling faster and more consistent.
The barrel rotates evenly, wrapping hair smoothly without uneven strain or hot spots from hand twisting. Slide the iron down straight to let the curl go. Don’t unclamp like with normal curling irons.
This method frees your curl safely. This motion stops pulling and helps curls hold their shape better over time.
These tools work best on long straight or wavy hair. They aren’t designed for wet or tangled hair. So drying and combing your hair first is key.
Choose a smaller barrel and adjustable heat for fine hair. This helps avoid burning and keeps curls longer. It protects your hair strands well.
How to Prepare Your Hair Before Using the Curler

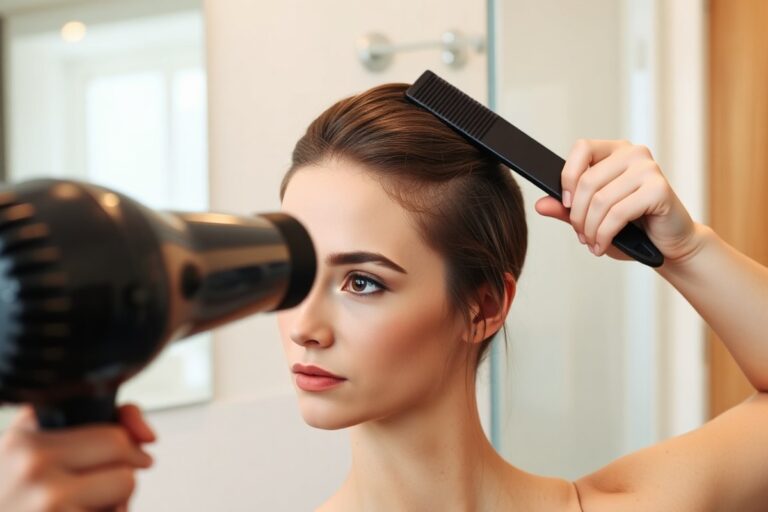
Before using an automatic curling iron, your hair must be completely dry. Curling damp hair or hair with heavy product won’t hold curls well. Preparing your hair properly helps protect it and makes curling easier.
Ideal Hair Dryness and Timing
Hair should be fully dry before curling to avoid damage and better hold. Blow-drying your hair after washing ensures dryness, especially if your hair tends to stay damp. Aim to curl your hair at least 30 minutes after washing to let natural oils settle.
Moisture or oil can stop curls from forming or cause frizz. Curling while hair is damp or wet might weaken strands or cause heat steam damage. Some people with very fine hair prefer to wait longer.
They wait until the hair feels fully dry to the touch. This helps get the best curling results.
Recommended Products Before Curling
Always apply a heat protectant spray before using the curling iron. This spray shields hair fibers and prevents breakage from the high heat. Choose light hold mousse or setting spray for extra grip to help curls last longer.
A texture spray can be useful if your hair is freshly washed and slippery. It adds some grit, making the hair easier to wrap around the barrel. Avoid heavy oils or thick creams before curling your hair.
They can block the curl from forming properly. Also, these products make hair feel heavy.
Brushing and Detangling Tips
Brush or comb your hair thoroughly before curling to remove knots and tangles. Detangled hair wraps evenly around the barrel, which helps create smooth curls. Start with a wide-tooth comb and finish with a soft bristle brush for gentle smoothing.
Untangling reduces hair breakage during the curling process. Hair that is knotted can snag on the curling iron.
This may pull strands and cause damage. Take your time to section and detangle carefully, especially for thick or long hair.
Follow these steps before you start curling your hair:
- Wash your hair and dry it completely with a blow dryer.
- Wait 30 to 60 minutes after drying for hair oils to settle.
- Apply a heat protectant spray evenly throughout your hair.
- Add a light hold mousse or texture spray as needed for grip.
- Use a wide-tooth comb to gently detangle your hair.
- Section your hair for easier curling (small sections work best).
Never curl hair that is damp or wet. Always start with completely dry hair. This protects your strands and helps curls last longer.
Sectioning Hair and Choosing the Right Curling Settings
Section your hair into manageable parts for even curls. Use barrel size and temperature suited to your hair length and type. Adjust curl direction and hold times to match your look.
Hair Type and Recommended Heat Settings
Choosing the right temperature protects hair from damage. Fine or damaged hair should use lower heat to avoid burns. Thick or coarse hair can tolerate higher heat to curl properly.
Hold time varies by hair texture. Fine hair needs less time, while thick hair requires longer heat application. Matching heat and hold time improves curl definition and longevity.
| Hair Type | Temperature Advice (°F) | Recommended Hold Time (seconds) |
|---|---|---|
| Fine or Damaged | 300, 330 | 8, 10 |
| Normal or Medium | 350, 380 | 10, 12 |
| Thick or Coarse | 380, 430 | 12, 13 |
| Very Short (Chin-length) | 330, 360 | 5, 8 |
Fine hair’s lower heat prevents breaks and fading color. Medium hair curls well on mid-range heat and time. Thick hair needs higher temperature and longer hold for strong curls.
Section Size and Barrel Diameter Guide
Section hair into sizes that match the curling barrel. Small sections work best with smaller barrels for even heat. Larger barrels suit bigger sections and soft, loose waves.
Long hair needs sections about the barrel’s width or slightly wider. Short hair requires smaller sections to wrap correctly. Good sectioning helps avoid uneven curls or heat spots.
| Hair Length | Recommended Section Size | Barrel Size |
|---|---|---|
| Very Short (Chin-length) | Smaller than barrel width | 0.5, 1 inch |
| Medium Length | Medium (about barrel width) | 1 inch |
| Long (Past Shoulders) | Match barrel diameter or slightly larger | 1.25, 1.5 inches |
Divide hair into three layers: bottom, middle, and top. Use clips to hold layers apart for easier curling. This keeps curls consistent and saves styling time.
Choosing Curl Direction and Hold Time
Curling away from your face opens and softens your look. Curling toward the face gives a cozy, inward curl effect. Alternating directions creates natural beach waves.
Short hair needs shorter hold times to avoid heat damage. Longer times produce tighter, lasting curls on medium and thick hair. Adjust heat and hold to control curl tightness.
Start with recommended hold times, then tweak per your curl’s bounce and look. Always let curls cool before touching to lock shape. This keeps curls intact longer.
Step-by-Step: How to Use an Automatic Curling Iron
Using an automatic curling iron is simple once you get the hang of it. You’ll insert small hair sections. Set your curl direction and temperature.
Then hold and release the curl carefully. Follow these steps for smooth curls without tangles or damage.
Section and Insert Hair Correctly
Start by parting your hair into 1- to 2-inch sections. Smaller sections help curls form evenly and stop tangles. Keep your hair dry and smooth before you insert it into the curler.
Hold the section straight. Gently place the ends into the curling chamber. Make sure they rest against the barrel.
Use a comb if needed, but avoid combing hair once it’s inside. For thick or long hair, work from the bottom layers upwards.
Set Temperature and Curl Direction
Turn on the curling iron by holding the power button for about 2 seconds. Change the temperature to match your hair type.
Use about 300°F for fine hair. Go up to 375°F for thick hair.
Press and hold the left button to curl hair away from your face. Use the right button to curl hair towards your face. Curling away often looks nicer, but you can choose either style.
Hold, Rotate, and Release Safely
After inserting the hair, press the curl button to start the barrel rotation. Hold it in place for 5 to 7 seconds so heat sets the curl properly. Don’t try to rush this, or the curl won’t hold.
Release the curl by pressing the button to open the chamber. Or unclip the barrel. This depends on your curling tool.
Avoid pulling the iron out too quickly to prevent tangling or breaking hair. Wait until the curls have cooled before styling.
- Divide dry hair into 1- to 2-inch sections using clips.
- Insert a smooth, untangled section straight into the curling chamber or wrap around the barrel’s end.
- Press and hold the power button for 2 seconds to turn on the iron.
- Select heat level appropriate for your hair type (300°F to 375°F).
- Press and hold the left or right rotation button to curl away or toward your face.
- Hold for 5 to 7 seconds to let the curl set fully.
- Release the hair carefully by opening the chamber or unclamping the barrel.
- Repeat with all sections layer by layer until your hair is fully curled.
How to Cool, Finish, and Maintain Your Curls
Hot curls are soft and fluid, so you need to let them cool first. Hold each curl in your palm for 10 to 15 minutes. Or clip it to your head.
This keeps the curl in place. This step helps your curl stay tight and neat.
It lasts longer without frizz. It won’t fall flat when you brush it.
After cooling, use finishing products designed to hold curls without weighing them down. Light-hold hairsprays and curl-improving serums work best. They keep your style shiny and bouncy while guarding against humidity and flyaways.
- Hold curls in your hand or clip them for 10, 15 minutes
- Apply light-hold hairspray for flexible hold
- Use a small amount of curl-improving serum to reduce frizz
- Gently separate curls with fingers or a wide-tooth comb
- Use dry shampoo at roots to refresh curls on day two
- Touch up with your curling iron on loosened curls only
To keep curls looking fresh during the day, avoid running your fingers through them too much. Curls loosen? Quickly touch them up with your curling iron.
Use low heat. Only a few seconds is enough. Dry shampoo also helps absorb oils near the scalp and brings back volume between washes.
Some habits make curls last longer. Don’t sleep on freshly curled hair. Don’t wrap your hair tightly in a towel.
Instead, loosely wrap it in a silk scarf. Or sleep on a silk pillowcase to avoid frizz.
Also, avoid heavy brushes that break curls apart. Use your fingers or a wide-tooth comb to gently style curls.
Never brush curls while warm, this is the fastest way to lose your curl shape.
Common Mistakes When Using Automatic Curling Irons and How to Fix Them
Tangled hair in an automatic curling iron often happens because your hair is wet or damp. Steam inside the curler can cause the iron to jam. This may pull your hair and cause breakage.
Always dry your hair completely before curling. This helps prevent problems and keeps curls smooth.
Curls fall out quickly when hair isn’t prepped right. Short curling time can also cause it. Use heat protectant spray before curling.
Apply light hairspray after to keep curls longer. Wrap small sections of hair evenly around the iron. Hold for 8 to 10 seconds to shape.
Uneven or misshaped curls show up when the hair sections are too big or inconsistent. You want to take small, equal-sized pieces to get uniform curls.
Curls look squished if temperature is too high. Pulling hair too hard during release also causes this.
- Don’t use your curling iron on damp or dirty hair.
- Divide your hair into small, equal sections.
- Set the temperature between 300°F and 370°F depending on your hair type.
- Hold each section in the iron for 8 to 12 seconds.
- Release hair gently to avoid tugging or tangling.
- Apply heat protectant before styling.
- Use a light hairspray after curling to keep curls intact.
Overheating is a common cause of hair damage during curling. Hair can dry out, become brittle, or develop heat spots where the iron stayed too long.
Select the lowest temperature effective for your hair type. Fine or damaged hair needs about 300°F. Thicker hair can handle 350°F to 370°F. Never hold the iron on the same spot for more than 12 seconds.
Adjusting Technique for Different Hair Lengths and Types
Automatic curling irons can work well on short hair. But you need a narrow barrel.
This helps the ends wrap fully and creates neat curls close to the scalp. For medium or long hair, a larger barrel holds bigger sections and makes styling faster.
Different hair types need adjustments to heat and section size. Fine or color-treated hair is more delicate.
So use lower heat, around 270°F to 320°F. Thick or coarse hair needs higher heat, up to 400°F. Use smaller sections to curl hair evenly. This helps the curls last longer and look better.
| Hair Length | Recommended Barrel Size | Section Size | Heat Setting Range (°F) |
|---|---|---|---|
| Short (chin length or above) | Small (about 0.75 inch) | Small (thin pieces) | 270, 320 (fine/color-treated), up to 350 (coarse) |
| Medium (shoulder length) | Medium (1 to 1.25 inch) | Medium | 300, 350 (fine/color-treated), up to 380 (coarse) |
| Long (past shoulders) | Large (1.5 to 2 inch) | Medium to large | 320, 360 (fine/color-treated), up to 400 (coarse) |
For thick or coarse hair, smaller sections work better so heat can reach each strand. Also, some thick hair might resist curling without enough heat or time.
Try curling sections for 10 to 15 seconds. Running a brush through your hair before styling spreads your natural oils and protects strands.
Natural curly or wavy hair needs a gentler touch. Avoid the highest heat to protect your hair’s texture.
Use medium heat and curl in larger sections to keep your waves soft. Let curls cool fully before touching, so they last longer and don’t frizz.
Safety Tips and When to Seek Professional Help
Using an automatic curling iron safely means keeping a close eye on heat and handling. Always make sure your tool is unplugged before cleaning or storing it.
Avoid touching the heated barrel directly to prevent burns. Use a heat protectant spray on your hair to reduce damage.
Proper maintenance helps your curling iron last longer and work better. Clean the barrel after every few uses to remove any leftover product or hair oils.
Use a soft cloth dampened with rubbing alcohol or warm soapy water. Never soak the device or let water get inside the electrical parts.
Here’s a quick checklist for safe use and maintenance:
- Always unplug before cleaning or when done styling
- Use heat protectant sprays on your hair before curling
- Clean the curling barrel regularly with a soft, damp cloth
- Keep the device away from water or damp areas
- Store the iron in a heat-resistant pouch or holder
- Check the cord for damage and avoid twisting or pulling
- Use the auto shut-off feature if available for extra safety
Interrupt daily heat styling if your hair looks dry, frizzy, or feels brittle. Heat can weaken hair cuticles over time. Seeing a professional makes sense if your hair shows damage.
They can also help with new looks that are hard to do yourself. This keeps your hair safe and looking good. They can also advise about treatments or lower-heat styling options that protect your hair.
Never ignore burning smells or tool malfunction; stop use immediately and consult a professional.
Your curling iron has an auto shut-off feature for safety. It turns off after a set time without use. This helps prevent accidents and saves energy.
This helps prevent fires or accidents if you’re distracted. Avoid curling sections of hair more than twice in one session to limit heat stress. Using medium heat settings instead of highest also reduces damage risk and still creates flattering curls.
Simple Action Plan to Master Your Automatic Curling Iron
Follow these steps to get comfortable using your curler and see real results. Check your progress by how your curls look and hold.
- Before you start: Wash and dry your hair fully. This helps curls last and avoids heat damage.
- First time: Set your curling iron on the lowest heat. Curl a small section to see how your hair reacts.
- After 3 curls: Raise heat if curls fall quickly. Lower heat if hair feels dry or weak. Adjust it to find the right balance.
- First week: Practice sections on different hair parts. Notice which size and direction create your best curls.
- Week 2: Use a light hairspray after curling to lock curls. Check if curls last a few hours without falling flat.
- After 2 weeks: Try curling your hair at night and sleeping on satin pillowcases. See if curls stay longer next morning.
- Ongoing: Clean the curling iron after every few uses. This removes buildup and keeps heat even.
Frequently Asked Questions
Can I Use an Automatic Curling Iron on Damp Hair?
You should only use an automatic curling iron on dry hair. Damp hair may steam and damage your strands or cause uneven curls.
What Heat Setting Is Best for Fine Hair on an Automatic Curling Iron?
Use a low heat setting around 250°F for fine hair to avoid damage. Lower heat still curls well without burning or drying your hair out.
How Do I Prevent Curls from Loosening Quickly with an Automatic Curling Iron?
Let curls cool completely before touching or brushing them. Cooling sets the curl shape and helps it last longer during the day.
Can I Use Styling Product Before Curling with an Automatic Curling Iron?
Yes, apply a heat protectant spray and light styling mousse before curling. These help shield hair from heat and hold the curl better.
How Often Should I Clean My Automatic Curling Iron Barrel?
Clean the barrel every few uses or after product buildup. Wipe it with a damp cloth when cool to keep curls smooth and tool working well.
Is It Safe to Leave the Automatic Curling Iron Plugged in for a Long Time?
No, avoid leaving the curling iron plugged in when unused for safety. Unplug it after use to reduce fire risks and prolong the tool’s life.
Wrapping Up
Using an automatic curling iron gets easier once you practice the right steps. Pay attention to your hair’s needs and adjust settings as you go. Begin curling with clean, dry hair.
Use the lowest heat to protect your hair. This helps you get great curls safely.