How Can I Do Highlights at Home? A Complete Guide with 8 Proven Steps
How can I do highlights at home? You can do them step by step with the right tools and patience.
Start with clean, slightly dry hair to ensure the color lifts evenly. Use foils or a highlighting cap to separate strands and prevent color bleeding.
Timing is key. Check your highlights every 5 to 10 minutes to avoid over-processing. Lifting time changes depending on your hair type.
Don’t rush the process. Check inside the foil to track your progress safely.
After applying color, tone your hair to get the shade just right. Wait about 20 minutes for toner to work, then rinse with a conditioner that detangles. Taking these steps helps you get neat, professional-looking highlights right at home.
Key Takeaways
- Wash hair 1-2 days before highlighting for the best results.
- Use foil strips 4 inches wide and longer than your hair length.
- Check processing every 5-10 minutes to control lift and avoid damage.
- Leave hair about 80% dry before applying bleach or color.
- Wait 20 minutes after toning before rinsing out the product.
- Apply a deep conditioner after highlighting for smooth, strong hair.
1. How Can I Do Highlights at Home Step by Step

Start with clean, dry hair and a well-ventilated space. Wear gloves and cover your shoulders with an old towel. Prepare your highlighting kit as the instructions say right before you begin.
Follow these clear steps to get highlights at home safely and evenly. Stay patient and check your hair color frequently during processing. Timing and sectioning are key to avoid uneven color or damage.
- Section your hair into four parts: part down the middle, then ear to ear. Secure each section with clips. This simple division helps you work methodically.
- Slice thin pieces of hair from the top layer of each section for foiling. For softer highlights, take wider sections without foils like in balayage. Thinner slices create natural streaks.
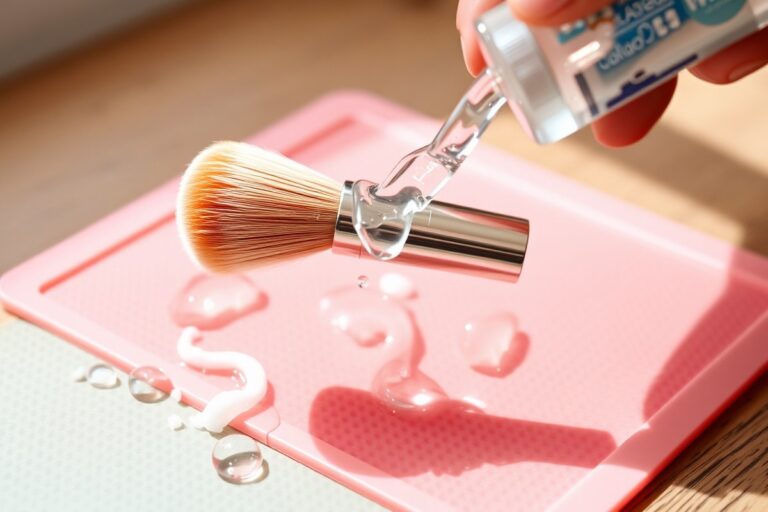
- Apply the bleach or lightener with the brush to the chosen strands. Start 1 inch away from the roots, then cover the ends last. This prevents harsh lines near the scalp.
- Wrap each highlighted section in foil if using. This boosts lightening and keeps strands separated. Skip foils if using a cap or balayage.
- Set a timer according to your product instructions, usually 20 to 45 minutes. Peek at your hair every 5 to 10 minutes to avoid overprocessing. Stop once you reach the desired lightness.
- Rinse out the lightener thoroughly with lukewarm water, then shampoo and condition. Use a deep conditioner to restore moisture. Avoid hot water, which can dry your hair.
- Dry your hair gently and check the highlights in natural light. Repeat or tone if necessary to achieve the perfect shade.
Checking highlights frequently matters most because hair lifts at different speeds. Brighter, more precise highlights happen with thinner slices and foils. For a more natural effect, bigger sections and no foil work well.
Watching the clock and your hair’s tone keeps damage low and colour even. Waiting too long between application and rinsing risks dry, brittle hair and stiff highlights. Sticking close to timing instructions will help your highlights look fresh and beautiful.
2. What Tools and Products Do I Need for At-Home Highlights?

You’ll need a few key tools and products to do highlights at home. Start with a good-quality highlighting kit that includes bleach, developer, and an applicator brush. Many kits also come with a toning glaze to neutralize brassiness after lightening.
Choose silver pre-cut hair foils to isolate strands if you want precise highlights. Foils help control where the bleach goes and avoid overlap. Alternatively, a balayage brush works well for a softer, more natural look without foils.
Developer strength matters. For most hair, 20 Volume developer is standard and safe. Using 30 Volume developer with Olaplex helps lift your hair.
It gives stronger lift without causing extra damage. This keeps hair protected during coloring. Dark, coarse, or resistant hair may need 40 Volume developer.
Use it carefully to avoid over-processing damage. Watch your hair’s condition while coloring.
- Highlighting kit: bleach, developer, applicator, and toning glaze included
- Silver pre-cut foils for controlled, exact highlights
- Balayage brush if you prefer freehand, soft blending
- Developer: 20 Volume for mild lift, 30 with Olaplex for stronger lift
- Protective products like Olaplex to minimize damage
- Comb or section clips to separate hair
- Gloves to protect your hands during bleaching
Using professional-grade products improves your results and hair health. Drugstore bleach is less consistent and can cause more damage.
Expect to spend around $20 to $40 for a quality at-home highlighting kit. Foils cost between $5 and $10 for a pack, which lasts several sessions.
Keep your hair dry and unwashed for 24 to 48 hours before highlighting. This reduces scalp sensitivity and protects from irritation.
Follow package instructions for mixing bleach and developer, usually a 1:1 ratio. Apply bleach quickly and evenly to avoid patchy highlights.
Don’t use higher developer volumes than needed; it risks hair damage and uneven color.
3. Which Highlighting Methods Work Best for Different Hair Types?
Foil highlights and no-foil methods both work well at home. But the best choice depends on your hair type and look.
Foil highlights make bold, defined streaks, while no-foil methods produce softer, natural results. Choosing the right technique helps avoid over-processing and gives better blend.
Foil Highlights vs No-Foil Highlights
Foil highlights are the classic way to get brighter, noticeable streaks. The foil traps heat and helps bleach lift color faster. You’ll get clear, even color, especially on dark or coarse hair.
No-foil methods like balayage or caps use freehand painting or pulling strands through a cap. These create subtle, blended highlights. They work well with fine hair.
They’re also good for gray hair since they avoid harsh lines. They also reduce the risk of damage around fragile roots.
Foil can take longer and feels more complicated at home. No-foil methods are simpler to do.
They’re better for a low-maintenance style. Use them if you don’t want full head highlights.
Highlighting Curly, Short, and Gray Hair
Curly hair usually benefits from no-foil methods. Balayage or hand-painting keeps curls soft and natural. Foil can flatten curls and create uneven color.
Short hair calls for face-framing highlights or subtle money-piece highlights. Avoid heavy foiling, which feels bulky. The few lighter strands add brightness without harsh contrasts.
Fine cap highlights or hand-painted pieces suit gray hair nicely. Placing them near temples and crown blends the gray well.
Avoid over-toning silver hair to keep its shine bright. Keep colors close to your natural base.
Choosing Balayage, Money-Piece, or Cap Methods
Balayage is best for a natural, sun-kissed look. It uses hand-painting on mid-length to ends.
It suits all hair types and needs little upkeep. It’s great for dark brown hair with honey or caramel tones.
Money-piece highlights focus on face-framing strands. They give immediate brightness around the face and suit fine or thinning hair well. This method adds life without over-processing delicate areas.
Highlighting caps are great if it’s your first time or you want root touch-ups. They pull strands through small holes, giving controlled, even highlights. Caps work well for blending gray or adding subtle lightness.
Here’s a quick table to help decide based on your hair:
| Your Hair Situation | Best No-Foil Method | Why It Works | Watch Out For |
|---|---|---|---|
| Mostly gray or silver | Fine cap highlights or soft hand-painted pieces | Blends gray without harsh stripes | Over-toning silver hair purple or dull |
| Fine or thinning hair | Few face-framing pieces or scattered cap highlights | Brightens without overprocessing fragile areas | Bleaching hairline too heavily |
| Dark brown hair | Caramel balayage or honey face-framing pieces | Warm highlights with natural fade | Too wide or thick foils |
Choose foil for bold, full-head highlights on thick hair. This method works best for intense color. Use another way for softer looks.
Choose balayage or money-piece for soft, natural looks on dark or fine hair. Try a cap if you want controlled, subtle highlights or need root blends.
4. How to Do a Strand Test and Why It’s important
Doing a strand test before highlighting helps you avoid hair damage and surprises. You learn how long the bleach or dye takes to work. The strand test also shows what your color will look like.
Selecting the Test Strand
Start by picking a small strand of hair from the back. Choose one hidden under a top layer.
Choose hair that resembles your overall texture and color for accurate results. Dry hair without products is best for the test.
Snip off about one inch of this strand. It should be big enough to work with, but small enough to check easily. Avoid strands that are overly damaged or previously colored.
Applying the Bleach or Color Safely
Prepare your bleach or highlighting mix as instructed on the box or product sheet. Apply it only to the little strand you cut, using a small brush or cotton swab. Avoid spilling it on your scalp or skin.
Set a timer and watch the strand closely as the color or bleach processes. Check the strand every 10 to 15 minutes. This helps you find the exact processing time without leaving bleach too long.
Evaluating Results and Adjusting Process
Look at your test strand’s color when processing finishes or reaches 45 minutes max. You want it to lighten to the shade you hoped for without becoming brittle or breaking. Soft, even lightening means you’re good to go.
The bleach is too strong when hair feels rough or breaks off easily. It also causes the hair to become very dry and stiff.
Stop the test and rinse immediately. You might need a lower bleach strength or shorter time next try.
Step-by-step to do a strand test:
- Pick a small hidden strand of dry hair, about 1 inch long.
- Mix your bleach or color as the package instructs.
- Apply the mixture evenly on the test strand, avoiding skin contact.
- Set a timer and check the strand every 10 to 15 minutes.
- Stop at 45 minutes or when the color looks right.
- Rinse the strand thoroughly with cool water and dry it gently.
- Assess the strand texture and color to decide your next steps.
5. How to Tone and Care for Highlights After Coloring
Toning your highlights depends on the colour you see after bleaching. Pale yellow highlights ask for violet toner or purple shampoo to balance the brassiness. When you notice golden yellow tones, a violet-blue or beige toner works well.
Orange hues mean you need a blue-based toner or shampoo. Blue shampoo helps cancel out orange tones.
Use it to balance your hair color. Red-orange shades usually require professional help.
Use purple shampoo every week or two, mainly on your highlights. This stops yellow or orange tones but doesn’t dry your hair out. Many people like L’Oréal Paris EverPure Purple Shampoo for blond, bleached, or silver hair.
Brown highlights react well to it too. Use it as a normal shampoo and let it stay on for 3 to 5 minutes. This short wait improves the shampoo’s toning effect.
After washing, deep condition your hair once a week. This strengthens your hair and stops it from feeling dry or brittle. Add leave-in conditioner or a light oil to your ends.
This helps reduce frizz and rough feel. Do it daily or when needed. Always spray heat protectant before using heat tools.
This keeps your highlights safe from damage. Don’t skip this step.
Toning glosses like L’Oréal Paris Le Color Gloss in Cool Blonde add shine. They also bring warmth back to dull or ashy highlights. Use them for fresh color.
Use these treatments every few weeks depending on how worn your colour looks. Don’t tone too often.
Over-toning can make hair look gray or too dark. Use toners only when your color starts to fade.
Only tone your highlights when you see unwanted yellow or orange tones. Overuse can dull your colour and dry your hair.
Aftercare keeps your highlights bright and healthy. Wash with gentle, colour-safe shampoo and conditioner. Skip harsh shampoos and hot water, which strip colour faster.
Treat your hair kindly. You’ll enjoy your DIY highlights longer without brassiness or dryness.
6. How to Avoid Common At-Home Highlighting Mistakes
Uneven or brassy highlights come from leaving bleach on too long. Sometimes you apply bleach unevenly. Both cause this problem.
Orange tones show up when hair didn’t lighten enough. Dark or dyed hair can cause this too. Fix orange tones by applying toner that cancels orange.
You can also use purple shampoo. Both help balance hair color.
Over-processing leaves your hair weak and may cause scalp burns. Watch for signs like a burning or itching scalp and hair feeling rough or straw-like. Remove the product right away if irritation happens.
Rinse your hair well. Then, use conditioner to soothe the scalp.
- Apply bleach only to dry, clean hair to avoid uneven lightening
- Use a highlighting cap for sensitive scalps to prevent burns
- Check your color every 5 to 10 minutes during processing
- Stick to the time recommended in your kit’s instructions
- Add a semi-permanent dye one shade darker when highlights are too light.
- Use foils or plastic sheets to separate strands and avoid overlap
- Don’t rush the process; stressing your hair causes breakage
Highlights turning too dark means bleach didn’t lift hair enough. It might have been neutralized too soon. You can add more lightener carefully.
But only after your hair recovers, which could take weeks. For a quick fix, try a color remover designed for hair dye, following instructions closely.
Uneven application usually happens if you rush or don’t section your hair well. Use clips to divide hair into small parts.
Apply bleach evenly using a brush on each section. Take your time to avoid patches that look obvious and unnatural.
Watching your processing time is key. Dark or previously dyed hair lifts slower. So it can take longer, sometimes 30 to 45 minutes.
Light hair lifts faster. So check it every 5 minutes to avoid going too light. Setting a timer helps keep track precisely.
7. What Safety Precautions Should I Take When Highlighting?
You must protect your scalp and skin by applying petroleum jelly around your hairline. This prevents bleach from irritating your skin. Also, wear gloves to keep the chemicals off your hands during application.
Choose a developer with 10 or 20 volume strength for home highlights. These lower volumes lift the color gently and reduce hair damage. Using a higher volume developer risks scalp burns and dries hair out too much.
Keep bleach away from your scalp by using a highlighting board. It helps separate the hair strands and keeps bleach in place. This limits accidental spreading and protects your skin from chemical contact.
Avoid highlighting your hair at home if your scalp is sensitive, sunburned, or has cuts. Also, skip DIY highlights if your hair is very damaged or recently chemically treated. Under those conditions, a professional colorist is safer and can prevent serious damage.
Limit the time bleach stays on your hair to no more than 30-40 minutes. Leaving it longer causes hair breakage and scalp burns. Check your hair every 10 minutes during processing to watch the color change.
For extra hair protection, consider using a bond-building treatment like Olaplex during coloring. It helps keep hair strong and less prone to breakage. These products add cost but can save money from damage repairs later.
Have a backup plan if your results look uneven or too light. A colorist can fix mistakes you shouldn’t try to correct alone. Trying complicated fixes at home often makes damage worse and costs more in the end.
8. How Long Does At-Home Highlighting Take from Start to Finish?
Expect to spend about two to three hours for at-home highlights. This includes prepping your hair, applying the lightener, processing, toning, and washing out the color. Timing varies by hair type and the highlighting method you choose.
Preparation and Strand Test Timeline
Start by washing your hair one or two days before highlighting. This lets your scalp’s natural oils protect it during treatment. Next, do a strand test by applying the lightener mixture to a small hair section.
Wait up to 48 hours after the test to check for reactions. During this, prepare your products and tools so everything is ready. This prep phase usually takes about 30 to 45 minutes.
Application and Processing Times
Divide your hair into ¼-inch sections for an even application. For long hair, this step takes 40 to 60 minutes. Dark hair often lifts warmer, so watch closely during processing to avoid brassiness.
Processing time ranges from 20 to 45 minutes. It depends on the lightener strength.
Your hair’s natural color also affects it. Follow the product instructions carefully to avoid over-processing or damage.
Stop processing as soon as your hair reaches the desired lightness to prevent damage.
Toning and Aftercare Duration
Toning usually takes 10 to 20 minutes. It controls brassiness and refines the highlight tone. Use the toner with processing solution in a 1:1 ratio, adjusting amounts for your hair length.
After toning, rinse thoroughly and follow with a deep conditioning treatment. This adds moisture back to your hair. Washing and aftercare usually take 15 to 20 minutes.
You might wonder how often to redo your highlights. Most people touch them up every eight to twelve weeks. It depends on your hair growth, highlight style, and how well you maintain your hair.
The timeline below shows typical times for each step in the at-home highlighting process:
| Step | Time Needed | Notes |
|---|---|---|
| Hair Washing Before Highlight | 1-2 days before | Helps scalp protect during bleaching |
| Strand Test | 15-30 minutes + 24-48 hours wait | Check hair reaction and color results |
| Preparation | 30-45 minutes | Mix products and section hair for application |
| Application | 40-60 minutes | Depends on hair length and thickness |
| Processing | 20-45 minutes | Watch for lightening progress to avoid damage |
| Toning | 10-20 minutes | Neutralizes unwanted warm tones |
| Rinsing and Conditioning | 15-20 minutes | Restores moisture and removes product residue |
Long or thick hair tends to add time to application and processing. Using foils or cap methods can speed this up but needs practice. Adjust your schedule to have no rush, especially if it’s your first time highlighting.
Step-by-Step Action Plan
Follow these steps to highlight your hair at home safely and get good results.
- Before You Start: Gather all tools like bleach, brush, gloves, and foil. Check your supplies to avoid last-minute runs.
- Strand Test Time: Do a strand test on a small hair piece 48 hours before. Look for any irritation or unexpected color.
- Highlighting Session: Apply bleach to small sections with foil, starting from the back. Watch the clock and rinse when desired lift is reached.
- Toning Phase: Use toner on dry highlights right after rinsing to fix brassiness. Wait the recommended 10-20 minutes for best color.
- First Wash After: Wait 48 hours before shampooing with a color-safe formula. This helps your highlights last longer.
- Weekly Care: Use purple shampoo once a week to keep brassiness away. Do this after you’ve shampooed and conditioned.
- Next Highlighting: Plan your next highlight session 8-10 weeks later. Check your roots and the overall look before deciding.
Frequently Asked Questions
How Can I Choose the Right Highlight Shade for My Skin Tone?
Pick a highlight color that blends well with your natural tone. Cooler shades suit fair skin.
Warm shades look good on olive or darker skin. Testing a small strand helps find the best match.
Is It Better to Use Foil or No-Foil Highlights at Home?
No-foil highlights are easier for beginners doing hair at home. They give a softer, more natural look with less risk of sharp lines. Foil highlights create brighter, more structured results but can be tricky to apply evenly.
Can I Do Highlights on Previously Colored or Damaged Hair?
You can, but it’s riskier and may cause more damage. Highlighting over color can cause uneven results or breakage. Use a strand test each time before lightening your whole head.
It helps see how your hair will react to the product. This step avoids surprises and protects your strands.
How Often Should I Touch Up My Color After Highlights at Home?
Touching up every 6 to 8 weeks keeps highlights looking fresh. Roots grow out and can look noticeable over time. Regular toning helps maintain the color and reduce brassiness between touch-ups.
Can I Use Natural or DIY Products Instead of Bleach for Highlights?
Natural options usually don’t lift hair enough for true highlights. Lemon juice or honey lighten hair by small amounts and take longer. For clear highlights, commercial bleach or lightener is needed, but use it carefully.
What Should I Do If I Accidentally Overlap Bleach on My Hair?
Overlapping can cause damage and uneven color, so act fast. Rinse the hair immediately with cool water to stop processing. Deep condition your hair afterward to restore moisture and avoid breakage.
Before You Go
Highlighting your hair at home takes care and the right steps. Take your time and pay attention to the results at each phase. Your next move is to gather supplies and do that critical strand test first.