How to Clean Makeup Brushes with Brush Cleaner: Simple Steps That Work
Knowing how to clean makeup brushes with brush cleaner makes your routine easier. Use a gentle brush cleaner designed for cosmetics to avoid damage.
Start by wetting the brush bristles, then apply the cleaner and swirl gently. This method removes makeup residue without harming brush fibers.
Pick a cleaner that suits your brush type and skin needs. Avoid harsh soaps or household cleaners that can dry or ruin brushes. After cleaning, rinse thoroughly with lukewarm water to remove all cleaner residue.
Dry your brushes by laying them flat on a clean towel or hanging them upside down. This keeps water from seeping into the ferrule, preventing loose bristles or mold. Taking these steps helps your brushes last longer and stay fresh.
Key Takeaways
- Use a brush cleaner made specifically for makeup brushes.
- Wet brush bristles with lukewarm water before applying cleaner.
- Swirl brushes gently to avoid damaging bristles.
- Rinse all cleaner off completely to avoid residue buildup.
- Dry brushes flat or upside down to protect the handle.
- Choose cleaners based on your brush material and makeup type.
How to Clean Makeup Brushes Using Brush Cleaner Effectively

Cleaning your makeup brushes with brush cleaner works best if you follow clear, simple steps. You need to prepare your brushes, wash them gently, rinse well, and dry properly.
This process usually takes about 10 to 20 minutes. But drying can take a few hours depending on the brush size and environment.
Start with a clean workspace. Gather brush cleaner, water, and a towel. You can also use a silicone brush cleaning mat.
The mat helps remove makeup quickly without rough scrubbing. Using brush cleaner keeps your brushes safe from damage while removing oils and bacteria.
- Wet the brush bristles under lukewarm water. Avoid hot water since it can weaken synthetic bristles and loosen glue holding the brush together.
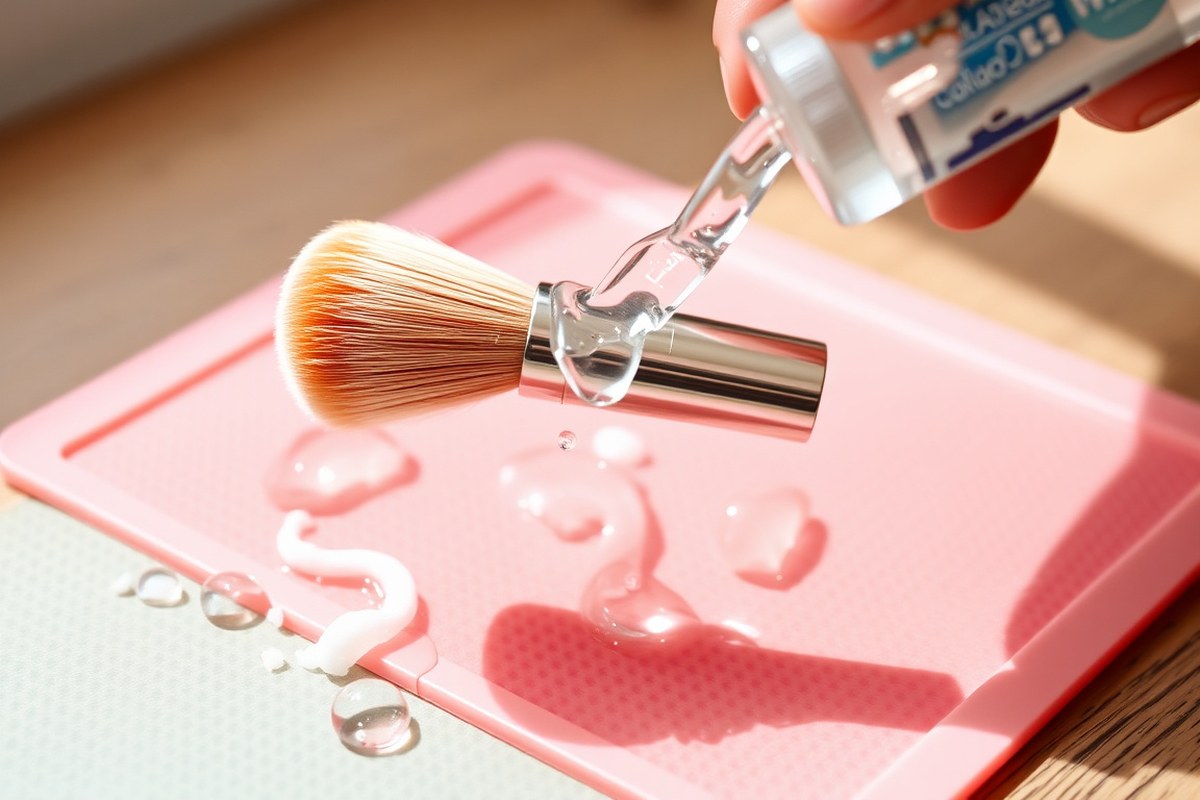
- Apply brush cleaner directly onto the bristles or spray it on. Put a small amount of cleaner on the silicone mat. Swirl the brush gently on it. This loosens makeup and dirt.
- Gently massage the brush on the silicone mat or with your fingers. Work it until you see a lather. This cleans the bristles well. Focus on areas with heavy makeup buildup like the base of the bristles.
- Rinse thoroughly under lukewarm water, keeping the brush downward to avoid water reaching the handle. Rinse until the water runs clear to ensure all residue is removed.
- Repeat cleaning if needed for heavily stained brushes. Use isopropyl alcohol spray for stubborn stains to disinfect and break down product buildup.
- Remove excess water by gently squeezing the bristles with your fingers or a clean towel. Avoid twisting or pulling to protect the shape.
- Dry brushes at a 45-degree angle. Let bristles face down or lie flat on a towel edge. This keeps water from entering the brush base. Water can seep into the ferrule if brushes dry upright. This weakens the glue and makes bristles fall out. Drying at an angle stops this problem.
Depending on the brush size and thickness, drying might take 2 to 6 hours or overnight. Fluffy brushes usually dry quicker than dense foundation brushes. Avoid using a hair dryer or direct sunlight because heat can damage fibers.
Lightly sprayed, wiped brushes dry faster. Often they are ready within 10 minutes.
Never use brushes while still wet. Proper drying keeps your brushes fresh and stops bacteria growth.
Choosing the Right Brush Cleaner for Your Makeup Brushes

Picking the right brush cleaner depends on your brush type. It also matters how often you clean. Skin sensitivity and makeup type count too.
Brushes with natural bristles may need gentler products than synthetic ones. Frequent cleaning may call for quick-drying, alcohol-based cleaners, while sensitive skin needs mild options. Use specialized cleaners for different tools like sponges and brushes.
Alcohol-Based Versus Gentle Cleansers
Alcohol-based brush cleaners kill bacteria fast and dry brushes quickly. They fit best for deep cleaning where germs and oil buildup are concerns. These are good if you clean brushes often.
Cleaning after every use of liquid makeup works best. That includes foundation or concealer.
Gentle cleansers avoid harsh chemicals that can irritate sensitive skin or damage natural bristles. They usually take longer to dry but keep brushes softer. You should pick a milder option if you have acne-prone or dry skin.
Using a strong alcohol-based cleaner too often may dry out your brushes.
Liquid, Solid, and Spray Brush Cleaners
Liquid brush cleansers offer thorough cleaning, especially for heavy buildup. Use them with a textured cleaning mat for loosening stubborn makeup. They often require rinsing and take longer to dry but give the best deep clean.
Solid brush cleaners, like soap bars, are ideal for sponges and brushes. You rub the bristles on the soap, then rinse.
These are gentle and economical, cost around $7 to $15. They’re handy for weekly deep cleaning.
Spray cleaners work well for quick touch-ups and daily maintenance. Just spray and wipe or air dry.
They’re fast, usually rinse-free, and cost roughly $7 for a refill. Spray cleansers fit best if you clean brushes often and want a simple process.
| Type | Best For | Use Frequency | Dry Time | Typical Cost |
|---|---|---|---|---|
| Liquid | Deep cleaning, heavy residue | Weekly or biweekly | Longer (minutes) | $10-$20 |
| Solid | Sponges, gentle cleaning | Weekly | Moderate | $7-$15 |
| Spray | Quick daily cleanse | Every 1-2 weeks | Seconds | About $7 |
Choosing between these types depends largely on your schedule and how often you use your brushes. Quick sprays keep brushes fresh, and liquids handle tough dirt and oils better.
Specialized Cleaners for Sensitive Skin and Acne-Prone Skin
People with sensitive or acne-prone skin should select cleaners made for gentle care. EcoTools Daily Makeup Brush Cleanser Spray costs about $7 and suits sensitive skin without strong chemicals. This helps avoid irritation while keeping brushes bacteria-free.
Acne-prone skin benefits from cleansers that prevent pore-clogging buildup on brushes. Clean your sponges with a dedicated sponge cleanser or a solid soap like Beautyblender Blendercleanser Solid. These clean deeply and remove skin oils and cells.
Always test a small skin patch before switching to a new cleanser. This prevents unexpected reactions or dryness.
How Often You Should Clean Your Makeup Brushes and Why
You should clean your makeup brushes regularly to avoid bacteria buildup and skin problems. The American Academy of Dermatology Association recommends washing brushes every seven to ten days. Different brushes and makeup types may need different cleaning routines.
Daily Quick Clean Versus Deep Cleaning Intervals
Quick daily cleans help remove residual makeup and bacteria between uses. A fast spritz with a brush cleaner often refreshes the bristles. Then, wipe the bristles clean to keep them fresh.
This quick step helps maintain your brushes. Deep cleaning removes stubborn products and dirt that build up over time. It takes longer and uses more brush cleaner.
Most people should deep clean their brushes once a week. Quick daily cleaning suits busy users who apply makeup often and want to prevent contamination. You can save time by using an instant-dry formula that dries quickly in minutes.
Signs Your Brushes Need Cleaning
Check your brushes for product buildup, a change in bristle texture, or a lingering smell. Bacteria or mold can cause unpleasant odors even after cleaning. Notice makeup residue that won’t wipe off quickly.
That means it’s time for a deep clean. This keeps your brushes safe and ready.
Eye irritation or redness after applying makeup can also mean your brushes are dirty. You should clean your tools immediately at that point and consider replacing old brushes. Healthy skin depends on keeping those bacteria-free.
- Visible product buildup on bristles
- Brushes feel stiff or clumpy
- Unpleasant or sour smell from brushes
- Redness or irritation near eyes after makeup
- Bristles shedding or breaking apart
- Makeup application looks uneven or patchy
When you notice any of these signs, cleaning your brushes right away can prevent skin issues. Regular checks will save you trouble later.
Frequency Based on Makeup Type Used
Brushes used with liquid or cream products need cleaning more often. These products build up faster and trap bacteria more quickly. Powder brushes tend to stay cleaner longer but still need weekly washing.
You test new looks or work on clients often. Clean your brushes more than once a week. This prevents germs and product buildup.
Sponges require the same routine as brushes because they also hold moisture and bacteria. Adjust your schedule based on your makeup habits and brush use.
Proper Techniques to Dry and Store Makeup Brushes After Cleaning
Rinse your makeup brushes under lukewarm running water, holding the bristles downward. Avoid soaking or bending the brush past the ferrule, where the bristles attach to the handle. After rinsing, squeeze the bristles gently with a clean towel.
Use a paper towel to soak up extra water. Avoid pulling the bristles while drying.
Lay your brushes flat on a clean towel to dry. Place the bristles over the edge of a counter. This helps air dry them better.
Letting bristles hang freely prevents them from flattening or losing shape. Don’t dry brushes standing straight up.
Water can seep into the handle this way. It may loosen glue and cause bristles to shed.
Reshape the bristles by hand before drying to keep their original look. Air-drying usually takes several hours or overnight.
Faster drying risks damaging bristles. So don’t use a hairdryer or heat source, which can dry them out or cause breakage.
Store brushes in a dry, clean holder or case. This keeps dust and germs away. Make sure the container is free of moisture.
A brush cup, roll, or pouch can work depending on your space. Keep brushes upright or separated when storing them.
This stops bristles from bending. Also, it prevents them from touching dirty surfaces.
For travel, use a brush guard or cover. It protects brushes from getting squashed. This keeps the bristles safe in your makeup bag.
Keeping your brushes well-stored helps maintain their quality and avoids frequent reshaping. Toss any brush that loses shape or sheds a lot.
Also toss brushes with frayed bristles. This keeps your makeup application smooth.
Removing Stubborn Makeup Residue and Deep Cleaning with Brush Cleaner
Stubborn makeup residue like foundation, concealer, or eyeshadow often needs extra effort to clean. You can clean brushes with brush cleaner and household items. Use baby shampoo or mild dish soap for best results.
These soaps break down oils and pigments better than just water. This makes your brushes soft and ready to use again.
Using Silicone Brush Cleaning Mats
Silicone mats have textured surfaces that help scrub away makeup stuck deep in bristles. They’re gentle but effective, saving your brushes from harsh scrubbing that can damage them. You just need a bit of brush cleaner and water to get started.
Use the mat by rubbing your brush against it with light pressure. This action loosens stubborn residue faster than finger scrubbing. It also helps evenly spread soap or brush cleaner through the hairs.
- Run the brush under lukewarm water, pointing the bristles downward.
- Apply a small amount of brush cleaner or gentle soap to the silicone mat.
- Brush the makeup bristles over the textured surface in circular motions.
- Rinse the brush frequently, continuing to scrub until water runs clear.
- Use your fingers to gently squeeze the brush, removing trapped residue.
- Blot excess water with a clean towel and reshape the brush head.
- Let the brush air dry flat or bristles down to avoid water damage.
Make sure to clean the silicone mat regularly. It can collect makeup residue and oils.
Adding Mild Dish Soap or Baby Shampoo
Household soaps break down oily makeup and do not harm fibers. They keep your brushes clean and gentle to touch.
Baby shampoo is particularly good for natural bristles, avoiding sulfates that can dry them out. Dish soap works well for synthetic brushes that handle tougher stains.
Mix soap with warm water to create a lather before cleaning. This helps lift foundation and concealer from dense brush heads without harsh chemicals.
- Wet the brush with lukewarm water, brushing downward to protect the handle.
- Put a few drops of baby shampoo or dish soap in your hand. You can also add the soap to a small bowl.
- Swirl the brush in the soap, working into a gentle lather.
- Use your fingers or a silicone mat to work the soap through the bristles.
- Rinse thoroughly until the water runs clear, checking for any leftover residue.
- Gently squeeze out excess water with a towel, reshape, and air dry.
Avoid hot water, as it can loosen glue inside the brush handle and shed bristles.
Spraying 70% Isopropyl Alcohol for Disinfection
After cleaning, spraying brushes with 70% isopropyl alcohol kills bacteria and dries quickly. This step is ideal for brushes you use on acne-prone or sensitive skin. Alcohol also helps remove remaining makeup oils that soap might miss.
Don’t soak brushes in alcohol; a light mist is enough. Follow this with air drying to keep bristles healthy and fresh.
- After washing and drying your brush, hold it bristles up or flat.
- Lightly spray the brush head with 70% isopropyl alcohol.
- Allow the brush to air dry completely before using it again.
- Repeat regular disinfection weekly or after heavy use to prevent buildup.
Never use rubbing alcohol on natural bristle brushes too often, as it can dry them out.
Common Mistakes When Cleaning Makeup Brushes and How to Fix Them
Using too much brush cleaner can leave residue, making your brushes stiff. Always use just enough to wet the bristles, about a dime-sized amount. Rinse thoroughly with lukewarm water until the water runs clear to avoid buildup.
Scrubbing brushes harshly damages bristles and causes shedding. Instead, swirl your brush gently on the cleaner or use a soft brush cleaning mat. Rough treatment loosens glue in the ferrule, which is why brushes fall apart over time.
- Never soak brushes completely, especially near the handle to protect the glue.
- Don’t reuse brush cleaner indefinitely; toss it after 2-3 uses or when dirty.
- Avoid hot water, which weakens glue and bristles; lukewarm is best.
- Dry brushes flat or hang upside down to keep water from seeping inside.
- Clean eye brushes more often to reduce infection risk.
- Replace brush cleaner if it no longer removes makeup well or smells off.
- Let brushes air dry fully before using or storing them again.
Ignoring these tips leads to stiff, misshaped brushes and frequent replacement. Some people skip drying steps, causing water to loosen the ferrule glue. It’s essential to dry brushes properly to avoid shedding and loss of bristles.
Reusing dirty brush cleaner spreads bacteria and reduces cleaning power. Brush cleaner costs usually range from $5 to $20. So swapping it regularly is affordable and safer.
You should rinse brushes well to remove all makeup. This also helps get rid of bacteria that may remain. Clean brushes last longer when you rinse them thoroughly.
Professional and Electric Brush Cleaners: When Are They Worth It?
Electric makeup brush cleaners spin your brushes in a small bowl of water and cleanser. They speed up the process by washing and drying brushes in minutes. Some models act like mini washer-dryers, handling larger brushes with ease.
Professional-grade brush cleaners often use more powerful motors and durable materials. These tools are built for heavy use and can clean multiple brushes efficiently. They’re common in salons and for people with many brushes or tight schedules.
| Type of Brush Cleaner | Average Price | Speed | Brush Safety | Ease of Use |
|---|---|---|---|---|
| Basic Electric Cleaner | $20 to $40 | 3 to 5 minutes per brush | Gentle for most synthetic and natural brushes | Easy, one-button operation |
| Professional-Grade Cleaner | $100 to $300+ | 2 to 3 minutes per brush | Safe but varies by brand; check instructions | Moderate; built for multiple brushes at once |
Electric models take guesswork out of timing and rinsing. They clean and dry faster than hand washing. However, cleaning stubborn residue might still need manual scrubbing.
Some worry electric cleaners might damage brushes with fast spinning. Most devices spin gently enough for regular use. Always follow the manufacturer’s instructions to avoid loosening brush glue or bending bristles.
The cost reflects who the tool suits best. Basic electric cleaners fit makeup lovers who want quicker cleaning. Pros with heavy brush use benefit from professional tools despite the higher price.
Consider how many brushes you clean and your daily schedule before buying. If you clean daily or weekly multiple brushes, pro cleaners might save you time. Don’t invest if you only wash brushes occasionally or prefer hand washing.
Maintaining Makeup Brushes After Cleaning to Extend Their Lifespan
After cleaning, reshape your brush bristles while they’re still damp. Use your fingers to gently form the bristles into their original shape. This step keeps them from drying misshapen and helps maintain their effectiveness for makeup application.
Avoid using heat sources like blow dryers to dry your brushes. Heat can weaken the glue that holds the bristles together. Lay your brushes flat on a clean towel, letting the bristles hang beyond the counter edge for air drying.
Conditioning your brushes occasionally helps keep the bristles soft and manageable. Use a drop of hair conditioner diluted with water after cleaning, then rinse thoroughly. This prevents dryness and brittleness, which can lead to fraying or shedding over time.
Strong odors or heavy shedding mean your brushes need extra cleaning or a replacement. Brushes that smell bad might harbor bacteria, even after cleaning.
Check your brushes regularly. Losing shape, lots of shedding, or a musty smell suggest it’s time to replace brushes.
Store your brushes in a holder or case that keeps them upright and separated. Crowding them can bend or flatten bristles, ruining their shape. Keep them in a dry, clean space away from dust and humidity to prolong their lifespan.
Don’t ignore shedding or unpleasant smells. These signs mean your brush needs extra care or replacement.
Step-by-Step Action Plan for Cleaning Your Makeup Brushes
Follow these simple steps to clean your brushes effectively and keep them in good shape.
- Before you start: Gather your brush cleaner, a clean bowl, and a towel. Make sure you have all supplies ready.
- Day 1: Dip each brush into the cleaner and swirl gently. Check if makeup residue lifts away easily.
- Day 1: Rinse brushes under lukewarm water, avoiding the handle base. The water should run clear when done.
- Day 1: Gently squeeze out excess water with your fingers or a clean cloth. Don’t wring the bristles to avoid damage.
- Day 1: Lay brushes flat on a towel with bristles hanging off the edge to dry. This keeps shape and speeds drying.
- Week 1: Once dry, store brushes in a clean holder upright or inside a brush roll. This protects the bristles and keeps dust away.
- Weekly: Clean brushes used with liquid formulas weekly. Use deeper cleaning methods if brushes get stiff or discolored.
- Monthly: Check for bristles falling out or broken handles. Replace brushes showing wear to keep your makeup smooth.
Frequently Asked Questions
Can I Use Regular Soap Instead of Brush Cleaner for My Makeup Brushes?
Regular soap can dry out your brushes and damage bristles. Use a gentle, specially formulated brush cleaner instead for the best results. It protects the brush fibers and cleans them deeply without harm.
Is It Okay to Clean Makeup Brushes with Alcohol?
Using 70% isopropyl alcohol can disinfect brushes and remove tough stains. Spray lightly and follow with a gentle brush cleaner to avoid drying out the bristles. Avoid frequent use to keep brushes soft.
How Long Should Makeup Brushes Dry After Cleaning?
Let brushes dry 4 to 6 hours or overnight for best results. Position them at a 45-degree angle to avoid water damaging the handle. Avoid drying brushes upright to prevent water from seeping into the base.
Can I Clean Synthetic and Natural Brushes the Same Way?
Both types benefit from gentle brush cleaners, but avoid hot water. Hot water can melt synthetic bristles and damage natural hair. Use lukewarm water and cleanser for all brush types to keep them safe.
Does Frequent Cleaning Shorten My Makeup Brushes’ Lifespan?
Cleaning often won’t ruin brushes if done gently with proper cleaner. Dirt and oils can damage brushes more than cleaning. Use a good detergent and dry them correctly to extend their use.
Can a Makeup Brush Cleaning Mat Damage My Brushes?
No, a silicone brush cleaning mat gently loosens makeup buildup. It’s safer and easier than scrubbing by hand, especially for fluffy brushes. Avoid harsh scrubbing motions to protect bristles.
Wrapping Up
Cleaning your makeup brushes with brush cleaner keeps skin healthy and improves makeup application. Start today by washing one brush to see how easy it is. Make brush cleaning part of your routine for the best results.