How Can You Dye Your Hair at Home: A Complete Guide for Best Results
Pick the right color and type that suits your hair and skin tone. Wash your hair once to remove dirt and oils.
Wait one to two days, then wash it again before coloring. This helps the dye stick better and protects your scalp from irritation.
Do a patch test 48 hours before dyeing to check for allergic reactions. Plan to spend about one to one and a half hours dyeing your hair. This includes prep, application, and cleanup, so set enough time aside.
Wear nitrile gloves to protect your hands from stains and allergies. Section your hair into parts for even dye coverage. Follow the dyeing time on the package, adding 10 minutes for grey hair.
Key Takeaways
- Choose a hair dye color that complements your skin tone and natural hair.
- Wash your hair twice, 24, 48 hours before dyeing, with clarifying shampoo.
- Perform a patch test on your skin 48 hours before coloring your hair.
- Wear nitrile gloves to prevent dye stains and allergic skin reactions.
- Section your hair into four parts for even color application.
- Leave dye in according to instructions; add 10 minutes for stubborn grey hair.
How Can You Dye Your Hair at Home Step by Step?
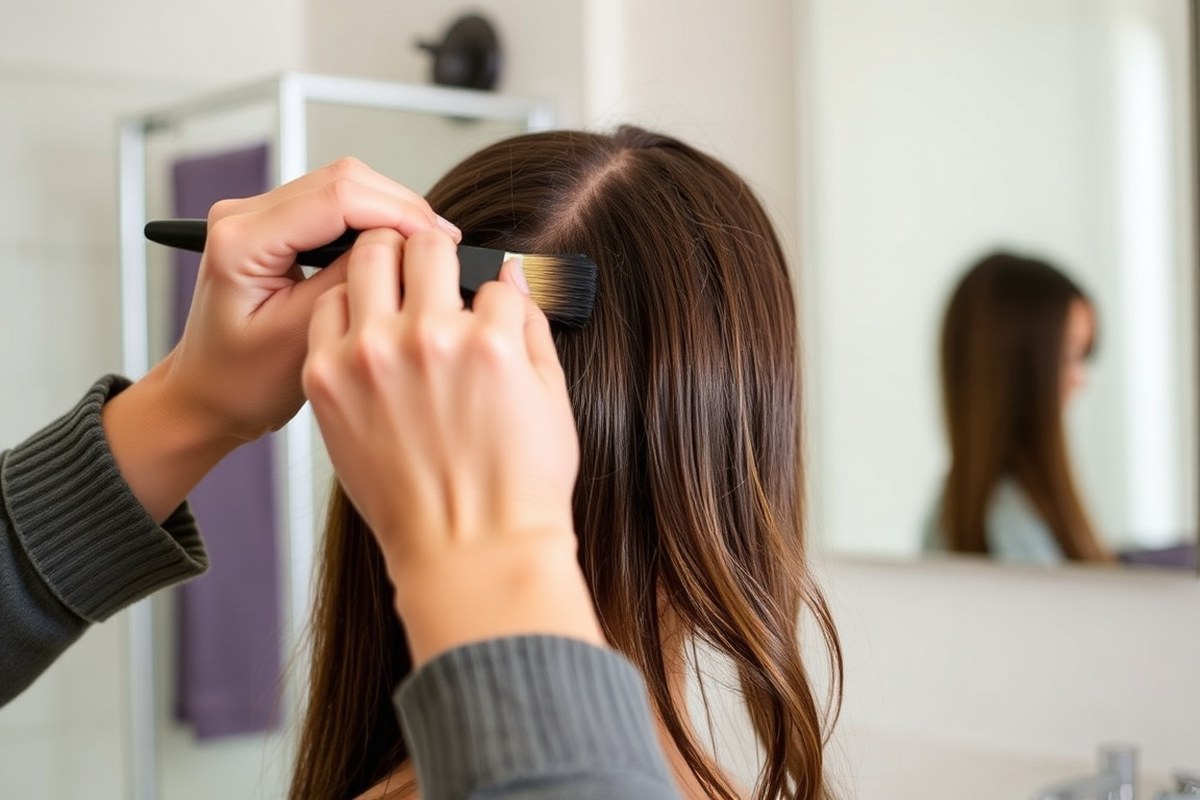
Dyeing your hair at home takes some time and care. You’ll need about 1 to 1.5 hours from start to finish. Your goal is to get your hair and workspace ready first.
Apply the dye evenly all over your hair. Rinse carefully to get the best results.
Start by washing your hair with a clarifying shampoo 24 hours before coloring. This removes buildup that blocks dye and lets the color stick better.
Keep your natural scalp oils intact by avoiding shampoos right before dyeing. This lowers irritation and protects your hair protein.
- Set up your area. Wear old clothes and put down towels. Gather your dye kit, gloves, tint brush, and a comb. Keep a timer handy so you won’t leave the color on too long.
- Mix the dye. Follow the instructions exactly. Use the tint brush to mix the color and developer until smooth and creamy, without lumps.
- Section your hair. Divide your hair into at least four parts using clips. This makes the dye easier to apply evenly, especially on thick or long hair.
- Apply the dye. Start from your roots if you have new growth or want a root touch-up. Push the color through to the ends to prevent inconsistent shade. Brush it in neatly, working section by section.
- Wait the right time. Set a timer for the recommended wait. Usually, it’s 25 to 45 minutes depending on the dye type. Too little time weakens color; too long risks damage or irritation.
- Rinse properly. Use lukewarm water to rinse until the water runs clear. Avoid hot water, which strips color and dries hair. Apply the conditioning treatment that came with your kit to lock the color and soften hair.
- Dry and style gently. Pat your hair dry with a towel, don’t rub. Let your hair air dry if possible. If not, use a blow dryer on low. This helps protect your new color.
You want even color from roots to ends. No patches or dull spots should show.
Avoiding harsh rinsing and mixing the dye correctly helps prevent uneven fading. Following these steps gives you a fresh, professional look at home.
How to Choose the Right Hair Dye Type and Color for You

Choose the right hair dye based on how long you want color to last. Also, consider your hair’s condition before picking the dye. These factors will guide your choice well.
Permanent dyes last longer but can cause more damage. Semi-permanent and temporary dyes are gentler but fade faster.
Permanent Hair Dye Features and Uses
Permanent hair dye changes your hair color by opening the cuticle and penetrating the hair shaft. It lasts until your hair grows out or you recolor. Pick a shade a little darker than your desired tone.
Permanent dyes lighten hair less than you might expect. This helps you get the color you want.
This dye usually contains ammonia and a developer, which can dry your hair, especially the ends. It’s great for covering gray hair or drastically changing color.
Using too little dye risks patchy results. Too much won’t make the color stronger.
Permanent dye costs vary but boxed kits often run from $10 to $20. Apply it evenly to roots, lengths, and ends for the best coverage. Using a stronger developer speeds up the process but can stress your hair.
Semi-Permanent and Temporary Dye Options
Semi-permanent dyes coat your hair’s outer layer without fully penetrating the shaft. They last about 4 to 12 shampoos depending on the product and your hair type.
This type of dye contains no ammonia. So it’s less drying and better for fine or damaged hair.
Temporary dyes sit even more on the surface and wash out in one to three shampoos. These dyes are good for trying wild colors without long-term commitment. They let you play with shades easily.
It’s great if you like to change often. Temporary and semi-permanent options are easy to apply and less risky.
Demi-permanent dye partially opens the cuticle for longer color. It lasts more than semi-permanent dye but is gentler than permanent.
This makes it a balanced choice. These often include color-depositing shampoos or conditioners that refresh your color in just a few uses.
| Hair Dye Type | Lasts | Penetration | Ammonia | Best Use | Damage Risk |
|---|---|---|---|---|---|
| Permanent | Until new growth | Full hair shaft | Yes | Gray coverage, drastic change | Higher |
| Semi-permanent | 4 to 12 shampoos | Outer cuticle | No | Color refresh, gentle change | Low |
| Temporary | 1 to 3 shampoos | Surface only | No | Fun colors, short-term | Minimal |
Most box dyes are displayed in shade ranges to help you pick a close match. Hold a hair strand next to the box to check the shade. Try a tone lighter or darker for better matching.
This helps avoid surprises after dyeing. Demi-permanent dyes are a good middle ground for color.
They add color without the harsh effects of permanent dyes. It’s easier on your hair.
Color Matching Basics for Your Complexion
Skin tone is a strong guide for picking hair color. Warm skin tones suit warm hair colors like golden brown or copper. Cool skin tones generally look better with ash blondes or cool browns.
Consider your natural hair texture too. Fine or medium hair may absorb color unevenly. It might show warm tones like orange or red.
Choose shade adjustments to avoid this. Darker hair needs more lift to lighten well.
You may need permanent dye for a true color change. This ensures the color shows up clearly.
Matching hair color to eye color improves your overall look. For example, blue eyes pop with contrasting colors like warm blondes. Browns and greens work well with rich, deep hair colors.
Always test dye on a small skin patch 48 hours before full application to avoid reactions.
How to Safely Perform Patch and Strand Tests Before Dyeing
Do a patch test first to check for allergies, applying dye on a small skin spot. Then do a strand test on hidden hair to see the final color and hair reaction. Wait 48 hours between testing and dyeing to be safe.
Preparing and Applying a Skin Patch Test
A patch test checks if your skin reacts badly to the dye’s chemicals. These reactions happen because of para-phenylenediamine (PPD), which causes allergies for about 7% of users.
Mix the hair dye as the instructions say. Then put a small drop behind your ear or on the inside of your elbow. These spots are easy to watch and less visible if irritated.
Wait without washing that area for 48 hours. Redness, itching, swelling, or blisters mean you shouldn’t use the dye. Avoid applying dye directly on broken or sensitive skin.
Doing a Strand Test on a Small Hair Section
Next, test the dye on a small hair strand. This will show the color result.
It also checks if your hair feels strong or weak. Pick a hidden spot like a strand near your neck’s base.
Apply the dye on that strand like you plan to do. Leave the dye on your hair for the listed time. Usually, this is 20 to 45 minutes.
Check the box for the exact time. Dry and look at the color in natural light to see if it’s okay.
Check if your hair feels dry, rough, or looks damaged after rinsing the test strand. Check how your hair feels and looks after the test.
Weak hair or wrong color means rethinking the dye. You might also try changing the timing for your full hair dye.
Interpreting Results Before Your Dyeing Day
Pay attention to any skin changes on your patch test area. Rash, hives, or burning mean stop and do not dye your hair. Mild redness without swelling can be a false positive but watch closely.
Look at the test strand color in daylight to confirm it matches your expectation. Faded, dull, or too warm tones may require choosing a different shade or formula.
Wait at least 48 hours after the patch test before applying dye to your whole head. This gap lets any allergic reactions develop so you won’t risk irritation during full dyeing.
- Mix a small amount of dye per package directions.
- Apply a drop behind your ear or inside elbow for the patch test.
- Wait 48 hours, watch for irritations or rash.
- Choose a hidden hair strand for the strand test.
- Apply dye to the strand and leave it on for box time.
- Rinse and dry the strand, check color and hair condition.
- Review results in daylight before dyeing all hair.
- Skip dyeing if signs of allergy or damage appear.
What Tools and Products You Need to Dye Hair at Home
You’ll want to gather a few key tools before starting. Your hair dye kit usually includes gloves, a developer, and a conditioner. These items work together to protect your skin.
They also help activate the color. Plus, they keep your hair healthy after dyeing.
Not all gloves are equal. Look for thick, nitrile gloves to avoid stains and allergic reactions.
Cheaper vinyl gloves can tear easily, letting dye touch your skin. Nitrile ones cost around $10 for 50 pairs and do a better job protecting your hands.
Conditioners in dye kits are often tinted. They help lock in the color. They also soften your hair.
Using them right after rinsing dye prevents your hair from feeling dry or brittle. Some brands also sell specialized deep conditioners for color-treated hair. They cost $8 to $15 and are worth it for longer hair or bright colors.
- Wide tooth comb to spread dye evenly and prevent clumps
- Hair clips to separate hair into manageable sections
- Old towel to protect your clothes and shoulders from stains
- Plastic or glass bowl for mixing dye if kit doesn’t have one
- Timer or phone alarm to track dye processing time
- Petroleum jelly to apply around hairline and avoid dye stains on skin
- Mirror to check the back of your head while applying
Developer strength matters. Most kits come with 20-volume developer, good for covering gray or lightening one to two shades. Use 30-volume developer for stronger lifting.
It adjusts dye faster but may damage hair. Avoid mixing your own developers unless you’re sure of the science. Follow the instructions exactly for the best results.
Gather your tools in one spot before you start. So you don’t have to stop mid-process.
Setting a timer helps prevent leaving dye on too long or rinsing too early. Keep the conditioner handy to apply immediately after rinsing so your hair feels smooth and shiny.
How to Prepare and Section Your Hair for Even Dye Application
You should not wash your hair right before dyeing. Hair with natural oils protects your scalp and helps the dye stick better. Instead, wash and detangle your hair one or two days before starting.
Dividing your hair into sections keeps the dye even and avoids missed spots. Use clips or hair bands to hold each section separately. Keep at least one inch between sections to prevent dye overlap.
- Detangle your hair gently with a wide-tooth comb to remove knots. This step helps dye spread smoothly and evenly.
- Divide your hair into four main parts. Two go in front. Two go in the back. This is called the quadrant method.
- Secure each section with non-metallic clips to avoid chemical reactions. These keep hair apart without slipping.
- Subdivide each main part into smaller bits. Size them no wider than 1/4 inch. This helps if you want extra coverage. Work with these subsections one at a time.
- Use a pointed-tip comb to create clean, straight partings between the sections. Defined lines make application easier.
- Apply dye starting from the back sections and move forward. This order helps you reach spots easily and avoids missed areas.
- Work with two mirrors or a handheld mirror to check your hair’s coverage in hard-to-see places. It lowers missed spots by about 20%.
- Wear latex gloves to protect your hands and reduce staining risk while spreading the dye.
Keeps tools like clips and combs nearby to keep the process smooth. Use a dense-bristle brush after sectioning. It helps saturate your hair 30% better than fingers.
Don’t wash your hair for 48 hours after dyeing to keep color longer and richer.
How to Apply Hair Dye Properly: Roots, Lengths, and Ends
Start by applying dye to your mid-lengths and ends first. These areas absorb color slower than roots, so they get enough processing time. Work the dye through your hair like a rich conditioner.
Make sure every strand is fully coated. Spread the color evenly for best results.
Save the roots for last to avoid “hot roots.” Scalp heat speeds up color development. This can cause uneven coloring near your scalp.
Applying dye to roots last keeps your color even and prevents patchy or banded results. Use a brush to target roots carefully, avoiding overlapping too much on previously dyed hair.
Protect your skin by applying petroleum jelly in a thin layer. Put it around your hairline and on your ears. This helps stop dye stains.
This barrier helps stop dye from staining your skin. You can also use a barrier cream made for hair dye.
It shields your skin during the coloring process. This prevents unwanted stains.
Use a dye brush to apply color near your scalp. Start at the back and move forward slowly. This gives a neat, even application.
Avoid dunking roots with thick layers of dye. Thin, even layers give better coverage without mess. Wipe any dye on your skin quickly with a cotton ball.
Dip it in warm water or astringent before wiping. This helps stop stains early.
Section your hair into four parts before applying any dye. This makes spreading the color easier and more even.
Skip this step. You’ll likely end up with spotty, uneven color that looks unnatural.
For highlighted hair, apply conditioner on parts you want to protect before dyeing. This helps prevent those areas from absorbing too much dye. Use a small makeup brush or spooley for precise application.
This works great for bleach or dye on sections. It reduces orange or uneven tones.
Applying dye evenly means working it through in layers. Use your fingers or a wide-tooth comb to distribute color from roots to ends gently. This ensures full coverage without leaving dry, untreated patches.
How Long to Leave Hair Dye in for Optimal Results
Permanent hair dyes usually need about 35 to 45 minutes to fully work. This timing depends on your hair’s porosity and if you’ve treated it before. For stubborn gray hair, adding 10 extra minutes helps the dye cover better and last longer.
Leaving the dye on too long can cause scalp irritation or overly dark color. On the other hand, washing it out too soon might leave your hair patchy or faded. Always follow the dye package instructions.
Do not exceed the time by more than 10 minutes. Staying within the time helps protect your hair.
Semipermanent dyes don’t have a developer. So they keep darkening the longer they stay on.
You can leave these in a bit longer, but usually, 20 minutes is enough. After that, shampoo and condition your hair like the instructions say, without overdoing the conditioning time.
Your roots often take the longest to process because they’re less damaged and need more treatment. Applying dye there first can help even out your color. For longer or thicker hair, you might need two boxes of dye to cover everything evenly.
Using a blow-dryer can speed up the dye’s process. After 10 minutes with semipermanent dye, use warm air on your hair. This helps the color set better.
Blow-drying gently works well. Just keep an eye on your scalp to avoid burning or drying out your skin.
How Often You Can Dye Your Hair at Home Without Damage
You can dye your hair at home every 4 to 6 weeks. Doing this often shouldn’t cause much damage. Just keep an eye on how your hair feels.
This spacing gives your hair time to recover and keeps your scalp from irritation. Coloring too often can dry out your hair or cause redness and itching.
Several things affect how often you can dye your hair safely. Wait at least 6 weeks if your hair is fine or damaged. Thick, healthy hair can handle dyeing closer to 4 weeks.
Also, permanent dye is harsher than semi-permanent. So you should space permanent treatments further apart.
Avoid trying to lighten your hair at home. It often damages hair and creates orange tones. Instead, stick to covering grays or refreshing color in natural shades.
Using mousse dye can control application better than liquid dye. It reduces dripping and helps you dye at home more cleanly.
Watch your scalp during and after dyeing. Redness, itching, or burning means you need to wait longer before your next dye session. Those signs tell you your skin needs extra time to heal.
Don’t rush your next hair dye if your scalp feels irritated. Also, avoid dye if your hair feels dry. Let your hair rest before dyeing again.
Space out dyeing your roots and lengths for better hair health. Add dye to your roots every 4 to 6 weeks.
Then wait longer before colouring your ends again. Ends are older and more fragile, so they need extra care.
Your hair’s condition sets the timing for your next color job. Use deep conditioning treatments between dye sessions to help your hair stay strong. These steps prevent damage and make your color last longer.
How to Cover Gray Hair Effectively with At-Home Dye
Permanent hair dye is the best choice for full gray coverage. It changes the hair structure with chemicals, making the color last 6 to 8 weeks. Semi-permanent dyes won’t cover gray hair fully, so they’re not ideal for this purpose.
Work in sections to apply the dye evenly across your roots. Use a tint brush for precision, especially around your hairline where grays first show. Starting about an inch from the roots lets the dye process fully where gray is strongest.
Apply the dye liberally to each section so it’s fully covered. Make sure every part of your hair gets enough color to prevent spots. Use two boxes of the same shade if your hair is thick or past your shoulders.
Gray roots often resist color, so timing matters. Follow the box instructions exactly. You can leave the dye on your roots a bit longer.
Follow the instructions to see if extra time is allowed. This helps the color develop better at the roots. Just avoid leaving it too long to prevent damage.
After applying dye at the roots, comb it through your hair length with a wide-toothed comb. This spreads the color evenly and prevents lines between colored roots and previously dyed ends. Don’t forget shoulder-length and longer hair need careful combing after application.
Touch-ups are best done every 6 to 8 weeks to cover new gray growth. Waiting longer risks having obvious regrowth lines. Use shampoo and conditioner made for color-treated hair.
These products keep your dye looking bright and your hair soft. They help keep your hair hydrated and healthy.
For light colors or gray highlights try a two-step method. First, apply a base shade all over your hair. Then add highlights to give your hair more dimension.
This hides gray better and gives a natural shine. But permanent dye remains the go-to for total gray coverage.
Common At-Home Hair Dye Mistakes and How to Fix Them
Uneven or too dark hair color is a common mistake when dyeing at home. Fine hair absorbs color faster, so avoid shades that are too dark. To fix uneven tones, gently shampoo your hair with a clarifying shampoo.
This lightens the color by washing out some dye. Repeat once or twice over a few days. But don’t overdo it or your hair will dry out.
You can fade unwanted or harsh color by using home color removers. They break down the artificial pigment without bleaching your hair. Follow the product instructions exactly.
Usually, this involves mixing a remover with an activator and applying for under an hour. Expect to pay from $10 to $20. Avoid using bleach unless you’re experienced, as it can cause serious damage.
Skin irritation or allergic reactions are another problem to handle carefully. Wash the irritated area immediately with cool water and mild soap. Apply a cold compress to reduce redness.
Watch symptoms closely and see a doctor when they continue or worsen. Always perform a patch test 48 hours before dyeing to catch allergies early. Do not use the product when the patch test shows a positive reaction.
- Uneven color: use clarifying shampoo, wash gently
- Too dark: shampoo more frequently early on
- Fade color: use a home color remover, follow instructions
- Stubborn stains on skin: rub gently with baking soda paste
- Irritation: rinse area immediately, apply cold compress
- Allergic reaction: stop dye use, seek medical advice
- Patch test 48 hours before dyeing every new product
To remove dye stains on your skin, make a paste from baking soda and water. Rub the paste gently over the stains with a cotton ball.
Rinse thoroughly without scrubbing hard, which can irritate your skin. Avoid strong solvents or scrubbing tools, which might cause damage or worsen irritation.
These fixes work well if you act quickly. Permanent dye can be tricky to fully remove.
Next time, test your shade on a small hair strand first. That step helps avoid surprises, especially with dark or bold colors.
How to Maintain and Protect Your Hair Color After Dyeing
To keep your hair color bright and your strands healthy, use color-safe shampoos and conditioners regularly. Wash your hair less often and choose gentle styling methods that avoid heat and harsh chemicals. These steps help your color last longer and your hair feel softer.
Choosing Color-Safe Shampoos and Conditioners
Select shampoos and conditioners made for color-treated hair to protect your dye. These products use gentler ingredients that don’t strip color like regular shampoos can. Look for sulfate-free labels since sulfates can fade hair color faster.
Adding a weekly color-depositing conditioner or hair gloss can refresh your shade and reduce dullness. For example, products like Overtone Daily Conditioner add pigment without re-dying your hair. Hydrating masks cut breakage by around 60 percent and stretch your color’s life by two weeks.
Here’s a checklist for your post-color shampoo and conditioner:
- Sulfate-free shampoo for gentle cleansing
- Conditioner rich in moisture for softness
- Color-depositing treatment once a week
- Hydrating hair masks every 7, 10 days
- Avoid clarifying shampoos after dyeing
How and When to Wash Dyed Hair Post-Color
After dyeing, wait at least 48 hours before washing your hair to let color set fully. Washing too soon causes premature fading. Use warm water, not hot, since heat opens hair cuticles and lets color escape.
Wash your hair two to three times per week maximum. Daily washing removes natural oils and fades dye quicker. Rinse thoroughly and always follow with color-safe conditioner to seal moisture.
Avoid harsh scrubbing and use your fingertips instead of nails. This protects your scalp and keeps colored hair smooth.
Styling Habits to Protect Your New Color
Limit heat styling tools or use a heat protectant spray before blow-drying or straightening. Heat damages hair and speeds up color fading. Let hair air dry when you can to reduce heat exposure.
Choose hairstyles that don’t pull or break hair to keep strands intact. Tight ponytails or braids can cause damage, so switch to loose styles when possible. Also, avoid heavy use of hairspray or gel that may contain alcohol, which dries hair out.
Here’s how to keep color looking fresh while styling:
- Use a heat protectant before styling with heat
- Air dry hair whenever you can
- Wear loose hairstyles to prevent breakage
- Avoid alcohol-based styling products
- Protect hair from sun exposure with hats or UV sprays
Wash your hair only two or three times a week. This helps keep your color vibrant longer. Stretch out your washes to protect the dye.
When to Seek a Professional Instead of Dyeing at Home
Dyeing at home works best when you’re going for simple color changes or touch-ups. Complex jobs like bleach lightening or big color changes need a pro. Fixing dye mistakes often requires expert help.
It’s best to avoid doing these alone. Professionals spot problems like uneven pigment, damage, or sensitivity that are easy to miss at home.
Check your hair’s condition and color history before deciding. You have dark hair and want to go much lighter. Home kits usually can’t lighten pigment evenly enough.
Fragile or damaged hair can break from chemical treatments. Experts handle these risks better. Avoid DIY if your hair feels weak.
Use this rule to decide on your own. Major pigment changes or more than one step mean no home dye. Choose a pro for those jobs.
Don’t do heavy bleaching or mix dyes yourself. Fixing uneven color needs experience.
Avoid these at home or risk bad results. These jobs need skill to avoid patchiness and scalp burns.
Trying complex colors at home can cause problems like uneven tones and color damage. Over-processed hair may turn dry, brittle, or even break off. Scalp irritation is another risk if you misuse bleach or strong dyes, especially without patch tests.
Professional dyeing costs about $60 to $150. Price depends on hair length and treatment type. Complex work means higher cost.
This price covers expert consultation, precise product mixing, and care during application. The investment pays off by reducing hair damage and making color results last longer.
Patchy color, unexpected shades, or hair damage after dyeing means call a professional. Don’t try to fix these alone.
Color correction usually involves multiple visits and special products that are hard to do at home. Avoid experimenting with harsh chemicals if you’ve never done it before.
Your scalp condition matters too. Your scalp should not be sore, inflamed, or have open sores. Never dye hair at home in that condition.
Professionals have ways to protect sensitive skin and choose gentler treatments. Ignoring this can cause serious burns or allergies.
For colored hair, the challenge grows with complexity. Balayage, highlights, or detailed multi-tone work need a stylist.
Trusting a pro gives better, safer results. These styles need careful sectioning and timing, which is tough without training and proper tools.
Step-by-Step Action Plan for At-Home Hair Dye
Follow these steps today to dye your hair safely and get the color you want.
- Before you start: Do a patch test 48 hours before to check for allergies. No itching or redness means you’re good.
- Prep time: Gather all your tools like gloves, a bowl, applicator brush, and an old towel. Having everything ready makes the process smoother.
- Section your hair: Divide your hair into four parts for even dye coverage. It helps apply color evenly and reach all spots.
- Apply dye: Start at the roots since they take longer to process. Then apply dye to the lengths and ends for uniform color.
- Wait patiently: Leave the dye on for the recommended 30 to 45 minutes. Follow the box instructions to avoid damage or uneven color.
- Rinse and condition: Rinse your hair with cool water. Keep rinsing until the water runs clear. Use the conditioner included with the dye. This seals the color and keeps hair soft.
- Aftercare: Use shampoo and conditioner for color-treated hair from now on. It helps maintain your new color and prevents fading.
- Touch up roots: Plan to dye only your roots every 4 to 6 weeks. This keeps your color fresh without damaging your lengths.
Frequently Asked Questions
Can You Use Hair Dye Without Developer at Home?
No, almost all home hair dyes need developer to activate the color. Developer helps the dye penetrate your hair and achieve the right shade safely.
Is It Okay to Dye Your Hair on Dirty or Oily Hair?
It’s best to dye hair 24 hours after washing to protect your scalp. Natural oils reduce irritation and help the dye spread evenly.
How Do You Fix Uneven Color After Dyeing at Home?
You can fix uneven color by applying dye only on the lighter spots. Use a small brush for precise touch-ups and check results after processing time.
What Is the Best Way to Remove Hair Dye from Skin?
Use a cotton ball dipped in rubbing alcohol or makeup remover right after dyeing. This helps remove stains before they set. Avoid harsh scrubbing to protect your skin.
Can You Mix Different Hair Dye Brands at Home?
It’s generally not recommended to mix brands because formulas differ. This could cause unpredictable colors or damage. Stick to one kit for consistent results.
How Do You Know If Your Hair Is Ready to Dye Again?
Wait at least 4 to 6 weeks before re-dyeing to protect hair health. Frequent dyeing can cause dryness and breakage, so give your hair time to recover.
Wrapping Up
Dyeing hair at home takes care and the right steps to get good results. Start with a patch test and prep your tools before you dye. Stick to aftercare for longer-lasting, healthy color.