How to Cut Own Layered Hair: A Complete Guide with Proven Methods
Knowing how to cut own layered hair lets you refresh your look anytime. You can save time and money by doing it yourself at home. Cutting your own layers works best when your hair is slightly damp, about 15% stretched.
Start by gathering the right tools like sharp scissors and a fine-toothed comb. Prepare your hair well by detangling it and sectioning it into 1- to 2-inch wide pieces. A tight ponytail near your hairline can help create even layers quickly.
Watch your angles carefully and cut small amounts to avoid big mistakes. Checking your progress with a hand mirror from different angles helps blend layers smoothly. Taking it slow gives better results and saves frustration.
Key Takeaways
- Use sharp hairdressing scissors for clean, precise cuts.
- Keep your hair slightly damp to see true length without slipping.
- Section hair into 1-2 inch widths for manageable, even layers.
- Secure hair in a tight front ponytail to guide consistent cutting.
- Trim small amounts at once; you can always cut more later.
- Check your work with two mirrors to blend layers naturally.
How to Cut Your Own Layered Hair Step-by-Step

Cutting your own hair in layers needs careful sectioning, steady hands, and sharp scissors. Start with clean, damp hair and work slowly. This way, you’ll get even layers that add volume and texture without big mistakes.
Sectioning Your Hair Properly
Divide your hair into 4 to 6 neat sections to keep track while cutting. Sectioning helps you manage the layers and reduces the chance of cutting unevenly.
Use clips or hair ties to hold sections out of the way. Keep your hair damp for easier combing and cutting.
Creating Guide Cuts for Consistency
Start by making a guide cut which sets the length for each layer. This baseline helps you maintain evenness throughout your haircut.
Cut a small section at the back as your first guide. Use this cut to compare other sections as you go along.
Techniques for Cutting Each Layer
Hold your scissors at a 45-degree angle for soft, natural layers. Cut in small sections to avoid mistakes and create precise layers.
Use point-cutting by snipping the ends vertically to soften harsh lines. Keep checking your work in the mirror every few minutes.
- Wash and towel dry your hair until damp.
- Comb your hair thoroughly to remove tangles.
- Part your hair down the middle and create 4-6 sections using clips or ties.
- Take a small section at the back, comb it straight, and cut your first guide layer.
- Use the guide layer length to cut each section the same. Hold scissors at a 45-degree angle. Cut along the guide steadily for consistent layers.
- Cut in small snips with point-cutting to soften edges.
- Check layers in the mirror, adjusting any uneven parts.
- Trim any stray hairs and re-comb for your final shape.
Tools and Preparation You Need Before Cutting
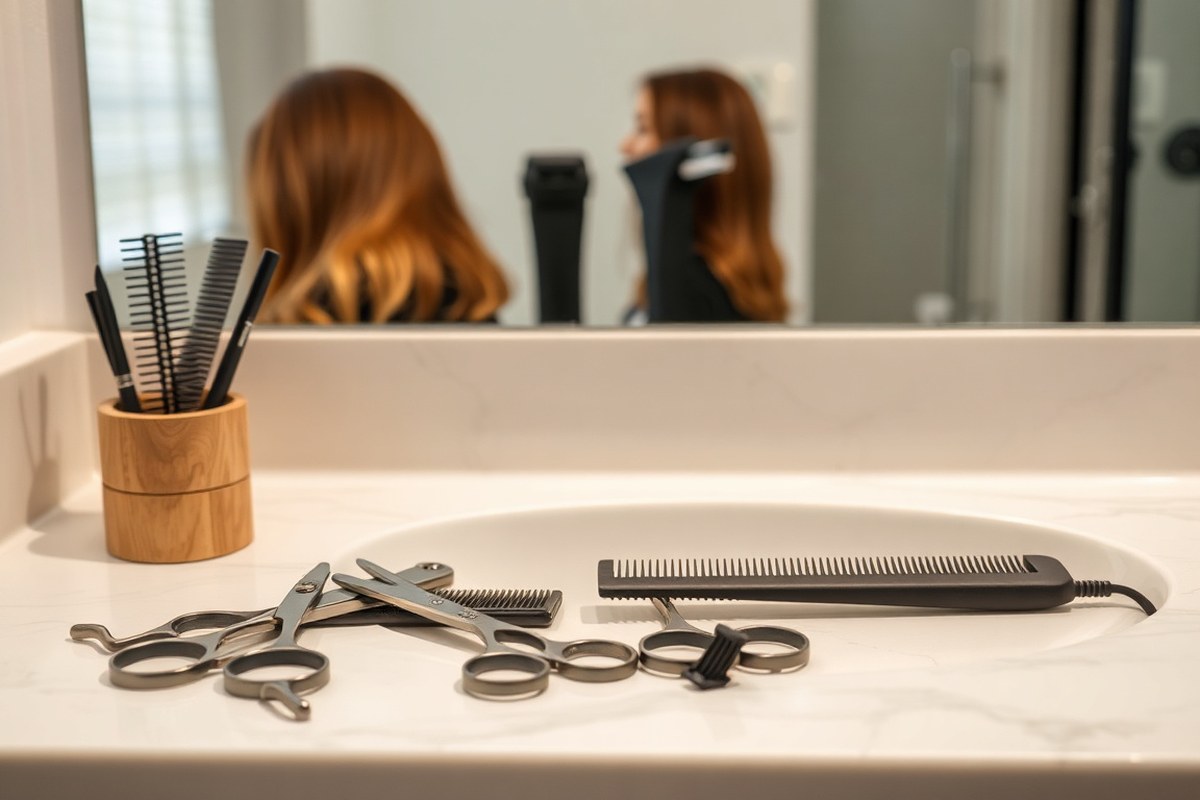
Start by gathering sharp hair-cutting scissors, a wide-tooth comb, hair clips, and a mirror. Using dull scissors can cause rough ends and increase split ends. Pick scissors designed for hair, which generally cost between $8 and $10 online for a smoother trim.
Decide if your hair should be wet or dry before cutting. Wet hair stretches and looks longer. So it can mislead you to cut too short once it dries.
Fine or straight hair cuts better when damp. Curly or thick hair often works best dry to see natural shape and shrinkage clearly.
- Sharp hair-cutting scissors, ideally 6.5 inches long
- Wide-tooth comb to detangle without breaking hair
- Hair clips to section hair securely
- Mirror positioned for a clear front and side view
- Towel or cape to catch cut hair and protect clothes
- Good lighting to see hair layers accurately
Before cutting, wash and detangle your hair thoroughly. Section it with clips into manageable parts to avoid uneven snips.
Use a sturdy surface or stand in front of a large mirror. Keep scissors perpendicular to hair strands to create clean layers.
Never rush when cutting; small snips let you adjust before trimming too much.
Keep fingers away from the scissor blades and cut slowly. Avoid cutting large chunks at once, take small sections to maintain control. Always double-check lengths in the mirror throughout the process to catch mistakes early.
Choosing the Best Layering Method for Your Hair Type and Length
Choose a layering method based on your hair length, texture, and skill level. Long and straight hair suits the ponytail method. For shorter or more textured hair, sectioning or finger cutting gives better control.
Ponytail Method for Long and Straight Hair
This method works well for beginners and medium to long hair. You gather your hair into a tight ponytail and cut straight across at the desired length. It’s quick, low-risk, and adds soft layers easily.
Hold the ponytail firmly. Use a comb to measure the length, then cut straight across with sharp scissors. Use your fingers to guide you in trimming uneven bits by point-cutting.
This method isn’t ideal for curly or very uneven hair. It creates blended layers with little effort.
It works best on dry hair. Straight or wavy hair that lies flat is ideal.
Section-by-Section Layering for Precision
This method suits short to medium hair or more precise styles. You divide hair into parts and cut each section individually. It gives you more control over layers and framing.
Start by combing and clipping back sections you’re not cutting. Work from the bottom up, cutting layers based on your desired length and shape. Keep your cuts small at first.
It requires more time and practice. Mistakes might be more visible on short hair, so use point-cutting to soften edges. This method also works well on color-treated hair.
Finger Cutting and Twist & Snip for Texture
Curly and wavy hair needs special care in layering to avoid bulk or shrinkage. Finger cutting lets you feel the hair’s natural flow and cut accordingly. Twist & snip involves twisting small hair sections and trimming the ends.
Cut curly hair dry and moisturized to see its actual length and curl pattern. Use quick, small snips at the ends to reduce bulk and keep texture. Avoid straight cuts that flatten curls.
These methods take more patience and attention but keep layers natural. Point-cutting within these techniques softens the look and prevents blunt lines. It’s best for textured hair that doesn’t easily fall flat.
Here’s a comparison of layering methods by hair type and length:
| Method | Best For | Avoid If | Most Important Rule | Stop Point |
|---|---|---|---|---|
| Ponytail Method | Medium to long, straight to wavy hair | Very uneven, fragile, curly with major shrinkage | Cut less than planned on first pass | Back becomes uneven or guide is lost |
| Section-by-Section | Short to medium hair needing exact shaping | Beginners with no cutting experience | Keep cuts small and symmetric | Shape that is unbalanced or uneven needs correcting. |
| Finger Cutting / Twist & Snip | Curly, wavy, or thick hair textures | Very fragile or wet hair (cut dry and moisturized) | Moisturize curls before cutting | Curls that look too thin or flat require thickening. |
Following these guides keeps your layered haircut balanced. Start with small trims and check your work often. Use the method that fits your hair type and comfort level.
How to Cut Layers in Curly and Textured Hair
Cutting layers in curly or textured hair works best when the hair is dry. This lets you see the natural shape and spring of each curl. It helps you avoid cutting too much hair and losing volume.
Why Dry Cutting Works Better for Curls
Curly hair can reduce in length by almost a third once dry. Cutting it wet hides how much it will shrink later. This often leads to layers ended up shorter than planned.
Dry hair shows the real length and bounce of your curls. You can cut each curl individually to follow its natural pattern. This prevents surprises once the hair dries.
Sectioning and Finger Cutting Techniques
Divide your hair into small sections to manage each curl separately. Use clips to hold back parts you’re not cutting yet. Working this way ensures you cut evenly and shape your hair well.
Hold each curl between your fingers at the length you want to keep. Cut just the ends straight across or with small snips for texture. This finger-cutting technique shapes curls gently without flattening them.
Blending Layers Without Frizz
To avoid choppy layers, use sharp scissors and point cutting. Point cutting means snipping small sections straight into the ends vertically to soften the look. This keeps curls defined and helps the layers blend naturally.
Cut slowly and avoid taking large chunks at once. Cutting little by little helps keep the hair’s shape balanced. Cutting too quickly often leads to uneven or frizzy layers that don’t lay right.
How to Blend and Refine Layers for a Natural Look
Point cutting means cutting the hair tips at an angle, not straight across. This creates texture and softens harsh lines between layers. Hold a small hair section away from your head.
Use sharp scissors. Snip the ends vertically.
Use scissors made for hair, not regular ones. Snip lightly, working through your layers to blend any harsh steps or uneven edges.
To fix choppy layers, start by spotting the rough spots in a mirror. Use the point cutting method on those areas, cutting small sections at an angle. Check often by moving your head and looking from different sides.
Avoid cutting large chunks at once; cut a little, then reassess. Straight cuts often cause the choppiness. So soften them this way instead of cutting flat again.
Your layers need refining if chunks stick out. Uneven lengths sit side by side. Sharp lines show in your hair.
Also, if layers don’t flow smoothly or look blocky, they need blending. Running your fingers through your hair helps you feel uneven spots too.
Fix these by carefully point cutting the ends. Work dry or slightly damp hair for better control and accuracy.
For uneven front layers or bangs, trim small parts. Use pinking shears. Cut horizontally.
These scissors have tiny teeth to prevent blunt lines. They help bangs look softer and less harsh.
When you feel a layer looks too short or uneven, don’t rush to cut more. Sometimes waiting a few days helps your hair settle into the cut before fixing it.
After cutting, use a handheld mirror to check how your layers blend all around your head. Look from different angles and light to catch any unevenness. Clean, hydrated hair cuts easier and more accurately.
Don’t cut hair when it’s dirty or sticky. Hair shape changes when dry. This causes mistakes.
Don’t cut large chunks without checking frequently. Small point cuts and constant reassessment prevent uneven layers and choppiness.
Common Layered Haircut Mistakes and How to Fix Them
Uneven layers happen when you cut without checking your angles. It leaves some pieces longer and others too short.
Fix this by combing your hair straight down, then snipping the longest bits slightly. Do this gently, a little at a time.
Choppy or blunt layers often come from cutting hairs dry or using dull scissors. It makes the layers look harsh and uneven. Try wetting your hair and using sharp hair shears designed for cutting.
Point cutting at the ends softens the edges. To point cut, hold scissors vertically and snip the tips lightly.
Beginners sometimes cut too many layers too close to the roots. It removes too much weight and volume, making hair look thin and flat.
Layer your hair in increments, starting from the bottom third. Leave the top layers fuller and cut less there to keep shape and movement.
- Fix uneven layers by trimming the longest strands little by little.
- Use sharp hair scissors, not household ones, for a clean cut.
- Cut hair wet for easier handling and more precise results.
- Point cut ends to avoid blunt, choppy lines.
- Work in small sections to control layer length better.
- Regularly check the length by comparing both sides visually.
- Leave top layers thicker for natural volume and shape.
Uneven layers that look patchy can improve with a quick trim. Dry your hair, comb it through, and spot trim the longest uneven bits.
Avoid cutting too much at once; small adjustments work best. Blunt layers need some softening by carefully snipping into the ends.
Choppy cuts look rough when sections are cut unevenly or too quickly. Slow your pace and rely on your comb as a guide.
Keep your scissors vertical and snip bit by bit near the ends. This method creates a smoother, textured finish instead of harsh lines.
Aftercare and Maintenance to Keep Layers Looking Fresh
Trim your layers every 6 to 8 weeks to keep their shape and prevent split ends. Regular trims stop damage from moving up the hair shaft. Skipping this can leave layers looking uneven and frayed.
Styling matters for layered hair. Dry your hair with a nozzle on your blow dryer, aiming downward to smooth the cuticles.
Use your fingers or a round brush to lift layers at the roots for more volume. Avoid rough towel drying that causes frizz and messes with your layers.
Products can help maintain your layers too. Choose a lightweight leave-in conditioner to add moisture without weighing hair down. A texturizing spray brings out layer definition if your hair is fine.
For thicker hair, a smoothing serum controls frizz and shine. Use heat protectant before styling with tools.
- Trim every 6-8 weeks
- Dry hair downward for smooth layers
- Use a round brush or fingers for volume
- Choose light leave-in conditioner
- Apply texturizing spray for fine hair
- Smoothing serum for thick hair
- Always use heat protectant
After cutting, keep your hair healthy by washing with gentle, sulfate-free shampoo. Deep condition once a week to repair damage.
Avoid tight hairstyles that stress the hair roots. Don’t cut too much hair at once, trim just a little to maintain balance.
Keeping your chin up while trimming prevents uneven cuts. Cut slowly and in small sections, checking the shape often in the mirror.
The right tools, like Tweezerman’s 2000 Styling Shears, make precise trimming easier. This care saves you from trimming too short and ruining your layers’ look.
When to Call a Professional Instead of Cutting Yourself
Stop cutting your layers at home if you feel confused or unsure. Layering needs careful angle control, especially for short hair.
Don’t get a clean, even cut fast? Go to a salon.
Uneven or choppy layers won’t fix with a small trim. That means you need more than simple fixes. Complex curls or textures make DIY layering risky.
It can cause damage or a messy look. Curly hair often needs expert shaping to avoid frizz or weird layers.
Watch for jagged edges, unblended layers, or big length gaps. These change your style in bad ways. These show the cut is out of control.
Don’t try to keep fixing messy layers yourself. Repeated snipping can thin hair or create damage spots.
Hair conditions like severe thinning, breakage, or scalp issues also call for a pro. A stylist can assess these and cut without causing further damage.
Your hair is chemically treated? A stylist knows how to handle it.
Think about the time and cost. At-home tools might cost under $20. But fixing a bad cut at a salon could run from $50 to $100.
A good stylist can restore your layers smoothly in about 30 to 60 minutes. This is often faster and safer than trying to cut again yourself.
Dry layers look uneven? Hard to keep angles consistent? Call a pro.
Also, if your style depends on precise layering, such as face-framing cuts, avoid DIY. These need a trained eye for balance.
Don’t keep cutting if your layers are uneven or your hair looks damaged. Most problems get worse without professional help.
Step-by-Step Action Plan
Follow these steps to cut your own layered hair safely at home. Check your progress after each phase to stay on track.
- Before you start: Gather scissors, a comb, clips, and a mirror. Make sure they’re sharp and clean for a smooth cut.
- Section your hair: Divide your hair into three to four parts. Even sections help keep layers balanced and neat.
- First cut: Take one section and trim the ends to set your base length. Your hair should look even when combed down.
- Cut layers: Hold the hair at a 45-degree angle and snip small amounts. Stop often to compare both sides for symmetry.
- Blend layers: Use the point-cutting method to soften edges. Your layers will look natural, not choppy or uneven.
- Check the shape: Comb your hair down and look in the mirror from all angles. Fix any spots that seem off or too thick.
- Clean up: Trim any stray or uneven hairs with small snips. Your style should feel fresh and polished.
- After 1 week: Watch your hair’s growth and shape. Do minor trims to keep layers looking sharp and healthy.
Frequently Asked Questions
How Do I Choose the Right Scissors for Cutting Layered Hair?
Use sharp haircutting scissors, not regular ones. They make cleaner cuts and prevent split ends for better layers.
Can I Cut Layered Hair on Dry Hair or Only Damp?
You can cut dry or damp, but damp hair gives more control. It’s easier to see and shape layers when hair is wet.
How Often Should I Trim My Own Layered Hair to Keep It Fresh?
Trim every 6 to 8 weeks to maintain layers and shape. Regular trims prevent split ends and keep layers looking clean.
Can I Layer My Own Hair If It’s Very Fine or Thin?
Yes, layering works on fine hair to add volume. Keep layers subtle to avoid making hair look thinner.
Is There a Quick Layering Method for Very Long Hair?
Yes, the ponytail method is fast and easy for long hair. It helps create a soft, natural layered effect in minutes.
What’s the Best Way to Avoid Uneven Layers When Cutting Myself?
Always cut little at a time and check symmetry often. Use mirrors to view all angles and fix uneven spots early.
Before You Go
Cutting your own layered hair works best when you stay patient and precise. Start small, trim slowly, and check your work often. Try your first small cut today to see how it feels before going deeper.