How Can You Cut Your Own Hair in Layers: A Complete Guide That Works
How can you cut your own hair in layers without messing it up? Start with damp hair and section it into four to six parts. Use point-cutting or slice-cutting techniques at a 45- to 90-degree angle to create natural layers.
Preparing your hair before you cut is key, it sets up about 40% of your success. Trim your layers every six to eight weeks.
This keeps them fresh and stops split ends. Take your time with small sections of one to two inches for better control.
Hold your scissors at a 45-degree angle and cut in small, precise snips for subtle layers. Cut both sides first. Then use a hand mirror.
Check that layers blend well from all angles. This method works well for all hair lengths and textures.
Key Takeaways
- Start with clean, damp hair to get more accurate, even cuts.
- Divide hair into four to six manageable sections before cutting.
- Use a 45-degree angle with your scissors for natural-looking layers.
- Cut small sections, about one to two inches wide, to avoid mistakes.
- Trim your hair every six to eight weeks to maintain layer shape.
- Use a hand mirror to check how your layers blend from behind.
How to Cut Your Own Hair in Layers Step-by-Step
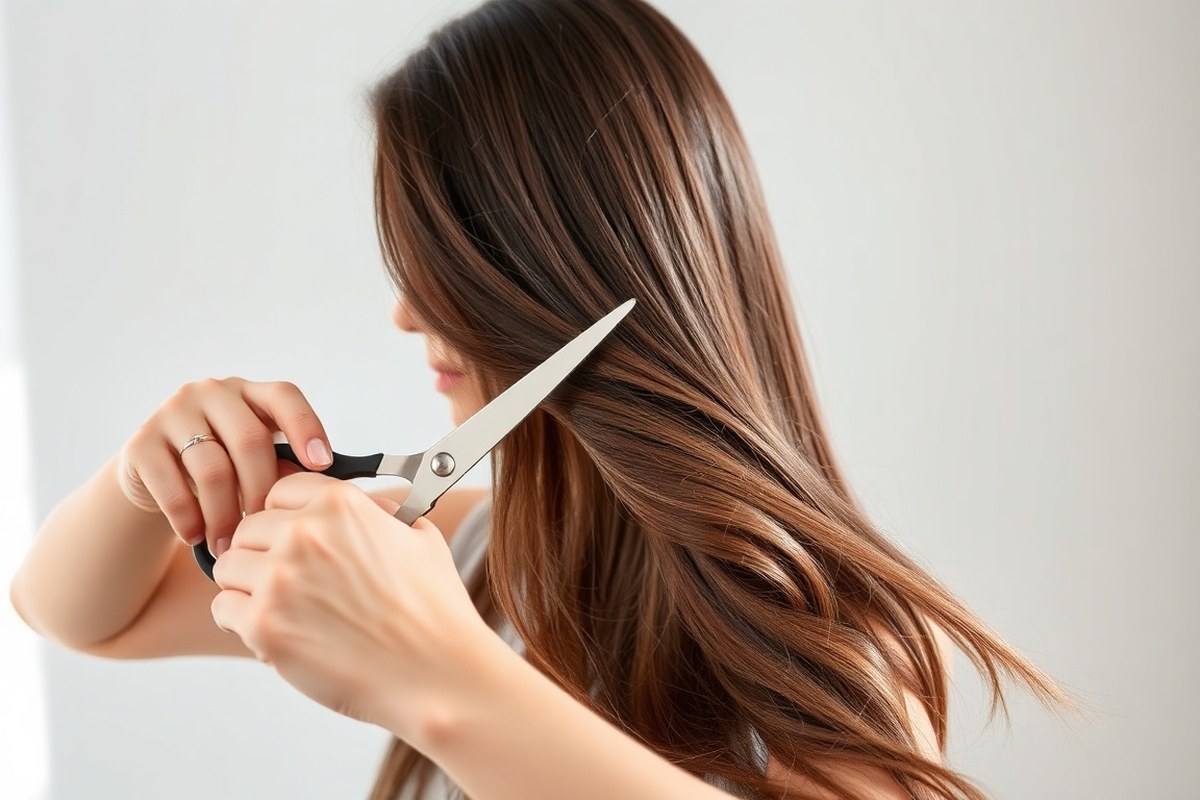
Cutting your own hair into layers works best with damp hair. Sectioning your hair into four to six parts helps keep your layers even and neat. Use sharp scissors and a comb to work gradually.
Cut at an angle to create natural, blended layers. Take your time with each cut.
Start with the top sections, lifting hair away from your scalp between 45 and 90 degrees. This angle controls how short each layer will be and prevents harsh lines. After cutting, use blending techniques like point-cutting to soften the ends, making your layers flow smoothly.
- Section your hair: Divide your damp hair into four to six parts, clipping them in place.
- Choose a guide length: Start with a small section at the crown. Work on the top of your head first.
- Lift hair at an angle: Hold each section between your fingers. Keep it at about 45 to 90 degrees from your head.
- Cut the first layer: Snip hair straight across or slightly angled, depending on desired layer shape.
- Work downwards: Use the freshly cut section as your guide. Cut lower sections slightly longer than the one above.
- Blend layers: Use point-cutting by snipping vertically into the ends. This removes harsh edges and blends layers smoothly.
- Check layer evenness: Comb hair to fall naturally. Look from all angles using a hand mirror.
- Make final adjustments: Trim uneven or bulky spots carefully. Keep trimming until the layers look balanced.
For face-framing layers, cut shorter pieces near your cheeks. Use a gentle angle to avoid straight lines.
Always cut a little less than you think you want at first. This way, you can trim more if needed without removing too much hair.
It usually takes 30 to 60 minutes, depending on your comfort with cutting. Using the ponytail method can speed up the process for beginners and minimize uneven layers.
Remember, layering adds volume and reduces bulk. So it won’t look like a blunt cut if done right.
Tools You Need and How to Prepare Your Hair
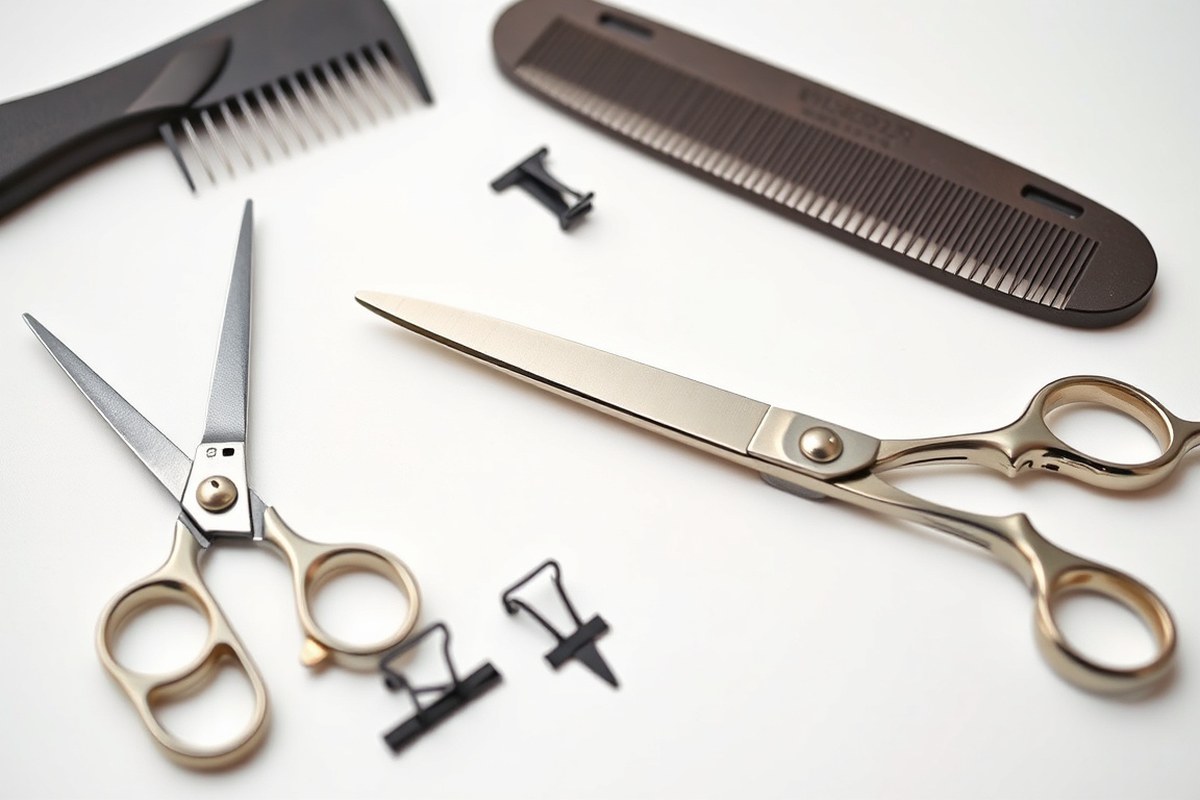
Use sharp scissors made for hair cutting only. Craft scissors or dull blades can cause split ends and uneven cuts. Look for 6.Get 5-inch professional hair cutting shears for about $9 to $10 each on Amazon.
They offer better control and give cleaner cuts. These shears make cutting your hair easier and neater.
Besides scissors, get a fine-tooth comb to detangle strands and section hair evenly. Hair clips can hold sections apart and avoid accidental snips. Keep a spray bottle nearby.
Use it if you cut wet hair. It also helps to lightly dampen hair during your cut.
- Professional hair cutting scissors, sharp and 6.5 inches long
- Fine-tooth comb for parting and detangling
- Hair clips to secure sections during cutting
- Spray bottle for dampening hair if necessary
Clean hair that is hydrated is easier to cut. Wash and condition your hair first. Towel dry it gently until just damp.
This works well for cutting layers on wet hair. Wet hair stretches, so layer cuts often turn out shorter when dry. This matters especially for straight or wavy hair.
You can cut curly hair when it’s dry. This shows how curls naturally fall. It helps avoid cutting hair too short.
For dry cuts, first detangle hair completely. Smooth it out, then clip it up section by section. This keeps your cut controlled and accurate.
Cutting dry allows you to follow your hair’s natural fall and avoid surprises in length.
Comb through each section slowly before you trim to ensure smoothness. Your fine hair can be cut damp or dry. Both ways usually won’t change length much.
Medium to long straight hair often cuts best slightly damp and combed out. Remove tangles carefully to avoid uneven cuts and pressure spots on the strands. This prep saves you time and keeps layers neat and balanced throughout.
Choosing the Best Layer Cutting Method for Your Hair Type and Length
Choosing the right method depends on your hair length, texture, and skill set. Long to medium hair often suits the ponytail method best. It’s easy and treats your hair as one section, making a straight, even cut.
Curly or textured hair requires different care. You should cut your curls when they are dry and moisturized. This helps you see their actual length and prevents cutting too short because of shrinkage.
Beginners will find blunt, straight cuts simpler. More experienced cutters might add texture with point cutting or angle cuts. Point cutting uses snips that create a softer, blended look by cutting vertically into the ends.
| Cutting Method | Best For | Avoid If | Key Tips |
|---|---|---|---|
| Ponytail Method | Long to medium straight hair, beginner-friendly | Very uneven, fragile, curly hair with shrinkage | Cut less on the first pass, keep the ponytail tight |
| Point Cutting | Experienced cutters, creating soft textured layers | Beginners, very short hair | Use vertical snips to soften blunt ends |
| Curl Cutting Dry | Curly, textured hair | Wet hair, or unmoisturized curls | Cut moisturized curls at their natural length |
| Blunt Straight Cut | Short to medium straight hair | Curly hair or major hair texture variations | Hold hair smooth, cut straight across ends |
The ponytail method works by gathering your hair forward into a tight ponytail at the front. You pick the length and cut straight across.
This avoids uneven layers and shifts during the cut. It’s a quick way to get beginner-friendly long layers.
For curly hair, don’t cut when wet or dry without moisture. Let your hair air dry or blow dry first.
Then, cut so all curls sit evenly by stretching them gently before cutting. This prevents surprises in length after the cut and shrinkage.
Step-by-Step Guide to Cutting Layers on Medium-Length Hair
Cutting medium-length layers on your own needs careful guide cuts and blending. Start by sectioning hair evenly, then cut guide layers at a 45-degree angle. Blend edges by checking from all sides to keep your layers smooth and balanced.
Creating Sections and Clipping
Divide your hair into four even sections to work with control. Clip the top layers up, leaving the underneath hair down. This keeps your volume intact while you shape only the layers.
Smoothly comb through each section to avoid tangles. Use a hand mirror to check parting lines are straight. Uneven sections make your layers look messy and uneven after cutting.
Making the Guide Cuts
Start by cutting the guide layers in the front middle section. Hold scissors at a 45-degree angle for a soft, natural layer edge. Cut small sections, about half an inch wide, to keep the shape precise.
Match the guide cut on the sides, cutting each small section to the same length. Keep the scissors steady and avoid cutting too much at once. The layers should gradually build down from the crown to the ends.
- Comb the front middle section straight down and cut at the desired length.
- Release a side section and cut at the same angle and length as the guide.
- Repeat on the other side, matching lengths closely for symmetry.
- Trim the back section following the front guide lengths, checking with a mirror.
- Use your fingers to pull small sections out and do touch-ups evenly.
Blending and Final Touches
Hold scissors vertically and point cut the edges for a softer look. Slide cut by slicing gently along your hair ends to remove bluntness. Avoid big jumps in length to keep layers subtle and smooth.
Look into a hand mirror and walk around to check how layers blend. Small uneven spots show up here, trim them lightly. Finish by re-combing and making sure the volume stays balanced on both sides.
How to Cut Layers in Curly or Textured Hair at Home
Cutting curly or textured hair in layers takes special care. You should cut it dry, curl by curl, to keep shape and avoid surprises. Section hair carefully, and use finger cutting for soft, natural layers.
Why Dry Cutting Benefits Curly Hair
Curly hair shrinks a lot as it dries, sometimes up to 25%. Cutting it wet can leave you with much shorter hair than planned. Cutting dry lets you see the true curl pattern and length before cutting.
When hair is dry, you cut each curl to the right length. It’s easier to avoid cutting too much or uneven layers. This approach helps keep your curls bouncy and shaped.
Sectioning Curly Hair Safely
Divide your hair into 3 or 4 main sections using elastic ties and clips. Keep sections clean to cut one at a time and avoid mixing curls. Use your fingers or a wide-tooth comb to smooth each section gently.
Start with the middle section to create your guide layer. Pull small portions of hair straight up and cut on a slight slant. This angle helps make layers that fall naturally.
The layers start shorter in front. They get longer toward the back.
Using Finger Cutting to Shape Layers
Finger cutting means holding hair between your fingers and snipping into the ends with shears. It softens lines and blends layers well on textured hair. Work on small curl groups so cuts are even and natural.
Use sharp hair cutting shears, never household scissors, for clean cuts. Cut slowly and check the curl shape often to avoid cutting uneven lengths. Finger cutting lets you shape layers with gentle, gradual changes in length.
Always cut a little less than you think you need. You can trim more later if needed.
Common Layer Cutting Mistakes and How to Fix Them
Cutting your own layers often causes uneven results. Hair shrinks when dry. It looks longer when wet.
Many cut their hair soaking wet, which makes strands stretch. When hair dries, layers turn out shorter and choppier than expected. Another mistake is rushing through the process without checking lengths frequently.
Uneven or choppy layers mostly happen from cutting wet hair too short or pulling hair unevenly. Also, trimming random strands instead of following clear guidelines creates a jagged shape.
Avoid cutting bangs to fix uneven front layers, especially if you never had any before. Bangs change your look a lot and can complicate fixing layers.
- Cut hair when damp, not soaking wet.
- Trim small sections evenly and slowly.
- Use sharp scissors designed for hair.
- Check lengths frequently with a mirror.
- Do not trim bangs to cover uneven fronts.
- Comb straight or in natural fall to see true hair length.
- Work in natural light when possible.
To fix uneven layers at home, start by drying your hair completely. Drying shows where strands fall and helps spot length differences. Next, separate the hair into thin, manageable sections.
Pull each section straight and trim just a tiny bit off the longer parts. Use point cutting, snipping into the ends instead of straight across, to soften edges.
Check your work by combing all layers down. Make sure the ends blend smoothly instead of sticking out. Spot chunks or blunt edges?
Trim small bits carefully with scissors. Avoid cutting large chunks at once, as this makes unevenness worse. Take breaks and look at your hair from different angles.
Prevent mistakes by never using dull scissors; they cause split ends and choppy cuts. Keep your head level and mirror steady. Use clips to hold layers separate.
Give yourself enough time by setting a timer. 20 to 30 minutes works well.
Medium-length hair fits this time range. Don’t cut layers when in a hurry or upset, as mistakes happen easier.
How to Cut Face-Framing Layers Yourself
Cutting your own face-framing layers shapes hair around your face. It softens and highlights your features. This gives a balanced look.
Angle these sections inward with point cutting to avoid harsh edges. Work slowly, cutting small amounts, to control the length and thickness for a natural look.
Determining Face Shape
Knowing your face shape helps pick layer lengths that flatter you. Round faces benefit from longer, wispy layers that narrow the face. Square faces look softer with layers that start just below the jawline.
Oval faces suit almost any length but look great with graduated layers near the cheekbones. Heart-shaped faces do well with layers that fall right below the chin, balancing a wider forehead. Match your layer length to what you want to highlight or soften.
Cutting Angled Front Sections
Start with dry, detangled hair parted as you normally wear it. Isolate the sections framing your face by combing strands straight down from the temples forward. Keep these strands separate for precise cutting.
Hold the hair between your fingers at about a 45-degree angle from the face. Use sharp scissors to point cut upward into the ends, removing small snips to create softness. Point cutting avoids blunt edges that look heavy or uneven.
Blending Face Frames into Layers
Blend the face-framing sections smoothly with the rest of your hair’s layers. Comb through the hair and check for harsh lines that stand out. Use gentle point cuts to soften these transitions along the edges.
Start by cutting less hair at first. Check both sides in a mirror. Cut more if needed to match them up.
Thick or coarse hair may need thinner layers to avoid a bulky look. Fine or straight hair benefits from slightly thicker face frames for shape and fullness.
Follow these steps for cutting face-framing layers yourself:
- Comb your hair straight down and separate front sections from the rest.
- Hold a front section at a 45-degree inward angle toward your face.
- Use sharp scissors to point cut small snips upward into the ends.
- Repeat on matching sections on the other side for symmetry.
- Check the length and thickness while blending into existing layers.
- Point cut uneven edges gently to soften blunt lines.
- Review your work in natural light and make small adjustments.
Recognizing When to Call a Professional Stylist Instead
Cutting your own layers is doable but knowing when to stop helps avoid big mistakes. Your layers look uneven, jagged, or patchy, so book a professional. A stylist can reshape your cut with special layering scissors.
They fix uneven lengths. They also correct awkward angles.
Hair that’s very thick, curly, or textured needs more skill to layer cleanly. Trying to cut layers on this hair type without experience often causes dryness, breakage, or frizz.
Also, if your hair is short, layering yourself can be risky because every snip stands out. In these cases, it’s safer and saves money to see a pro.
Sometimes, a DIY layering attempt will leave your ends too choppy or uneven. Professionals trim down uneven layers to give your hair a fresh shape. They blend the layers better.
This creates a smooth look. They might also suggest new styles if the layers don’t suit your face or hair type. A quick corrective cut at the salon usually costs £40 to £80 in the UK.
This price is modest. It is cheaper than later repair jobs.
Don’t cut if your hair is damaged or recently treated with chemicals like bleach or relaxers. Layers cut into fragile hair can cause more breakage. Waiting until your hair recovers and visiting a stylist will protect your hair’s health and appearance.
Knowing your limits means asking yourself three questions: Are the layers uneven or jagged? Is my hair type thick, curly, or very short? Is my hair in good condition to handle cutting?
You answer yes to any, so skip the scissors and book a stylist. Your hair is long and healthy, and you want subtle layered movement. Try cutting at home with the guide-section method.
When your haircut looks uneven, jagged, or patchy, stop cutting and see a professional. Fixing bad layers often requires a stylist’s skill and tools.
Step-by-Step Action Plan for Cutting Your Own Layers
Follow these clear steps to cut your layers safely and confidently. Check each result to stay on track as you go.
- Before you start: Gather scissors, comb, clips, and a mirror. Make sure your hair is clean and dry for accuracy.
- Step 1: Section your hair into top, middle, and bottom layers. Use clips to hold each part separately. The sections should lay flat and even.
- Step 2: Choose your cutting method based on your hair texture. For straight hair, use horizontal cuts; for curly hair, try point cutting. Check your guides for smooth results.
- Step 3: Cut the bottom layer first, trimming small amounts to avoid mistakes. The hair should feel even when combed.
- Step 4: Release the middle layer and cut to match the bottom layer’s length. Blend with gentle snips to avoid harsh lines.
- Step 5: Work on the top layer, adding face-framing pieces if you want. Make sure the layers fall naturally around your face.
- Step 6: Use a hand mirror to check your cut from different angles. Look for any uneven spots or bulky areas.
- Step 7: Fix any mistakes by trimming carefully and blending textures. Small corrections can make a big difference.
Frequently Asked Questions
What Angle Should I Hold the Scissors to Create Natural Layers?
Hold the scissors at a 45 to 90-degree angle to the hair. This lets you create layers that blend smoothly without harsh lines.
Can I Layer My Hair If It’s Very Thick Without Losing Volume?
Yes, layering thick hair can reduce bulk and add shape. Use thinning shears to avoid making it look thin.
How Often Should I Trim Layers to Keep Them Looking Fresh?
Trim layers every 6 to 8 weeks to maintain their shape. Regular trims prevent split ends and uneven growth.
Is It Better to Cut Layers on Dry or Damp Hair?
You should cut layers on damp hair for better control and accuracy. Dry cutting works for textured or curly hair to see the natural fall.
Can I Layer My Hair at Different Lengths on Each Side?
You can, but uneven layers may look unbalanced unless styled purposely. Use a hand mirror to check your work from all angles.
How Do I Know If My Layers Are Blended Properly?
Look at your hair from all sides with a hand mirror. The layers should flow smoothly without visible harsh lines or steps.
Wrapping Up
Cutting your own layered hair is doable with patience and the right steps. Start with small trims and build your confidence. Always keep your tools sharp and clean for the best results.