How to Curl Hair with a Straightening Iron: 8 Techniques for Perfect Curls
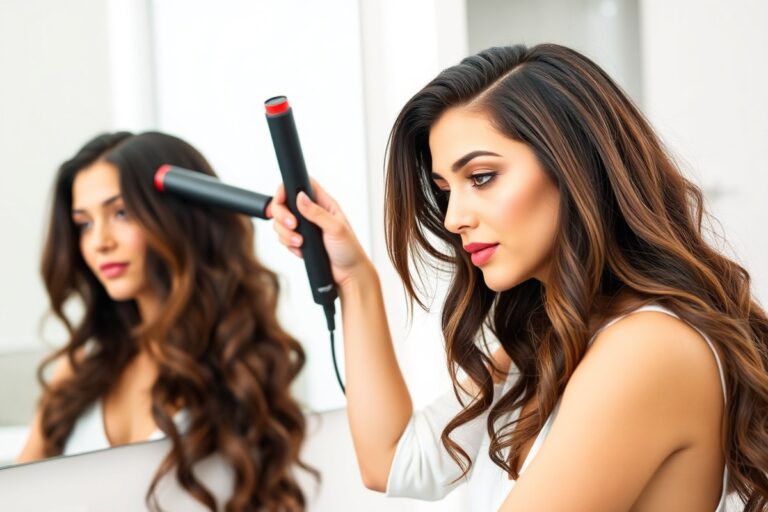
How to curl hair with a straightening iron is easier than you think. You clamp a small section of hair with the iron. Twist the iron 180 degrees.
Glide it down to form curls. This technique gives you long-lasting curls and works well on various hair types.
First, choose the right flat iron size. A smaller iron works best for short hair.
Longer plates suit thicker or longer hair. Also, clean hair and proper heat settings make your curls hold better and look smooth.
Setting the correct temperature matters. For fine hair, keep the heat under 300°F to avoid damage. Thicker hair can handle higher heat, up to 400°F, to get the best curl shape.
Key Takeaways
- Use a half-inch flat iron for hair shorter than two inches.
- Clamp hair sections, twist the iron 180 degrees away from your face.
- Start curling from sections about one inch wide for even heat distribution.
- Keep heat below 300°F for fine or color-treated hair to prevent damage.
- Thick or coarse hair needs higher heat, between 375°F and 400°F.
- Wash hair within 24 hours before curling to help curls last longer.
How to Curl Hair with a Straightening Iron Step-By-Step

Curling your hair with a flat iron takes some practice but gives great results. The iron’s curved sides help shape smooth, natural-looking curls faster than many tools. You’ll clamp a small section near the roots, twist the iron, then glide it down carefully.
Holding and twisting the flat iron the right way matters a lot. Twist your wrist 180 degrees away from your face as you move down.
This motion wraps the hair around the iron’s edges to form a curl. Pulling the iron downward rather than straight out helps keep curls tight and neat.
- Separate dry hair into small sections about 1 inch wide for even heat.
- Clamp the flat iron vertically near your scalp on a section.
- Rotate your wrist 180 degrees away from your face to wrap hair.
- Slowly glide the iron down the hair, maintaining the twist.
- Release the clamp after reaching the end of the hair strand.
- Repeat on all sections, curling all in the same direction or alternating.
- Let curls cool without touching to set the shape.
Using small sections helps curls heat evenly and last longer. Trying to curl damp hair or using large sections often leads to bends or uneven waves. Start with clean, dry hair plus a heat protectant spray to cut heat damage.
You can curl short or long hair by adjusting the iron size and section width. For finer hair, keep heat below 325°F and use smaller sections.
Thick hair needs higher heat, around 375 to 410°F, and smaller pieces for full curls. Practice makes twisting easier; start slowly to master the wrist motion.
Choosing the Right Flat Iron and Heat Settings by Hair Type
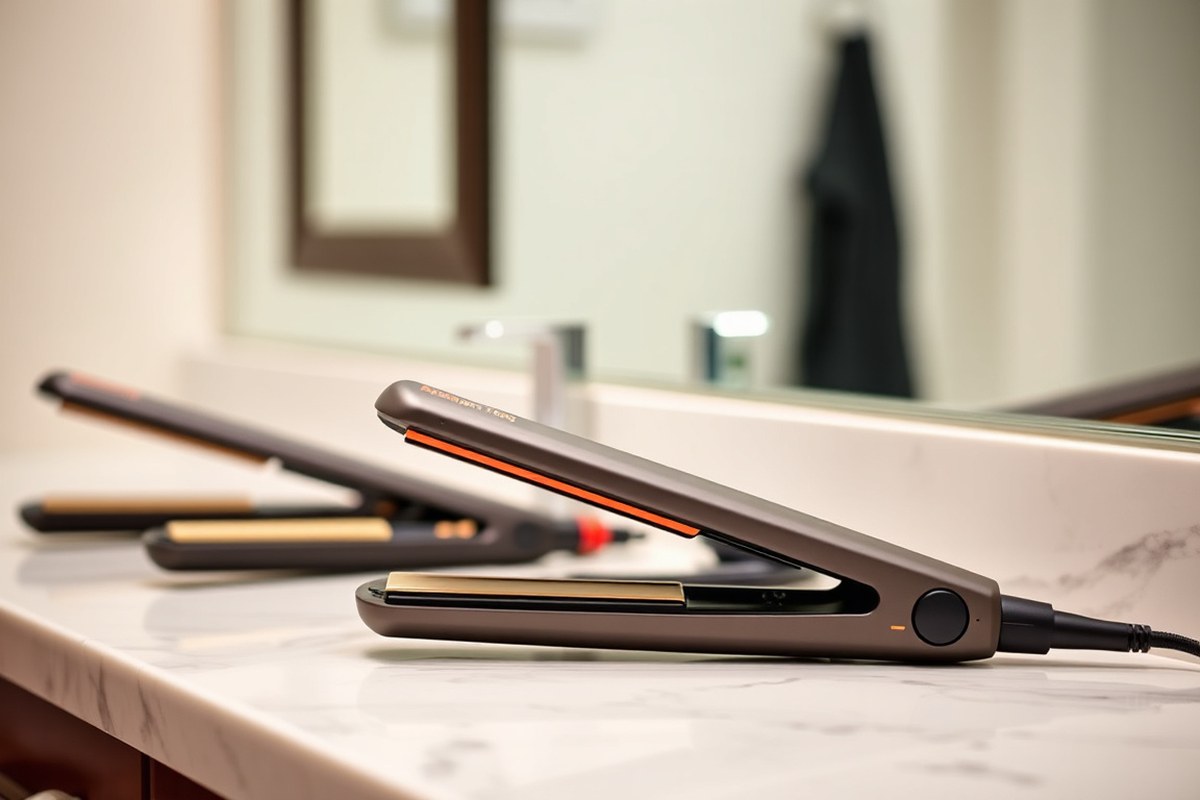
Choosing the right flat iron size and heat setting depends on your hair type. Use smaller plates for tight curls and wider plates for loose waves. Match your iron’s temperature to avoid damage and get lasting curls.
Flat Iron Sizes and Curling Suitability
Flat irons with plate widths around 1 inch work best for curls. They let you handle small hair sections and create defined spirals. Wider plates, like 1.5 to 2 inches, suit thick or long hair and help make loose waves quickly.
Too large a plate can clump hair, making curls uneven or loose. Smaller plates need more passes but offer better curl control for fine or short hair. Check if your flat iron heats evenly and has adjustable settings.
Hair Type and Recommended Temperature Ranges
Fine or damaged hair curls best at lower heat. Aim for 250°F to 300°F to prevent damage while curling. Medium hair can handle 300°F to 350°F for effective styling.
Thick or coarse hair needs higher heat, between 350°F and 400°F, to form curls. Avoid cranking heat too high for thick hair because it risks frizz and damage. Start low and work your way up if curls don’t hold.
| Hair Type | Flat Iron Plate Size | Recommended Heat Range |
|---|---|---|
| Fine / Damaged Hair | ½ to 1 inch | 250°F, 300°F |
| Medium Hair | 1 inch | 300°F, 350°F |
| Thick / Coarse Hair | 1.5 to 2 inches | 350°F, 400°F |
Product Recommendations for Heat Protection
Using a heat protectant spray is essential for every hair type before curling. Choose lightweight sprays that shield against heat without weighing hair down. They act as a barrier to reduce damage and keep hair smooth.
For fine or straight hair, volumizing mousse helps curls hold better. It adds grip to your hair before heat styling.
Thick or slippery hair needs texture spray to catch curls. It helps curls stay in place longer.
Set your flat iron to the lowest heat that works. Always use heat protectant spray before styling.
Preparing and Sectioning Hair for Easy Curling
Getting your hair ready before curling saves time and protects your strands. You want hair clean but not slippery, dried but not stiff, and ready for hot styling. Proper sectioning speeds up curling and helps curls form evenly.
Best Hair Washing and Drying Practices
Start with clean hair to keep curls fresh and bouncy. Use a shampoo and conditioner that suit your hair type to avoid excess oil or dryness. Gently towel dry to remove most water without roughing the hair cuticle.
Air dry your hair until it is about 80% dry. You can also use a blow dryer on medium heat. This speeds up drying without damaging your hair.
Avoid completely soaking wet hair because wet hair is weaker and will take longer to curl. Slightly damp hair can cause uneven curls or damage when heated harshly.
Applying Heat Protectant and Styling Products
Spray a heat protectant evenly over your hair before using any hot tools. This creates a barrier, reducing frizz and heat damage. Don’t skip this step even if you curl at lower temperatures.
Pick styling products based on your hair texture. Wavy hair benefits from just heat protectant and a light texture spray.
Thick hair needs stronger-hold products and smaller sections to help heat reach every strand. Avoid applying too much product, it can weigh curls down or cause buildup.
Here’s a checklist for product prep:
- Heat protectant spray applied all over
- Optional curl-improving mousse for thick hair
- Light texturizing spray for body and bounce
- Use products as directed to avoid residue
- Let product dry slightly before curling
How to Divide Hair into Curling Sections
Sectioning your hair makes curling quicker and easier. Divide your hair based on thickness and length, thicker hair needs more sections. Aim for about 1-inch wide sections to give the iron control over the curl.
Start by parting your hair horizontally at the nape, clipping the top half up. Work with the bottom section first, then move up. This approach ensures you don’t miss strands or redo areas.
Try this sectioning method:
- Create a horizontal part just above the ears
- Clip the top half of hair out of the way
- Divide the bottom half into 1-inch wide vertical sections
- After curling the bottom, release the top half
- Repeat the vertical sectioning for the top layer
Different Curling Styles Possible with a Flat Iron
You can create different curl styles using a flat iron by changing the technique. For beach waves, clamp a 1-inch hair section near the roots. Twist the iron away from your face.
Slowly pull it down while twisting back and forth. This motion shapes hair into loose, natural waves. They look soft, like an ocean breeze blew through.
Loose waves need a slightly smaller section of hair. Clamp the iron, then rotate it 180 degrees away from your face. Slowly slide it down the hair in a smooth motion.
This creates a soft, gentle wave that adds volume without tight curls. The key is keeping the iron moving steadily to avoid creases or kinks.
Tight curls need a different method. Use smaller sections, like half-inch strands. Clamp the hair near the roots, then turn the iron 360 degrees quickly.
Hold it for a few seconds before releasing. This will make springy curls close to ringlets.
You need practice to keep curls even. Avoid flattening them by pulling too hard.
For polished curls, use the flat iron’s plates straight and smooth. Take small hair sections and clamp near the root. Slowly rotate the iron to form neat curls.
Keep the heat steady at around 350°F to avoid damage. Polished curls have a shiny, uniform look that works well for formal events.
Flat irons with rotating plates are easier to use for all these styles. They let you manipulate hair more fluidly into curls and waves. A flat iron is not like a curling iron.
You control curls by twisting and moving the iron, not barrel size. This makes the tool versatile but also needs more practice to master various looks.
A common mistake is squeezing the flat iron too hard. This causes a crease line rather than a smooth curl. Squeeze just enough to hold hair without pinching tightly.
Also, make sure hair is dry and prepped to avoid limp curls that fall flat quickly. Dirty or damp hair can’t hold curls well, no matter which method you use.
You can create S-waves by twisting the iron in opposite directions on alternate sections. This gives a wave pattern that looks polished but relaxed.
This style offers waves with more texture than beach waves. It gives less volume than loose curls.
How to Finish and Maintain Curls for All-Day Hold
After curling your hair with a flat iron, you should let the curls cool completely. Cooling helps the curls set and last longer by locking the shape into the hair cuticle. Avoid touching or combing the curls before they cool, or they might loosen or frizz.
Wait for your curls to cool and feel firm first. Then, gently run your fingers through them. This softens the curls for a natural look.
Spray a light mist of hairspray on your curls. It holds them sleek and tight all day.
It won’t make your hair stiff. Use a flexible-hold spray to avoid crunchy curls.
Don’t spray hairspray before the curls cool; it can cause damp spots and frizz.
Some products work well to keep curls lasting longer. A heat protectant spray before curling shields your hair from damage.
After curling, a lightweight mousse or curl cream adds definition and bounce. Avoid products with heavy oils or silicones that can weigh curls down.
You can refresh curls without heat by misting your hair with water or a curl-refresh spray. Then scrunch curls lightly with your hands to bring back their shape. This helps when curls fall flat during the day without needing to reheat.
- Let curls cool for 10 to 15 minutes before touching
- Use a light mist of flexible-hold hairspray after cooling
- Apply curl cream or mousse to add softness and hold
- Spritz curls with water or refresh spray to revive shape
- Avoid heavy oils that make curls limp
- Use a wide-tooth comb or fingers, not a brush
- Reheat only if curls lose most of their shape
For short hair or delicate curls, be gentler when styling and refreshing. Too much product or rough touch can flatten your curls. Keep your routine light and simple for natural, bouncy curls that last all day.
Common Mistakes When Curling with a Flat Iron and How to Fix Them
Using too much heat can burn your hair or cause breakage. Keep your flat iron temperature between 300°F and 350°F for fine or damaged hair. For thick or coarse hair, 350°F to 400°F works but don’t go higher.
Holding your hair on the iron too long can lead to dry, brittle strands. Aim to hold each section for about 5 to 8 seconds only. This lets the heat work without frying your hair.
Choosing the right section size is a common struggle. Big sections often don’t curl or lose shape fast. Smaller sections, about 1 inch thick, curl more evenly and hold better.
Wrapping too many turns around the iron is unnecessary and can tangle or break hair. Stylist Steven Waldman says, one full wrap around the barrel works.
This gives you a clear, defined curl. You don’t need to wrap more than once.
- Avoid curling damp hair to prevent heat damage and weak curls
- Use smaller sections about 1 inch wide for even curls
- Hold the iron for 5 to 8 seconds per curl, no longer
- Keep heat between 300°F and 350°F for fine hair
- Don’t twist the flat iron continuously while curling
- Apply a light mist of hairspray before curling for better hold
- Let curls cool before touching to prevent frizz and flattening
Starting with damp hair can result in frizzy curls that fall out quickly. Always dry your hair fully before curling. Spraying a tiny bit of hairspray just before curling helps curls stay firm and last longer.
Avoid twisting the flat iron constantly; move it smoothly through your hair instead. That prevents uneven curls and damage.
Frizz often happens when curls aren’t cooled down properly. Let each curl cool in your hand or pin it up briefly. This locks the shape and reduces flyaways.
Your curls might fall flat too soon. Check if your hair feels heavy with product.
That heaviness can weigh curls down. Too much oil or conditioner can weigh curls down and ruin bounce.
Comparing Curling with a Flat Iron Versus a Curling Iron
Flat irons curl hair by clamping it between two heated plates. This pressure heats hair evenly on both sides, making curls last longer. The pinching action helps you shape curls as you move the iron.
Twist the iron while sliding down to control the curl shape. This gives you more control over your curls.
Curling irons heat just one side of the hair strand, usually wrapping around a hot barrel. This creates a rounder, looser curl faster. Curling irons have many barrel sizes to choose from.
You can get tight ringlets or soft beach waves. Pick the barrel that matches the curl size you want.
Using a flat iron takes more time than a curling iron. You need to clamp, twist, and slide each section carefully. However, you get more styling control and can make different curl shapes with one tool.
| Feature | Flat Iron | Curling Iron |
|---|---|---|
| Heat Contact | Both sides of hair strand | One side via heated barrel |
| Curl Shape | Compressed, elongated curl | Round, classic curl |
| Time to Curl | Longer, needs careful twisting | Shorter, wrap and hold |
| Heat Settings | Often adjustable up to 450°F (230°C) | Varies, some with less control |
| Best for | Custom curl shapes; long-lasting results | Quick styling; loose or tight curls |
| Price Range | $40 to $150+ for quality brands | $20 to $100+ depending on brand |
Heat is important in both tools but manages hair differently. Flat irons press heat deep with two plates, which helps curls hold.
Curling irons focus heat on the barrel’s surface. So curls feel lighter but may not last as long.
Flat irons offer more curl style options. You can make sleek waves or tight curls by changing grip and angle.
Curling irons usually give one curl type per barrel size. Choose a barrel around 1 inch for versatile curls.
Not everyone needs a flat iron for curls. Choose a curling iron for quick curls or very fine hair. It heats only one side, which can protect your strands.
This can reduce damage compared to other tools. Flat irons work better on medium to thick hair to shape curls neatly.
Advanced Tips and Professional Techniques to Master Curls
Customizing curls using a straightening iron depends on your hair’s texture and length. Different methods work better for fine, coarse, or short hair. Variations like rope twists and S-waves add unique styles and texture to your curls.
Curling Coarse Versus Fine Hair Tips
Coarse hair needs higher heat to hold curls, usually between 350°F and 400°F. Use smaller sections to make sure the heat reaches every strand. Fine hair can burn easily at high heat. So keep it below 350°F and use a heat protectant spray.
For coarse hair, take your time. Hold the flat iron on each section about 5 seconds. This helps the heat work better.
Fine hair curls best if you clamp and twist quickly to avoid heat damage. Adjust the speed of sliding the iron down your hair to control the curl tightness.
Techniques for Short or Layered Hair
Short hair curls require smaller sections and a narrow flat iron, about 1 inch wide. Tilt the iron vertically and twist it slowly to create curls that blend well with layers.
Your hair is very short. Try curling just the ends to add a soft bend.
For layered hair, curl the top layers away from your face. Curl the bottom layers toward your face. This creates a balanced look.
This adds volume and natural flow. Avoid holding the flat iron too long on short layers. They heat up quickly and can get damaged.
Creating Rope Twists and S-Wave Curls
Rope twists start by twisting two hair strands the same way. Then curl them together with the flat iron. This makes a tight, textured curl.
This creates a tighter, textured look. Hold the flat iron steady and slide slowly to set the twist well.
S-wave curls need you to clamp the hair. Then bend it one way and back the other. Keep alternating these bends to shape the waves.
Slide the straightener down with controlled movements to form smooth S shapes. This style works well on medium to long hair for a natural, beachy texture.
Always finish with a light mist of hairspray to lock curls and reduce frizz.
Step-by-Step Action Plan
Follow these steps to start curling your hair with a straightening iron confidently. You’ll see curls form that last all day with simple practice.
- Before you begin: Wash and dry your hair completely. Dry hair holds curls better and avoids damage.
- Preparation phase: Apply a heat protectant spray evenly. Strands feeling coated means you applied enough protection before styling.
- Sectioning time: Divide your hair into small, even sections. You’ll find curling easier and neater this way.
- First pass: Heat your straightener to the right temperature for your hair type. Test on one section to see if curls form.
- Curling session: Clamp the iron near your roots. Twist it away from your face. Then slowly glide the iron down. The hair should curl smoothly without pulling.
- Cool down: Let each curl cool before touching it. Curls that cool well last longer and hold shape.
- Finishing touch: Use a lightweight hairspray or curl-setting spray. Check if curls hold but still feel soft and flexible.
Frequently Asked Questions
How Long Does It Take to Curl an Entire Head with a Flat Iron?
Curling hair with a flat iron usually takes about 10 sections or less. It’s a fast process ideal for quick styling before an event or work.
Can You Curl Hair with a Flat Iron Without Creating Creases?
Yes, avoid squeezing the flat iron too tight to prevent creases. Hold your hair gently and keep even pressure throughout the curl.
What’s a Good Technique to Control Curls While Using a Flat Iron?
Hold the ends of your hair firmly as you feed it through the iron. This helps keep control and an even curl pattern without tangles.
Can You Re-Curl Hair with a Flat Iron If the Curl Loosened?
Yes, you can reheat the section and twist the iron again gently to redefine the curl. Using fingers to spin the curl helps shape it.
Is It Harder to Learn Wrist Movement or Hair Sectioning When Curling with a Flat Iron?
Wrist movement is often trickier than sectioning hair for beginners. Practice twisting the iron 180 degrees to get curls without frustration.
What Types of Curls Can I Make with a Flat Iron Besides Normal Curls?
You can create flicks, waves, and rope twists using a flat iron. Each style just requires a slightly different angle or twist of the iron.
Final Thoughts
Curling your hair with a straightening iron takes some practice but gets easier fast. Start with small sections and protect your hair well. Next, try creating different curl shapes to find your favorite look.