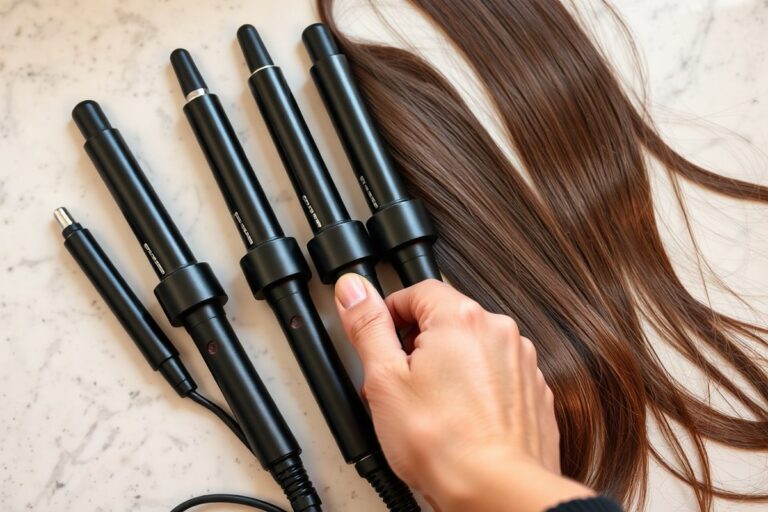
How to Make Hair Curlier: 8 Essential Ways for Defined, Lasting Curls
How to make hair curlier starts with keeping your strands healthy and hydrated. Dry, damaged hair rarely curls well, so focus on gentle care and moisture-rich products. Avoid harsh shampoos and use a conditioner designed for wavy or curly hair.
Next, trim your hair regularly to remove split ends and boost curl shape. Even a quarter-inch trim every 4 to 6 weeks makes a noticeable difference. Fresh ends reduce frizz and help your waves look more defined and bouncy.
Styling tools also play a big part in curliness. Use a diffuser on low heat. Dry your hair until it’s mostly dry.
Aim for about 80% dry to improve waves. Avoid rough towel drying, which can flatten curls and cause frizz.
Key Takeaways
- Trim hair every 4 to 6 weeks, even just a small amount.
- Use conditioners made for curly or wavy hair to add moisture.
- Dry with a diffuser on low heat until hair is 80% dry.
- Avoid rough towel drying to reduce frizz and flattening.
- Skip harsh shampoos that strip natural oils and cause dryness.
- Protect hair from heat damage with the right temperature settings.
1. How to Make Hair Curlier Without Damage

Improving your curls without heat keeps hair healthy and prevents damage. Using the right products and techniques helps your natural waves or curls pop. Avoid rough towels and brushing your hair dry to keep curl clumps intact.
Scrunching your hair when it’s wet helps encourage curl formation. Diffusing dries hair faster and tightens curls without the frizz that air drying might cause. Applying curl-friendly products locks in your curl pattern and adds hold.
Follow these steps to make your hair curlier without heat while protecting it:
- Shampoo and condition gently. Use sulfate-free shampoo and moisturizing conditioner. This reduces damage and keeps hair soft.
- Spray heat protectant on wet hair. Even without heat styling, this shields your hair from drying effects and frizz. Let it air dry for a few minutes.
- Apply curl-improving cream or mousse. Use a small amount. Flip your hair forward and rake the product evenly through with your fingers.
- Scrunch your hair gently upward. Use your hands to squeeze curls toward your scalp. Avoid gripping too tight, which can break curls.
- Plop with a microfiber towel or cotton T-shirt. Wrap your hair to soak up water and keep curls in place. Leave it on for 10 to 20 minutes.
- Diffuse on low heat with cool air. Flip your hair forward and use a diffuser with over 90 air vents. This speeds drying without overheating and tightens curls.
- Finish with a lightweight hairspray or curl gel. This holds curls all day without making them stiff or crunchy.
- Trim hair every 4 to 6 weeks. Removing damaged ends reduces weight that pulls curls down and lets curls bounce up.
Products like lightweight gels and curl creams give your curls hold. Mousse also works well to shape curls without heaviness. These products keep your curls defined but soft.
Avoid heavy or greasy products that can flatten curls. Plopping curls reduces drying time compared to air drying.
It helps curls stay tight and well-defined. Diffusing also speeds drying and keeps curl shape.
Scrunching folds your hair upward, encouraging natural curl clumps to form. You’ll see wet curls start shaping this way. Air drying can cause frizz and loose curls.
Diffusing controls frizz and dries hair faster than air drying. It locks in curl shape and maintains volume. This method works best for wavy and curly hair.
2. Choosing the Right Haircut to Boost Curl Definition

A haircut shapes how your curls spring up and look. Hair that’s too long weighs curls down, pulling them into looser waves. Trimming just a quarter of an inch (0.64 cm) every 6 to 8 weeks helps keep curls bouncy and defined.
Layering can boost curl tightness, too. It removes some weight from heavy sections, letting curls form without being stretched flat.
Specialized dry curl cuts shape each curl individually. So the haircut fits the pattern, not just the overall length.
Get trims regularly before split ends form, especially if your curls appear uneven. Ends typically loosen curls, while hair closer to the scalp stays tighter. A good trim evens this out and can help curls look fresher and more alive.
Don’t skip trims just because you want to keep length. Weight from long hair flattens curls more than a small cut does.
3. Guidelines for Using Heat Tools to Create Curls Safely
Use curling irons, wands, or rollers to curl your hair. Adjust the heat setting to a safer level. Always protect your hair before using heat tools.
Match the heat to your hair texture and follow a careful curling routine. This helps avoid damage and keeps your curls looking fresh longer.
Heat Settings by Hair Texture
Every hair type needs different heat to curl without harm. Use lower heat for fine or damaged hair and higher heat for thick or coarse hair. Setting your tool between 265°F and 350°F usually works well for most textures.
Precision heat controls let you choose the perfect temperature. Avoid guessing to stop frying your hair. Start low, then increase if curls don’t hold.
| Hair Texture | Recommended Heat Setting (°F) |
|---|---|
| Fine or Damaged | 265 – 300 |
| Normal or Medium | 300 – 350 |
| Thick or Coarse | 350 – 450 |
Hotter temperatures work faster but risk damage if overused. Keep heat sessions short and never skip protection steps.
Comparing Curling Tools and Their Effects
Curling irons use a clamp to hold hair while curling, giving glam waves. Wands don’t have clamps and create loose, natural waves. Hot rollers give volume and curls when left in place as hair cools down.
For tight, spiral curls, curling irons are best. Wands suit soft, beachy waves. Rollers take longer but make curls last hours without direct heat during styling.
Choose a tool based on your desired curl shape and time you can spend. Each tool requires heat protection and careful handling to avoid damage.
Steps to Protect Hair During Heat Styling
- Start with clean, dry hair and apply heat protectant spray evenly.
- Set your tool to the right temperature based on your hair texture.
- Curl small sections and hold the hair wrapped around the tool for 8 to 12 seconds.
- Release curls gently without pulling or combing to keep the shape.
- Allow curls to cool completely before touching or styling further.
Taking these steps limits heat damage and helps curls last longer. Avoid doing this on wet hair to prevent frying and breakage.
Curling Method: Spiral vs Loose Curls
For tight spiral curls, wrap hair fully around the curling tool and hold for 10 seconds. Use a small barrel size for detailed ringlets. This method works best on dry, prepped hair.
Loose curls or beach waves need a half-turn wrap and shorter heating time. Use a larger barrel curling wand or iron clipped loosely for soft, flowing waves. You can create this look quickly for an everyday style.
Adjust the curling time and tool size depending on your hair length and texture. Always cool your curls before touching them to keep their pattern.
4. The Role of Hair Texture and Porosity in Curling Results
Hair texture shapes how curls form and hold. Fine hair often struggles to hold curls because it’s lighter and more delicate. Thick or coarse hair tends to hold curls longer due to its weight and structure.
Using a curling rod on a low heat works best for fine hair. Coarser hair, however, can handle higher heat settings to achieve stronger curls.
Hair porosity matters too because it affects moisture retention, which influences curl bounce and frizz. Low porosity hair repels water and products. So you might need lightweight moisturizers to avoid weighing curls down.
High porosity hair absorbs moisture quickly but loses it fast, causing dryness and damage. Conditioning helps maintain hydration without heavy buildup, especially for fine hair. Keep products light to prevent curls from drooping or looking flat.
Damaged hair loses elasticity, making curls loose or limp. Heat damage or overprocessing breaks the hair’s protein, reducing its natural curl pattern. You can improve curliness by avoiding harsh heat and deep-conditioning regularly.
Restoring protein and moisture balance helps curls spring back, although full recovery takes time. Using heat protectants before styling and limiting heat tool use prevents further damage and curl loss.
For everyday curling, prepare hair wisely based on your texture. Fine hair benefits from mousse before blow-drying and heat protection to lock in shape without weight. Curl smaller sections to get tighter, longer-lasting curls.
Thick hair may need bigger sections and more heat for defined curls. Curling works better on the second or third day after washing.
Hair holds shape well when it’s not freshly shampooed. This helps curls last longer.
Porosity also guides product choices. High porosity curls need richer creams or oils to seal moisture. Low porosity curls prefer lighter gels or sprays to avoid stiffness.
Testing small amounts helps you find the right balance. Overloading curls can cause them to drop or feel crunchy. Adjust your routine when curls look limp or frizzy, switching products or limiting buildup.
5. How to Combine Products for Strong, Long-Lasting Curls
To get strong, long-lasting curls, start with a good base of moisture. Layer your products from light to heavier textures to avoid weighing hair down. Start by adding moisture to your hair.
Then, work on defining your curls. Finish with a product that locks in hold and shine.
Start with Moisturizing Leave-In Conditioner
Apply a leave-in conditioner to damp hair, focusing on the mids and ends. This adds moisture and softness, which curls need to bounce up nicely without frizz. Use your fingers to comb the product through gently, starting at the ends and moving upward.
Lightweight leave-in conditioners work best to avoid heavy buildup, especially on fine hair. Skip heavy conditioners or thick creams here.
They can weigh your hair down and flatten your curls. Spritzing a water-based leave-in can refresh curls between washes, too.
Apply Curl-Defining Creams or Gels
Next, use a curl cream or gel designed for hold. These products help shape your curls and keep them from falling flat during the day. Apply after the leave-in, so your hair stays moisturized underneath the styling product.
For best results, flip your head over and scrunch curls upward with your hands. Work gel or cream evenly but avoid roots to prevent greasiness.
Strong-hold gels are better for refining tight curls. Creams work well for soft waves and looser curls.
Seal with Lightweight Oils or Serums
A light oil or serum after your styling products seals in moisture and reduces frizz. Use just a pea-sized amount to smooth the surface of your curls, focusing on ends. Avoid heavy oils, which can weigh curls down and make hair look greasy.
This step gives your curls a shiny finish and helps them last longer without crunchiness. Look for oils like argan or jojoba that absorb quickly without adding weight. Apply after your hair is mostly dry for the best hold and softness balance.
Avoid Overloading Fine or Limp Hair
When your hair is fine, avoid thick creams. Heavy conditioners can weigh your curls down.
Use light, water-based leave-ins and gels with medium hold instead. Overusing product can cause buildup and limp curls that lose their bounce.
Also, avoid applying gel before a cream or conditioner. The denser product won’t moisturize hair well this way, leading to dryness and frizz. Apply products in this order: leave-in conditioner first.
Then use curl cream or gel. Finish by applying oil or serum for healthy curls.
- Apply leave-in conditioner to damp hair first
- Layer curl cream or gel after for definition
- Seal with a lightweight oil or serum
- Skip heavy creams if hair is fine or limp
- Use fingers to comb, not brushes, to reduce frizz
- Scrunch curls upward to boost bounce
- Avoid product buildup with occasional clarifying shampoo
Applying gel before cream stops hair from getting proper moisture. Follow the right order to keep curls healthy and shaped.
6. Common Mistakes That Flatten or Damage Curls and How to Fix Them
Curls lose their shape when you damage hair or disturb curl patterns. Brushing dry curls or waves breaks clumps and creates frizz. Heat tools can damage strands if the temperature is too high or used too often.
To keep curls popping, avoid brushing your hair when dry. You can finger-comb or use a wide-tooth comb while hair is wet. This helps keep curl groups intact and reduces frizz.
High heat melts curls and weakens hair. Use your curling iron on medium settings, between 300°F and 350°F works for most wavy hair. Avoid holding the iron on each section for more than 10 seconds.
- Don’t brush curls when dry; finger comb or wide-tooth comb wet hair
- Use curling irons at 300°F to 350°F to protect your hair
- Limit curling iron use to avoid heat damage
- Blow-dry hair with a diffuser and curl hair upward for tighter curls
- Apply heat protectant spray before heat styling
- Don’t over-wash hair; dry scalp oils help curls hold
- Sleep on a silk pillowcase to reduce breakage and frizz
Blow-drying with a diffuser while lifting curls encourages tighter shapes. Always apply a heat protectant spray first. This layer guards your strands from heat damage and keeps curls shiny.
Frequent heat styling dries out your hair. Try to limit it to two or three times a week. On no-heat days, apply gel or curl cream to your hair.
Let your hair air dry to keep curls defined. This avoids heat damage and keeps curls healthy.
7. Using Overnight and Heat-Free Methods to improve Curl Definition
You can boost curl definition without heat by using simple, gentle methods. Protective styles, plopping, sock curls, and braiding shape curls while keeping hair healthy. These techniques save time and reduce damage.
Plopping and Microplopping Techniques
Plopping lets your hair dry in its natural curl pattern on top of your head. It removes excess water while preventing frizz and flattening. Microplopping focuses on smaller sections, improving tighter curls or waves.
Plop your hair with a lightweight, absorbent t-shirt or microfiber towel. This keeps curls intact and frizz-free without rough rubbing that causes damage.
- Apply styling product evenly to wet hair, like curl cream or gel.
- Flip your head forward and place hair in the center of the towel.
- Fold the bottom edge of the towel over your neck.
- Wrap the sides of the towel around your head and twist tightly.
- Tuck loose ends under the wrap securely.
- Leave the towel on for 20 to 40 minutes to absorb water.
- Remove carefully and let hair air-dry or diffuse gently.
Plopping works best on wavy or curly hair types and avoids flat roots. Overdoing it can dry out your curls.
Leaving the towel too long may cause kink marks. Both can harm your curl shape.
Braiding or Twisting Hair for Curl
Braiding or twisting damp hair helps create natural curls without heat. These styles stretch smaller sections and encourage curls as hair dries. The size of the braids or twists affects how tight your curls become.
You can refresh curls by undoing braids and scrunching hair lightly. These methods are gentle and great for second-day hair, avoiding washing and heat.
- Start with damp hair and apply a curl-improving product.
- Divide hair into sections, depending on your preferred curl size.
- Braid or twist each section tightly but comfortably.
- Secure ends with small hair ties or clips.
- Leave braids or twists overnight or at least 4 to 6 hours.
- Undo gently, starting from the bottom to avoid breakage.
- Scrunch curls lightly and set with a light hold spray.
Thicker braids create looser waves, while thin braids give tighter curls. Avoid braids that are too tight as they may cause breakage.
Sock Curling Hack for Heat-Free Curls
Sock curling is a clever way to get tighter curls without heat or tools. Use clean, soft socks twisted around sections of damp hair. This method shapes curls overnight, resulting in bouncy waves or ringlets.
It’s inexpensive and gentle, making it ideal for delicate hair prone to heat damage.
- Cut a pair of clean cotton socks into long strips.
- Apply a curl-improving moisturizing product to damp hair.
- Divide hair into sections about 2 inches wide.
- For each section, roll hair around the sock strip.
- Twist the ends of the sock strip tightly to secure.
- Sleep with the socks in place overnight.
- Remove socks carefully in the morning and separate curls with fingers.
Wet hair works best for sock curls because it holds the shape as it dries. Make sure the socks are not too tight to avoid tension on your scalp.
Protecting Curls Overnight with Silk
Using silk or satin pillowcases and scarves protects curls from friction and frizz overnight. These materials keep hair smooth and retain moisture better than cotton. This reduces breakage and helps curls stay defined.
You can wrap your hair in a silk scarf or bonnet before sleep. Loose, gentle styles avoid flattening curls while you rest.
- Choose a silk or satin pillowcase or scarf for sleep.
- Apply a light leave-in conditioner or curl refresher before bed.
- Gather hair loosely into a high puff or pineapple on top.
- Wrap hair with the scarf or bonnet without pulling tight.
- Secure with a hair tie or pins if needed, ensuring no tension.
- In the morning, remove the wrap gently and fluff curls.
This routine minimizes frizz and keeps curls bouncy without washing. Avoid tight wraps or heavy products that weigh curls down overnight.
8. When to Consult a Professional for Permanent Curl Enhancements
Chemical treatments like perms are a way to make hair curlier for about six months. They work by changing your hair’s structure to hold curls longer than natural waves. You might want a perm for semi-permanent curl changes.
It needs upkeep and can affect your hair’s health. Consider these before deciding.
Talk to a professional for lasting curl changes. This is key if other styling methods don’t work well. They know how to handle your hair.
Professionals assess hair health and texture before suggesting a perm, which helps avoid damage. Your stylist might suggest deep conditioning or protein to fix damage first. This gets your hair ready for curls.
A typical perm session takes two to three hours. The stylist applies chemicals that break and reform hair bonds to create curls.
After, you’ll need to avoid washing your hair for 48 hours to let curls set fully. Costs usually range from $70 to $150 depending on your salon and hair length.
Good results show shiny, bouncy curls that last several months without feeling stiff or brittle. You should expect some maintenance like using curl-friendly shampoos and hydrating treatments.
Dry, breaking curls mean time for a stylist visit fast. This helps stop damage from getting worse.
Don’t try a perm at home. Improper use can lead to serious hair breakage or scalp burns.
Step-by-Step Action Plan to Boost Your Curls
Follow these clear steps to make your hair curlier without damage. Check your curls after each phase to see the results.
- Before you start: Choose a moisturizing curl cream suited for your hair type. If your hair feels dry, curls will be frizzy and less defined.
- Day 1: Wash hair with a sulfate-free shampoo and apply a leave-in conditioner. Well-hydrated hair holds curls better and reduces frizz.
- After washing: Use a wide-tooth comb to detangle gently. Avoid brushing; your curls stay intact and don’t break.
- Day 2: Apply curl-improving gel before scrunching your damp hair upward. Curls should look tighter and springier once dry.
- Before bed: Pineapple your hair by loosely securing it on top of your head. This preserves curls overnight without flattening.
- Week 1: Try a heat-free curl method like twist-outs or flexi-rods. You want more curl definition without the heat damage.
- Week 2: Trim ends if curls look uneven or weighed down. A layered haircut can boost bounce and shape.
- After 3 weeks: Assess your hair porosity and adjust products for moisture or protein as needed. Healthy hair curls better and lasts longer.
Frequently Asked Questions
Can I Make My Hair Curlier by Adding Moisture?
Yes, moisture helps define curls. Using hydrating conditioners and oils keeps curls bouncy and less frizzy.
Are There Natural Oils That improve Curliness?
Black castor oil can make hair curlier. Apply it lightly to boost curl clumps and add shine.
Does Brushing My Hair Make Curls Tighter?
No, brushing usually breaks up curls and causes frizz. Use fingers or a wide-tooth comb when dry.
Can Sleep Position Affect My Curls?
Yes, sleeping on a silk pillowcase or using a satin bonnet protects curls. It reduces frizz and breakage.
Is It Okay to Apply Gel to Dry Hair for More Curls?
Applying gel to damp hair gives better curl definition. Dry application may cause flaky buildup.
Does Cold Water Help in Making Hair Curlier?
Rinsing hair with cool water closes cuticles, added shine. It may make curls look more defined.
The Bottom Line
Adding curliness takes patience and the right care. Start by using gentle products and protecting your hair. The first step is picking products that suit your curl type right now.