How to Make Your Hair Curly: 8 Effective Methods with Expert Tips
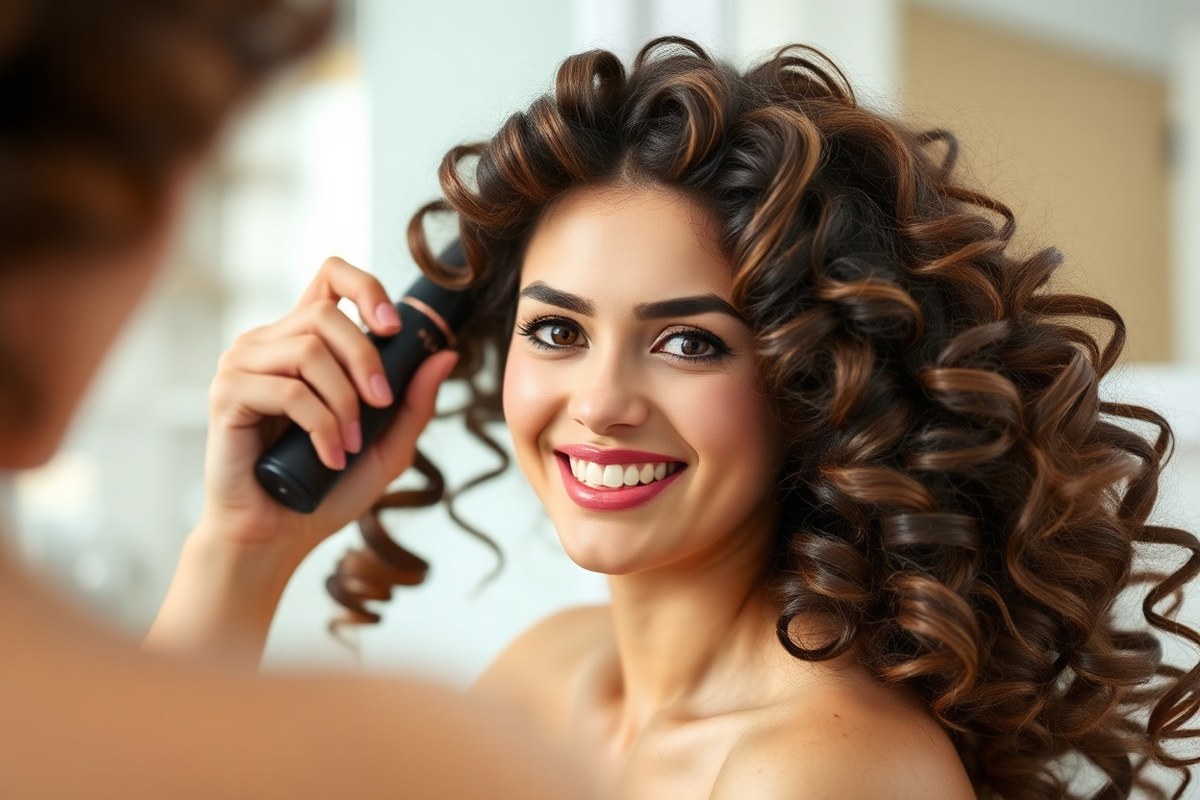
Knowing how to make your hair curly starts with choosing the right method. You can create curls quickly using heat tools or try gentle heatless ways for softer waves. The key is to prep your hair well first.
Then adjust your technique. Base it on your hair type and texture.
Start by washing your hair and letting it dry until about 70 to 80 percent dry. This makes it easier to curl without causing damage or frizz. Using the right temperature on hot tools prevents burning your hair while still making lasting curls.
You can try heatless curls by twisting or braiding damp hair. Let these sections dry all by themselves.
This approach helps avoid damage but needs more drying time. Either way, being patient with your hair’s drying and styling process brings the best results.
Key Takeaways
- Wash hair and towel dry until about 80% dry for curling.
- Use 300-350°F heat for fine hair; 400-450°F for coarse hair.
- Section hair in 1-2 inch pieces for tighter curls.
- Turn the curling tool 180 degrees away from your face when styling.
- Air dry 90% before diffusing to boost natural wave formation.
- Avoid curling damp hair with hot tools to reduce heat damage.
1. How to Make Your Hair Curly at Home Quickly

To curl your hair quickly at home, a curling iron is your best bet. Use a 1-inch curling iron for spiral curls. Use heat protectant spray on your hair before styling.
It protects from damage. It also helps your curls stay longer.
Curling takes between 15 and 30 minutes based on your hair. Choose iron heat by hair type. Use 300-350°F for fine hair.
Pick 350-400°F for normal hair. Use 400-450°F for coarse hair.
Here’s a simple step-by-step to get fast, defined curls with a curling iron:
- Apply heat protectant spray to dry hair. This shields strands from heat damage.
- Divide your hair into 4 to 6 sections. This makes curling easier and faster.
- Take a 1-inch-wide section of hair. Clamp the curling iron near the roots, about eyebrow level.
- Wrap hair flat against the curling iron barrel away from your face. Avoid twisting the strand.
- Hold for 8 to 12 seconds, then gently release the curl.
- Repeat for all sections until all hair is curled.
- Let curls cool completely. This sets them and helps them last longer.
- Finish with light hairspray or curl-improving cream to add definition and reduce frizz.
Not wrapping the hair flat can cause uneven curls or frizz. Holding the iron too long risks heat damage, so time it well. Using the right temperature helps curls hold without frying your strands.
Keep heat low on fine hair. High heat can make curls drop fast. Thicker or coarser hair usually needs heat around 400 degrees to curl well.
When you prep well, quick curls shine and last a few hours. Don’t touch curls while they cool down.
2. Choosing the Best Curling Method for Your Hair Type

Not all hair types hold curls the same way. Fine hair struggles more with holding curls.
Coarse or thick hair tends to keep curls longer. Using the right method helps your hair keep curls and avoid damage.
Heat settings should match your hair texture to prevent burning or dryness. Use a lower temperature around 400°F for fine hair. Thicker or coarse hair can handle higher heat, about 425°F, for stronger hold.
The table below matches hair types with the best curl methods and heat advice. These choices fit most people’s needs for lasting curls and less breakage.
| Hair Type | Best Curl Method | Heat Setting | Notes |
|---|---|---|---|
| Straight (Type 1) | Heat curling iron, Bantu knots | 400-425°F | Needs strong products for hold, heat damage risk |
| Fine | Ponytail Method, Velcro Rollers | Max 400°F or heatless | Gentle methods prevent strand stress |
| Wavy / Naturally Curly | Bantu knots, Paper Towel Method | Low to moderate for touch-ups | Prep with heat protectant, avoid high heat |
| Coarse / Thick | Bantu knots, Paper Towel Method, heat curling | Up to 425°F | Can use higher heat for tight curls |
Choosing a method that fits your hair texture avoids frustration. Fine hair curls look soft and stay longer with heatless rollers. Coarse hair gets tight, defined curls from Bantu knots or paper towel wraps.
Heat can dry and damage naturally curly hair if overused. Use heat only for occasional styling. Always prep with a heat protectant spray to keep curls healthy and frizz controlled.
Hold the curl in your hand. Keep it until it cools down. This helps lock the shape, especially if curls don’t hold well.
3. Step-by-Step Heat Curling Techniques
Heat curling tools like curling irons, wands, and flat irons can create beautiful curls at home. Each tool works differently.
Using the right technique helps shape curls and protect your hair from damage. Follow these steps and tips to curl your hair safely and get lasting results.
Using a Curling Iron or Wand
Curling irons and wands heat your hair to bend it into curls or waves. Wands don’t have clamps, so you wrap hair around the barrel. Irons have clamps that hold hair in place for even heat application.
A 1-inch barrel is the most versatile since it can create both tight and loose curls. Choose a ceramic or tourmaline-coated tool to reduce damage and frizz.
Because curls loosen over time, use a smaller barrel than your desired curl size. Start with dry hair and always apply heat protectant first.
- Spray heat protectant evenly on dry hair to guard against damage.
- Divide hair into 1-inch sections to ensure uniform curling.
- Start curling a few inches from your roots. Clamp the curling iron or wrap hair around the wand. Hold it steadily to form the curl.
- Hold the hair on the barrel for 8 to 12 seconds without overheating.
- Release the hair and let the curl cool without touching.
- Repeat for all sections, curling away from the face for a natural look.
- Finish with a light mist of hairspray to hold curls longer.
How to Curl Hair with a Flat Iron
Flat irons can curl hair by twisting or bending it as you pull the iron down. The result is a sleek curl or wave, especially smooth on straighter hair.
Use a 1-inch flat iron for better curl control. Curl tighter sections for more defined curls and larger sections for loose waves.
Start with clean, dry hair and protective spray. Take a 1-inch hair section near your roots.
Clamp it and turn the iron away from your face. Slowly move the iron down the hair.
- Apply heat protectant spray to dry hair for protection.
- Separate hair into 1-inch wide sections for curling.
- Clamp the flat iron near the roots of a section, without pulling tight.
- Twist the iron away from your face while slowly sliding down the hair.
- Release the curl gently and let it cool before touching.
- Continue until all sections are curled.
- Use a smoothing serum to reduce frizz and define curls.
Protecting Hair from Heat Damage
Heat styling can cause dryness, breakage, and frizz if you don’t protect your hair. Always coat your hair with a heat protectant spray before curling.
Choose tools made of ceramic or tourmaline, which emit gentler heat. Keep your tool’s temperature below 350°F, especially for dry or curly hair.
Avoid curling the same section multiple times. Give curls time to cool before touching to help them set. Hydrating your hair regularly also reduces damage over time.
4. Effective Heatless Methods to Create Curls
Heatless curling methods protect your hair and create a natural look. Bantu knots, twist-outs, braids, and rollers each suit different hair types and curl styles. These methods mainly need damp hair, some patience, and a night to set curls without damage.
Bantu Knots for Defined Curls
Bantu knots form tight, springy curls by twisting small hair sections into mini buns. This method works best on damp hair and is ideal for those wanting well-defined, bouncy curls. The knots dry overnight, so plan to sleep with them.
- Start with clean, damp hair, detangled and moisturized.
- Divide your hair into 1- to 2-inch sections depending on curl size.
- Twist each section tightly from root to tip.
- Wrap each twist around its base to form a small bun.
- Secure each knot with a bobby pin or small elastic.
- Let your hair dry completely, ideally overnight.
- Undo the knots carefully and separate curls with fingers.
Bantu knots give you tight, springy curls, but twisting too loosely makes them frizzy. Larger sections mean bigger curls. You might want to lightly moisturize before twisting to reduce frizz.
Twist-Out Method for Natural Texture
Twist-outs stretch hair and form soft, natural curls that last for days. This method works well for medium to coarser hair textures and improve natural curl patterns. Use it on damp hair to lock in moisture and curl shape.
- Apply a leave-in conditioner or curl cream to damp hair.
- Divide hair into medium-sized sections, about 2 inches wide.
- Twist each section by wrapping two strands tightly around each other.
- Secure the ends with small rubber bands if needed.
- Allow hair to dry overnight or fully air-dry for several hours.
- Undo each twist gently and separate curls with your fingers.
Twist-outs create softer curls and volume, lasting 3 to 4 days if protected at night. Finer hair may need smaller sections or extra product. Avoid rushing the drying time to prevent frizz.
Overnight Braids and Roller Sets
Braids and rollers offer versatile curl sizes from loose waves to tight spirals. Braids are simple and suit wavy or curly hair.
Rollers work well for straight to wavy types. Both require dry, brushed hair and a full night to set.
- Start with towel-dried, detangled hair.
- For braids, divide hair into 2 to 6 sections depending on desired wave tightness.
- Braid each section tightly and secure ends with elastics.
- For rollers, select the largest size for loose curls or smaller for tighter curls.
- Wrap 1-inch hair sections around rollers, rolling towards roots.
- Secure rollers with clips or pins to keep them tight.
- Sleep with rollers or braids overnight for best results.
- Remove braids or rollers gently and fluff curls with your fingers.
Braids cause waves, not tight curls, and suit all hair types. Rollers create more defined curls but need practice for even wrapping. Both methods help keep your curls intact overnight.
Cover your hair with a silk scarf or bonnet for better protection. This reduces friction and keeps curls from getting messy.
5. How to Prep and Care for Curly Hair
Start your curly hair care by washing it less often to prevent dryness. Curly hair is naturally drier. So using conditioner every time you wash helps reduce frizz.
Let your hair air-dry or towel dry it gently first. Stop when it is about 70-80% dry.
Only then start styling your hair. This moisture level helps curls form better without weighing them down.
Choose styling products designed for curly hair, like curl creams and anti-frizz serums. Curl cream provides hydration and defines curls without heaviness. An anti-frizz serum like Garnier Fructis Sleek &.
Shine helps smooth coarse strands and adds shine. Applying a light hold hairspray after styling locks in the shape without stiffness.
Dry your hair carefully to protect your curl pattern. Avoid brushing dry curls because it breaks up the pattern and causes frizz. Instead, use a wide-toothed comb on wet or damp hair.
Blow-dry small sections of hair at a time. Twist each section around a round brush.
Use warm air while doing this. This method sets curls gently without roughing up the strands.
- Wash hair 1 to 3 times per week, depending on oiliness and activity
- Always condition after shampooing to replenish moisture
- Pat hair with a towel instead of rubbing to avoid frizz
- Use curl cream on damp hair to define curls before drying
- Apply anti-frizz serum on coarse hair for smoother curls
- Blow-dry with a round brush, twisting hair around it for shape
- Finish with a light mist of hairspray to hold curls all day
Don’t touch your hair while it’s drying. It only causes frizz and messes up curls.
Waiting until your curls are almost dry before styling reduces heat damage risk. For heat styling, hair must be 100% dry to minimize damage. Some curly hair products don’t have sulfates.
For example, L’Oréal Evercurl Curl Care Spray. It moistens hair without stripping oils. Following these steps keeps your curls healthy and helps them hold their shape through the day.
6. Maintaining and improving Natural Curls over Time
Maintaining and improving your natural curls takes regular care and some training. Curl training helps your hair hold its natural shape better over time. A simple weekly routine and the right products can keep curls looking fresh longer.
Understanding Curl Training
Curl training means encouraging your natural hair to form consistent curls without heat or harsh styling. It works by using moisture, gentle handling, and styling techniques that support curl clumping. Over weeks, your hair adapts and curls become more defined and lasting.
Start curl training by limiting shampoo to once or twice a week. Shampoo removes natural oils that curls need to stay hydrated and bouncy. Use a gentle sulfate-free shampoo and deep condition regularly to keep curls soft.
Scrunching your hair when wet helps curls shape and hold better. Avoid combing your hair when dry, which can break up curls and cause frizz. Instead, finger comb or use a wide-tooth comb while conditioning.
Daily and Weekly Curl Care
Maintaining curls means less frequent washing and more daily refreshing. You can keep curls neat for 2 to 3 days with proper care. A weekly routine improves curl shape and health over time without overwhelming your hair.
Here’s a simple weekly curl care routine to follow for better curls:
- Wash with sulfate-free shampoo once or twice per week.
- Apply deep conditioner and detangle hair gently with fingers or wide-tooth comb.
- Rinse with cool water to seal cuticles and reduce frizz.
- Apply a curl-improving cream or gel evenly while hair is damp.
- Scrunch hair upwards to encourage curl formation.
- Air dry about 90%, then use a diffuser on low heat if needed.
- Use an oil-infused spray or light serum to refresh curls between washes.
This routine costs about $10 to $20 weekly depending on product brands. Most of the needed products last several months, spreading out the cost.
Using Diffusers and Scrunching Techniques
Diffusers spread airflow gently, reducing frizz while drying curls. Use the lowest heat and speed settings on your blow dryer. Cup hair sections in your palm and scrunch upwards as you dry to boost curl shape.
Scrunching lifts curls and helps clump strands together naturally. Apply curl creams or gels while your hair is wet and scrunch repeatedly. Avoid touching your curls too much after they dry.
This can cause frizz. It also breaks up the curl pattern.
For curls that fall flat, avoid styling the last 2 inches of your hair. This keeps curls more natural looking and avoids a heavy curl tip. Use a medium-hold hairspray to set curls lightly and keep them fresh longer.
7. Permanent Curl Options: When and How to Get a Perm
Yes, straight hair can become curly with a perm. This process uses chemicals to change hair structure. The curls usually last a few months.
The process starts with washing your hair and then rolling it on rods. Chemicals are applied to break hair bonds so the curls form around the rods. After a set time, usually 15 to 30 minutes, a neutralizer locks the curls in place.
Different perm types suit different hair goals and textures. Cold perms use room-temperature solutions and take about an hour. They work well for fine or normal hair.
Digital perms use heat and take more time. They last longer than regular perms. These create soft curls good for thick hair.
Spiral perms create tight, springy curls, while body wave perms offer loose, natural waves. Choosing the right type depends on your hair type and the curl style you want.
Perms typically last 2 to 6 months, depending on hair growth and care. Avoid washing hair for 48 hours after the perm to keep curls intact. Consider that perms involve strong chemicals, which can dry or damage hair if not done right.
Costs vary widely, often $60 to $200 depending on salon and perm type. Think about your hair condition, lifestyle, and desired upkeep before deciding on a perm.
A perm might not suit very damaged or chemically treated hair. It could cause more harm in that case. Consider your hair’s health before perming.
For fine hair, a body wave perm adds good volume. It can help hair look thicker and full. This style suits people wanting soft waves.
Digital perms suit thicker hair and those wanting softer, bouncier curls. Results depend on rod size, the smaller the rod, the tighter the curls. Leaving ends out during the perm gives a more natural, beachy look.
After a perm, use gentle shampoos and conditioners. Pick products made for curly hair. Avoid heat styling to keep curls healthy longer.
Some people find perms can cause dryness or frizz initially. Good results mean curls hold shape without excessive frizz or damage. A licensed stylist should handle your perm to control chemical use and timing carefully.
8. Common Mistakes When Curling Hair and How to Fix Them
Using the wrong heat setting is a common cause of flat curls or hair damage. Fine or damaged hair needs a lower temperature, usually between 250°F and 300°F. Thick or coarse hair can handle 350°F to 400°F. Too high heat causes breakage, frizz, and curls that won’t hold.
Not prepping your hair properly also ruins curls. Always apply a heat protectant spray evenly before heat styling.
It shields your hair from damage and prevents frizz. Skipping this step leads to dry, brittle strands and dull-looking curls.
Holding curls incorrectly affects how long they last. After wrapping hair around the curling iron, hold it still. Keep the strand wrapped for at least 10 seconds.
This helps set the curl better. Then release the curl gently and let it cool undisturbed. Pulling curls apart or touching them too soon makes them fall flat quickly.
- Use the right heat: 250°F-300°F for fine hair, 350°F-400°F for thick hair
- Always apply a heat protectant before styling
- Hold each curl on the iron for 8 to 12 seconds
- Let curls cool completely before touching or brushing
- Don’t overload hair with heavy products that weigh curls down
- Use a lightweight hairspray to lock curls in place
- Avoid curling hair that’s too wet or too dry for better hold
Never skip heat protectant; it prevents damage and helps fluff-free curls last.
Another mistake is curling hair without the right moisture balance. Your curls look frizzy and won’t last when hair is dry. Too much conditioner or leftover oils make curls limp.
Wash hair using a light shampoo. Then mist it lightly with water. Or use a curl refresher spray before curling.
Too much heat or holding the iron too long causes frizz. It also leads to split ends. Use steady timing and don’t repeat the same section too many times.
To keep curls longer, avoid brushing them too soon. Use your fingers to separate the curls gently instead.
Step-by-Step Action Plan to Get Curly Hair Today
Follow these steps to create curls quickly and keep them healthy. You’ll see the results after each step.
- Before you start: Wash your hair with a curl-friendly shampoo and conditioner. Your hair should feel clean but not dry.
- Right after washing: Towel dry gently by squeezing water out. Avoid rubbing to reduce frizz and damage.
- Within 5 minutes: Apply a curl-improving cream or mousse evenly through damp hair. Check that no spot feels crunchy once dried.
- Next 10 minutes: Use a diffuser on low heat while scrunching your hair. Stop when your hair is mostly dry and curls look formed.
- After drying: Let hair cool fully before touching it. This helps curls set firmly.
- After 1 hour: Use your fingers to gently separate the curls. Avoid brushes or combs to keep shape.
- Before bed: Pineapple your hair (gather on top loosely) to protect curls overnight.
- Next morning: Refresh curls with a small spray of water and light curl cream. Your curls will look revived and soft.
Frequently Asked Questions
What to Put in Your Hair to Make It Curly?
Use curl-improving cream or curl cream to help form curls. These products add moisture and hold, making curls look defined and less frizzy without stiffness.
How Often Should Curly Hair Be Washed?
Wash curly hair 2-3 times per week to avoid drying it out. Curly hair is drier.
Wash it less to keep natural oils. These oils make curls soft.
What Is the Girly Curl Method?
The Curly Girl Method involves avoiding harsh shampoos and using gentle products for curly hair. It focuses on moisture, using conditioners and styling techniques to improve your natural curls.
Does Salt Water Make Hair Curly?
Salt water can add texture and volume to your hair, helping waves form. Sea salt sprays can dry out hair.
Use them only sometimes. Always add moisturizer after.
Can I Make Straight Hair Curly Without Heat?
Yes, heatless methods like the sock or twist method can create curls overnight. They are gentle and don’t cause heat damage. You might need practice for your style.
Will Brushing Curly Hair Make It Frizzy?
Yes, brushing dry curly hair breaks up curl clumps and causes frizz. Use a wide-tooth comb or your fingers on wet hair. This keeps curls smooth and intact.
Key Points to Remember
Making curly hair at home is about timing and caring during every step. Pick the way that fits your hair type and lifestyle. Start using your favorite method today and enjoy your curls confidently.