How to Use Hair Curler with Clamp: A Complete Guide for Perfect Curls
How to use hair curler with clamp is a common question. The best approach is to clamp your hair mid-shaft, not at the ends. This method helps form smooth curls without pinching or damage.
Start with small sections of hair, clamp firmly, then wrap the loose ends around the barrel. Hold the clamp closed just long enough to shape the curl without overheating. Let the curl cool completely before releasing to set it well.
Using the right heat setting matters a lot. Choose a temperature that fits your hair type to avoid damage and get lasting curls. Make sure your hair is mostly dry before using the curler.
It should be about 80% dry to protect it from heat. This helps avoid damage.
Key Takeaways
- Clamp hair 1-2 inches from the ends, then wrap the rest around the barrel.
- Work with small sections for even curls and better control.
- Let curls cool fully before touching or styling to lock in shape.
- Use 250°F-300°F heats for fine or damaged hair to prevent burning.
- Set heat between 300°F-350°F for normal hair for lasting curls.
- Raise heat to 375°F-400°F only for thick or coarse hair.
How to Use a Hair Curler with Clamp Step-by-Step

A clamp hair curler shapes your hair by holding a small section against a heated barrel. This gives more control and defined curls. It’s best to handle small, dry sections for even heat and lasting curls.
Hold the curler vertically with the clamp opening facing you. Place the clamp near your hair roots to secure strands well.
Wrap hair around the barrel away from your face. Keep the iron steady for the right time to set the curl properly.
- Section your hair into small pieces, about 1 inch wide. Smaller pieces make tighter, longer-lasting curls.
- Open the clamp and place it near your scalp, grabbing the section close to the roots. This avoids loose curls at the top.
- Wrap your hair around the barrel carefully. Slide the curler down as you wrap. Always wind the hair away from your face for best look. Keep the clamp closed to hold hair tight.
- Hold the hair in place for 5 to 10 seconds depending on your hair type. Thick hair needs more time; fine hair less.
- Release the clamp carefully and slide the curler out to avoid pulling hair.
- Repeat on all sections, working from the bottom layers up to the crown for uniform curls.
- Let curls cool before touching them to help set the shape long term.
Clamp placement near the roots secures hair and shapes curls better. Wrapping hair away from your face makes curls fall nicely and won’t block your vision.
Holding the clamp too long risks heat damage. Holding it too briefly means curls don’t form well.
For very long hair, use an extra-long barrel. You may need to wrap your strands in parts to avoid overlapping and uneven heat. Some people prefer to wrap hair with the clamp open.
Only close the clamp after wrapping the hair fully. This method gives smoother curls.
Choosing the Right Temperature and Barrel Size for Your Hair
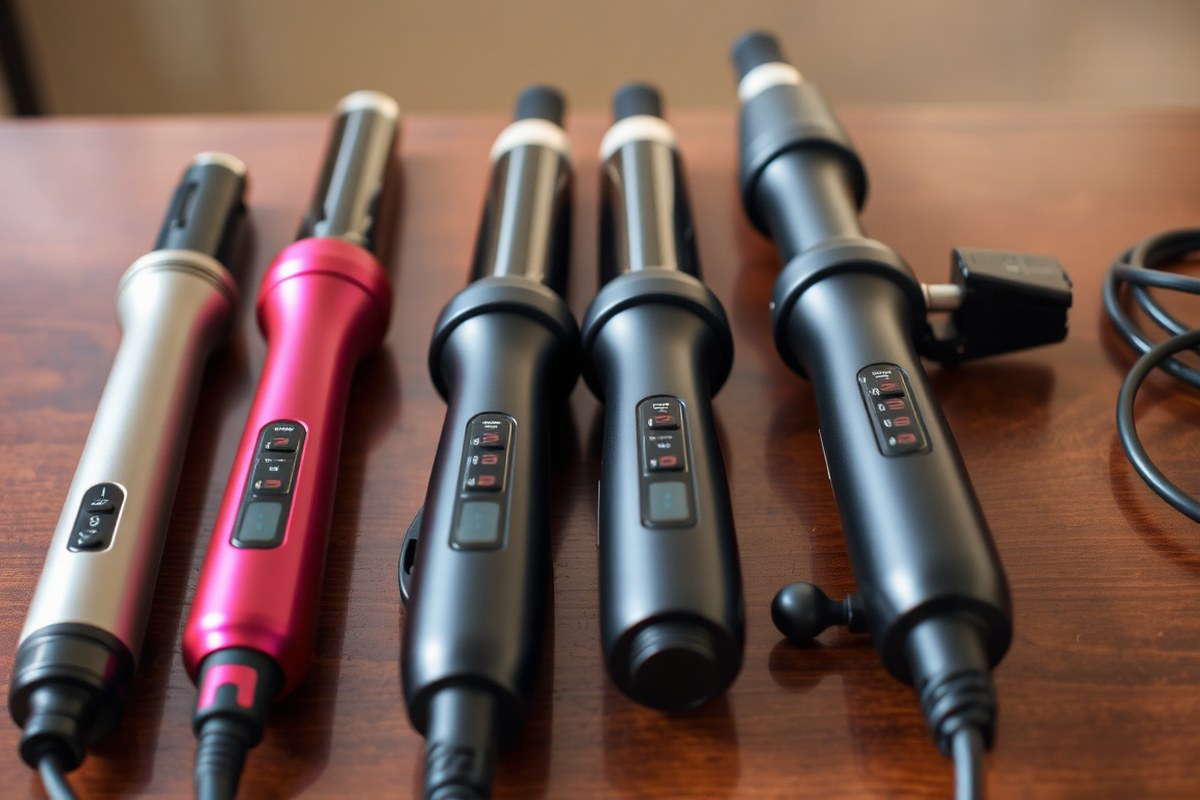
Pick heat and barrel size based on your hair type. Think about the kind of curls you want. This helps get the best results.
Using the wrong setting can cause damage or weak curls. Choosing the right barrel material also helps your hair respond better.
Temperature Recommendations by Hair Type
Fine or damaged hair needs lower heat to avoid burning or breakage. A range of 250 to 325°F usually works well.
Medium hair can handle heat from 300 to 350°F. This range gives good curl hold. It also avoids drying your hair too much.
Thick or coarse hair needs hotter settings, from 350 up to 400°F. This helps curls last longer and penetrate dense strands. Use adjustable heat so you can find the balance between damage and curl strength.
Barrel Sizes and Effects
Smaller barrels around 0.5 to 0.75 inches give tight, springy curls. These are great for short styles or very defined ringlets. Medium barrels measuring 1 to 1.25 inches suit most hair lengths and make classic bouncy curls or waves.
You get loose, relaxed waves with barrels between 1.5 and 2 inches. These are easy to use on longer hair and perfect for beachy, undone styles. Section size also impacts curls, about one-inch sections for tight curls, 2-inch sections for loose waves.
Barrel Material Pros and Cons
Ceramic barrels spread heat evenly, which lowers damage risk and gives smooth curls. They work well on all hair types but are best for fine to medium strands. Tourmaline barrels emit negative ions that reduce frizz and static, making curls shinier and softer.
Titanium barrels heat up quickly and stay hot longer. These work well for thick and coarse hair types. They keep high heat long enough for curls.
This heat helps curls last longer. Titanium is very durable and long-lasting.
But it may be too harsh for fine or fragile hair. Use it carefully on delicate strands.
Here’s a quick look at barrel materials and when to use them. Keep this table handy when picking your curling iron or curler:
| Barrel Material | Best For | Key Benefit |
|---|---|---|
| Ceramic | Fine to medium hair | Even heat and gentle styling |
| Tourmaline | Frizz-prone or dry hair | Reduces frizz and adds shine |
| Titanium | Thick or coarse hair | High heat and durability |
Right barrel size and material make curls hold better. They also give a more natural look. Both matter for great curls.
It also protects your hair from too much heat damage. Remember to start on a lower temperature and work your way up.
Avoid cranking heat to the max right away. Test lower settings to protect your hair.
How to Prep and Protect Hair Before Curling
Never curl wet or damp hair. Using a clamp hair curler on damp hair causes serious damage by boiling moisture inside strands.
This also prevents curls from holding their shape. Always start with fully dry hair to protect it and get the best curls.
Use a heat protectant spray or serum before curling. These products form a barrier that lowers heat damage risk and keeps hair shiny.
Apply evenly from roots to ends on dry hair. Let it dry for a minute before curling to avoid damp sections.
Divide your hair into 3 or 4 sections to make curling easier and faster. It helps you reach every strand evenly without repeating or missing parts. While the curling iron heats up, you can prepare these sections to save time.
- Wash hair 1-2 days before curling to avoid limp curls from greasy hair
- Use a lightweight heat protectant spray on dry hair
- Comb through gently to detangle without breakage
- Section hair into 3, 4 even parts for easy handling
- Check the curling iron’s temperature setting matches your hair type
- Dry any damp spots fully with a blow dryer before curling
Lower temperatures (around 300°F to 350°F) suit fine or damaged hair. Thicker hair can handle 350°F to 400°F. Adjust heat to your hair type for effective curls with less damage. You can test a small strand first to avoid burning or ineffective curling.
Prepping this way saves hair and boosts curl hold. Skipping any step can lead to dry, broken strands or curls that fall out fast.
Take the time for these basics. Your curling results will look better, last longer, and feel healthier.
Techniques to Avoid Clamp Marks and Crimped Curls
Clamp marks happen when you hold hair too tightly between the curler’s metal clamp. These dents show as sharp creases that ruin smooth curls. To fix this, clamp the hair gently.
Use just enough pressure to hold it. Avoid squishing it flat.
Try keeping the clamp open as you wrap the hair around the barrel. Close it only at the end of the wrap. This lowers the chance of sharp clamp dents.
The clamp doesn’t press long. It’s better to keep pressure brief.
Clamp marks can come from holding too long. More than 10 to 15 seconds causes dents. Keep hold time shorter.
That heat and pressure leave a crease. Curl for about 8 to 12 seconds on most hair.
Let hair cool fully before touching curls. Cooling locks in the shape.
Crimped or unnatural curls usually come from wrapping hair unevenly or too tightly around the barrel. Avoid this by wrapping hair smoothly without overlapping strands.
Leave the last 1 to 2 inches of hair out of the clamp for beachy waves. This prevents rigid, crimped ends and gives a softer look.
Short layers show clamp marks more easily. Use lower heat, about 300°F (150°C), and a small ¾ inch barrel. Hold the barrel horizontally or diagonally, clamp facing forward to avoid dents.
Always let curls cool on the barrel before releasing or touching them. Hair is soft and vulnerable right after heating. Cooling locks the curl shape.
It keeps curls bouncy and stops crimping. Don’t comb or touch curls too soon.
Using a spray with heat protection also helps hair stay healthy and flexible. Damaged strands are more likely to hold clamp marks or get frizzy around the curls. Investing in a good heat protectant spray can reduce these problems without extra effort.
Directional Curling: Toward vs. Away from Your Face
Curling hair toward or away from your face changes your look a lot. Toward the face curls make your hair frame your features.
Away from the face curls open your face up, giving a more relaxed style. You pick the direction based on the vibe you want.
To curl toward your face, clamp in the middle of a hair section. Then wrap the hair around the barrel toward your face.
Keep the clamp steady but not too tight to avoid dents or clamp marks. Slide the clamp down slowly as you wrap, so the curl forms evenly.
Curling away from your face starts the same way. Clamp the strand about halfway down. Then wrap the rest around the barrel.
Make sure to point the barrel away from your face. This pulls your hair back gently.
It creates soft waves that lift your hair. The waves keep hair off your face.
For formal or polished looks, curls toward the face give a neat frame. It works well for medium to long hair.
For casual or beachy styles, curling away creates movement and volume. Those curls look great if you want a fresh, natural feel.
Try mixing the directions for a more natural finish. Curl the front hair toward your face, then alternate curls away on other sections. This stops curls from clumping and adds bounce.
Use a clamp with a smooth grip and don’t squeeze too hard. Hard clamping can cause sharp creases in your curls.
Wrap hair slowly and release the clamp gently to avoid clamp dents and rough edges.
Finishing and Setting Curls for Long-Lasting Style
After curling, let your curls cool down fully. Cooling helps curls last longer. Use the right products to keep them in place.
It usually takes about a minute per section for curls to set. Finish by locking the style with a light hairspray and a bit of shine serum.
Let Curls Cool Completely
Rest your curls without touching them for at least one full minute. This cooling time helps the curls keep their shape longer. Avoid running your fingers or combing through curls before this wait.
Hold your curling iron with the clamp pointing upwards to help curls stay tight while cooling. Skipping this step makes curls fall flat very fast. The longer cooling sets the curl’s structure.
Use Finishing Sprays and Serums
Spray a lightweight, flexible hold hairspray once curls are cool. It keeps your style locked without making hair stiff or crunchy. Use a light hand to avoid weighing curls down.
Use one or two pumps of shine serum or spray. This adds gloss to your curls. It also cuts down frizz.
Gently smooth it over your curls with your fingers. Avoid heavy products that can relax your curls.
Final Styling Touches
Use your fingers or a wide-tooth comb to separate curls after they cool. This softens the look and adds volume. Comb too soon, and curls might lose shape or look frizzy.
Gently fluff curls at the roots for extra body if you want more lift. Keep motions light to keep curls intact. This helps the style look natural and full.
Follow these simple steps for finishing curls that last all day:
- Curl your hair section by section, holding the clamp hair curler vertically.
- Hold each curl on the iron for a few seconds, then release the clamp gently.
- Allow your curls to cool completely without touching or combing for about one minute.
- Spray a lightweight, flexible hold hairspray evenly over your cooled curls.
- Apply a small amount of shine serum or spray to add gloss and tame frizz.
- Use fingers or a wide-tooth comb to gently separate and soften curls.
- Fluff roots lightly with fingers for volume if desired.
Common Mistakes and How to Fix Them When Using Clamp Irons
Beginners often clamp too much hair at once, causing uneven curls. Work with smaller sections, about 1 inch wide, for even heat distribution. Smaller sections take about 8 to 12 seconds to curl properly without burning.
Another mistake is holding the iron too long in one spot. This can cause heat damage and curls that look fried, not bouncy. Set a timer or count to 10 while curling each section as a reminder.
Uneven curls happen when you don’t rotate the clamp around the hair strand. Rotate the curling iron smoothly from root to tip to get a uniform curl. Curling only from one side can leave some spots flat.
- Use heat protectant spray before curling to reduce damage.
- Don’t clamp too close to your scalp to avoid burns.
- Wrap hair neatly around the barrel to prevent crimps.
- Let curls cool before touching or brushing to set shape.
- Adjust the temperature by hair type. Use 300°F for fine hair. Medium hair needs 350°F, thick hair 400°F.
Curls falling out too fast often means hair isn’t cooled down enough to set. Hold curls in place with your hand or clip for 5 minutes after curling. Finishing with a light hairspray also improves hold.
Clamp marks happen if the clamp is too tight. They also appear if you leave the clamp on too long.
Loosen your grip slightly and release the clamp immediately after curling. This avoids dents and keeps curls smooth.
Finally, try to avoid curling damp hair. It can cause uneven heat and damage easily. Your hair should be completely dry for best curl results with a clamp curling iron.
Selecting the Best Curling Iron with Clamp for Your Needs
Pick a curling iron with a clamp to match your hair type. Look for safety features to avoid accidents. Choose one that feels easy to use for you.
Focus on barrel size, temperature controls, and materials. These affect how well the tool works and protects your hair.
Safety Features to Consider
Look for curling irons with an auto shut-off feature. This helps prevent accidents if you forget to turn it off. Adjustable temperature settings let you use the right heat for your hair without causing damage.
An ergonomic handle improves grip and control during styling. A heat-resistant clamp protects your fingers when holding the curler. These safety features reduce burns and help you style with less stress.
Accessories That Help
Heat-protectant gloves stop burns on your hands. They help you hold hair near the barrel better. This makes curling safer and easier.
Sectioning clips let you divide hair neatly for faster curls. A heat-proof mat or stand protects your counter when the iron is hot.
Using these tools makes curling faster and safer. They keep your hair organized and prevent damage to surfaces. You’ll avoid common slips and burns this way.
Choosing Based on Hair and Experience
Beginners often start with a 1-inch ceramic barrel curling iron with a spring clamp. Ceramic barrels heat evenly and cause less damage. This size works well for most hair types and styles.
Coarse or thick hair may need a curling iron that reaches higher temperatures. Fine or damaged hair should use lower heat settings to avoid burning. Adjust temperature based on your hair to get smoother curls without excessive heat.
| Hair Type | Recommended Barrel Size | Temperature Range | Clamp Type |
|---|---|---|---|
| Fine or Damaged | 1 inch or smaller | 250°F to 300°F | Spring clamp |
| Normal or Medium | 1 inch | 300°F to 350°F | Spring clamp |
| Coarse or Thick | 1 to 1.5 inches | 350°F to 400°F | Strong clamp |
Match your curling iron to your hair type and skill. Start on the lower heat side to avoid damage. Use a clamp that holds hair securely without too much pressure to prevent dents.
Don’t crank the heat too high. Start low and test on a small hair section.
Step-by-Step Action Plan to Curl Your Hair Today
Follow these steps to start curling your hair with a clamp curler confidently. Each step shows what to do and how to check your progress.
- Before You Start: Wash and dry your hair completely. Your curls last longer and look smoother when your hair is dry and clean.
- Five Minutes Before Curling: Apply a heat protectant evenly. Your hair should feel lightly coated but not sticky or heavy.
- Right Before Curling: Choose a heat setting that fits your hair type. Use low heat for fine hair and high heat for thick hair. The curler should warm fast without smoke or bad smells.
- During Curling: Take 1-inch sections and clamp the curler near the roots. Hold for about 8 to 10 seconds then release gently. Check the curl shape, springs should be smooth, not crimped or flattened.
- Right After Curling Each Section: Let curls cool in your hand for 10 seconds. This cool-down helps curls hold their shape longer.
- Once All Hair is Curled: Use your fingers to softly separate the curls. Or try a wide-tooth comb for a gentle brush. This makes your curls look soft and natural. This softens curls for a natural look without breakage.
- Finishing Touch: Apply a light mist of flexible hold hairspray. Curls should feel light with no crunchiness or stiffness.
Frequently Asked Questions
Can You Use a Clamp Curling Iron on Damp Hair?
It’s best to use a clamp curling iron on mostly dry hair. Damp hair won’t curl as well and may get damaged if you apply heat directly. Blow dry your hair until about 80% dry before curling for best results.
How Long Should You Hold Hair in the Clamp When Curling?
Hold your hair in the clamp for about 5 to 10 seconds. This time is enough to shape the curl without causing heat damage. Adjust timing based on your hair type and the curling iron’s temperature.
What’s the Safest Way to Clean a Clamp Curling Iron?
Always unplug the curling iron and let it cool completely before cleaning. Wipe the barrel and clamp with a damp cloth to remove product buildup. Avoid submerging it in water to protect the electrical components.
Can I Curl Just the Ends of My Hair with a Clamp Iron?
Yes, leaving an inch of your hair ends out of the clamp gives a soft curl. This technique creates more natural-looking, relaxed waves. It also reduces heat damage at the very tips.
Should You Clamp Hair Tightly or Lightly When Curling?
Apply light pressure with the clamp to avoid creases or clamp marks. Too tight can leave unwanted dents.
Too loose may not hold the curl well. Start light and adjust based on your hair thickness.
Is It Okay to Curl the Same Hair Section Twice?
It’s better to avoid curling the same section twice to limit heat damage. If you must, do it quickly and with a lower temperature. Always use a heat protectant spray to protect your strands.
The Bottom Line
Using a clamp hair curler the right way keeps your curls smooth and long lasting. Focus on heat protection and gentle handling to avoid damage. Try curling a small section next to practice technique and temperature control.