How to Curl Hair with Curling Iron with Clamp: 8 Steps for Perfect Long-Lasting Curls
Knowing how to curl hair with curling iron with clamp makes styling quick and easy. The clamp holds your hair securely yet gently, creating neat, defined curls. You clamp a small strand of hair with the iron.
Hold it for about 10 seconds. Then release it to make a perfect curl. Make sure to use the right section size and avoid touching curls before they cool to keep their shape.
Start by heating your curling iron near your mirror for 2 to 3 minutes. Use a 1-inch barrel for classic curls that hold well without getting too tight or too loose.
Working in small sections helps avoid tangling and ensures even heat distribution. Be patient and let each curl cool completely before styling.
Key Takeaways
- Heat curling iron for 2-3 minutes before use for even temperature.
- Clamp 1-inch hair sections for around 10 seconds to create curls.
- Use a ceramic barrel with a spring clamp for better curl results.
- Work in 3-4 sections so you can reach all hair evenly.
- Don’t touch curls until they cool down completely to keep shape.
- Start curling near the roots for volume but avoid scalp burns.
1. How to Curl Hair with a Curling Iron with Clamp Step-by-Step

Curling hair with a clamp curling iron gives smooth, polished curls. Clamp a small section of hair. Wrap it around the barrel.
Hold it for a few seconds. The clamp holds hair in place, which helps form tight, even curls.
It’s important to work with dry hair and small sections for best results. Holding the iron vertically helps curls look natural and face-framing.
Hold the hair in the clamp for about 5 to 10 seconds. This helps avoid heat damage.
- Divide your hair into sections. Clip away the top layers and start curling from the bottom. Smaller sections heat evenly and curl better.
- Position the curling iron vertically. Open the clamp and take a 1-inch section of hair. Clamp the ends of the section without touching your scalp.
- Wrap the hair around the barrel. Roll the iron away from your face, wrapping the hair smoothly and evenly.
- Hold the hair in the clamp for 5 to 10 seconds. Keep an eye on time to prevent heat damage. You’ll feel the heat through the hair before releasing.
- Release the clamp gently and slide out the iron. Avoid pulling or tugging to keep curls intact.
- Let your curl cool in place. Keep the curl in your hand or pin it for a few minutes. This helps the curl set and last longer.
- Move to the next section and repeat. Work methodically through all your hair for uniform curls.
Holding the iron vertically creates curls that fall naturally. Wrapping away from your face brightens your features. Never hold hair longer than 10 seconds, or you risk burning strands.
Letting curls cool before releasing the clamp locks in the shape. Releasing too early makes curls fall flat and not last long. Also, hold smaller sections to avoid uneven curls or bends.
2. Choosing the Right Barrel Size and Temperature for Your Hair

Choosing the right barrel size sets the tone for your curls. Smaller barrels around 3/4 inch make tight, springy curls. These curls work well for classic styles.
They can create bouncy ringlets too. A 1-inch barrel creates versatile medium curls that look natural and soft. Larger barrels from 1 1/4 to 2 inches make loose waves or soft curls.
These waves work great for a beach style. They also add volume.
| Barrel Size | Curl Type |
|---|---|
| 3/4 inch | Tight curls and ringlets |
| 1 inch | Natural, medium curls |
| 1 1/4 inch | Loose waves and big curls |
| 1 1/2 to 2 inches | Soft waves and volume |
Heat level depends mainly on your hair thickness. Light or fine hair curls best at 320°F. Medium hair can handle between 330°F and 400°F. Thick or coarse hair usually needs 400°F to 430°F to hold curls well.
Using too high heat on fine hair risks damage. Too low heat on thick hair might not curl at all.
Always heat your curling iron fully before styling. Use a clamp iron on small sections of hair. The section should be about the barrel’s width.
This helps curls turn out even. Holding the iron for 10 to 15 seconds per section usually works well. Careful timing helps avoid burning and gives curls a natural bounce.
Curling damp or wet hair with a clamp iron isn’t safe. The moisture can cause serious damage and your curls won’t hold. Always dry your hair fully before curling.
Set aside time to dry hair fully after washing. You can air dry or use a blow dryer. Dry hair well before curling.
Never curl damp hair; it causes heat damage and weak curls.
3. Preparing Hair Properly Before Curling with a Clamp Iron
Preparing your hair before curling helps curls last longer. It also keeps your hair healthy.
Your hair should be fully dry and protected from heat. Use the right products and tools to get smooth curls without damage.
Wash and Dry Hair Correctly
Wash your hair the night before or at least a few hours before curling. Hair must be completely dry before using a clamp curling iron. This avoids steam damage.
Blow dry your hair until it’s smooth and almost fully dry. Leave very little moisture.
Blow drying on medium heat works well. Use a round brush to smooth hair as you dry it. Let hair cool before starting to curl to keep styles in place.
- Wash with a gentle shampoo the day before curling
- Dry thoroughly with a towel before blow drying
- Use medium heat on your blow dryer
- Brush hair smoothly during blow drying for fewer tangles
- Wait a few minutes after drying before curling
Apply Heat Protectant Products
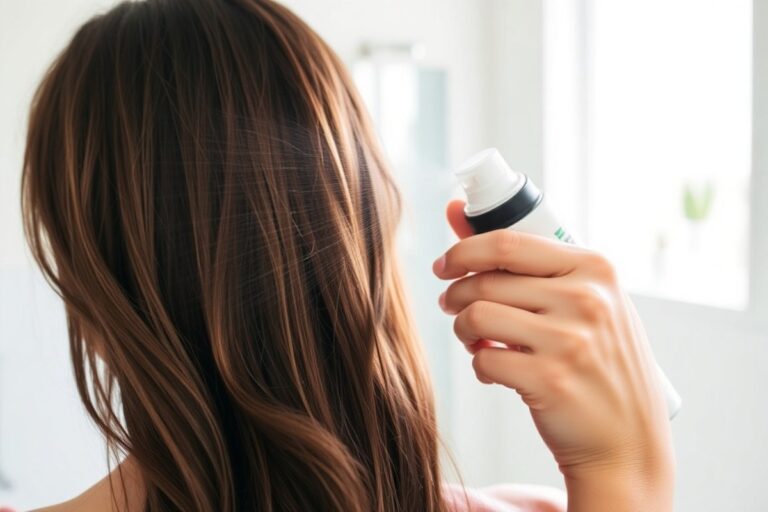
Heat protectant spray is a must before curling. It forms a shield that cuts down heat damage and frizz. Choose lightweight sprays that won’t weigh hair down or make it greasy.
Apply evenly to all your hair from roots to ends. Work the product through with your fingers or a wide-tooth comb. Let the spray dry a bit so it doesn’t steam when you curl.
- Use a heat protectant spray designed for up to 450°F heat
- Spray hair evenly before sectioning
- Avoid heavy oils or creams that block curls
- Repeat spray lightly between sections if needed
- Check ingredients for anti-frizz benefits if needed
Detangle and Section Evenly
Brush your hair thoroughly to remove knots before curling. Tangled hair curls unevenly and might snag on the clamp. Use a wide-tooth comb or paddle brush for gentle detangling.
Divide hair into 2 to 3 inch sections using clips. Sectioning lets you curl small sections for tighter, lasting curls. Keep sections consistent to avoid hot spots and clamp marks.
- Detangle with a wide-tooth comb or paddle brush
- Part hair into 2, 3 inch wide sections
- Use sectioning clips to hold hair in place
- Curl from the bottom layers to the top
- Wrap hair tightly around the barrel for smooth curls
4. How to Avoid Clamp Marks and Keep Curls Smooth
Clamp marks happen when the curling iron grips your hair too tightly. This pressure leaves visible creases or kinks instead of smooth curls. To avoid this, clamp your hair gently without squeezing too hard.
Hold for about 10 seconds to let it heat. Don’t press hard or you’ll get lines.
Wrap your hair around the barrel neatly and keep the iron vertical as you curl. This helps the heat spread evenly and shapes curls without sharp bends. After 10 seconds, slowly open the clamp on your hair.
Then unwind the hair carefully while pulling the iron down. This smooths the ends well.
You can fix kinks or clamp marks by running a flat iron over them. Use a low heat setting to avoid damage. Don’t press hard or hold too long, or you risk damage.
Another method is to curl your hair in different directions. Alternate between clockwise and counterclockwise curls. This creates a natural wave and hides creases.
5. Making Curls Last: Products and Techniques for Longevity
To make curls last longer, use the right hair products. Set your curls properly after curling. This helps hold the shape throughout the day.
Applying a good setting spray right after styling locks the shape. Cooling your curls fully before touching them helps them hold better through the day or night.
Use Setting Sprays and Serums
Setting sprays add hold and shine to curls without stiffening hair too much. Look for a lightweight hairspray with flexible hold to avoid crunchy curls. A smoothing serum adds shine and controls frizz for a final polished look.
Use these products in this order for the best result. First, apply heat protectant before curling your hair. Then, spray a light hairspray right after curling.
Add serum last as a finishing touch to tame flyaways. Avoid using heavy products that weigh curls down, especially on finer hair.
- Heat protectant spray applied before curling
- Flexible hold hairspray right after curling
- Light smoothing serum for shine and frizz control
- Avoid heavy creams or oils that flatten curls
- Choose alcohol-free sprays to prevent dryness
This routine keeps curls bouncy while controlling frizz and shine.
Cooling Down and Non-Touch Techniques
Holding curls in your palm to cool after curling sets them in place. Let the curls cool for about 10 seconds before releasing. The “cool down” period helps lock your curls in place.
It lets the hair shaft keep its new shape better. This makes your curls hold longer throughout the day.
Try not to touch or brush curls right after curling. Fingers or brushes can break the curl pattern, causing frizz and limpness. Instead, let curls fully cool and settle before gently separating or styling with fingers.
Touching curls too soon makes them fall flat faster, hold off until they cool.
Refresh Curls Without Heat
To revive day-old curls, use a light mist of water or curl refresher spray. Spray damply, scrunch curls softly, and let them air dry to regain bounce. Avoid reapplying heat to prevent damage and dryness.
Twist each curl around your finger if curls look flat. This reshapes them and adds bounce back to curls. Try it when your curls lose volume.
You can also use a little mousse or light hairspray to add volume and hold. This quick refresh saves time and protects hair from extra heat.
- Lightly mist curls with water or curl refresher spray
- Scrunch curls gently and air dry
- Twist curls around finger to reshape
- Use a small amount of mousse or flexible hairspray
- Avoid heat styling on refresh days
6. Common Mistakes When Using a Clamp Curling Iron and How to Fix Them
A common mistake is clamping the hair too tightly. This leaves dents or marks on your curls, making them look uneven. Hold the clamp with light pressure to grip the hair gently.
Avoid squeezing it hard or tight. This helps prevent damage and keeps curls neat.
Another issue is curling the hair ends inside the clamp, causing damage and breakage. Avoid this by leaving the very ends free from the clamp. This protects the tips from heat and keeps your curls looking natural.
Many beginners use too high a temperature, thinking it sets curls better. While higher heat can hold curls longer, it damages hair over time. Use a moderate heat setting between 300 and 350 degrees Fahrenheit.
This protects your hair while keeping curls lasting. It’s a safe balance for styling.
Uneven curls often come from taking hair sections that are too thick or too thin. Aim for pieces about 1 inch wide to get consistent curls. Also, curl all sections in the same direction for a uniform look.
Skipping hair preparation steps leads to curls that fall out quickly. Using a heat protectant spray before curling reduces damage and helps curls last longer. Make sure your hair is dry, as damp hair won’t hold curls well.
Hair ties can get stuck in the clamp, causing frustration and snags. Use a simple hair tie instead of a scrunchie to keep hair out of the way. This small change lets you work faster and avoids pulling out strands.
Clamp curling irons work well on fine hair because you control the pressure. Still, applying too much clamp pressure breaks thinner strands.
Keep the clamp light but secure. Don’t clamp the same spot for more than 10 seconds to protect hair ends.
7. Tailoring Clamp Curling Techniques for Different Hair Types
Curling different hair types well means changing your heat, section size, and timing. Fine hair needs lower heat and smaller sections to avoid damage.
Thick, coarse hair needs more heat and smaller pieces for deep curls. Short and wavy hair need special methods to boost volume and wave definition.
Fine and Color-Treated Hair Tips
Set your curling iron between 250°F and 300°F for fine or color-treated hair. Use smaller sections, about 1 inch (2.5 cm) wide, to reduce heat exposure. Hold the iron on your hair for 5 to 8 seconds.
This helps avoid burning or drying out your hair. Keep the time short to protect your strands.
Try a smaller barrel, like 1 inch or less, for tighter curls that last. For softer waves, use larger sections and shorter hold times. Avoid high heat since this hair type is more fragile.
Thick or Coarse Hair Adjustments
Raise the curling iron temperature to roughly 350°F to 400°F for thick or coarse hair. Smaller sections, about 1 inch or less, help the heat spread evenly and curl well. Hold the iron on each section for 10 to 12 seconds to ensure defined curls.
Use medium to large barrels, around 1 to 1.5 inches, based on your curl preference. To keep curls in place, apply a strong hold spray after curling. Don’t hold the iron too long or you risk hair damage.
Handling Naturally Wavy or Short Hair
For natural waves, use about 300°F heat and curl medium sections of 1.5 inches. Wrap hair loosely around a large barrel (1.5 to 2 inches) to improve waves without tight curls. Hold the iron just 5 to 7 seconds for gentle waves.
Short hair works best with small sections, about ½ inch wide. Use a small barrel, ½ to 1 inch, for tighter curls if you prefer. To add volume, lift hair at the roots before clamping each section.
Follow these detailed steps to curl your hair based on its type:
- Choose the correct barrel size: smaller for tight curls, larger for soft waves.
- Set your curling iron to the right heat for your hair. Use lower heat for fine hair. Choose higher heat for thick hair.
- Section your hair before curling. Take smaller sections for fine hair. Use bigger chunks for thick hair to heat better.
- Clamp the curling iron on a hair section. Hold it for 5 to 12 seconds. The time depends on your hair type.
- Release the clamp and gently slide the iron out without pulling or tugging.
- Repeat on all sections, working from bottom layers to top.
- Use a hold spray on thick hair or to keep curls longer in any type.
- Let curls cool before touching to help them set stronger.
8. Safety Tips and When to Seek Professional Help
Coat your hair evenly with a heat protectant spray before curling. Focus especially on the ends, as they get damaged fastest. This spray forms a shield that protects your hair from the high heat and adds shine.
Always use the clamp to hold your hair when curling. The clamp stops your fingers from touching the hot barrel and burning your skin. Hold the iron steady and avoid rushing to keep curls smooth and safe.
Set the curling iron temperature to match your hair type. For fine hair, stay around 250°F to 300°F. Thicker hair can take 350°F to 400°F heat.
Avoid staying too long on one section. This prevents heat damage to your hair.
Red flags needing pro advice include visible breakage, excessive dryness, or scalp irritation after curling. Stop using heat tools when your scalp burns.
Also, stop if hair breaks easily. A stylist can offer treatments or safer styling alternatives.
Some heat protectants are better for clamp irons because they spread evenly without making hair slippery. Look for sprays labeled for high heat styling. These usually cost between $8 and $20 but last for months depending on use.
Consult a professional if you want complex styles or have damaged hair. Experts can use safer tools and techniques suited to your hair’s health. Professional treatments often cost $50 to $100 but can save you from long-term damage.
Never touch a heated clamp or barrel directly. Always handle the iron by its grip to avoid burns.
Step-by-Step Action Plan to Curl Hair with a Clamp Iron
Follow these steps to style your hair using a curling iron with clamp. Each step will help you get smooth, lasting curls without damage or clamp marks.
- Before you start: Wash and dry your hair completely. Use a heat protectant spray to avoid damage.
- Minute 1: Heat your curling iron to the temperature suited for your hair type. Check the iron reaches the set heat.
- Minute 2: Section your hair into small, manageable pieces. You should be able to hold each piece easily for curling.
- Minute 3-5: Clamp the iron around the hair section near the end. Twist the iron away from your face carefully. Hold it like that for a few seconds before releasing. Hold for 8-12 seconds.
- Minute 6: Release the clamp and slide the iron out carefully to keep the curl intact. Check that the curl holds its shape.
- Minute 7-10: Repeat on all sections. Alternate curling directions for a natural look.
- After curling: Let curls cool completely before touching. Spray lightly with a flexible hold hairspray to set.
- Later in the day: Gently finger comb curls to soften look without frizz or clamp marks.
Frequently Asked Questions
How Do You Prevent Your Curls from Loosening Too Quickly with a Clamp Iron?
Use a light hairspray immediately after curling. Then let curls cool completely before touching them to set their shape better.
Can You Curl Hair with a Clamp Iron Without Heat Protectant?
It’s better to always use heat protectant spray to avoid damage. Skipping this risks drying and breaking your hair from the hot barrel.
What’s the Best Way to Create Volume at the Roots Using a Clamp Curling Iron?
Hold hair sections near the roots and curl away from the scalp carefully. This lifts hair and gives your roots more volume instantly.
How Do You Clean a Curling Iron with a Clamp Safely?
Let the iron cool completely first. Wipe the barrel gently with a damp cloth.
Use mild soap if needed. This helps remove any product buildup on the barrel.
How Long Should You Hold Your Hair on the Barrel When Using a Clamp Curling Iron?
Hold the hair for about 5 to 10 seconds, feeling the heat through strands. Release once the hair feels warm to avoid burns and damage.
Can a Clamp Curling Iron Be Used on Wet Hair?
Avoid curling wet hair with a heated clamp iron to prevent damage. Always dry hair completely first for safe and effective curling.
Key Points to Remember
Using a curling iron with a clamp takes practice. But starting with the right steps helps.
Protect your hair and control the iron for best curls. Try your first curling session today and see how your curls turn out.