What Is a Good Curling Iron? A Complete Guide to Choosing the Best Tool
What is a good curling iron? It heats evenly, lets you pick your heat level, and fits your hair type.
A solid curling iron helps you get the curls you want without frying your strands. Choosing one with adjustable heat settings protects your hair from damage.
Barrel size matters for the curls you want. So pick one that matches your style.
Also, curling iron materials affect how fast it heats and how smooth your curls turn out. Keep your hair type in mind to match the right iron for the best finish.
Look for a curling iron with a safety shutoff and a heatproof handle. These features keep styling safer and more comfortable. Starting with these basics helps you get excellent curls without the guesswork or damage.
Key Takeaways
- Pick a curling iron with adjustable heat settings for safer styling.
- Choose barrel size based on the curl size you want.
- Ceramic barrels provide even heat for smooth, shiny curls.
- Titanium irons heat faster, ideal for thick or coarse hair.
- Tourmaline irons reduce frizz and add shine with negative ions.
- Longer barrels cover more hair for quicker curling on long hair.
What Defines a Good Curling Iron for Your Hair?

A good curling iron has a ceramic or metal barrel that heats evenly. This helps prevent hot spots that damage hair. It should offer multiple heat settings, ideally from 260°F to 450°F. So you can pick the right temperature for your hair type.
The barrel size affects the style you get. Curling irons with 1 to 1.25-inch barrels work well for most hair lengths and provide medium curls. For thick or long hair, use a barrel about 6 inches long.
This size helps wrap hair smoothly. It also speeds up your styling time. Smaller barrels near ¾ inch suit short hair or tight curls.
Material matters because ceramic barrels spread heat gently for smooth curls. Titanium or 24K gold barrels heat up faster and stay hot longer. These work well for thick or hard-to-curl hair.
But they can increase the chance of hair damage. A good curling iron has safety features like auto shut-off.
It should turn off after about one hour. A swivel cord makes handling easier.
Brand reputation often signals quality and durability. A curling iron from a trusted name tends to last longer and delivers consistent results. Prices range from under $20 for basic curling irons.
Professional models can cost $150 or more. These have advanced technology or extra attachments. Investing in a mid-range iron around $80 can balance reliable performance with reasonable cost.
Look for curling irons that heat up quickly but don’t spike to unsafe temperatures. Rapid heat-up saves time, but you want steady heat control to avoid burning hair.
A rotating power cord can prevent tangling, making styling smoother and faster. These details make a visible difference in convenience and comfort during your routine.
Choosing the Right Barrel Size for Your Desired Curls
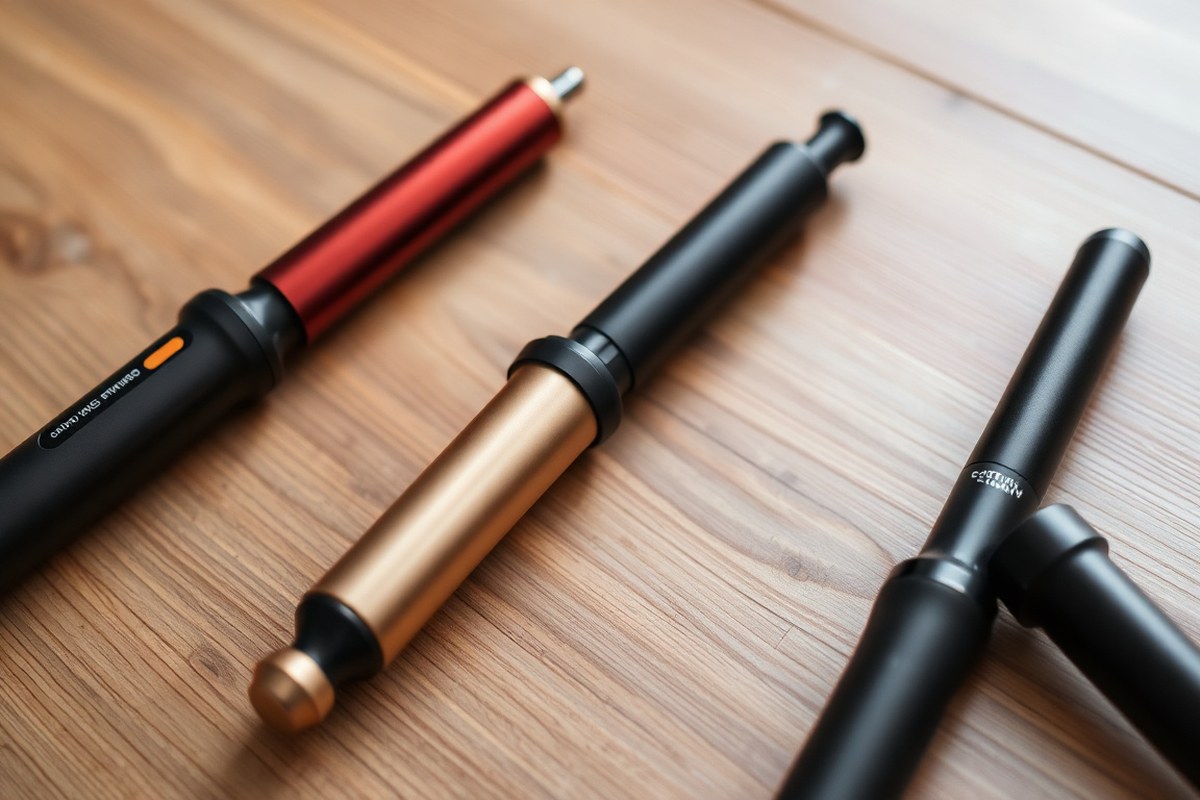
The barrel size you choose shapes your curls and suits your hair length. Small barrels curl tight and close to the scalp, best for short hair. Larger barrels create looser curls or waves, fitting longer hair and quicker styling.
Small Barrels: 0.5 to 1 Inch
Small barrels, around 0.5 to 1 inch, produce tight curls and defined ringlets. They work well on short to medium hair. Use them for a springy look.
They give your hair a nice bounce. Styling with a small barrel takes more time because you curl smaller hair sections.
For example, the Conair Instant Heat ½-Inch Curling Iron is great for short hair beach waves. Small barrels help you control the curl near roots. They take time if your hair is thick.
Be patient with long hair too. These barrels are often lighter, making them easier to handle during detailed styles.
Medium Barrels: 1.25 to 1.5 Inches
Medium barrels between 1.25 and 1.5 inches create classic, voluminous curls. This size fits most hair lengths and offers versatility, making it the most popular barrel size.
It’s fast to style since you wrap bigger hair sections. The curls last well on many hair textures.
The 1¼-inch barrel is ideal for everyday curls, from tighter spirals to loose waves. You’ll find curls with a natural bounce that suits casual and formal looks. Medium barrels suit hair that’s not very fine or thick.
They balance curl hold and ease. These barrels are a good middle ground.
Large Barrels: 1.75 to 2 Inches and Above
Large barrels, measuring 1.75 inches or more, create loose waves and big, soft curls. They’re perfect for long hair or anyone aiming for natural, flowing styles. Longer barrels, like the Bio Ionic Long Barrel Curling Iron with 6.25 inches, save time by wrapping more hair.
These barrels style quick because you grab larger strands per section. They’re especially helpful with hair extensions or hard-to-reach sections at the back. Larger barrels offer a smooth, easy wave but won’t give the tight curls small barrels create.
| Best For | Barrel Size | Heat Settings | Barrel Material | Additional Features |
|---|---|---|---|---|
| Short to medium hair, tight bouncy curls | 0.75 inches | 25 settings | Chromium/Nickel/Steel | Dual voltage, auto shut-off, extra-long cool tip |
| All hair textures (voluminous curls) | 1.25 inches | Variable | Ceramic | Frizz-free curls, moisture retention |
| Long hair, quick styling | Up to 2+ inches, 6.25-inch barrel length | Variable | Ceramic or ceramic-coated | Extended barrel to wrap more hair |
Pick a barrel size that matches your hair length and the curl shape. Shorter hair often needs smaller barrels for tighter curls. Longer hair looks best with bigger barrels and longer barrels to save time.
Choose a barrel size that suits your hair’s length and texture to avoid uneven curls.
How Heat Settings Impact Curl Quality and Hair Health
Adjustable heat controls let you find the right temperature for your hair. Fine hair needs lower heat, around 270°F to 300°F, to avoid damage. Thick or coarse hair needs higher heat, sometimes up to 430°F. This helps curls last all day.
Using medium heat, about 350°F, works best for medium hair that’s not too fine or thick. You want a curling iron with several heat settings so you can adjust as you style. This way, you don’t overheat your hair, which leads to broken strands and dullness.
Set your curling iron heat based on your hair type. Start low. Raise heat if curls don’t hold.
Start at 270°F with fine hair. Raise temperature by 10 degrees to 300°F if needed.
Thick hair might start at 380°F and go higher. But avoid going above 430°F to prevent damage.
Keep the heat steady while styling. Some irons use tech to keep temperature steady. This prevents hot spots.
That protects your hair. Look for irons that check heat hundreds of times per second. This keeps hair safe and smooth curls.
Avoid using maximum heat unless your hair truly needs it. Higher temperatures speed up curling but risk damage.
Don’t spray hairspray until after curling. Spraying first can dry out hair when hot.
A good curling iron will heat fast, offer many temperature options, and hold heat steady. This usually costs between $30 and $150 depending on brand and tech features. Using adjustable heat properly keeps curls lasting and hair healthy without breaking or looking fried.
Comparing Curling Iron Materials: Ceramic, Titanium, and Tourmaline
Ceramic, titanium, and tourmaline are common materials for curling irons. Each offers different heat distribution and effects on your hair’s condition. Choosing the right one depends on your hair type and styling goals.
Ceramic barrels are known for even heat distribution. They protect the hair cuticle and help create smooth, shiny curls. Ceramic spreads heat evenly, so it’s good for fine hair.
It avoids hot spots that can damage fragile strands. This makes it gentle for delicate hair types.
Titanium heats up quickly and stays hot, making it ideal for thick or coarse hair. It can heat up to 410°F or more. That high heat shapes curls faster.
It works well on stubborn, hard-to-curl hair. Because it handles high heat well, titanium is durable. But it may cause more damage if used on fine hair.
| Material | Heat Distribution | Ideal Hair Type | Effect on Hair | Max Heat |
|---|---|---|---|---|
| Ceramic | Even, consistent heat | Fine to normal | Reduces frizz, adds shine | Up to 410°F |
| Titanium | Fast, high heat | Thick, coarse, curly | Strong hold, may cause damage if misused | Up to 430°F |
| Tourmaline-Ceramic | Even heat with negative ion boost | Most types, especially frizzy | Seals cuticle, reduces frizz, improve shine | Varies, generally up to 410°F |
The tourmaline-ceramic mix adds negative ion technology. This feature seals moisture into your hair and lowers frizz. That kind of barrel suits hair that tends to dry out or look dull after curling.
For damaged or color-treated hair, ceramic or tourmaline-ceramic options are safer choices. Their gentle heat spread avoids hot spots that cause more damage. Titanium’s higher heat suits thick hair but risks drying out fragile strands.
Best Curling Irons by Hair Type and Styling Goals
Fine or Thin Hair Picks
Low heat and gentle materials protect fine or thin hair from damage. Look for curling irons with ceramic or tourmaline barrels that evenly distribute heat. Temperatures should stay between 250 and 300°F to avoid burning fragile strands.
Smaller barrel sizes, like 1 inch or less, create curls without weighing hair down. A curling wand without a clamp helps you avoid pinching hair.
It’s great for thin hair. It also stops dents from forming.
- Ceramic or tourmaline barrel for gentle, even heat
- Temperature control with max 300°F
- Barrel size ½ to 1 inch for tighter curls
- Clamp-free wand options prevent dents
- Lightweight, easy-to-handle design
Always cool your curls before touching to help them set firmly in fine hair.
Thick or Coarse Hair Options
Thicker hair needs higher heat, usually between 370 and 450°F, to form long-lasting curls. Titanium barrels handle high temperatures well and speed up styling on coarse hair. A spring clamp curling iron gives strong hold for thick strands.
Barrels about 1 ¼ inch or larger work best for long thick hair. Avoid small barrels since curls will drop fast. Look for irons with fast heat-up and temperature control to protect hair.
- Titanium barrel for fast, even heating
- Adjustable heat up to 450°F
- Spring clamp to hold thick hair
- Barrel size 1 ¼ inch or bigger
- Professional-length cord (around 9 feet) for easy use
Don’t exceed your hair’s heat tolerance; use heat protectant before styling.
Tools for Short Hair
Short hair curls best around smaller barrels like ¾ to 1 inch. A compact curling iron or wand makes handling shorter lengths easier. Marcel irons often produce tighter curls perfect for short styles.
Look for lightweight tools with thin barrels to wrap short hair without slipping. Clamp irons help secure hair for precise curls near the roots and ends.
- Barrel size ¾ inch to 1 inch
- Lightweight, compact irons or wands
- Clamp-style curling irons for secure grip
- Adjustable lower heat settings (around 300-350°F)
- Fast heat-up time for quick styling
Don’t hold short hair on the barrel too long. Curls set fast and can burn.
Best for Long Hair
Long hair needs barrels from 1 ¼ to 2 inches. These sizes create curls that last. Larger barrels keep waves looking fresh all day.
Tools with multiple barrel options can create varied looks from ringlets to beach waves. Ionic technology on curling irons seals moisture for shiny results.
Look for curling irons with longer cords and comfortable grips for easier use on long hair. Interchangeable barrels also reduce clutter when styling different sections.
- Barrel size 1 ¼ to 2 inches for loose to big curls
- Interchangeable barrel sets for style variety
- Long, flexible power cord (around 9 feet)
- Ionic or ceramic technology to lock in shine
- Lightweight handle with good grip
Wrap hair midlength on barrel, leaving ends out for natural waves.
Styling Objectives: Tight Curls, Beach Waves, Hollywood Waves
Tight curls need small barrels from ½ to 1 inch. They work best with clamp irons. The clamp holds the hair firmly around the barrel.
Heat should be higher for thicker hair and moderate for fine hair. BaBylissPRO’s titanium spring curling iron is strong for tight curls on various hair types.
Beach waves look best with a 2-inch barrel wand or iron. Leave hair ends out to keep them straight, creating soft bends mid-length. For smooth Hollywood waves, use a 1 ¼ inch barrel.
Choose a clamp and medium-high heat. This creates polished, well-defined curls.
- Tight curls: ½ to 1 inch barrel, clamp iron, higher heat
- Beach waves: 2-inch barrel wand or iron, leave ends out
- Hollywood waves: 1 ¼ inch barrel, clamp, medium-high heat
- Use heat protectant before all styles
- Set curls by cooling before touching
Use a reverse tapered wand to create varied waves without swapping tools.
How to Use a Curling Iron for Lasting Curls
Using a curling iron correctly takes some practice. It results in curls that last all day. You get better with each use.
Hold hair at the mid-shaft, wrap it around the barrel, and follow timed steps. Letting curls cool fully locks in the shape, making your style hold longer.
Prepping Hair Before Curling
Start with clean, dry hair to get the best curl hold. Apply a heat protectant spray evenly through your hair to prevent damage. Use a blow dryer or let your hair air dry completely before curling.
Brush out any knots so hair wraps smoothly around the iron. For finer hair, set the curling iron to a lower temperature around 300°F. Thicker or coarse hair needs higher heat between 350°F and 410°F for effective curling.
Sectioning Hair for Consistent Results
Divide your hair into at least four sections, two on top and two underneath. Clip each section separately to keep hair organized during curling. Small sections of 1 to 2 inches make curls neater and hold better.
Work through sections one at a time from the bottom up. This keeps curls uniform instead of mixed sizes. Creating clean partings with a comb helps you reach every piece evenly without missing strands.
Curling Technique and Timing
Hold the curling iron vertically and wrap the section around the barrel starting at the mid-shaft. This approach helps heat reach the roots and the middle, giving stronger curls. Leave about 1 inch of hair ends out for natural-looking curls.
Clamp the hair gently or use a clamp-free iron, depending on your tool. Hold the iron for 8 to 12 seconds on each section, adjusting time for hair thickness.
Thick hair may need closer to 12 seconds. Fine hair less than 8 seconds to avoid damage.
Use your wrist to softly twist the iron while curling. This prevents tangles and keeps curls tight. Pull the iron down slowly to release the curl smoothly without kinks or folds.
Allowing Curls to Cool and Set
Don’t touch or brush curls immediately after curling. Let each curl cool completely to hold its shape. Hold curls in place for 10 to 30 minutes.
Use a clip wrapped around your finger. This helps keep the bounce in your curls.
Once cooled, gently break curls with fingers or a wide-tooth comb. This stops curls from getting frizzy while still looking natural. Using a cool shot from your blow dryer can speed up this cooling step.
- Heat your curling iron to the right temperature for your hair type.
- Apply heat protectant spray and brush through dry hair.
- Section hair into 4 parts and clip to keep organized.
- Take a 1-2 inch section, hold iron at mid-shaft.
- Wrap hair around the barrel, leaving 1 inch of ends out.
- Hold for 8-12 seconds depending on hair thickness.
- Release the curl gently and clip if you want long-lasting hold.
- Repeat on all sections and let curls cool fully before styling.
Must-Have Safety Features in a Quality Curling Iron
Look for curling irons with automatic shutoff to prevent fires. This feature turns the iron off after 30 to 60 minutes of no use. It avoids accidents if you forget to unplug it before leaving home.
Heat-resistant gloves protect your fingers from burns while styling. These gloves usually cost between $10 and $20 but are worth it for safer curling. They help you hold the barrel without pulling or burning your skin.
A curling iron should have adjustable temperature controls for your hair type. Lower heat settings around 250, 300°F suit fine or damaged hair. Thicker or coarser hair may need higher temps, up to 425°F. But be careful not to overheat.
- Automatic shutoff after 30-60 minutes
- Heat-resistant gloves for finger protection
- Adjustable temperature dial or digital display
- Cool tip on the barrel for safer handling
- Swivel cord to prevent tangling and reduce stress on wiring
- Quality materials like ceramic or tourmaline to reduce hair damage
- Non-slip handle for steady control
Automatic shutoff sensors detect inactivity by timing and power use. After a set period, the iron cools down by cutting electricity.
Many models blink or beep to show it’s shutting off. This stops burns to surfaces and lowers fire risks.
When you wear heat-resistant gloves, you can style closer to the scalp without burning. They typically have silicone or Kevlar fibers. Gloves make curling faster and safer, especially for beginners or thick hair that needs quick work.
A curling iron without these safety tools risks burns, fires, and broken hair. For example, holding a hot barrel too long or on one spot weakens strands. Always check your curling iron’s safety features before buying to protect yourself and your hair.
Common Curling Iron Mistakes and How to Fix Them
Not holding curls often means your heat setting is off or you’re rushing the process. Hair needs enough heat to shape but not so much to burn or dry it out. For fine hair, try 300°F to 350°F. Thicker hair might need 350°F to 400°F. Hold the iron on each section for 8 to 10 seconds.
That’s enough time to form the shape. Don’t hold it longer or you might damage your hair.
Using too low heat or too short a time can cause curls to fall flat quickly. Apply a light hairspray or heat-protectant before curling. These help hold curls better.
They also keep your hair shiny. Avoid heavy products that weigh hair down or create buildup, making curls limp.
- Not sectioning hair evenly: Work with small, equal parts for consistent curls.
- Hold the hair tight enough to grip but not too tight. You don’t want to pinch your strands. Also, don’t hold it so loose that hair slides out.
- Curling in the wrong direction: Curl all sections away from your face for balanced style.
- Skipping the cooling step: Let curls cool in your hand or pin them before releasing.
- Ignoring hair type heat needs: Use medium heat (about 350°F) for most hair; adjust if needed.
- Make sure the curling iron is fully heated before you start. A warm iron curls smoothly. Using it while cool might cause uneven curls.
- Not sealing cuticles: Finish with a silicone-based spray to reduce frizz and add shine.
Curls may look uneven or frizzy when the hair cuticle isn’t sealed properly. Spraying a silicone spray after curling closes the cuticle and smooths strands. It also boosts shine and keeps curls soft instead of crunchy.
Some curlers include a cold air lock feature. Using this setting as you release each curl can set the shape without causing frizz.
Hold each curl in your hand for 10 seconds before releasing. This helps lock in the curl’s shape. Don’t let go too soon.
Another common slip is curling hair that hasn’t fully dried. Damp hair curls hold poorly and risk damage. Always start with dry hair or dry it thoroughly before curling.
Use a diffuser on low heat to finish for extra volume. This keeps curls soft and natural-looking. Avoid brushing curls out to keep their shape.
Maintaining and Caring for Your Curling Iron
Curling irons need regular cleaning to work well and last longer. Clean at least once a week if you use oils or hairspray before styling. If you style every day or share your iron, clean it more often to stop buildup from damaging the tool or your hair.
Product buildup looks like sticky, shiny spots on the barrel. To remove it, unplug the iron first and wait for it to cool.
Dampen a soft cloth with rubbing alcohol or a mix of water and gentle soap. Gently rub the barrel until the residue lifts off.
- Unplug curling iron and let it cool completely.
- Use a soft cloth dampened with rubbing alcohol or mild soap solution.
- Wipe the barrel and clamp, avoiding the electrical parts.
- For stubborn buildup, hold the cloth on the barrel for 30 seconds.
- Dry the iron completely before plugging it back in.
- Store in a cool, dry place away from water or humidity.
- Use the iron’s kickstand to keep it off counters when hot.
Storing the curling iron properly helps prevent burns, damage, and shortening its life. Always let it cool on the built-in kickstand or heat-resistant mat.
Avoid wrapping the cord too tight or around the iron. That can cause internal wire breaks over time.
Avoid leaving the iron on damp bathroom counters. High humidity may rust parts faster.
A clean, dry drawer or a heat-proof pouch are good ideas. Regular cleaning and mindful storage keep your curling iron safe and ready whenever you need it.
When to Choose a Professional Stylist over DIY Curling
Curling your hair at home usually works fine for everyday styles. But if your hair is damaged or very fragile, a professional stylist should handle heat styling. They use tools with precise temperature controls and protectants to avoid extra damage.
Big events like weddings or photo shoots often call for professional curling. Stylists can make tight spirals or big waves. They also create curls with different textures.
These curls last all day without falling apart. Replicating this level of detail is tough with DIY tools, even the best curling irons.
Strong chemical treatments or very brittle hair also need caution. Professionals know when to lower heat or skip certain styles to prevent breakage. Using a curling iron that’s too hot can damage your hair.
Leaving it on too long risks frying your hair strands. Be careful with temperature and timing.
To decide, check your hair’s health and your style goals. Your hair feels dry or breaks easily.
You should see a professional for care. For simple curls on healthy hair, you can curl yourself safely at 300°F to 350°F. Use a ceramic or tourmaline iron to reduce frizz and damage.
Cost and time matter too. Professional styling can run $50 to $150 and takes 45 minutes or more.
DIY saves money but may mean less polish and shorter-lasting curls. Choose pro help when quality and staying power are top priorities.
Want easy curls and your hair is healthy? Choose a curling iron for home use. Style your hair yourself with simple steps.
For thick, curly, or chemically treated hair needing a precise, lasting style, book a pro. It prevents heat damage and gives a polished look that DIY curls may lack.
Step-by-Step Action Plan for Finding and Using Your Ideal Curling Iron
Follow these simple steps to pick, use, and care for your curling iron confidently. Check your hair’s feel and look after each step to see progress.
- Before you buy: Identify your hair type and desired curl style. Knowing this helps you pick the right barrel size and material.
- Day 1: Choose a curling iron with adjustable heat and a safety shutoff. Test the heat on a small hair strand to avoid damage.
- Day 2: Practice curling on dry, clean hair using the lowest effective heat setting. Good curls hold shape and don’t feel crispy.
- After one week: Check your curling iron’s condition and clean any residue. Regular cleaning keeps it working well and protects your hair.
- After two weeks: Try different barrel sizes to see what works. Adjust heat settings for your best look. Your curls should last longer and feel softer.
- Ongoing: Avoid common mistakes like holding the iron too long or using too much heat. Fix these based on how your hair reacts.
- Monthly check: Inspect the curling iron for any damage or malfunction. Using a damaged tool can hurt your hair or cause accidents.
Frequently Asked Questions
What Is the Difference Between a Curling Iron and a Curling Wand?
A curling iron has a clamp to hold hair, while a wand doesn’t. The wand gives more natural, loose curls.
Can a Curling Iron Damage Hair If Used Correctly?
Yes, curling irons can damage hair if used too hot or too often. Use heat protectant and lower heat settings to reduce risk.
How Often Should I Clean My Curling Iron?
Clean your curling iron about once a month or more if used daily. Wipe off residue to keep it heating evenly and avoid buildup.
Can I Use a Curling Iron on Wet Hair?
No, never use a curling iron on wet hair; it may cause damage. Always dry your hair completely before styling with heat tools.
How Do I Know the Right Heat Setting for My Hair?
Fine hair needs lower heat (around 300°F). Coarse hair can handle higher (up to 410°F). Try starting low and increasing as needed.
Should I Use a Curling Iron with a Clamp or Clipless Style?
Use a clamp iron for defined curls and easier control. Clipless wands are best for soft, beachy waves.
The Bottom Line
Choosing the right curling iron makes a big difference in your curls and hair health. Start with a tool that fits your hair type and learn proper use. Taking care of your curling iron ensures better curls, day after day.