
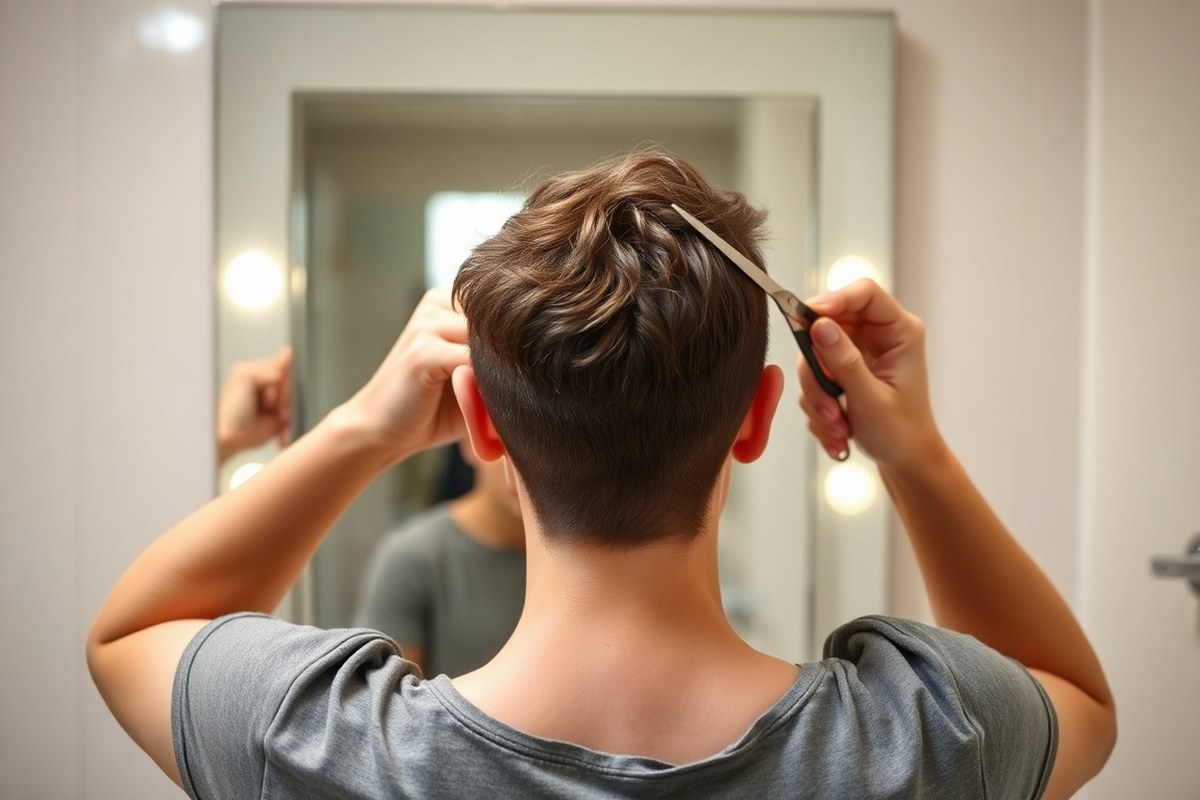
How to Cut Your Own Hair Short: Complete Guide with Safe Methods
How to cut your own hair short can feel tricky at first. The best way is to take it slow and cut small amounts at a time. Start with dry hair so you see the exact shape and length before cutting.
Focus on trimming just a little, about a quarter inch or less. This keeps your hair healthy and avoids big mistakes. Use sharp scissors or clippers for clean lines and steady hands for control.
Lift small sections at a 90-degree angle to get an even cut all around. Imagine scooping your hand to blend hair from short to long. Use smooth, controlled motions on the sides.
This helps create a natural fade effect. This helps your haircut look natural and polished.
Key Takeaways
- Cut dry hair to judge the exact length and shape correctly.
- Trim only a tiny amount, about ¼ inch, to maintain healthy ends.
- Use sharp scissors or hair clippers designed for short haircuts.
- Lift hair sections straight up at 90 degrees for even cutting.
- Blend sides and top using a scoop motion to avoid harsh lines.
- Work slowly and in small sections to avoid cutting too much.
How to Cut Your Own Hair Short Step-by-Step

Cutting your hair short at home takes care and patience. Follow clear steps to avoid mistakes and get an even look. Section hair properly and cut in small amounts to keep control.
Prepare Your Workspace and Tools
Set up in a bright place with mirrors that show your hair from multiple angles. Gather sharp hair-cutting scissors, clips, a comb, and a spray bottle with water. Avoid dull scissors that can cause split ends or an uneven cut.
Lay a towel down to catch cut hair. Use a handheld mirror. Check the back of your head carefully.
Make sure you can clearly see every angle to spot uneven spots as you work. Good lighting and tools make the process easier and safer.
Section the Hair into Manageable Parts
Divide your hair into four to six sections using clips to keep strands separate. Typical sections include a top part, both sides, and the back. This helps you work methodically and prevents cutting too much by accident.
Start with clean, detangled hair. Use a comb to smooth each section before clipping so the hair lies flat. Sectioning helps keep lengths consistent on both sides of your head.
Choose the Cutting Technique and Start Trimming
Work from the back section forward, trimming small amounts to create your guide length. Cut quarter-inch to half-inch trims to avoid removing too much at once. Always check your progress in the mirror every few cuts.
Hold hair between your fingers, using the guide strand to match lengths as you go. For blending, point scissors vertically and cut upward in small snips rather than chopping straight across. Keep hands steady to maintain an even line.
Finish with Blending and Detailing
Use point cutting to soften blunt edges and blend layers, especially around the crown and sides. Trim bangs last, leaving them longer than desired to account for shrinkage as they dry. Let hair dry fully before fixing bangs with tiny touch-ups.
Regularly step back and check your reflection from different angles with a handheld mirror. Adjust uneven spots carefully by cutting tiny sections at a time. Finish by styling hair as usual to see how the cut settles.
- Set up a well-lit workspace with multiple mirrors.
- Gather sharp scissors, clips, a comb, and a spray bottle.
- Section hair into four to six parts and clip each.
- Start cutting from the back, trimming small amounts.
- Use a guide strand to keep length consistent.
- Point cut to blend layers and soften edges.
- Trim bangs last, cutting dry and in small sections.
- Check overall balance regularly using mirrors.
Essential Tools for Cutting Short Hair at Home

Cutting short hair at home requires a few key tools to get a clean, even cut. You need good scissors made for hair and reliable clippers. Use a comb to section and control your hair.
Have mirrors to see all angles clearly. Picking the right tools makes a big difference in your results and comfort during the cut.
Choosing the Right Scissors for Short Hair
Hair scissors have sharper, thinner blades than regular scissors. They cut hair cleanly without damaging the ends.
Beginner-friendly scissors typically cost between $20 and $50, which is enough for neat trims. For sharper, professional-quality shears, prices start around $70 and can go much higher.
Choose scissors with a comfortable grip that fits your hand size to avoid fatigue. Smaller scissors, around 5 to 6 inches, work best for precise cutting in short hair. Avoid using dull or multipurpose scissors as they can cause split ends or an uneven cut.
Hair Clippers: Are They Necessary?
Clippers aren’t required. Clippers make trimming the back and sides much easier. They work well for tapered or buzzed short styles.
A good clipper kit with guard sizes costs $40 to $120. The price depends on the brand and features.
For beginners, a basic clipper with 1/8-inch to 1-inch guards suits most short haircuts. Grab popular clipper kits quickly.
They have been hard to find since 2020. An alternative is using scissors carefully for the sides and back if clippers aren’t accessible.
Combs That Make Cutting Easier
A fine-toothed comb helps control hair during cutting and ensures an even trim. You’ll want a sturdy comb about 7 to 8 inches long, often costing under $10. Use it to part your hair evenly and smooth strands before cutting.
For curly or textured hair, use a wide-toothed comb or hair pick. These tools gently detangle without stretching curls. Comb through the hair section by section while trimming to keep control over the length.
Mirrors Setup for Cutting the Back and Sides
Using just one mirror makes cutting the back very tricky. The best setup includes a large wall mirror plus a handheld mirror. Hold the handheld mirror behind you so you see the back reflected in the wall mirror.
Using two mirrors lets you check your haircut progress. It helps avoid uneven spots on the back and sides. A standard handheld mirror costs around $10.
You probably already have a wall mirror. Position them comfortably before starting your cut.
Essential Tools Checklist for DIY Short Haircuts
Here are the must-have tools that help you cut your own short hair well at home:
- Haircutting scissors (5-6 inch, sharp blades)
- Hair clippers with multiple guard sizes (optional but helpful)
- Fine-tooth comb for straight hair, wide-tooth comb for curls
- Large wall mirror and a handheld mirror for back viewing
- Hair clips or ties to section hair
- A cape or towel to catch cut hair
- Spray bottle for lightly dampening hair (optional)
Having all these tools ready before you start keeps the process smooth and reduces mistakes.
Always check that your scissors are sharp and clippers fully charged before you begin. Dull blades slow you down and produce poor cuts.
Choosing the Best Cutting Method for Your Hair Type
Choosing the right cutting method depends on your hair type and the short style you want. Straight hair usually cuts best when damp.
Curly and wavy hair stays true to its texture if cut dry. This helps avoid surprises like uneven lengths or unwanted shape changes.
Cutting straight hair damp makes it easier to comb and create a precise line. Wavy hair can work either way, but damp cutting helps reduce frizz and snagging. Curly hair shrinks a lot when wet.
Cutting hair dry helps you see its natural fall better. It also helps you avoid cutting too much length. This way, you control how much you trim.
| Hair Type | Best Cutting Method | Why | Pros | Cons |
|---|---|---|---|---|
| Straight | Damp | Allows clean, even cuts | Easy to comb and measure; precise lines | May shrink when dry, altering length slightly |
| Wavy | Damp or dry | Depends on frizz control preference | Damp reduces frizz; dry shows natural shape | Harder to see true wave pattern when damp |
| Curly (loose 2A, 3B) | Dry | Preserves natural curl shape | Helps trim curl by curl for volume | More time-consuming; needs careful sectioning |
| Curly (tighter 3C, 4C) | Dry | Shows natural shrinkage and curl pattern | Use “dusting” to remove split ends safely | Avoid cutting straight lines for natural look |
For curly hair, take your time and work on small sections to avoid uneven cutting. Try trimming curl by curl at an angle if you have loose curls. Those with tight curls can try the dusting method.
It means snipping tiny bits from the ends. This refreshes hair without cutting a lot off.
Straight hair benefits from simple blunt cutting or point cutting to add softness. You can bring hair forward and snip straight or angled, depending on your desired style shape. Tools should be sharp scissors designed for hair to avoid split ends, no matter your method.
Tips for Cutting Specific Short Styles Yourself
Cutting short styles at home is easier with clear steps for each look. A blunt bob needs straight cuts. A pixie cut requires careful blending.
Bangs should be trimmed slowly in small amounts. Adding texture or layers follows simple angled snips you can try yourself.
Cutting a Blunt Bob Evenly
Start by combing your hair straight and detangling it fully. Use clips to divide hair into two or three even sections, starting at the back. Hold a guide strand at the desired length and cut straight across with sharp scissors.
Check the length and symmetry frequently by dropping the hair and combing it straight again. Trim any uneven parts carefully to keep the line clean. Using a mirror or camera helps you watch the angles clearly.
- Comb hair down and smooth out tangles.
- Clip hair into sections: bottom, middle, top.
- Choose a guide strand in the back and cut straight across.
- Move to sections on the sides and match length to guide.
- Release clips and comb hair straight to check sides.
- Trim any rough or uneven edges carefully.
- Double-check symmetry using a handheld mirror or phone camera.
Trimming and Maintaining a Pixie Cut
Work with small hair sections to keep the cut neat and blended. Use scissors to trim the top hair. Clippers or scissors work for the sides.
Choose what feels easier for you. Bring the side hair forward to compare lengths and blend carefully with the back.
Hold each section taut between your fingers at a slight angle for texture. Cutting little by little helps avoid big mistakes. Keep checking your progress in the mirror from different angles and adjust as needed.
- Part hair into small manageable sections.
- Hold each section firmly between index and middle fingers.
- Cut ends at about a 45-degree angle to add texture.
- Use scissors for top layers and clippers or scissors for sides.
- Bring side hair forward and trim to blend with back.
- Check all around with mirror for evenness and blend.
- Make very small trims to fine-tune the shape.
Cutting and Shaping Bangs
Section only the hair from your forehead, keeping bangs separate. Cut bangs dry to avoid short surprises when they dry. Take tiny cuts straight down or at an angle.
Cut no more than 1/4 inch at a time. Adjust angle based on the style.
Check symmetry often by combing bangs down and comparing sides in a mirror. Twist small sections of bangs to create softer face-framing pieces. Avoid rushing to keep bangs looking fresh and balanced.
- Separate bangs from rest of hair with clips.
- Comb bangs straight down while dry.
- Trim small amounts, about 1/4 inch at a time.
- Cut straight across or with slight angle for softness.
- Twist small sections to create face-framing pieces if desired.
- Frequently comb bangs and check for evenness in mirror.
- Adjust tiny bits as needed, avoiding big chops at once.
How to Avoid and Fix Common DIY Short Haircut Mistakes
Cutting too much hair at once is the most common mistake. You can fix it by trimming smaller amounts repeatedly, checking the length after each cut.
Rushing leads to uneven lines. Slow down and use a hand mirror to check all angles.
Uneven sides or choppy edges happen when you don’t blend properly. Blend by cutting small sections at a slight angle. Use scissors over comb to make smooth transitions.
This method helps the hair look neat and even. Start longer than you want, then gradually shorten to avoid patches.
Blending sides and top creates a neat, smooth look. Use the point-cutting method: hold scissors vertically and snip small chunks into the hair ends. It softens harsh lines and helps hair lie naturally.
| Mistake | How to Fix |
|---|---|
| Cutting too much at once | Trim small amounts repeatedly, check length often |
| Uneven sides or lines | Use scissors over comb to blend and even out |
| Rushing the process | Work slowly with breaks to check all angles |
| Not dampening hair | Cut hair damp to get better control on length |
| Attempting advanced cuts | Stick to basic trims or undercuts to reduce errors |
Always cut hair while damp, not soaking wet. Damp hair lies straighter and shows even length better. Start conservative with length.
It takes about 5 to 10 minutes for a quick trim. Check your work using natural light for true color and length.
To re-cut or fix uneven spots, isolate the problem areas with clips. Use scissors over comb to blend out rough edges. Spot choppy layers by checking the edges closely.
Point cut these edges to soften and blend them. This makes the hair blend better with the rest.
Tip: Use a comb as a guide and cut small sections to avoid big mistakes.
For blending top and sides, lift hair sections upward from the scalp. Snip small vertical cuts into the ends.
This breaks up harsh lines and creates a natural flow between layers. Avoid straight horizontal cuts that cause a blocky look.
Maintaining Your Short Haircut Between Home Cuts
Trim short hair every 6 to 8 weeks to keep the style fresh. Cutting less than ¼ inch each time helps avoid losing length. Your ends feel dry or tangle a lot.
Trim more often to remove damage. This helps keep your hair looking healthy.
Maintaining a short pixie or bob at home means regular light trims and simple styling. Use sharp hair shears or clippers to tidy edges and remove any stray hairs. After cutting, brush your hair to spot uneven bits.
Trim any that stick out. This keeps your cut tidy and neat.
Daily care protects short hair and slows the need for trims. Wash with a gentle shampoo and conditioner designed for your hair type. Avoid heavy products that weigh down hair.
Use a wide-tooth comb to detangle gently. This lowers your risk of breakage.
Keep your hair clean and styled by drying it gently with a towel. Rubbing too hard can cause frizz and split ends. For short hairstyles, use light styling cream or mousse.
It helps keep your style without stiffness. This avoids product buildup.
Edges around the neckline and ears can lose neatness quickly. Use small scissors or clippers to carefully trim these areas weekly.
Stand in front of a mirror and hold the skin tight for steady, even cuts. Take your time to avoid mistakes.
Regular trims and gentle daily care allow short hair to look sharp longer. This routine takes about 20 to 30 minutes every few weeks and saves salon visits. Investing in good hair shears makes trimming easier and leaves cleaner cuts compared to dull scissors.
Some short styles may need more frequent attention depending on hair texture and growth rate. Curly or thick hair can tangle and frizz faster.
So trim and style more often. Straight, fine hair often holds shape longer and requires fewer trims.
Keeping short hair healthy means avoiding too much heat or harsh chemicals. Let your hair air dry when possible and skip frequent coloring or chemical treatments. Healthy hair holds a style better and feels softer between cuts.
When to Choose a Professional over Cutting at Home
Cutting your own hair short works well for basic trims and simple styles. But if you want a style with complex layers or sharp lines, a professional is safer. They have training to shape hair precisely and create smooth blends you might miss at home.
Professionals also know how to handle thick or hard-to-manage hair, which can be tricky for beginners. Your hair is very curly, coarse, or grows in many directions.
Mistakes happen more easily when you cut it alone. A stylist can control the shape better and reduce uneven patches.
Watch out for uneven lengths wider than half an inch. Also, be careful not to cut off too much hair. These signs mean you may need professional help.
Your hair looks choppy or flat in some places. Or you trimmed deeper than planned.
Then it’s time to see a stylist. They can often even out your cut or turn a mistake into a stylish look.
Fixing a bad DIY cut with a stylist is common and usually affordable. Costs vary, but expect around $30 to $60 for a repair trim or shape-up.
Bringing a clear photo of your ideal look helps the stylist know what to fix. Avoid trying to fix big uneven spots yourself; that can make things worse.
Complex edits, like adding light layers for movement in short hair, suit professionals. Layers require precise angle cuts to keep hair balanced and soft. Professionals use sharp styling shears, which reduce split ends and jagged cuts compared to regular scissors.
Also, leave major style changes or color work to professionals. These services have higher technical risk and harder fixes. You may feel unsure about each step or lack the right tools.
Going to a salon saves time and stress. This choice helps avoid mistakes.
Safe Hair Cutting Practices and Tool Care
Cutting your own hair at home means safety comes first. Avoid rushing or cutting when your hands are shaky, and keep your workspace well-lit. Use a sturdy chair and sit comfortably.
Place a mirror at eye level. This helps you see your hair from many angles.
Work slowly to avoid accidents. Wear a cape or towel around your shoulders. This protects your skin and eyes.
Section your hair carefully with clips to keep loose strands out of your cutting area. This prevents cutting wrong sections or uneven results.
- Keep scissors sharp and specifically for hair to avoid jagged cuts
- Disinfect clippers and combs before and after use with rubbing alcohol
- Use clean towels and wash hands thoroughly to prevent infections
- Store tools dry in a safe place to avoid rust and damage
- Check for tool damage regularly and replace dull blades or broken clips
- Work slowly and double-check lengths before cutting with scissors
- Trim in small increments to avoid cutting too much hair at once
The tools you use can dramatically affect the cut quality and safety. Dull scissors pull hair instead of cutting cleanly, increasing split ends and uneven lines. Sharp scissors cut hair smoothly and reduce slips, which lowers your injury risk.
Cleaning your tools after each use stops bacteria and oils from building up. Wipe scissors and clippers with rubbing alcohol and dry them well. Avoid soaking scissors, which could loosen the joint or dull the blades.
Never run clippers or scissors without hair clips in place or on tangled hair. Tangles can cause uneven cuts and tool damage.
Cutting your hair yourself can cause cuts. It might lead to infections too. Clean tools and focus help prevent problems.
Always clean your hands and tools before cutting. Avoid sharing your instruments with others, and never cut scalp skin.
A basic disinfectant spray and good scissors cost about $15 to $40. These items are one-time buys for home haircuts.
These are small investments that improve safety and your hair looks in every trim. Well-maintained tools can last years if you clean them after each use and store them properly.
Short Haircut Quick-Start Action Plan
Get started with cutting your hair short at home by following these clear steps. Each step helps confirm you’re on track.
- Before you start: Gather your tools, sharp scissors, clippers, comb, and a mirror. Check they all work well and are clean.
- Day 1: Wash and dry your hair completely. Dry hair shows the true length, so your cut is even.
- Day 1: Section your hair using clips or ties. This keeps hair manageable and helps you cut in neat parts.
- Day 1: Start cutting small amounts at first, especially with scissors. Stop when you see a clean, even line forming.
- Day 1: Use clippers for very short cuts, moving slowly with the grain of hair. If the cut is uneven, trim again carefully.
- After cutting: Check your haircut in different mirrors. Look for uneven spots or missed patches and fix them gently.
- Week 1: Style your hair as usual to see how it settles. Adjust any odd areas if needed.
- After 3 weeks: Trim your ends to keep the shape sharp and fresh. This prevents split ends and uneven growth.
Frequently Asked Questions
Can I Cut My Own Short Hair with Blunt Scissors at Home?
Yes, blunt scissors can work if they’re sharp and designed for hair. Using dull scissors can cause split ends.
Make sure your tools are sharp. Clean them for the best cut.
How Often Should I Trim My Short Hair to Keep the Style Sharp?
Trim every 4 to 6 weeks to maintain a neat short haircut. This frequency helps avoid uneven growth and keeps your hair looking fresh.
Can I Cut My Own Short Hair Wet or Dry for Better Control?
Cutting short hair dry gives better control and lets you see the shape. Wet hair tends to shrink when dry and can lead to cutting too short.
What’s a Good Technique to Blend Different Hair Lengths When Cutting Short?
Use a scooping motion with scissors or clippers to blend lengths smoothly. Holding hair at 180 degrees and cutting points helps merge layers naturally.
Is It Safe to Use Electric Hair Clippers on My Own Short Haircut?
Yes, if you choose a suitable guard length and go slow to avoid mistakes. Clippers offer a clean cut but require careful handling to prevent unevenness.
How Do I Fix Uneven Spots After Cutting My Own Short Hair?
Slightly dampen uneven areas, trim small amounts gradually for balance. Use mirrors to check your work and avoid cutting too much at once.
Wrapping Up
Short haircuts done at home can look great and save you time and money. Start with small trims and go slow to avoid mistakes. Try a simple style first, then practice to build your confidence.


