How to Cut My Own Hair Men: Simple Steps for Fast, Professional Results
Cutting your own hair as a man works best when you take your time. Use clippers with several guards to control the length easily. Your first attempts may need patience because perfect cuts take practice.
Choose a bright area with good lighting for your haircut. Use a hand mirror to see the back clearly. Make sure your clippers have enough power or a long cord to move freely.
Move slowly, especially around hard-to-reach parts like the back of your head. Don’t rush since the process usually takes 30 to 45 minutes. Keeping hair short and simple makes cutting yourself easier.
Select guards that trim between half an inch and six inches for a neat look. This gives you better control than a basic buzz cut. Touch up every few weeks to keep your style fresh without much hassle.
Key Takeaways
- Choose clippers with multiple guard sizes to control hair length easily.
- Set up a bright space and use a hand mirror for hard-to-see spots.
- Take 30 to 45 minutes for your haircut to avoid mistakes.
- Start with longer guards and work down to avoid cutting too short.
- Keep hair short for simpler maintenance and easier cutting.
- Touch up your haircut every 2 to 3 weeks to stay neat.
How to Cut Your Own Hair Step-by-Step for Men
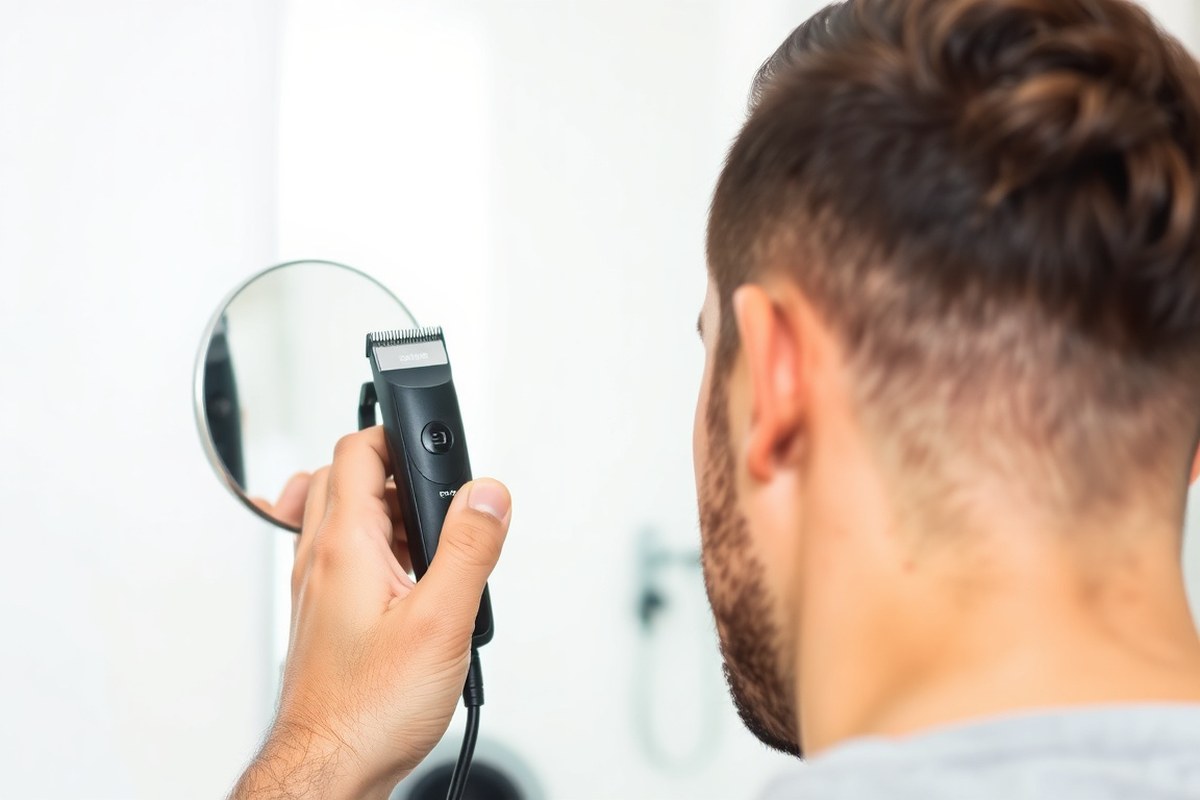
Cutting your own hair takes patience and the right approach. Using clippers is simpler for shorter styles, while scissors suit longer hair. A handheld mirror combined with a bigger mirror will help you see the back clearly.
Hold your head slightly down with the chin tucked in when cutting the back. Move the clippers or scissors in smooth, even strokes, working from the bottom upwards. This keeps the sides and back balanced and neat.
- Prepare your hair: Wash and dry your hair to remove oils and product build-up. Detangle any knots with a comb for a clean cut.
- Position a large mirror in front of you and hold a smaller one behind. Use the smaller mirror to check the back of your head. This setup helps you see all angles clearly.
- Trim the sides: Choose the correct clipper guard, often a longer size first. Glide the clippers upward from below your sideburns to the crown. Hold the clipper flush to your scalp to ensure uniform length.
- Cut the back: Use the two-mirror method to spot every area. Start at the base of your neck and move clippers upward. Clip in 1-inch rows, moving side to side for uniform coverage.
- Trim the top: Comb hair straight up in sections. Cut hair about a quarter inch at a time using scissors or clippers. Hold hair between your fingers to control the length.
- Connect the sides and top: Blend the areas by trimming slightly at the boundary. Hold scissors at a 45-degree angle and point cut to avoid harsh lines.
- Use clippers without guards or scissors to trim carefully around your neck. Clean up hairlines near your ears and neck edges.
- Check your work: Use both mirrors to inspect all angles. Touch up any uneven spots with slow, careful strokes.
Start your first cuts slowly. It may take 30 to 45 minutes.
Do less rather than more. You can always cut more later, but you can’t fix a mistake quickly.
Essential Tools and How to Choose Them

Cutting your own hair requires the right tools that suit your style and budget. Hair clippers are key since their guards control length easily. Pair them with scissors and mirrors to get the job done neatly.
Must-Have Tools for Every Home Haircut
You need a good pair of hair clippers with a full guard set. Guards help you choose the hair length, which keeps things consistent. Scissors designed for hair cutting give you better control for trimming and shaping.
These items help you cut your hair easily, even as a beginner. A hand mirror shows the back and sides well during the cut. Wearing a barber cape or old towel reduces the cleanup of hair bits.
- Hair clippers with a full set of guards
- Hair cutting scissors (shears)
- Handheld mirror (at least 8 inches wide)
- Barber cape or old towel to catch hair
- Fine-tooth comb to section hair
These basics cover most haircuts done at home. Optional tools like a fog-free shower mirror help with tricky angles, but aren’t essential.
Recommended Clippers and Guard Sizes
A reliable clipper brand offers smooth cutting and a variety of guards. Budget picks like the Wahl Color Pro Cordless are affordable and good for beginners. Upgrading to models like the Wahl Cordless Magic Clip gives more precision and battery life.
Guards control how short the hair gets clipped. Using lower guard numbers trims very close; higher numbers leave longer hair.
For example, a #1 guard cuts hair about 1/8 inch long. A #4 leaves about 1/2 inch.
| Guard Size | Hair Length Cut | Best Use |
|---|---|---|
| #0 | Almost no hair (1/16 inch) | Very close buzz or fade base |
| #1 | 1/8 inch | Short hair on sides or back |
| #2 | 1/4 inch | Standard short length on sides |
| #3 | 3/8 inch | Medium length on sides or above ears |
| #4 | 1/2 inch | Longer lengths or top blending |
| #5+ | 5/8 inch and longer | Longer top hair or trims |
Mix guards based on the style you want. For a fade, use a middle guard to blend different lengths smoothly. Changing guards between the top and sides helps create shape and texture.
Maintaining and Cleaning Your Equipment
Keeping your clippers clean means better cutting and longer tool life. Remove hair clippings after each use by brushing or tapping off the blades. Then, apply clipper oil to keep blades sharp and reduce heat buildup.
Scissors should be wiped down and occasionally sharpened to get clean cuts. Store everything dry to prevent rust or damage to moving parts. Routine maintenance takes just a few minutes but makes a big difference.
Never cut hair with dull scissors or dirty clippers. It leads to uneven results and damage.
Cleaning your mirrors and combs regularly will also keep your haircutting station tidy and functional. This step helps avoid mistakes caused by poor visibility or hair buildup on your tools.
How Hair Type Affects Your Cutting Technique
Hair type changes how you cut your hair at home. Straight hair lies flat and feeds smoothly through clipper guards. It usually shows fewer mistakes, making it easier for beginners to handle.
Curly and thick hair need a different approach. Curly hair springs back after cutting, so cut less length than you think. Thick hair often requires good clippers that cut cleanly without tugging.
A simple table lays out the best techniques and tools by hair type. It helps you choose the right method for your haircut.
You avoid problems like uneven cuts or rough edges. This guide shows you how to get it right.
| Hair Type | Best Cutting Technique | Recommended Tools | Tips |
|---|---|---|---|
| Straight | Clipper guards, cut in straight lines | Clipper with multiple guards, shavette for neck | Cut in consistent, slow strokes to avoid mistakes |
| Curly | Scissor over comb, cut dry or slightly damp | Scissors, wide-tooth comb, cordless clippers | Cut less than expected; curls shrink when dry |
| Thick | Use strong clippers, section hair before cutting | Quality heavy-duty clippers, blow dryer | Dry the hair before cutting to reduce bulk |
Cutting thick hair means working in small sections. Use a blow-dryer to remove loose cut hair and see what’s left. Good clippers handle thick hair better by cutting evenly every time.
Curly hair can hide uneven spots. Use scissors and comb for more control. Cut it dry or only lightly damp, because wet curls tighten up as they dry.
With straight hair, start with a longer guard number. Move slowly and keep the clipper flat to your head.
The hair feeds evenly. So uneven spots are easier to spot and fix right away.
Common Cutting Mistakes and How to Fix Them
Cutting your own hair often leads to uneven lengths and rough edges. This happens when you rush or apply too much pressure with the clippers. Taking your time and using gentle, steady strokes will help keep your cut even.
Going too short is a common mistake. Start with a longer guard on the clippers to avoid cutting off more than you want.
When hair feels uneven, blend shorter and longer parts carefully. Use scissors or a smaller guard size to trim.
Another snag is missing spots, especially in the back of your head. Use two mirrors or ask a friend to check that area. Gradual fades need extra care.
Start at the bottom. Work your way up for a smooth transition.
- Cut with a longer guard first to avoid cutting too short
- Use two mirrors to see the back of your head
- Apply light, even pressure with clippers to avoid uneven cuts
- Start cutting hair at the top before blending the bottom
- Take breaks to check your progress and adjust as needed
- Fix rough edges by trimming carefully with scissors
You can fix some mistakes by blending shorter areas into longer ones with scissors. A spot too short?
Buzz the rest of your hair to match. This isn’t perfect, but it saves your haircut from looking patchy.
Pacing is important. Don’t rush even if you plan a quick trim.
Take small sections at a time, then stop to check in the mirror. Moving slowly also helps you keep a consistent pressure, which avoids uneven lines.
Techniques for Trimming Different Areas of Your Head
Use clippers with different guard lengths for the back, sides, and neckline. Cut the top with scissors or a longer guard for a natural look. Trim sideburns using a steady hand and a close guard or scissors for precision.
Trimming the Back and Neckline
Start with clippers set to a low guard like #2 or #3. Use this for the neckline and lower back. This helps get a clean start.
Use a hand-held mirror to see the back clearly while trimming. Move the clippers upward from the neckline, stopping just below the occipital bone.
Clean up excess hair around the neckline and hairline for a sharp finish. Use slower, steady strokes near the edges to avoid harsh lines.
Choose a #4 guard above the neckline to create a fade. Blend the hair smoothly as you move upward.
- Place a hand mirror behind your neck to see the back clearly.
- Attach a #2 or #3 guard to your clippers.
- Start trimming from just above the neckline, moving upward in short strokes.
- Switch to a #4 guard to blend a fade above the trimmed neckline.
- Use the clippers without a guard to clean stray hairs along the hairline.
- Check symmetry frequently with both mirrors.
- Use scissors to snip any hairs the clippers miss.
Keep the clippers flat against your skin to avoid uneven lines on the neckline.
Cutting the Sides Evenly
Comb the side hair upward away from the head before trimming to reduce uneven spots. Use a #3 or #4 guard depending on how short you want the sides. Trim from bottom to top, moving the clippers upward against the natural hair growth.
For longer blends, switch to a #6 guard just below the top. This makes a smooth transition.
Take your time and check frequently with a hand mirror to catch missed spots. Avoid cutting too close to prevent patchy or choppy results.
Styling and Cutting the Top
Longer hair on top requires scissors rather than clippers. Comb the hair straight up between your fingers. Trim about ¼ to ½ inch off the ends.
This cleans up the hair neatly. Take small sections, trimming little by little to keep control over the length.
Use a longer guard like #5 or #6 for buzz cuts. Run clippers evenly over the top. This keeps the length consistent.
Blend the top into the sides with a middle guard. Usually, a #4 or #5 works well.
This bridges the length difference smoothly. Always leave hair slightly longer than you want, since you can always trim more.
Setting Up Your Home Haircut Station for Success
Start by choosing a well-lit space with a mirror at eye level. Natural light works best because it shows true hair colors and textures. Avoid bathrooms with harsh overhead lighting that casts shadows on your head.
Have a chair that keeps you steady and relaxed, ideally one without arms to avoid interference. Spread a plastic sheet or newspapers on the floor. This will catch hair clippings.
Cleanup will be much easier afterward. Keep your tools within arm’s reach so you don’t lose focus.
- Use a hand-held mirror to check the back of your head
- Keep a spray bottle filled with clean water nearby
- Have a towel ready to dry your hair after washing
- Gather your scissors, clippers, comb, and hair clips in one place
- Place a garbage bin or bag close for quick disposal
- Wear an old shirt or cape to catch loose hair
Wash and condition your hair the day you plan to cut. Clean hair cuts more evenly because products or grease can cause uneven snips. Towel-dry your hair until it feels damp.
Avoid leaving it dripping wet. Wet hair looks longer and is harder to cut.
Cutting damp hair works best when using scissors. Water helps hair strands sit closely together. So you get cleaner lines with fewer snags.
Clippers work best on dry hair. Wet hair can clog blades. This leads to uneven results.
Lightly mist your dry hair with water. This makes it easier to manage. Then start trimming.
Take care not to overdo the spray. A few quick squirts keep hair workable without dripping. This setup saves you time and reduces frustration while cutting at home.
When to Avoid Cutting Your Own Hair and Seek a Professional
Cutting your own hair is tough for complex styles. Sharp details need skill. A barber handles that better.
Styles like fades, undercuts, or intricate designs need a barber’s eye and hand. Barbers know how to work with hair’s natural grain and blend different lengths smoothly.
You should also see a professional if you’re preparing for a big event. Weddings, important job interviews, or formal occasions call for a precise, polished look. A barber can give you a fresh, sharp cut.
It lasts longer, too. You avoid awkward patches or uneven spots.
Knowing when you’ve hit your skill limit matters. Your DIY trim has uneven lines, patchy spots, or odd shapes. Time to get a professional.
They can fix it better. When you spend too much time fixing mistakes, get help.
Feeling unsure means it’s frustrating. A pro can save time.
Some hair types and styles are harder to manage alone. Thick, curly, or very layered hair often needs special tools and techniques only a barber uses. Trimming near the neckline or ears is tricky.
You need steady hands. Good lighting helps avoid mistakes.
You cut simple styles often, like buzz cuts or trims. Visiting the barber feels like a waste. Doing it yourself saves money.
Pros give a consistent finish for $25 to $50. You pay for ease and confidence.
Many think it’s worth it. Occasional visits can keep your self-cuts looking sharp and avoid build-up of mistakes.
Use these rules when choosing help: how complex your style is. Think about your comfort level. Check if your results match goals.
Your haircut needs more than trimming or shaping with clippers. You want a polished look. A barber is best for that.
Maintaining Your Haircut Between Self-Cuts
To keep your haircut looking sharp between full cuts, trim every 2 to 4 weeks. Focus on small areas like the neckline and around the ears. Use natural hair products to maintain style and control frizz daily.
Quick Touch-Up Techniques
Trim stray hairs around the neckline and ears to maintain a clean shape. Use a clipper guard that matches your last cut to avoid cutting too much. Take your time to avoid uneven spots.
Lightly trim split ends or uneven parts with scissors to keep the shape tidy. Use a handheld mirror to check all angles, especially the back. A fresh comb-over or part can also sharpen your look without cutting.
- Use a #2 or #3 guard for quick neckline trims
- Snip flyaways with sharp scissors
- Comb hair forward and trim slowly for even layering
- Dry your hair before trimming for accuracy
- Keep your tools clean and oiled
- Trim under natural light or good bathroom lighting
- Check cut with multiple mirrors
Only trim small sections at a time; rushing causes mistakes.
Timing Your Trims for Best Results
Trim every 2 to 4 weeks to maintain your style’s shape and neatness. Hair grows about half an inch a month on average.
So this timing controls length well. Waiting too long means more work and a patchier look.
If you keep your hair very short, trims every 2 weeks help avoid a messy appearance. Medium-length styles lean toward 3 to 4-week intervals for touch-ups. Track your hair growth and adjust timings based on how fast your hair changes shape.
Using Products to Improve Your Cut
Natural hair products help you style hair even if your cut isn’t perfect. Grooming cream controls frizz while keeping your hair’s natural flow. Ingredients like Aloe Leaf and Vitamin B3 also help smooth and promote growth.
Use a small amount of product after trimming for a fresh look. Always start with clean hair but avoid washing daily.
Twice a week is enough to keep hair manageable. Switch up your product if your hair grows longer or becomes harder to control.
Step-by-Step Action Plan to Cut Your Own Hair
Use this plan to get started cutting your hair at home confidently. Each step builds the skills you need for a clean, even look.
- Before you start: Gather your clippers, scissors, comb, mirror, and good lighting. Check your tools work well and are clean.
- Day 1: Try a basic clipper cut on the sides and back using a longer guard. See if the length looks even and you feel comfortable with the clipper.
- After Day 1: Trim the top carefully with scissors. Cut small amounts and check your progress in the mirror often.
- Week 1: Fix any uneven spots using your comb and clippers. Look for smooth transitions between different hair lengths.
- Week 2: Practice cleaning up your neckline and around your ears. Use the smallest guard or just the trimmer edge for sharp lines.
- Week 3: Check if your hair cut grows out evenly. If it feels patchy or hard to style, plan a touch-up session or visit a pro.
- After 3 weeks: Maintain your style with light trims every 1-2 weeks. Keep your tools clean and sharp for the best results.
Frequently Asked Questions
What’s the Best Way to Fix a Haircut Mistake at Home?
The best way is to trim small bits evenly to blend errors. Use a comb to even out uneven spots slowly without cutting too much at once.
How Often Should I Clean My Clippers When Cutting Hair?
Clean your clippers after every use to avoid hair and germ build-up. Use a small brush to remove hair and clipper oil for lubrication every few cuts.
Can I Cut My Hair Dry or Should It Be Wet?
Cutting your hair dry helps you see the natural shape better. Wet hair can stretch and look shorter, which might cause you to cut it too short.
Should I Use Scissors or Clippers for Self-Haircuts?
Use clippers for the sides and back, scissors for the top and details. Clippers give a cleaner line, and scissors help with blending and texturing.
How Can I Avoid Uneven Hair Length When Cutting My Own Hair?
Comb sections straight and cut small amounts uniformly to avoid unevenness. Check all angles with mirrors to help spot errors before finishing.
What’s a Simple Way to Cut My Neckline at Home?
Use a mirror to guide your hand and cut small sections at the neckline. Trim slowly, following your natural hairline to keep a clean edge.
Wrapping Up
Cutting your own hair takes patience and practice. Start slow, focus on short sessions, and keep your tools ready. Try your first trim today and adjust as you learn what suits your hair best.