How to Use Curling Tongs: Complete Steps and Expert Tips for Perfect Curls
Learning how to use curling tongs is about controlling heat and technique. First, make sure your hair is completely dry to avoid damage.
Pick the right heat setting for your hair type first. This stops frying and keeps curls holding better.
Take a small 1-2 inch hair section near ends. Hold the tongs straight up then roll hair up to your scalp. Keep the curl in place about 10 seconds.
Let it cool down to lock the curl tight. This way curls stay smooth and last more.
Watch your hair closely during curling to avoid overheating or tangling. Using the barrel clamp correctly creates polished curls that stay in place much better. Practice with small sections for an even, natural finish.
Key Takeaways
- Always dry your hair fully before using curling tongs to prevent damage.
- Choose a heat setting under 200°F for fine or damaged hair.
- Set heat between 300°F and 400°F for thick or curly hair.
- Clamp hair 1, 2 inches above the ends and roll tongs upward.
- Hold each curl for about 10 seconds before releasing.
- Leave 2-3 inches at the ends uncurled for a natural look.
What Are Curling Tongs and How Do They Work?
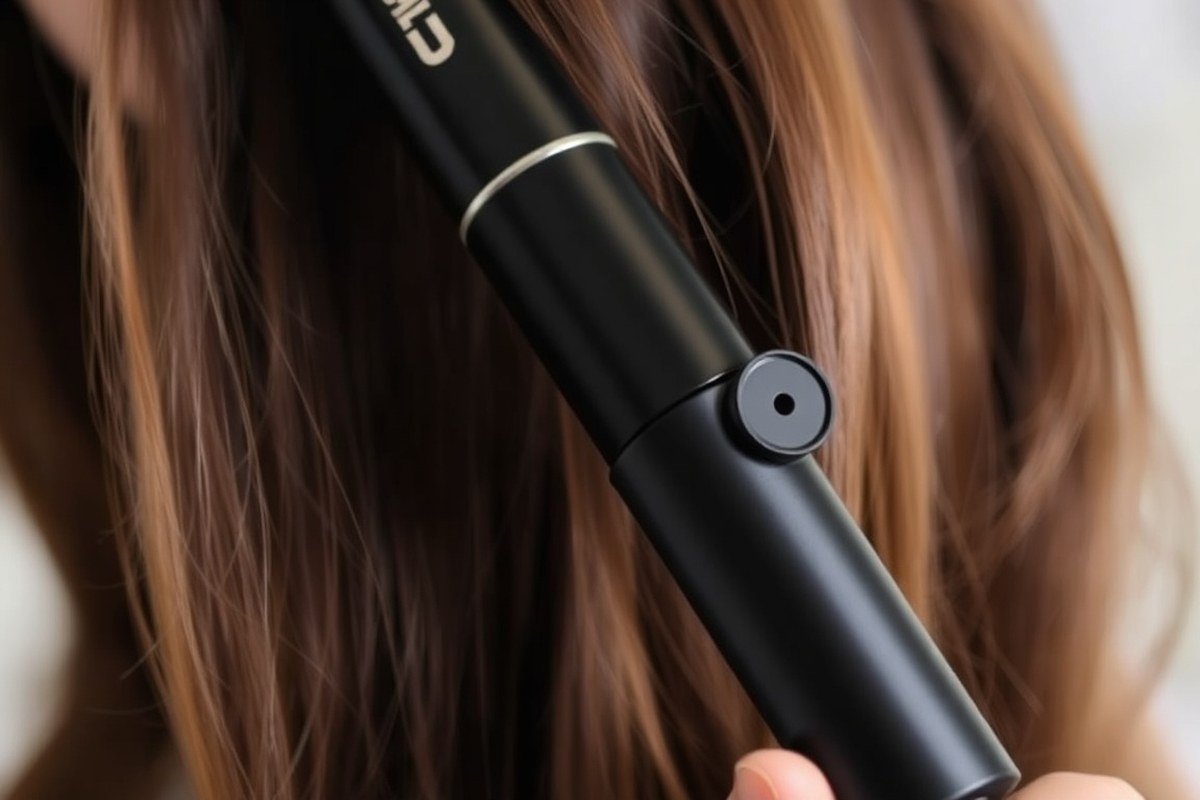
Curling tongs are heated tools designed to create curls by applying heat to your hair. They have a barrel that heats up. You wrap hair around to reshape it.
The barrel is cylindrical. Heat breaks down hydrogen bonds in hair.
This lets hair bend easily. It holds a curved shape after.
Most curling tongs have a clamp or clip that holds your hair against the barrel. The clamp keeps hair tight to the barrel. It heats hair for shaping.
This helps curls look uniform and defined. The parts are a handle with controls.
A heat-resistant barrel is included. The clamp opens and closes for styling.
Clipless tongs don’t have a clamp. They’re harder to use. These tongs create loose, natural-looking waves.
You wrap hair yourself around the barrel. This gives more styling control.
It takes practice to use well. Clip tongs, by contrast, are easier for beginners and produce tighter, polished curls.
There are various sizes of curling tongs you can choose. Smaller barrels, around ¾ to 1 inch, make tight curls that last longer. Larger barrels, about 1.5 inches or more, create loose waves or big curls with more movement.
Some curling tongs feature multiple barrels, like double or triple barrel designs. These are great for quick waves. But they don’t offer as much versatility as single barrels.
Single-barrel tongs work well for daily curls. They suit people who change styles often. These tongs make curls and waves.
The difference between curling tongs and curling wands mainly lies in the clamp. Wands have no clamp, so you wrap hair around the barrel by hand. Tongs have a clamp holding your hair.
This makes curling easier. They’re great for beginners or consistent curls.
Most curling tongs use ceramic or tourmaline barrels to reduce frizz and protect your hair. These materials heat evenly for curls. They help curls last 12 to 24 hours.
How long depends on hair and humidity. Temperature usually ranges between 250°F and 400°F, adjustable based on your hair’s thickness and texture.
Curling tongs help you create curls or waves. They are flexible tools to style hair. Use them for many looks.
Choosing the right size and type matches your curl style and hair skill level. Using the clamp helps keep curls uniform. Clipless tongs offer more natural styles but need more practice.
How to Prepare Your Hair Before Curling Tongs Use

Start with clean, dry hair before curling with tongs. Use heat protectant products to avoid damage. Section your hair for better control and even curls.
Step 1: Wash and Condition Properly
Wash and condition your hair with products fit for your hair type. Clean hair helps curls hold longer, but overly oily hair weighs curls down.
Use a moisturizing shampoo and conditioner if your hair feels dry. Avoid heavy conditioners that leave residue on fine hair. Rinse thoroughly to avoid leftovers that can make curls fall flat or slippery.
Step 2: Blow-Dry Hair Thoroughly
Make sure your hair is 100% dry before curling. Damp hair risks heat damage and won’t hold a curl well.
Use a blow-dryer on medium heat and a round brush to smooth hair. Drying can take 10 to 20 minutes depending on hair length and thickness.
Avoid curling tools on wet or damp hair. This cracks the hair shaft. It also causes frizz.
Step 3: Apply Heat Protectant Products
Spray or apply a heat protectant evenly before you curl. This shields hair from temperatures up to 450°F.
Use lightweight mousse or setting lotion as well, especially on fine or limp hair. These add volume and help curls last.
Do not skip heat protectant, even if your hair looks healthy. It reduces split ends and dryness.
Step 4: Section Hair for Easy Styling
Divide hair into 1- to 2-inch wide sections. Smaller sections curl more evenly and avoid uneven shapes.
Use clips or hair ties to keep sections separate. Start curling at the back and work forward. Sectioning helps you control heat exposure, which is important for thick or textured hair types.
- Wash hair with shampoo suited for your hair type.
- Condition hair lightly and rinse thoroughly.
- Blow-dry hair completely using medium heat.
- Apply a heat protectant spray from roots to ends.
- Apply mousse or setting lotion on fine hair for hold.
- Comb hair gently to remove tangles.
- Section hair evenly into 1- to 2-inch parts using clips.
Never curl damp hair. It leads to more damage and weak curls.
Choosing the Right Heat Settings for Your Hair Type
Choosing the right heat settings depends on your hair type and condition. Using the correct temperature prevents damage and helps curls hold better. Match heat and timing carefully to get the curls you want without harming your hair.
Heat Temperature Ranges by Hair Type
Fine or damaged hair requires the lowest heat to avoid breaking and dryness. Medium hair can handle moderate heat for effective curling without stress. Thick or coarse hair needs higher heat to shape curls well because it resists curling more.
| Hair Type | Temperature Range | Hold Time | Section Size |
|---|---|---|---|
| Fine or damaged | Under 200°F | 8, 10 seconds | 1, 1.5 inches wide |
| Medium texture | 200, 300°F | 10 seconds | 2 inches wide |
| Thick or coarse | 300, 400°F | 10, 15 seconds | 1.5, 2 inches wide |
| Color-treated | Under 300°F | 8, 10 seconds | 1.5 inches wide |
| Short hair (chin-length) | 300, 350°F | 5, 8 seconds | 1 inch wide |
Lower heat prevents damage but might slow curl setting on thicker hair. Higher heat helps thick hair curl but risks breaking fragile strands. Choose carefully based on your hair’s strength and thickness.
Recommended Hold Times per Hair Texture
Hold the curling tongs in place just long enough to shape curls without burning hair. Fine or thin hair needs about 8 to 10 seconds under low heat. Thick or coarse hair can handle 10 to 15 seconds at higher temperatures.
Shorter holds suit fine or damaged hair best to reduce stress. Medium hold times work well for medium hair to lock in curls firmly. For tight, bouncy curls, smaller sections held 10-15 seconds produce the best results.
Adjustments for Color-Treated or Damaged Hair
Color-treated and damaged hair require gentler heat settings to avoid fading and breakage. Keep temperatures under 300°F and hold hair for 8-10 seconds only. Use smaller sections, about 1.5 inches wide, to spread heat evenly and minimize damage.
Applying a heat protectant spray before curling gives extra safety. Avoid going above recommended ranges or too long hold times, which can cause dryness and frizz. Always check your hair’s condition and adjust heat accordingly to keep curls healthy and vibrant.
Step-by-Step Technique to Curl Hair with Tongs
To curl hair with tongs, start by sectioning it evenly. Clamp small sections close to the roots. Wrap hair around the barrel.
Hold the curl for 5 to 8 seconds. Release curls gently by holding the tongs vertically to avoid kinks.
Creating Even Sections for Best Results
Divide your hair into thin, vertical sections about 1 inch wide. This size allows the heat to reach all strands evenly. Small sections help create tight, well-defined curls.
Clip the unused hair out of the way to prevent tangles. Working in sections helps curl hair more quickly and makes the curls last longer. For thick hair, take thinner sections for better heat penetration.
Positioning the Clamp Correctly
Open the tongs and clamp about 5 cm (2 inches) from the roots. Clamping closer can burn your scalp or damage your hair. Holding too far misses the hot base that forms a strong curl foundation.
Place the clamp at a slight angle, not straight down. So the hair wraps smoothly.
The tongs hold the hair against the barrel to shape curls. Adjust the clamp angle to avoid pinching or folding hair sharply.
Wrapping Hair and Curl Direction
Wrap each hair section fully around the heated barrel, away from your face. Curling away frames your features and gives a natural flow. Leave the ends a bit straighter for soft, modern curls.
For looser waves, you can wrap without clamping but tongs need hair clamped tightly. Keeping the barrel vertical helps shape uniform curls. Short hair may need smaller tong barrels for full wraps.
Timing Your Hold for Defined Curls
Hold each curl in place for roughly 5 to 8 seconds with medium heat. Fine or damaged hair requires less time to avoid damage. Thick or coarse hair can hold for 8 seconds or slightly longer.
Allow curls to cool while cradled gently in your palm to help them set better. This cool-down keeps curls defined and stops them from falling flat too fast. Adjust hold time based on hair texture and tong temperature.
Releasing the Hair Gently
Hold the tongs vertically after the hold time is up. Gently open and close the clamp to reduce tension on hair. Slowly pull the tongs downward to release the curl without creases or kinks.
Hair that won’t hold curls needs extra care. Let it cool fully in your hand. Then release gently.
This technique maintains curl shape longer and prevents distortions. Avoid yanking or twisting hair, or curls might look uneven.
- Section hair into 1-inch vertical pieces and clip the rest away.
- Open the tong clamp and place 2 inches from roots at a slight angle.
- Clamp the hair and wrap the section around the barrel fully.
- Hold the curl for 5 to 8 seconds, adjusting time by hair type.
- Keep the tongs vertical while using. Carefully open and close the clamp to grip hair.
- Pull the tong downward to release curls slowly and smoothly.
- Cradle the curl in your palm until cool before letting go if needed.
How to Make Curls Last Longer and Look Natural
Use a humidity-absorbing product overnight to keep curls fresh until next day. Applying a strong hold hairspray right after curling locks in the shape. Let your curls cool down fully before styling or brushing for better hold and bounce.
Finger-styling curls is best to avoid stiffness and preserve softness. Brushing them makes curls frizz and look less natural.
Varying curl direction helps curls appear more natural and loose. Alternate wrapping hair strands away and toward your face when curling. Avoid keeping hair on the tongs too long, especially on small barrels.
Five seconds less heat time usually softens curls and makes them look more undone. Larger barrels suit longer hair and create waves better than tight rings.
- Use mousse or curl cream before curling for light hold and moisture
- Apply heat protectant spray to prevent damage
- Let curls cool pinned up to shape better
- Spritz curls lightly with hairspray after styling
- Refresh curls by misting water and scrunching or re-curl the front pieces
- Sleep on a silk pillowcase to reduce frizz and flattening
- Use finger combs or wide-tooth combs for loosening curls gently
Touch up curls on the go by spraying water or curl refresher spray. Then scrunch or twist curls with fingers to revive bounce.
Avoid crunchy curls by using minimal hairspray and skipping heavy gels or waxes. Keeping product layers thin helps curls stay soft and flexible all day long.
Don’t rush cooling your curls; chilling them without disturbance locks in springy shape.
Common Mistakes When Using Curling Tongs and How to Fix Them
Using too high heat on curling tongs can burn your hair quickly. Fine or color-treated hair suffers most from temperatures above 400°F. On the other hand, setting the heat too low might leave curls limp. These curls may not hold their shape well.
Try starting around 300°F for fine hair and up to 375°F for thicker hair. You can adjust from there depending on how your hair reacts.
Poor sectioning makes curls uneven and frizzy. Thick sections don’t let heat reach the middle evenly. Thinner sections help curls set better.
Thin, 1-inch sections work best, letting every strand get warmed properly. Clamp the tongs halfway down the length of each section to avoid weird bends or kinks.
- Always dry hair completely before curling to avoid damage
- Use heat protectant spray to reduce breakage
- Choose tourmaline curling tongs for frizz-prone hair
- Clamp hair gently and don’t hold curls too long
- Let curls cool without touching to set their shape
- Adjust heat settings based on hair thickness and condition
- Section hair uniformly for consistent curl results
Skipping heat protectant can cause your hair to dry out and snap. Applying heat on damp hair causes the water inside to boil. That boiling can break the hair’s structure, leaving it brittle and weak.
Avoid clamps if your hair is fragile. Curling tongs with smooth barrels help prevent breakage.
To avoid kinks, gently wrap hair around the barrel without twisting too tightly. Uneven or frizzy curls often come from uneven heat or damaged hair. Use a light serum or oil to smooth out flyaways after curling.
Let curls cool fully before touching them. This helps them set better and last longer without sagging.
Comparing Curling Tongs with Curling Wands and Other Tools
Curling tongs use a clamp to hold hair, while curling wands don’t have one. Tongs grip and roll hair around the barrel for more controlled, tighter curls. Wands let you wrap hair freely, creating loose, beachy waves with less tension.
Beginners usually find curling tongs easier because the clamp holds hair without slipping. Wands take more practice to wrap hair evenly and avoid burns.
For tighter curls, tongs work best. Wands better suit loose, flat curls or waves.
| Tool Type | Curl Style | Ease for Beginners | Best Hair Type | Clip or Clipless |
|---|---|---|---|---|
| Curling Tongs | Tighter to looser curls, controlled | More beginner-friendly | Most hair types | Clip clamp holds hair |
| Curling Wands | Loose, flat curls and beach waves | Less beginner-friendly | Fine to medium hair | Clipless, wrap freely |
| Spring Curling Tongs | Loose waves near ends if held vertically | Moderate | Medium to thick hair | Clip clamp with spring |
Clipless wands let you twist and wrap hair without the clamp. This freedom creates soft waves, but it’s easier to lose grip or burn fingers. Tongs clamp your hair tight, so curls come out uniform and neat.
Consider your hair type too. Thick hair might need higher heat, which some tongs handle better.
Fine hair works well with lower heat on wands or coated tongs to prevent damage. Some tongs come with ceramic or tourmaline barrels, which help keep curls frizz-free.
You can create many curl sizes just by changing how you hold the tongs or wand. For bigger waves, clip tongs an inch above ends and roll vertically. With wands, wrapping hair loosely gives relaxed curls.
Different curling tools fit different looks, skill levels, and hair types. Pick one that matches your style and practice to get the best curls.
Safety and Care Tips for Using Curling Tongs
Heat damage is the biggest risk when using curling tongs. Always use a heat protectant spray or serum first. It shields your hair from high heat.
This helps prevent damage. Limit curling to 2 or 3 times each week.
This stops your hair from drying out. It also reduces breakage.
Preventing burns means paying attention to how you hold the curling tongs. Keep the hot barrel away from your scalp and fingers. Use a heat-resistant glove if the tool doesn’t have one.
Set the curlers between 250°F and 350°F based on hair type. Fine hair needs lower heat. Coarse hair needs higher heat.
Cleaning your curling tongs helps keep them safe and working well. Let the curling tongs cool down completely first. Then wipe the barrel with a soft cloth.
Use rubbing alcohol to remove product build-up. Avoid water or harsh chemicals which can damage the heating elements and the surface.
- Use a moisturizing hair treatment once a week to repair heat damage.
- Choose curling tongs with ceramic and tourmaline for even heat and less frizz.
- Don’t leave curling tongs on hair longer than 10 seconds to prevent burns.
- Store curling tongs in a heat-proof pouch to protect surfaces and cords.
- Check the cord and plug regularly; stop using if frayed or damaged.
- Clean the barrel gently every 1 to 2 weeks depending on use frequency.
- Consider a professional stylist’s advice if unsure about heat settings or damage repair.
Never touch the barrel immediately after use. Keep the tool on a heat-proof surface.
The barrel’s coating type influences how gently the heat spreads on your hair. Ceramic with tourmaline helps reduce frizz by emitting negative ions.
This means less drying and fewer split ends than metal barrels. Avoid curling tongs with inconsistent heat or damage to their coating.
Using curling tongs too often without breaks causes dryness and breakage. Save them for special styles or days when you want curls, not every day. Your natural hair oils, washed away by heat, need time to rebuild.
Consult a professional if heat styling causes irritation or hair loss. They can help adjust your routine. You might need milder styling options.
Step-by-Step Action Plan to Master Curling Tongs
Follow this plan to start curling your hair with confidence and care. Each step helps you build skills and protect your hair.
- Before you start: Wash and dry your hair completely, then apply heat protectant spray. Your hair should feel dry and smooth to the touch.
- First try: Set curling tongs to the lowest heat that suits your hair type. Curl a small section to test the temperature feels comfortable and curls hold.
- Day 1: Section your hair into manageable parts, about 1-inch wide. This helps create even curls and avoids tangles.
- Day 2: Take small hair sections for curling. Wrap hair around the tong barrel. Hold for 8 to 12 seconds. Let the curls cool completely without touching to set the shape.
- Week 1: Apply a light hairspray or styling cream. This helps keep curls in place. It also reduces frizz all day. Check if curls last without stiffness or crunchy feeling.
- Week 2: Adjust heat setting if curls don’t hold or hair feels overly dry. Aim for the lowest effective temperature that keeps curls steady.
- After 2 weeks: Clean your curling tongs and check for any hair damage signs. Healthy hair curls better and the tool lasts longer.
Frequently Asked Questions
How Do I Avoid Heat Damage When Using Curling Tongs?
Use a heat protectant spray before curling. Keep the tong’s heat setting to medium or lower for fine hair to prevent damage.
Can I Use Curling Tongs on Wet Hair?
No, curling tongs should only be used on dry hair. Wet hair can burn and cause damage when exposed to hot tongs.
How Long Should I Hold My Hair in the Curling Tongs?
Hold each section for about 8 to 10 seconds. Holding longer risks damaging your hair with too much heat.
What’s the Best Way to Cool Curls After Using Tongs?
Let your curls cool in your hand or pin them up. Cooling helps them set better and last longer throughout the day.
Can I Create Both Tight and Loose Curls with the Same Curling Tongs?
Yes, use smaller sections for tighter curls and larger sections for loose curls. Adjust your technique and tong size to get different looks.
How Often Should I Clean My Curling Tongs?
Clean them after every 5 to 10 uses or when buildup appears. Use a damp cloth and avoid harsh chemicals to keep the coating intact.
Wrapping Up
Curling your hair with tongs takes some practice. But it’s easy once you get the hang of it.
Start slow and protect your hair with the right heat settings. Try curling a small section today to see the difference proper technique makes.