How to Use an Automatic Hair Curler: A Complete Guide for Fast, Flawless Curls
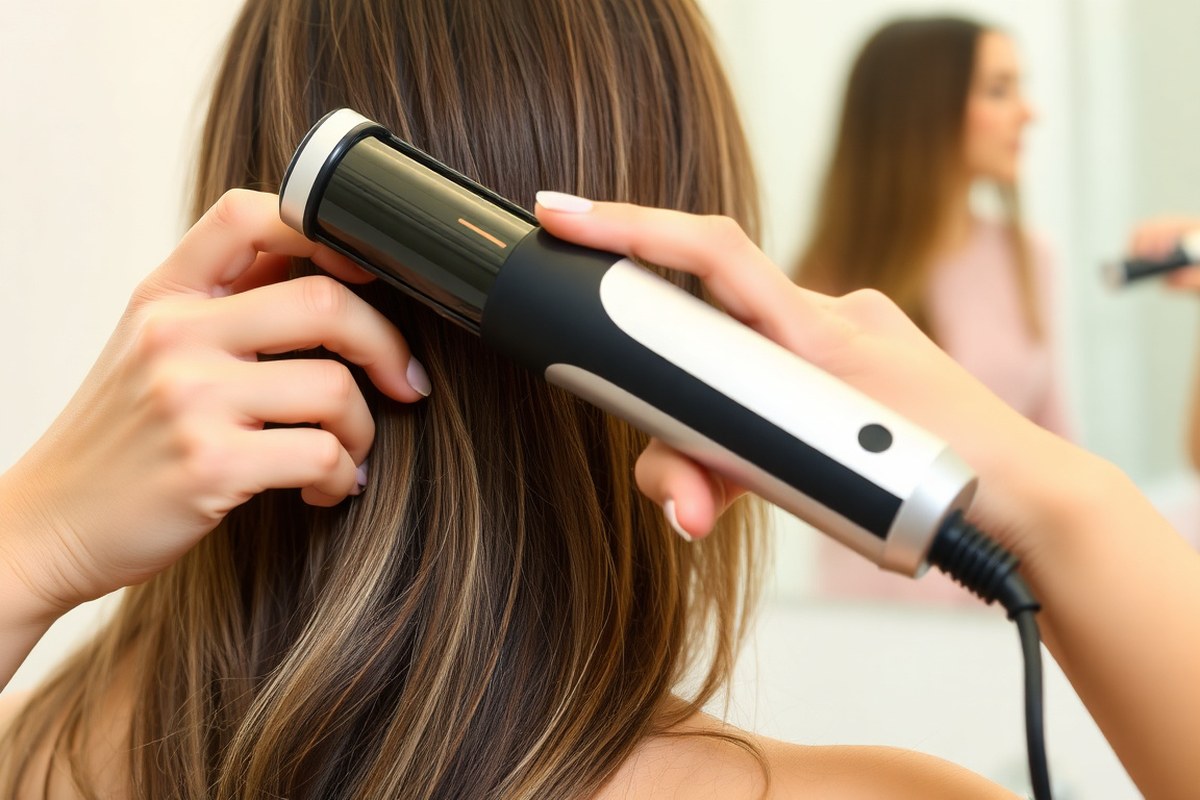
Figuring out how to use an automatic hair curler is easier than it seems. You simply need to section your hair, place it inside the chamber, and press the button. The curler will draw the hair in and curl it automatically without much effort.
Start with small sections about 1 inch wide to avoid tangles or uneven curls. Watch the timer and temperature settings so your hair doesn’t get damaged or frizzy. A suitable heat level depends on your hair type, which you can adjust on most devices.
It’s best to use a heat protectant before curling to keep your hair healthy. Most automatic curlers have an auto shut-off feature for safety.
So you don’t have to worry if you forget to turn it off. These features make curling fast and give you consistent results every time.
Key Takeaways
- Use 1-inch sections of hair for smooth, even curls.
- Adjust heat settings according to your hair type to avoid damage.
- Start by placing hair inside the curling chamber fully before activating.
- Lower temperatures work best for fine or damaged hair, around 150°C.
- Set timers between 8 to 15 seconds for ideal curl hold.
- Use a heat protectant spray to prevent hair from drying out.
How to Use an Automatic Hair Curler Step by Step

Operating an automatic hair curler is simple once you get the hang of it. You’ll want to work with clean, dry hair and section it properly.
Taking about a 1-inch strand for each curl works best. So the tool can grab and style your hair without tangling.
The right section size and timing really affect the curl’s shape. Hold the hair in the curler for 5 to 15 seconds. The time depends on the curl type you want.
Shorter time gives looser curls, longer time gives tighter curls. Shorter holds give looser waves, longer holds make tighter curls. Listen for the beep to know when the curl is ready.
- Start with dry, detangled hair: Brush your hair completely. Then divide it into 4 to 6 sections with clips. This setup helps you work evenly and avoid missing spots.
- Plug in and adjust settings: Set the temperature based on your hair type. Use a medium heat for fine hair and a higher heat for thick or coarse hair.
- Take a 1-inch strand: Hold the curler vertically. Place the strand at the chamber opening. Make sure you avoid overlapping strands.
- Press the curl button: The tool pulls the hair inside. It begins curling automatically. Keep pressing the button to keep the motor running.
- Hold until the beep: For soft waves, hold 5 to 7 seconds. For bouncy curls, hold 10 to 15 seconds. The tool will beep once the curl is formed.
- Release the curl gently: Press the button again to let go. Or move the curler away after the beep. Let the curl cool without touching it to keep its shape.
- Repeat through all sections: Work your way around your head section by section. Curl pieces away from the face for a more natural look.
- Finish with styling: Let curls cool completely. Then run your fingers lightly to soften or use light-hold hairspray.
Choosing Temperature and Timer Settings by Hair Type
Set your curler’s temperature and timer carefully for your hair type. Fine or damaged hair needs lower heat and shorter curl time to avoid damage. Thick or coarse hair requires higher temperature and longer hold time for curls to last well.
Use the LCD screen or control panel on your automatic curler. Select a heat level between 300°F and 410°F (150°C to 200°C).
Adjust the curling timer from 7 to 15 seconds depending on your hair texture. Start with the middle settings and change if needed.
| Hair Type | Recommended Temperature | Hold Time (Seconds) |
|---|---|---|
| Fine or Damaged Hair | 150°C (302°F) | 7, 8 |
| Medium or Normal Hair | 170°C (338°F) | 8, 10 |
| Thick or Coarse Hair | 190, 200°C (374, 392°F) | 10, 15 |
For fine hair, use the lowest heat setting around 300°F. Hold the curl button about 7 seconds to protect fragile strands. Medium hair usually handles about 340°F and 8 to 10 seconds hold.
Coarse hair needs more heat, closer to 400°F. Hold the curler button longer, around 10 to 15 seconds, for stronger curls. Longer hold time helps curls from thick hair keep their shape throughout the day.
Press and hold the curl button just for the needed time. This helps avoid heat damage and tangles. Don’t hold it longer than necessary.
Some automatic curlers let you set curl direction along with temperature and time. Alternate directions for natural-looking waves. Hair that is damaged or very fine needs lower heat settings.
Avoid quickly jumping to higher temperatures. Take your time with heat adjustments.
How Automatic Hair Curlers Work and Their Key Features
Automatic hair curlers pull your hair into a heated chamber. The chamber spins your hair around a heated barrel. This curling action creates the curl.
This rotation curls your hair automatically, saving you the effort of manual wrapping. Features like temperature control, curl direction, and automatic shutoff make styling easier and safer.
The Curling Chamber and Automatic Rotation
The curling chamber is a small barrel that heats up. It spins your hair to form curls. This is the most important part of the curler.
You place a section of hair into it. The device pulls the hair inside. The barrel then rotates, wrapping your hair smoothly around it without any manual effort.
This automatic rotation ensures an even curl, reducing the chance of kinks or uneven heat. Some models change speed and spinning angle. This helps create different curl styles.
You can get loose waves or tight ringlets. The chamber’s design helps protect hair from getting caught or pulled too hard.
Temperature, Timer, and Direction Controls
Most models let you adjust temperature settings from around 250°F to 400°F. Pick the right heat based on your hair type. Use lower heat for fine or damaged hair. Higher heat works better for thick or coarse hair.
Timers decide how long your hair stays in the chamber. Usually, it holds hair for 8 to 15 seconds. This time lets the curl form properly.
Some automatic curlers let you choose the curl’s direction, clockwise or counterclockwise. This feature changes curl direction for a natural look. Some models focus curls on one side for framing.
It helps create face-flattering styles. You set these controls on the device’s digital panel or buttons before starting your curl.
Safety Features Including Automatic Shutoff
Automatic hair curlers often include safety features like an auto shutoff. This feature turns off the curler after 30 to 60 minutes. It stops the device from overheating.
This helps prevent fire hazards. It’s especially useful if you forget to turn off the device in a hurry.
Other built-in protections help regulate heat so it spreads evenly around each hair strand. This avoids hot spots that can cause damage or burns.
Some models also beep or vibrate when your curl is done. So you won’t overcook your hair.
Preventing and Fixing Common Problems When Curling
Hair gets stuck when you feed too much hair at once. This usually causes tangling. Use smaller sections for better results.
This can cause jams and uneven heat, leading to snags or even pain. Always use small sections around 1 inch wide to avoid this. Try even smaller sections for smoother curls with thick or coarse hair.
Different curl directions happen because the curler switches rotation sides. This switch can surprise you. Curlers may turn differently each time.
To fix this, check your curler’s settings to control the curl direction for each section. Many models let you set the curl to turn left, right, or alternate. Consistently using the same direction setting creates a polished look instead of random waves.
Unplug your curler right away if it malfunctions or overheats. Stop using it to avoid damage or injury. Check for any hair stuck in the mechanism and gently remove it once it cools.
Using curlers with built-in safety features like automatic shutoff and tangle-free technology helps lower risks. Don’t force the curler open or closed if it jams. Forcing it can break the device or pull your hair.
- Use small, even sections of hair for smooth curling
- Set direction settings before starting your curls
- Unplug and cool your curler if it jams or heats too much
- Remove tangled hair gently with a comb or fingers after cooling
- Use curlers with safety features to avoid accidents
- Avoid forcing the curler open if it’s stuck
- Check the barrel and clean regularly to prevent buildup
Jammed or uneven curls happen if you rush or use big hair sections. Even the best curler needs time and smaller sections. Taking calm, small strokes and paying attention to the direction settings improves results.
Regular cleaning and following the manufacturer’s safety advice keep your curler running smoothly. Those simple steps can save you time and frustration while styling.
Tips for Getting Natural-Looking Curls and Face-Framing Styles
To get natural-looking curls with an automatic hair curler, vary the curl direction and strand size. Adjust the hold time based on your hair type and styling goals. These small changes prevent uniform curls and create soft, face-flattering styles.
Alternating Curl Directions for Naturalness
Many automatic curlers let you choose between curling left, right, or alternating directions. Alternating curl directions breaks up uniformity, making curls look more spontaneous. This technique adds volume and a tousled texture, which mimics natural curls better.
Uniform curls curl in the same direction and can look artificial or like a perm. Switching directions for each strand softens the overall effect. Some curlers have settings that automatically alternate, giving you fuller hair with less effort.
Set your curler to alternate directions for a natural, lived-in look without extra styling.
Face-Framing Curls: Inward vs Outward
Point curls away from your face on both sides to frame it. This makes soft waves around your jaw and cheekbones. It stops curls from covering your face or looking heavy.
Curling inward can work but might make curls look tighter and mask your facial features. Curl from roots to ends for a soft frame. Keep a gentle wave closer to your face.
This gives a subtle, natural look. This directs attention to your eyes and smile naturally.
Varying Hold Times and Strand Size
Hold time affects curl tightness: shorter holds produce loose waves, longer holds give defined curls. For fine hair, limit hold to 8-10 seconds at lower temperatures. Thick hair often needs 12-15 seconds at moderate heat for lasting curls.
Changing the strand size alters the curl’s look too. Use smaller sections for defined curls and larger sections for soft waves. Mix strand sizes to add texture and avoid all curls looking the same.
Don’t clamp too much hair at once; it can cause uneven curling and frizz.
Preparing Hair Safely for Curling and Best Practices
Your hair should be completely dry before using an automatic hair curler. Wet hair is fragile and can break when exposed to high heat. Drying your hair fully helps curls set better and last longer.
Applying heat protectant is a must before curling. It forms a barrier that reduces heat damage.
Use a spray or serum designed for heat styling. This step costs around $8 to $15 for an average bottle, which can last months.
Make sure your hair is tangle-free. Knots can cause the curler to pull and damage your strands. Brush through gently to remove any snags before you start curling.
- Wash and condition your hair as usual, then dry completely.
- Brush out all knots and tangles before styling.
- Apply a heat protectant evenly through your hair.
- Section your hair for easier curling if you want more control.
- Check your curler’s temperature settings before turning it on.
Using a heat protectant helps prevent dryness, breakage, and split ends. It also improves shine and smoothness after styling. Without it, hair may become brittle and dull quickly.
After drying, test a small hair section by curling it. This shows if your hair is ready and can handle the heat. If the curl doesn’t hold or your hair feels rough, try letting it dry more or applying a bit more protectant.
Still, be careful not to overload your hair with too much product. Heavy amounts can weigh curls down or cause build-up.
A few sprays or a pea-sized drop of serum works well. This keeps curls bouncy and natural-looking.
Using an Automatic Hair Curler on Different Hair Lengths and Types
You can use an automatic hair curler on short hair. Adjust how you section and curl your hair to fit its texture. This works for thick or curly hair too.
Hair length and texture do change the technique, especially the strand size and heat settings. Small tweaks help avoid tangling and get smooth, lasting curls across different hair types.
Adapting Section Size for Short Hair
Short hair works best with very small sections, about half an inch wide or less. Large sections might not fit well in the curler’s chamber and risk getting caught or pulled. Hold the curler close to the scalp but avoid touching the roots to prevent heat damage.
Use shorter curl times of 5 to 8 seconds per strand. Short hair heats up faster than long hair. This helps avoid damage.
Watch curls form soon after heating starts. Release the strand gently to keep curls soft.
Quick action helps maintain shape. Practice with small strands until you find the right timing for your hair length and thickness.
Adjusting Timing and Temperature for Thick/coily Hair
Thick or coily hair needs smaller strands to fit the curler barrel without jamming. Take strands around one-quarter to one-half inch wide to prevent overloading the automatic curler. It helps the device curl all the hair evenly and prevents tangles inside the barrel.
Use higher temperature settings like 350 to 380°F for thick hair. This ensures your curls form properly. Higher heat works better for coarse hair.
Hold each strand in the curler for 10 to 15 seconds. This lets heat soak deeply into thick hair.
It shapes curls well. Apply a heat protectant before curling to guard against damage from the higher temperature.
Best Curling Method for Wavy vs Straight Hair
Wavy hair usually needs moderate heat, around 300 to 340°F, and shorter curl times. Keep strands in the curler for 8 to 12 seconds. This defines curls but avoids over-processing.
It works well for wavy hair. Use medium-sized sections for a balanced, natural look.
Straight hair tends to need higher temperature and longer hold times to form lasting curls. Settings between 340 and 370°F work well, with curls held for 10 to 15 seconds. Try smaller sections, especially along the hairline, for tighter curls that last.
Maintaining Your Automatic Hair Curler for Longevity and Safety
Clean your automatic hair curler regularly to keep it working well. Unplug it and let it cool completely before cleaning. Use a soft, damp cloth to clean the barrel.
Wipe away hair product buildup inside the chamber too. This keeps the curler working well.
Never immerse the curler in water or use harsh chemicals. Dry it thoroughly before storing or using it again. This stops damage to the electrical parts and keeps it safe to use.
- Unplug and cool the device fully before cleaning
- Use a soft, damp cloth to remove residue and dust
- Avoid water or corrosive cleaners to protect electronics
- Store the curler in a dry, cool place away from heat
- Check the power cord for damage before each use
- Avoid wrapping the cord tightly to prevent breakage
- Follow the manufacturer’s instructions for any specific upkeep
Store your curler in a dry spot where it won’t get crushed or wet. Never put it away while still hot or wrapped tightly by the cord. You want to protect the barrel and keep the cord from fraying.
Look over your curler’s cord and plug every week. Frayed cords or loose plugs increase the risk of electric shock or fire.
Stop using the device immediately if you notice any damage. In that case, have a professional check or replace it.
Always let your curler cool fully before cleaning or storing to avoid burns or damage.
Step-by-Step Action Plan for Using Your Automatic Hair Curler
Follow these steps to start curling your hair safely and get great results. This plan helps you build skills and protect your hair.
- Before you start: Read the curler’s manual and set temperature based on your hair type. You’ll know it’s right if your hair curls without burning.
- Day 1: Practice with a small section of hair to get the feel. Success means the curl holds its shape and looks even.
- Week 1: Curl your whole head using recommended timer settings. Your curls should last several hours without frizz.
- After 1 week: Adjust temperature if curls drop too fast or hair feels dry. Find the lowest heat that works well.
- Week 2: Experiment with wrapping hair direction to create natural, face-framing styles. Notice which side suits your face best.
- After 2 weeks: Clean the barrel and check for any hair buildup. Clean barrel means smoother, safer curls each time.
- Continuously: Use a heat protectant before curling and avoid the highest heat. Your hair stays healthy and styling lasts longer.
Frequently Asked Questions
How Do You Use an Automatic Hair Curler Safely on Thin Hair?
Use the lowest heat setting and small hair sections to avoid damage. Thin hair needs gentle curling to keep it healthy and bouncy.
Can Automatic Hair Curlers Handle Thick or Coarse Hair Well?
Yes, but use smaller sections for the curler to work effectively. Thick hair takes longer, so be patient and avoid overloading the curling chamber.
Does Hair Type Affect the Best Temperature Setting on an Automatic Curler?
Yes, finer hair needs lower heat, while coarse hair requires higher temperatures. Adjust the timer for curl hold and avoid burning your strands.
How Long Does It Usually Take to Curl Hair with an Automatic Curler?
It typically takes 5 to 15 minutes depending on hair length and thickness. The tool wraps and cooks each section quickly, speeding up styling.
Can You Use an Automatic Hair Curler on Wet or Damp Hair?
Avoid using automatic curlers on wet hair to prevent damage. Hair should be dry or slightly damp for safer, better curling results.
What Does an Anti-Tangle Sensor Do on an Automatic Hair Curler?
It prevents hair from getting stuck or pulled during curling. This sensor improves safety and keeps your hair smooth and untangled.
Final Thoughts
Using an automatic hair curler lets you make beautiful curls quickly and safely. Start with low heat and short timer settings. Try your first curl today to see results.