How to Make Curls with Straightener: A Complete Guide for Perfect Results
Knowing how to make curls with straightener gives you a quick way to style your hair. Clamp a small section near the roots. Twist the iron 180 degrees.
Then glide it down the hair. This simple move creates curls without needing a curling iron.
Start by choosing small sections about 1 to 2 inches wide. Hold the straightener at a slight angle away from your face to shape the curl better. Avoid touching the skin near your roots to prevent burns.
Adjusting your straightener’s heat based on hair type matters too. Lower heat works best for fine hair around 250 to 350°F. Thick hair can handle up to 400°F. This helps protect your hair while making curls last longer.
Key Takeaways
- Use 1 to 2 inch sections for the best curl shape with a straightener.
- Clamp the straightener near your roots, but not directly on your scalp.
- Rotate the straightener 180 degrees away from your face before sliding down.
- Use medium-width plates (1 to 1.5 inches) for versatile curling results.
- Adjust heat to 250-350°F for fine hair, 350-400°F for thick hair.
- Choose wider plates (over 1.5 inches) to create loose, beachy waves.
How to Curl Hair with a Straightener Step-by-Step
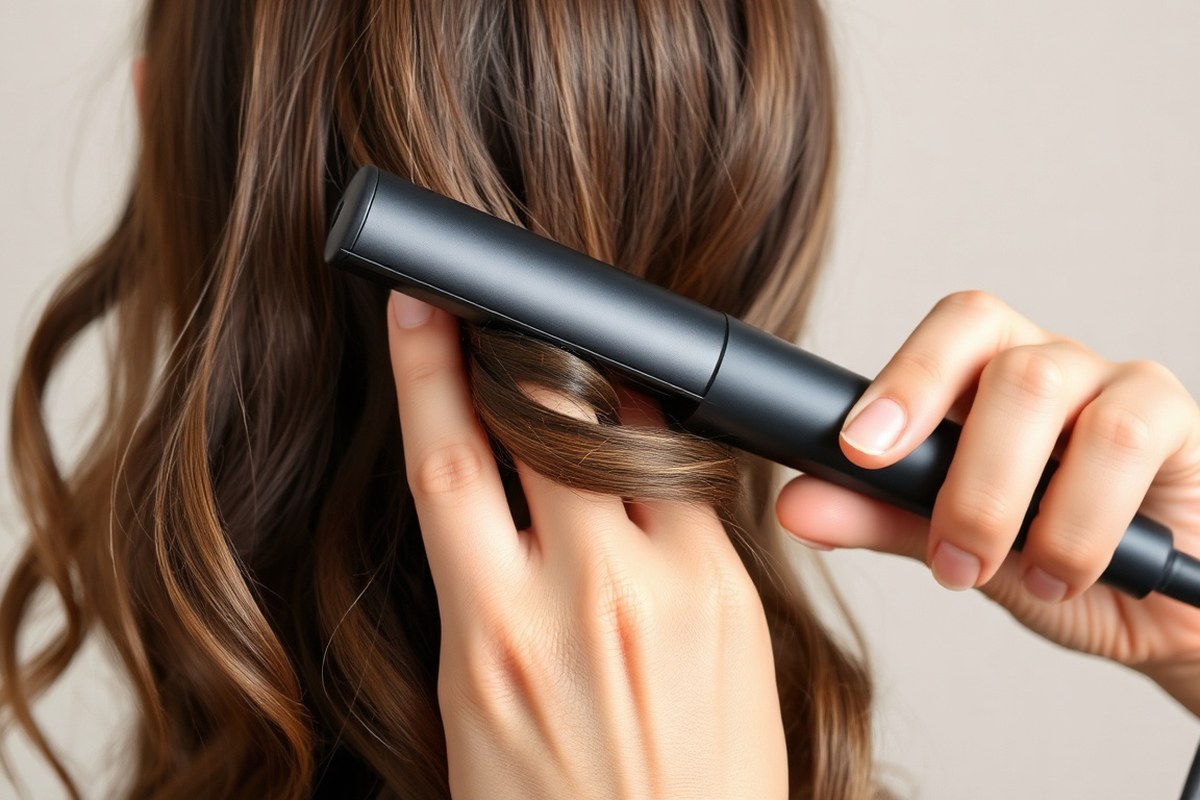
To curl your hair with a straightener, start with small, even sections. Using the right size helps curls form smoothly and last longer. Wrap the straightener around each section of hair.
Guide it by turning the tool. This shapes the curls you want.
- Separate your hair into 1-inch sections. Smaller sections work best for tighter curls, bigger ones for loose waves.
- Clamp the straightener near the roots of one section, keeping the straightener vertical for bouncy curls.
- Twist the straightener away from your face. Rotate it one full turn as you slide down the hair.
- Pull the straightener downward slowly and steadily, keeping tension on the hair for a smooth curl.
- Hold the straightener in place for about 3 to 5 seconds. Adjust based on your hair’s thickness and heat setting.
- Release gently and let the curl cool before touching it. This helps the curl set better and last longer.
- Repeat on each section of hair. Curl away from your face for volume. Curl toward your face for sharper curls.
Angles matter: holding the straightener too flat may cause kinks. Use a smooth, rounded motion to avoid sharp bends.
Hair that’s thick or curly might need longer hold times or a slightly higher temperature. Check that your straightener is suitable for curling: rounded edges usually work best.
This method works well by mixing section size and curl direction. How you pull the straightener matters too. Each part affects your curl shape.
For example, vertical sections give beachy waves, while horizontal sections create plumper curls. Short hair curls fast with a straightener. You need fewer rotations.
This saves time and effort. Use heat spray to protect your hair from damage.
Pick the right heat for your hair type. This keeps hair healthy while styling.
Choosing the Best Straightener for Curling Your Hair

You can use many straighteners to curl your hair. But some work better than others.
The plate size, material, and extra features affect how well you create curls. Picking the right straightener for your hair type makes curls easier and more lasting.
Plate Width Options and Best Uses
Narrow plates, usually less than 1 inch, are best for tight curls and short hair. They let you grab small sections and make controlled coils. Medium plates about 1 inch wide suit all hair lengths and curl sizes, offering more versatility.
Wide plates, 1.5 inches or more, work great for long hair or loose beach waves. They cover bigger sections and speed up the curling process. Your hair length and curl type guide what plate size feels right to you.
Plate Materials and Heat Distribution
Ceramic plates heat evenly and smoothly, reducing hair damage. They are a safe choice for most hair types and give you soft curls. Titanium heats up fast and keeps its heat for a long time.
It works well on thick or coarse hair. Just be careful not to burn your strands.
Tourmaline plates release negative ions that fight frizz and add shine. They help curls look smooth and last longer, especially for curly or frizzy hair. Choosing the plate material depends on how gentle or powerful you need the heat to be.
Additional Features to Consider
Temperature control allows setting the heat to your hair’s tolerance, usually between 250°F and 450°F. You want to avoid overheating and damage. So choosing a model with adjustable settings helps. Always start low and raise heat only if curls don’t form well.
A swivel cord stops tangling and lets you move the straightener freely while curling. Floating plates adjust to hair thickness, giving even pressure and better curl shape. These details improve comfort and results when you curl often.
Here’s a simple table to match hair types with heat protection and product recommendations. Use them before curling to shield your hair from heat damage and add shine or moisture.
| Hair Type | Recommended Heat Protectant | Features |
|---|---|---|
| Fine Hair | Lightweight spray | Protects up to 450°F |
| Thick Hair | Oil-based product | Adds moisture and shine while protecting from heat |
| Curly Hair | Hydrating treatment | Provides extra hydration and frizz control |
Choosing the right heat protectant preserves the health of your curls. It keeps hair smooth and stops frizz, making your curls last longer.
Always use a heat protectant spray or serum before curling to avoid damage. Never curl wet hair with a straightener to prevent breakage.
How to Prepare Your Hair Before Curling with a Straightener
Prepare your hair by ensuring it is clean, dry, and protected. Use the right products and section your hair for easy curling. These steps reduce damage and help your curls last longer.
Start with Completely Dry Clean Hair
Curling damp hair can cause serious damage since heat turns moisture into steam. This steam can weaken your hair cuticles and lead to breakage or frizz. Dry hair holds curls better and looks smoother after styling.
Wash your hair a day or a few hours before curling to remove dirt and oils. Avoid curling right after washing if your hair is still damp. Use a blow dryer to dry your hair completely before styling.
You can also let it air dry fully. Make sure no damp spots remain before you start.
Apply Suitable Heat Protectant Products
Always spray a heat protectant before using your straightener. This product creates a barrier that shields your hair from burning or excessive dryness. Pick a heat protectant that suits your hair type, whether oily, dry, or color-treated.
You can use sprays for fine hair. Serums work well on thick or coarse strands. Oils add extra smoothness and shine.
Spread the product evenly from mid-length to the ends. Avoid putting too much near your roots.
Heavy roots can make hair look flat and weighed down. Let it dry fully before heating to get the best protection.
- Use a light spray for thin or fine hair
- Choose a serum or creamy product for thick hair
- Select color-safe heat protectants for dyed hair
- Apply to all hair sections evenly
- Allow product to dry before styling
After protecting, you can add a root lift spray for volume. Finish with a flexible hold hairspray to lock in your curls for longer wear.
Detangle and Section Hair Properly
Remove all knots with a wide-tooth comb or detangling brush once hair is dry. Smooth hair curls more evenly. Avoid tugging hard, which can cause breakage before styling.
Divide your hair into horizontal sections using clips. Start with two sections: from ear to ear, top and bottom. Smaller sections create tighter curls while larger sections give loose waves.
- Use wide-tooth comb or detangling brush
- Separate hair from ear to ear in two parts
- Clip sections out of the way
- Work from bottom layers upward
- Adjust section size based on desired curl tightness
Proper sectioning keeps curls consistent and allows you to focus heat evenly. Holding the ends gently avoids creases and gives a polished look.
Curling Techniques for Different Hair Lengths
Short hair curls best with smaller plates, about 0.5 to 1 inch wide. Small plates handle tight, defined curls on short strands without awkward bends. Take thin 1-inch wide sections.
Clamp near roots. Twist the iron 180 degrees and slide down slowly.
Medium-length hair works with plates around 1 to 1.5 inches wide. This size balances control and volume, making it easy to curl without sections falling flat. Use 1-2 inch sections.
Clamp near roots at a slight angle. Rotate the iron and glide down your hair. This technique creates soft curls or waves that hold well.
For long hair, larger plates, 1.5 inches or more, are best. Bigger plates distribute heat more evenly, smoothing curls throughout the entire hair length. Work with 2-inch sections.
Clamp near roots pointing iron away from your face. Rotate 180 degrees and pull the iron down slowly. This method avoids creases and ensures full, natural curls.
Using smaller sections on long hair can make curls look tighter but take longer. For short hair, trying wide sections often results in loose waves or uneven curls. Medium hair length is more forgiving with section size.
But too-big sections may not hold curls well. Adjust the iron’s angle and speed to get your preferred curl shape.
Angle matters as much as section size. Holding the straightener at a slight angle away from your face lets curls fall softly. Rotating 180 degrees as you glide down creates a natural S-shape curl, not stiff lines.
Don’t clamp too hard to avoid dents. Dents and uneven curls happen if you hold too long.
Curls on short hair may need touch-ups since they fall quicker with body movement. Medium and long hair curls hold better but need more time to create. Moving your iron fast gives softer curls.
Slow rotation makes curls more defined. Faster slides give looser waves; slower moves create tighter curls.
Adjusting Heat and Section Size for Hair Type and Curl Style
Different hair types need different heat settings to avoid damage. Thin or damaged hair should use lower heat, around 300°F (150°C). Thick or coarse hair often needs higher heat, around 380°F (193°C), to hold curls well.
Section size also affects your curl style. Smaller sections make tighter curls, while larger sections give loose waves. Adjust section size based on how tight or loose you want your curls.
| Hair Type/Condition | Recommended Heat Setting | Section Size | Curl Style |
|---|---|---|---|
| Fine or Damaged Hair | 250°F, 300°F (121°C, 150°C) | Large sections (1, 1.5 inches) | Loose waves |
| Normal Hair | 300°F, 350°F (150°C, 177°C) | Medium sections (0.5, 1 inch) | Natural curls |
| Thick or Coarse Hair | 350°F, 380°F (177°C, 193°C) | Small sections (0.25, 0.5 inch) | Tight curls |
Start with lower heat and smaller sections, then increase if needed. Use a heat protectant spray to shield your hair from damage. Twist the section tightly before sliding the straightener slowly down to get a defined curl.
Test a small section first to avoid burning your hair or getting flat curls.
Avoid holding the straightener too long on each section. 5 to 7 seconds is enough.
Overheating can dry and break your hair. After curling, gently separate curls with your fingers to keep volume without frizz.
Tips to Make Curls Last Longer and Avoid Frizz
Your curls last longer when you start on day two after washing. Hair is slightly less slippery, so curls hold better. You need less product, and curls won’t droop quickly.
Use the right products before and after curling to lock your style. A texturizer spray before curling adds grip and helps waves stay in place. After curling, choose a hairspray designed for humidity to fight frizz all day.
- Smooth hair with a small dab of lightweight serum to prevent frizz.
- Spritz a texturizer spray on dry hair before curling for better hold.
- After curling, give your hair a quick mist of anti-humidity hairspray.
- Avoid heavy products that weigh hair down and make curls fall.
- Don’t touch curls too much; it causes frizz and curl drop.
- For natural frizz, lightly straighten roots to control flyaways.
- Use a curling iron with slim plates for tighter curls near roots.
Controlling humidity is key if you live in a damp climate. A spray labeled “high-humidity hairspray” protects curls from moisture. It keeps strands smooth and makes curls last longer without stiff crunchiness.
Be gentle after curling. Let curls cool completely before you touch them.
This sets the shape and keeps them bouncy. Avoid brushing curls; use fingers or a wide-tooth comb if needed.
Common Curling Mistakes and How to Fix Them
Many people struggle to curl hair with a flat iron. This often happens because they don’t know the right way to move the tool. Learning the correct motion solves this issue.
Many beginners clamp the iron too hard, causing bend marks or crimping instead of smooth curls. Hold the iron loosely.
Slowly glide it down the hair strand. Turn the iron gently one time while moving it.
Another common problem is constantly twisting the flat iron as you go. Just one gentle turn creates a curl. Make this turn near the top of your section.
This simple move shapes the curl. Twisting repeatedly can make curls look messy or uneven. So clamp the hair, twist once, and then pull down steadily without extra motion.
Curls that don’t hold or fall flat might need better heat settings or product support. For finer hair, set your flat iron between 300°F and 350°F. Coarser hair usually needs 350°F to 400°F. Let your hair cool completely before touching or styling.
Curls set as they cool. A light mist of hairspray right after curling can help too.
Using the right section size matters a lot. Large hair sections cause curls to look loose. Smaller sections create better-shaped curls.
Use smaller pieces for firmer curling. Try 1-inch wide sections to get defined curls that hold better.
For thick or curly hair, smaller sections work best. But very thin hair needs slightly bigger sections to avoid damage.
Not alternating the curl direction can make curls clump and look unnatural. Twist one section inward and the next outward for more texture and volume.
This back-and-forth motion helps your curls blend and last longer. Avoid the mistake of curling all sections the same way.
Flat curls can come from dirty hair or product buildup. Use clarifying shampoo sometimes to clean your hair well. This helps curls hold better.
Oil and dirt act as a barrier, making curls look limp. Also, avoid heavy conditioners right before curling as they weigh hair down.
Fixing uneven curls is about consistent speed with the flat iron. Pull too fast, and curls won’t form well. Drag too slow, and heat damage may happen.
Move the iron at a steady pace, about 1 to 2 seconds per section. This balance shapes neat curls safely.
Using Your Curling Skills for Different Curl Styles
You can make different curl styles by changing your angle. Try moving slower or faster with your iron. Also, change how you separate your hair to mix it up.
Hold the straightener in different ways and twist your wrist. This changes how tight or loose your curls turn out.
Try both to see what you like best. What you choose depends on the look you want, from soft waves to tight coils.
Curling Away from the Face for Volume
Turning the flat iron 180 degrees away from your face creates natural, flowing curls. Start clamping the hair near the roots. Then wrap the hair around the iron.
Finally, slide the iron down the strand with care. This movement gives your curls volume and keeps the hair from looking flat against your face.
This technique works well to open up your hair and create a tousled, modern look. Keeping each curl moving away from the face builds fullness around your cheeks and jawline. For beachy waves, twist your wrist away as you slide slowly.
Avoid making sharp bends while moving the iron down. Keep the motion smooth for best results.
Make sure to keep the hair wrapped above the mid-length for curls starting near your scalp.
Curling Toward the Face for Definition
Curling inward means turning the iron toward your face, which creates tighter curls with more shape. This method adds more control and definition to each curl’s spiral. Hold smaller sections of hair and twist the straightener slowly to keep curls well-formed.
Try curling toward your face when you want more precise, classic curls instead of loose waves. It tightens up the coil and gives a smoother finish. Be careful not to hold the iron too long on one spot to avoid heat damage.
Sectioning Horizontally vs. Vertically
Horizontal sections produce even, ringlet-like curls since you curl the whole width of the hair. This method creates curls that are the same size. It also helps to get even volume all over your hair.
This works well if you want balance in your curls. With bigger sections, you’ll get softer, fuller waves but less curl detail.
Vertical sections create more natural, free-flowing waves because the hair falls at different lengths. Curling smaller vertical pieces means tighter, more layered curls that add depth. Mixing horizontal and vertical helps when you want both volume and a tousled effect.
Step-by-Step Action Plan
Start curling your hair with a straightener using this easy plan. Follow each step and check for smooth, lasting curls.
- Before You Start: Wash and dry your hair completely. Make sure hair feels smooth and free of moisture.
- Right Before Curling: Apply a heat protectant spray to all sections. Your hair should feel light and protected, not sticky.
- First Try: Use a 1-inch section of hair to practice curling. When you see a clean, bouncy curl, you’re ready.
- After 10 Minutes: Finish curling all hair sections. Your curls should look even and stay in place without extra product.
- Right After: Let curls cool completely before touching. The curls will hold shape better when cool to the touch.
- After 30 Minutes: Gently run fingers through curls to soften them. Curls should feel natural, not crunchy or stiff.
- Daily Care: Use a light hairspray to set curls on day one. Check your hair stays frizz-free and touch up with a flat iron if needed.
- Weekly Review: Test different heat settings on a small strand. Your curls should last longer without burning or dryness.
Frequently Asked Questions
How Can I Curl My Hair Using a Straightener?
Clamp a small section of hair near the roots. Twist the straightener 180 degrees.
Glide it down slowly. This technique helps create smooth curls without kinks in your hair.
Why Is It so Hard to Curl My Hair with a Straightener?
It can be hard if the straightener’s heat is too low. Wide plates also make curling tougher. Try higher heat for thick hair and use narrow plates for better control on short hair.
Which Way to Turn Straightener for Curls?
Turn the straightener away from your face for natural-looking curls. This also helps prevent tangling and allows you to control curl direction better.
How to Curl Your Hair with a Straightener Hack?
Use a texturizing spray before curling to help hold the shape. It adds grip so curls last longer and look more defined.
How Do I Curl Short Hair with a Straightener?
Use a straightener with narrow plates and clamp small sections close to your scalp. This creates tighter, controlled curls perfect for short hair.
Can I Curl Hair with a Straightener Without Heat Damage?
Use a heat protectant spray every time before curling to reduce damage. Keep the temperature lower for fine or damaged hair to save strands.
Final Thoughts
Making curls with a straightener gets easier with practice and good prep. Try the steps today to see real curls form smoothly. Keep your hair safe by adjusting heat and using protectants each time.