

How to Cut Long Hair at Home Safely: 8 Effective Methods and Pro Tips
Cut long hair at home by taking small, careful steps to avoid mistakes. Trim a little at a time and check your progress often. This way, you keep control and avoid cutting too much at once.
Use sharp scissors made for hair to get clean cuts. Dull scissors cause uneven ends and damage your hair. Sharp blades also help reduce split ends and give a neater style.
Start with clean, dry hair before cutting. Wet hair shrinks when dry, making you cut more than planned. Dry hair shows the natural fall and length clearly.
Section your hair properly to control each area as you cut. Work in thin sections about 1 to 2 inches wide. Take your time and don’t rush to avoid uneven results.
Key Takeaways
- Always use sharp hair-cutting scissors, not household shears.
- Trim dry hair to see its true length and natural fall.
- Divide hair into small sections for better control and precision.
- Cut only a small amount, about a quarter to half an inch each session.
- Use a comb to smooth hair before you make each cut.
- Keep the scissors angled slightly for softer, natural-looking edges.
1. How to Cut Your Own Long Hair at Home Safely and Easily

Cutting your own long hair at home can feel tricky. But it doesn’t have to be.
You need sharp haircutting scissors, clean hair, and good lighting. Pulling your hair straight helps you see what you’re cutting and prevents mistakes.
Work slowly and cut small amounts. Cutting a little at a time means you can fix mistakes more easily.
A two-mirror setup helps you see the back of your head clearly. Ask a friend for help if you need another set of eyes on your hair.
- Wash and dry your hair. Clean hair is easier to manage. Dry it the way you usually wear it, unless your hair is curly. For curls, cut when dry to keep the shape.
- Comb through carefully. Detangle hair fully to avoid uneven cuts. Divide your hair into four to six sections using clips.
- Pull a back section forward. Gather hair from the back over your head and hold it tight. This keeps hair steady and straight for cutting.
- Cut slowly with sharp scissors. Trim a small amount with point cutting or blunt cuts. Point cutting adds texture, while blunt cuts give a clean line.
- Check your cut in mirrors. Use a hand mirror and a wall mirror to see the back. Trim a bit more if needed, but don’t rush.
- Repeat with other sections. Unclip and cut the sides and top, following your line from the back. Keep checking your length and evenness.
- Clean up edges carefully. Trim any uneven pieces or split ends. Take tiny snips to avoid cutting too much.
Good results mean hair looks even and healthy with no big gaps. Mistakes happen when you cut too much at once or don’t use sharp scissors. Patience and careful sectioning avoid most problems and give you control over your cut.
2. Essential Tools and Preparation for Cutting Long Hair at Home
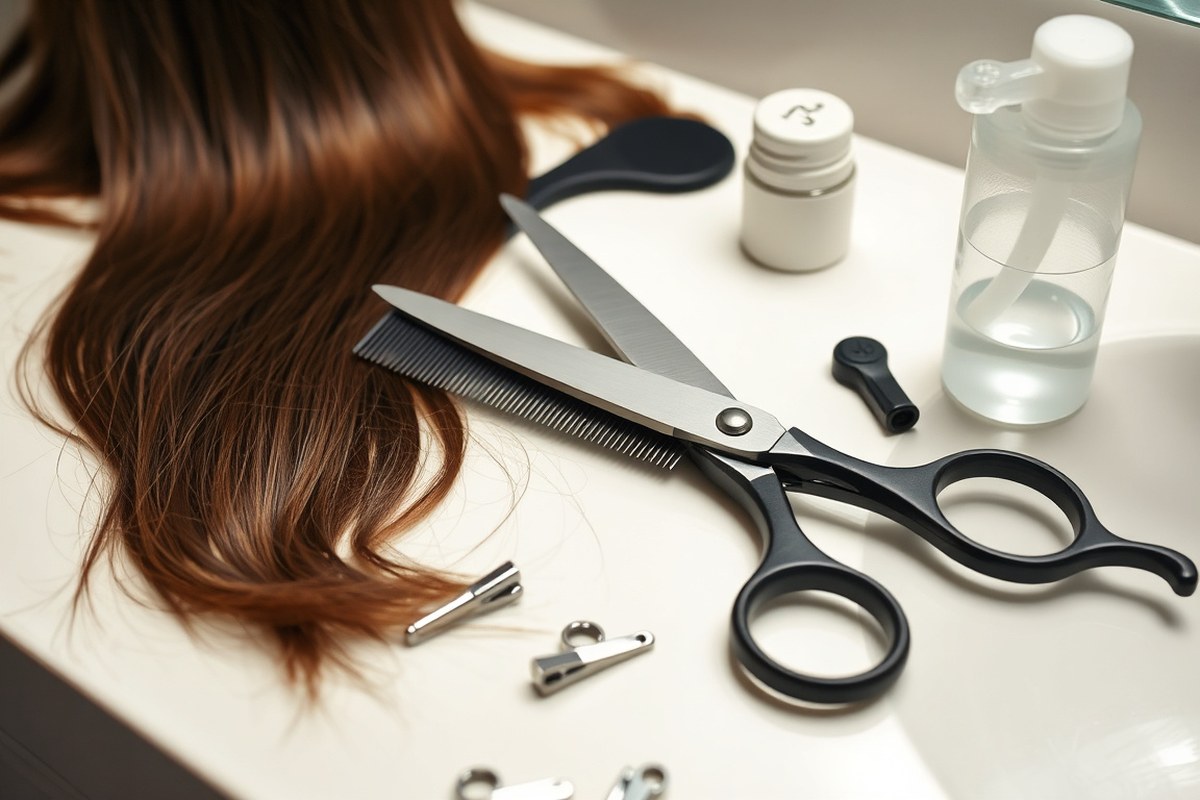
To cut your long hair at home, you need the right tools and proper prep. Use sharp hair-cutting shears for clean, precise cuts.
Avoid regular scissors since they can cause split ends or jagged edges. Separating clips help hold sections in place for accuracy.
Detangling your hair before cutting is important. Start with clean, dry hair styled how you usually wear it. This helps you see the final result clearly.
Use a wide-tooth comb first to remove knots gently. Follow with a detangling brush to smooth out the hair. Finish with a fine-tooth comb for precise sectioning.
- Sharp hair-cutting shears are a must for clean lines.
- Separating clips keep your hair divided and manageable.
- A wide-tooth comb removes major tangles without breakage.
- The detangling brush smooths your hair for a neat cut.
- A fine-tooth comb helps create even sections and guides.
Most people cut long hair dry to control length easier, unless hair is poker straight. Wet hair stretches, so cutting it wet means you might cut too much. Curly hair especially shrinks when dry, so cutting dry avoids surprises.
If still unsure, match what your usual hairstylist does. Dry cutting lets you see your natural hair fall and ensures an even look.
Cut less than you think at first. You can always trim more if needed.
Before you start, brush through your hair thoroughly to remove tangles. Make sure your mirrors show the front and back so you cut evenly all around.
Section hair carefully with clips so you manage manageable pieces. Good prep sets you up for a neat, professional-looking DIY haircut.
3. Sectioning and Parting Techniques to Manage Long Hair Before Cutting
Start by dividing your long hair into sections before cutting. This gives you control and helps you cut evenly. The right sections make the whole process less messy and more precise.
Why Sectioning Is Important for an Even Cut
Sectioning your hair helps you focus on small areas at a time. It keeps the hair from moving around too much while you cut. This way, each cut matches the last, making your haircut look even.
Without sectioning, hair can get tangled or cut unevenly. Sometimes small pieces dry at different lengths, which shows after the cut. Sectioning avoids this by giving you a clear place to cut next.
Using Clips and Combs to Create 4-6 Sections
Use a fine-toothed comb to smooth out your hair before sectioning. Then grab some alligator jaw clips, which hold the hair firmly without slipping. The goal is to make at least four sections, two on each side of your head.
Start with a middle part from front to back. Part your hair horizontally from ear to ear. This creates two sections: top and bottom.
Work with one section at a time. Clip each big section separately. For thicker hair, divide these into smaller parts so they feel lighter and manage better.
- Comb through your hair to remove all knots.
- Create a middle part from forehead to nape.
- Make a horizontal part from ear to ear.
- Clip the top half into two sections, left and right.
- Clip the bottom half into two sections the same way.
- Separate thick sections into smaller pieces if needed.
Adjusting Section Size for Thickness and Styles
Thicker or very long hair needs smaller sections for better control. Your hair feels heavy or hard to hold. Split each section into halves again.
This makes cutting easier. This gives you up to six smaller parts to work on.
For layers or angled cuts, pull your hair forward. Cut it section by section. Take your time with each part.
Smaller pieces let you make cleaner and more detailed trims. Remember, too big sections make it easy to miss uneven spots. Smaller sections do take longer but improve your precision.
4. Choosing the Right Cutting Method Based on Hair Type and Desired Style
Choosing the right cutting method depends on your hair type and the style you want. Blunt, layered, and ponytail cuts each work better for different textures and looks. Knowing these differences helps you get a better DIY haircut.
Blunt Cut: Definition and When to Use It
A blunt cut means cutting the hair straight across in one length. It creates clean, sharp edges best suited for straight or slightly wavy hair. Cutting hair wet brings out precision, so damp hair works well for this style.
Blunt cuts give a polished look and make thick hair look fuller at the ends. Curly or frizzy hair hides the clean line. It can cause unevenness.
These cuts are less forgiving on such hair types. Avoid blunt cuts on very curly hair.
Cut when dry instead. Account for shrinkage carefully.
Layered Cut: Technique and Hair Types Suited
Layered cuts add dimension and movement by cutting the hair at different lengths. This method breaks up the blunt effect and works well on wavy or curly hair types. Cutting dry helps you see how layers fall naturally, especially with curls.
Layers can help thin out thick hair and reduce bulk. For curly hair, layer lengths should follow the natural curl shape to avoid uneven volume.
You get softness and volume with layers on straight hair. Shrinkage is less of a worry.
Ponytail Cutting Method: Quick Trims and Shape
The ponytail cutting method is an easy way to add layers or trim length at home. Gather hair into a ponytail at the front.
Cut straight or at an angle across. This method works for most hair types but is especially beginner-friendly.
This method helps create a rounder or more natural shape and is good for quick trims. Hair is pulled tight in a ponytail before cutting. Cut less than you expect.
Hair loosens when down. This is a low-cost, low-effort technique for shaping long hair.
Here’s a comparison table summarizing these methods:
| Method | Best Hair Types | Hair Wet or Dry? | Pros | Cons |
|---|---|---|---|---|
| Blunt Cut | Straight, Wavy | Wet for precision | Sharp edges, thick ends look fuller | Harder for curly hair, risks unevenness |
| Layered Cut | Wavy, Curly | Dry for natural shape | Adds movement, reduces bulk in thick hair | Requires careful shaping for curls |
| Ponytail Method | Most types, good for beginners | Either, usually dry | Quick, easy layers and trims | Can cut too much if not careful |
Choosing a method suits your hair texture and desired look. Thicker or curly hair handles layers better, while straight hair shows blunt cuts clearly. The ponytail method is handy if you want a quick, simple shape or new layers.
5. Techniques for Trimming Split Ends and Maintaining Long Hair Length
Trimming split ends at home lets you keep your hair looking fresh without losing length. You just need to spot the damaged ends and cut them carefully at a slight angle. Trimming your hair every two or three months stops split ends.
This prevents damage from moving up the hair shaft. It keeps your hair healthier and stronger over time.
Identifying Split Ends Before Cutting
Look closely at your hair ends under good light to find split ends. These usually appear as tiny splits, fraying, or thinner strands at the tip. You can twist small sections to make split ends stick out for easier spotting.
Dry, rough, or frizzy ends can also signal split ends. Focus only on trimming those damaged bits. Avoid trimming healthy ends to keep your length intact.
Cutting at Slight Angles for Healthy Ends
Cutting straight across can cause the ends to look blunt and stand out unevenly. Instead, trim your ends using a point-cutting technique at a 45-degree angle. This means snipping into the tips vertically with the scissors’ points.
This method creates a softer finish and reduces the chance of new splits forming. Pull your hair into small sections and hold it gently taut to prevent uneven cuts. Use sharp hair scissors to avoid fluffing or damaging the ends further.
Frequency of Trims for Maintaining Length
Hair usually grows around half an inch each month. Trimming every 8 to 12 weeks keeps endings healthy. Waiting longer than three months can cause split ends and hair breakage.
Set a reminder to check your ends regularly. This avoids cutting more than you need and saves you money by preventing major damage. Follow these steps to trim split ends while maintaining length:
- Wash and dry your hair completely so the ends show clearly.
- Comb your hair gently to detangle and smooth it out.
- Separate hair into small sections using elastics or clips.
- Check each section for split ends by twisting or examining closely.
- Use sharp hair scissors to point cut the damaged tips at a 45-degree angle.
- Trim only the split or ragged ends, aiming to cut no more than ¼ inch.
- Repeat for all sections, keeping your hands steady to avoid uneven cuts.
- Comb through your hair to check for any missed splits and trim if needed.
Keep your scissors sharp and only trim dry hair to avoid cutting too much or unevenly.
6. Advanced Tips for Finishing and Blending Your DIY Haircut
Point cutting is a key move to soften your haircut edges and add texture. Hold your scissors tips parallel to your hair ends. Snip gently into the tips.
This helps create a soft finish. This breaks up harsh lines, making your layers blend smoothly and look natural.
After trimming straight lines or ponytails, try a new method. Grab a small hair section between your fingers.
Point scissors upward and snip lightly spaced apart. Quick, light cuts avoid a blunt look and create a feathered edge.
Point cutting is the best way to fix uneven layers or harsh steps. It softens the edges and blends layers better.
Instead of cutting more length off, cut into the ends vertically in small sections. This helps blend awkward steps without making your hair shorter overall.
Texturizing is another trick you can add to the finish. Texturizing shears have teeth that cut some strands and leave others. This tool adds texture and reduces bulk.
Use them if you have them. Use regular scissors for small zigzag snips on under layers or the crown. These snips create a natural textured look.
They work well if you don’t have texturizing shears. This cuts bulk and lets your hair move naturally.
Be careful not to overdo it, or your hair can look too thin or choppy. Work slowly and step back to check your progress often. Good texturizing helps your hair look soft, full, and professionally finished.
A common mistake is squeezing too much hair between your fingers when point cutting. That can lead to uneven results. Keep your grip light and snip into only small sections at a time.
Also, make sure your scissors are sharp. Dull scissors push hair and create jagged cuts that are hard to fix.
For long hair, these finishing moves add polish and blend your work smooth at home. Point cutting and texturizing take some practice but not much time. A few extra minutes at the end improves your DIY haircut.
It makes your cut look more professional. Avoid rushing, and you’ll avoid looking like you hacked it yourself.
7. Common Mistakes to Avoid When Cutting Long Hair at Home
Cutting too much hair at once is a common mistake. This often leads to a style that looks choppy and uneven. Always cut small amounts, like ¼ inch at a time, to keep control and avoid surprises.
Uneven sections cause noticeable gaps and different lengths. Splitting your hair into four to six sections helps manage it better. Use clips to hold each part firmly before cutting for a cleaner line.
Using the wrong tools can ruin your haircut fast. Dull or inappropriate scissors cause split ends and frayed cuts. Avoid using regular household scissors to cut your hair.
Buy sharp hair cutting shears instead. They usually cost between $10 and $30.
- Cut no more than ¼ inch per pass
- Divide hair into 4, 6 neat sections with clips
- Use sharp hair scissors, not regular kitchen or paper scissors
- Keep hair slightly damp if unruly, but don’t soak it
- Trim in front of a mirror and check from different angles
- Cut slowly and avoid rushing through each section
Trimming while hair is damp helps reduce frizz and improve precision. But don’t saturate it; too much water causes uneven shrinkage. Be patient and work in bright lighting to see the results clearly.
Uneven cuts or sharp lines are signs of rushing or poor sectioning. Stop regularly to comb through your hair and check for balance on both sides. That way, you catch mistakes early before they get worse.
8. When to Seek Professional Help Instead of Cutting at Home
Cutting your own hair is fine for small trims, but avoid big changes. Complex cuts like blunt bobs or dramatic layers need a stylist’s skill. These styles require precise horizontal lines or special tools that are hard to handle at home.
Cutting more than an inch or two? You should visit a salon instead.
Professionals use techniques that keep your hair balanced and shaped well. DIY cuts can quickly look uneven or blunt if you try major changes alone.
Look out for uneven layers, jagged ends, or choppy spots after your cut. These signs show your haircut needs fixing by a professional. A stylist can blend mistakes smoothly and restore evenness without cutting too much off.
A good rule: when trimming, stick to no more than one inch. Your hair looks or feels uneven after cutting?
Call your stylist. Also, avoid cutting tricky areas yourself, like the back or very thick sections.
Ask a friend to check your cuts. Use a mirror to help. This stops uneven results.
Remember, some hair types are harder to cut at home. Curly or very thick hair often needs special attention and tools. Professionals know how to handle these textures to avoid frizz or uneven length.
Regular trims for split ends or minor maintenance are safe to try at home. But major style changes, fixing mistakes, or transitioning between styles always call for an expert. This saves you time, money, and frustration in the long run.
Step-by-Step Action Plan for Cutting Your Long Hair at Home
Get ready to cut your hair safely and get a fresh look. Follow these steps in order to see your best results.
- Before you start: Gather all tools, towels, clips, and a mirror. Make sure your hair is clean and dry for easy handling.
- Section your hair: Divide your hair into four equal parts using clips. This keeps hair manageable and ensures an even cut.
- Trim split ends: Begin by carefully snipping ¼ inch from each section’s ends. Check that strands look even and no frayed edges remain.
- Cut length if desired: Choose the amount of hair to cut. Use point-cutting to avoid blunt edges. This keeps your cut softer and more natural. Confirm by comparing lengths on both sides.
- Blend layers: Use thinning shears on layers to soften any harsh transitions. Run fingers through hair to feel evenness and smooth blends.
- Check your work: Look at your hair from all angles in the mirror. Fix any uneven spots or missed sections before finishing.
- Style and review: Style your hair as usual to see the final shape. Make small trims if needed to perfect the look.
- Aftercare: Use a nourishing conditioner to seal hair ends. Keep an eye on split ends and repeat trimming every 6 to 8 weeks.
Frequently Asked Questions
What’s the Best Way to Avoid Uneven Cuts at Home?
Use sharp scissors and cut in small sections. Always cut less than you think to avoid mistakes.
How Do I Fix Mistakes Made While Cutting My Own Long Hair?
Minor mistakes can be hidden by trimming more evenly around the error. Use layering or texturizing to blend uneven spots for a natural look.
Can I Cut Long Curly Hair at Home the Same Way as Straight Hair?
Curly hair needs cutting when dry to see natural shape. Trim curls individually to avoid cutting too much off.
How Often Should I Trim My Long Hair at Home to Keep It Healthy?
Trim every 6 to 8 weeks to stop split ends and keep hair strong. Regular trims prevent damage without losing length.
Is It Safe to Cut My Own Bangs If I Have Long Hair?
Yes, but cut bangs slowly in small amounts. Use a pair of sharp scissors and cut while hair is dry for better control.
Can I Use Regular Household Scissors Instead of Hair Cutting Shears?
Regular scissors can cause split ends and uneven cuts. Invest in hair-cutting scissors for the best result and reduce damage.
Wrapping Up
Cutting your own long hair at home is doable with care and the right steps. Pick a quiet time to follow these tips slowly. Your next move is grabbing your scissors and giving it a try carefully.


