How to Sanitize Hair Clippers: Complete Steps, Tips, and Best Disinfectants
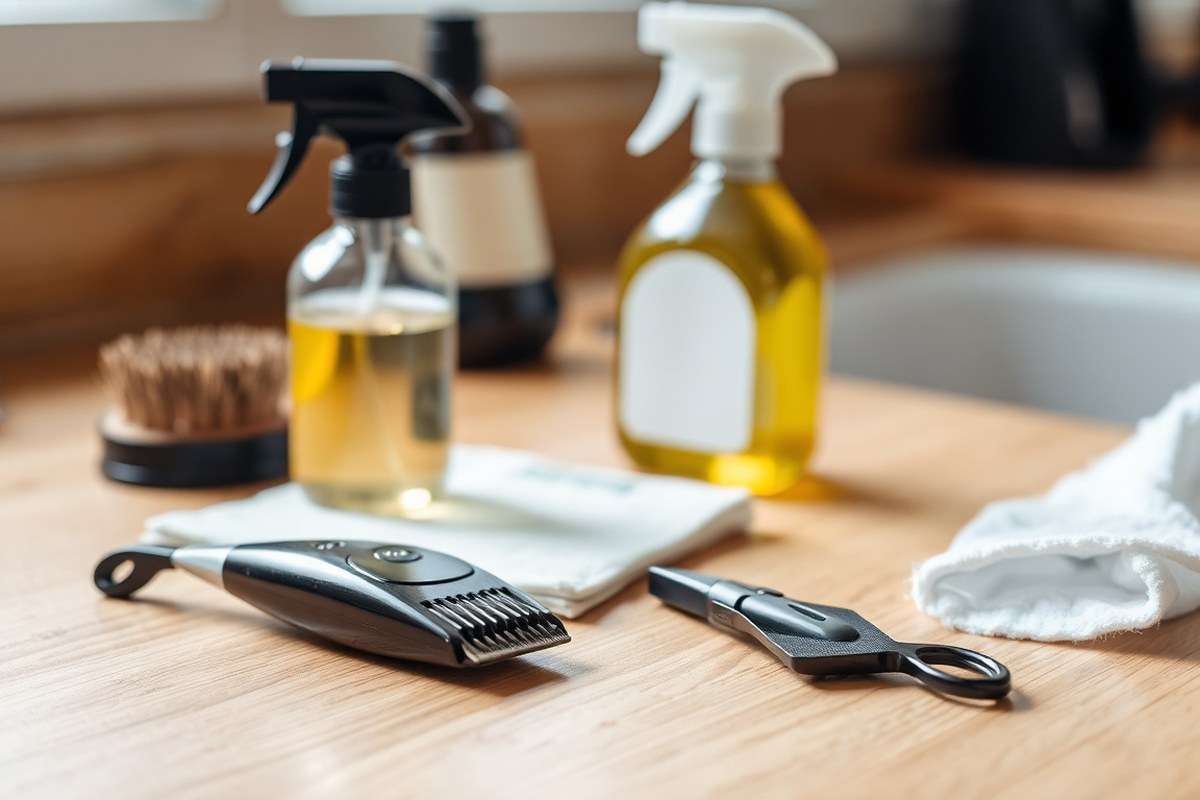
Knowing how to sanitize hair clippers keeps them safe and working well. Start by removing hair and debris from the blade edges and body. This step helps the disinfectant reach all parts of your clipper for better cleaning.
Use rubbing alcohol with at least 70% concentration as your main disinfectant. It kills germs and dries quickly without leaving residue that can harm blades.
You can spray or soak blades. But let the disinfectant sit at least ten minutes to work fully.
If you share clippers, consider soaking blades in Barbicide for deeper cleaning. It kills more types of bacteria and viruses but requires careful mixing and timing. Always follow label instructions for the best results.
Key Takeaways
- Remove loose hair from clippers before applying any disinfectant.
- Use 70% or higher isopropyl alcohol to disinfect clipper blades.
- Let disinfectants remain on blades for at least 10 minutes.
- Barbicide is ideal for shared clippers but must be used as directed.
- A toothbrush helps clean hard-to-reach spots on clipper blades.
- Don’t soak non-metal parts in alcohol; it can cause damage.
How to Sanitize Hair Clippers Step by Step

Sanitizing hair clippers means cleaning off hair and germs, then killing bacteria with a disinfectant. This stops infections and keeps your tools working well. Follow these steps carefully, using the right brushes and sprays.
Turn Off and Unplug Safely
Always turn off your hair clippers before cleaning to avoid electric shock. Unplug the device from the outlet to make sure no power flows during cleaning. This step protects you and your clippers from damage.
Handling tools carefully while unplugging prevents accidents and keeps the motor safe. Avoid pulling the cord; pull the plug instead. Set the clipper on a clean surface before cleaning.
Remove Hair and Debris Thoroughly
Brush away loose hair using a small, stiff brush or an old toothbrush. Tilt the clippers downward and brush away from the blade opening to clear trapped hair. Check the blade edges and under the housing for buildup.
For clippers you can take apart, remove the blades gently to access hidden hair. Clean inside the clipper housing with the brush to clear debris. Removing hair first helps disinfectants work better.
- Switch off and unplug the clippers completely.
- Use a cleaning brush to sweep hair from blade surfaces.
- Tilt clippers down and brush airways to clear loose strands.
- Carefully disassemble clipper blades if your model allows.
- Brush inside the clipper to remove trapped hair and dust.
Disinfect and Dry Blades Properly
Apply a spray disinfectant or wipe blades with rubbing alcohol to kill germs. Hold the spray about 3 to 4 inches away and cover the blades evenly. Let disinfectants sit for at least 10 minutes to work fully.
After disinfecting, use a dry cloth or paper towel to remove moisture gently. Avoid harsh rubbing that might damage the blades or their coating. Leave blades in open air for a few minutes until completely dry.
After drying, apply a small amount of clipper oil to the blades to keep them smooth and prevent rust. Turn on the clippers briefly to spread the oil evenly across the edges. Wipe away any leftover oil with a cloth to protect the blades and make them last longer.
- Spray clipper blades evenly with a recommended disinfectant.
- Wait at least 10 minutes for disinfection to complete.
- Dry blades carefully with a soft towel without rubbing hard.
- Optionally, apply a drop of blade oil to keep edges smooth.
- Turn on clippers for a few seconds to spread oil, then wipe excess.
Best Disinfectants for Hair Clipper Blades Compared

Rubbing alcohol is the most common disinfectant for hair clipper blades. Use 70% or higher isopropyl alcohol to kill bacteria effectively.
Simply apply it with a cloth or spray. Let blades dry for 30 seconds or more.
Barbicide is another option, mainly for shared clippers. Mix it exactly as the label says and soak the blades for 10 minutes. This gives deeper disinfection but takes more time than rubbing alcohol.
Hydrogen peroxide can disinfect but isn’t the best choice for clipper blades. It may cause some metal wear and doesn’t kill germs as fast as alcohol or Barbicide.
Household sprays like Lysol are not recommended. They might damage blades and often contain ingredients harmful to clipper materials.
| Disinfectant | Effectiveness | Usage Time | Safety for Blades | Cost and Availability |
|---|---|---|---|---|
| Rubbing Alcohol (70%+) | High | Apply, let dry ~30 seconds | Safe with brief contact | Low cost, widely available |
| Barbicide | Very High | Soak for 10 minutes | Safe if diluted and rinsed | Moderate price, salon supply stores |
| Hydrogen Peroxide | Medium | Apply and wipe dry | May cause metal wear | Low cost, common |
| Household Disinfectants (e.g. Lysol) | Varies | Follow label, often no soaking | Can damage blades | Low cost, common |
After applying any liquid disinfectant, wipe blades off and let them air dry fully. Use a brush or compressed air first to clear the hair from between blades. This helps the disinfectant reach all surfaces.
Remember to oil the blades after disinfecting. A few drops across the edges keep them sharp and prevent rust. Avoid longer soaking in liquids that can corrode metal quickly.
Always follow the label directions on disinfectants to avoid damaging clipper blades.
How Often to Clean and Sanitize Hair Clippers
After every haircut, spend 20 to 30 seconds clearing loose hair. Use a brush to remove hair, then spray clipper oil or dip in alcohol. Always unplug your clipper before starting any cleaning.
A deep clean is necessary after every 3 to 5 haircuts. This thorough process removes debris stuck between blades and prevents hair pulling or overheating. It usually takes a few minutes longer but keeps blades sharp and extends their life.
How often you clean also depends on how much you use the clippers. You cut hair daily, so quick cleaning after each use is needed. You might need to deep clean them weekly to maintain hygiene and performance.
For light home use, clean quickly after every haircut. Deep clean your clippers every few weeks for best results. Heavy professional use demands more regular deep cleaning to avoid damage and keep clients safe.
Skipping quick cleaning often leads to hair buildup, which dulls blades and strains the motor. Conversely, waiting too long between deep cleans can cause rust, odor, and poor cutting results. Taking just a few minutes regularly avoids these problems and saves money on repairs.
Cleaning and Sanitizing Clippers That Can’t Be Disassembled
Sanitizing clippers with fixed blades means you must avoid soaking them in water. Water can cause rust and damage the motor if it seeps inside. Instead, use a small stiff brush to remove hair and debris around the blade and casing.
Spray a clipper-safe disinfectant directly onto the blade, not on the whole clipper body. Choose an alcohol-based spray made for hair tools, as it dries fast and kills germs. Hold the clippers over a sink or paper towel when spraying to catch drips.
Wipe the blades with a clean cloth or cotton pad after spraying. This lifts off dirt that brushing misses.
Repeat spraying and wiping until the blade looks shiny and free of hair bits. Use a soft-bristle brush for stubborn spots, rubbing gently to avoid dulling the blade edges.
To clean the whole clipper surface without removing blades, use a damp cloth with disinfectant. Avoid dripping water or cleaning solutions near the motor or electrical parts. Wiping the handle and vents regularly can prevent buildup and keep your clippers working longer.
Clippers with sealed blades clean faster but need daily attention. Work quickly after every use, following this routine: brush, spray, wipe, then oil the blades.
When hair still pulls after cleaning, check blade alignment or dullness and sharpen accordingly. Often, cleaning fixes pulling cuts by removing stuck clumps and buildup.
Some clippers come with cleaning brushes included, which are perfect size and stiffness for tight areas. Look for these tools when buying or order them online for about $5 to $10. Avoid using toothbrushes or metal tools that can bend or scratch the blades.
Cleaning Clipper Guards and Attachments Correctly
Clipper guards and attachments need regular cleaning and disinfecting to stay hygienic. You can soak plastic guards in a Barbicide solution for 10 minutes. After soaking, rinse them well and dry completely before storage.
Removing and Brushing Off Debris
Before disinfecting, remove all loose hair and dirt from the guards. Use a small cleaning brush or the one that came with your clippers. Focus on the grooves and clip areas where hair often hides.
Even plastic guards can trap hair under the clips and edges. Thorough brushing helps the disinfectant work properly later. Missing spots allows bacteria and fungi to grow, which causes skin irritation.
- Detach the guards from the clipper carefully.
- Use a small brush to remove hair from the teeth and grooves.
- Flip guards over and brush the clips or attachment points.
- Tap the guards gently to dislodge trapped hair.
- Check each guard closely to ensure no hair remains.
Use a clean brush only for your clipper guards. Don’t mix it with other grooming tools to avoid cross-contamination.
Soaking Guards in Disinfectant
Plastic clipper guards can be soaked safely in Barbicide or similar disinfectants. Submerge them fully to reach all surfaces and crevices. Ten minutes soak time usually kills bacteria and viruses on the guards.
Avoid soaking metal clipper blades unless the manufacturer confirms it’s safe. Plastic guards can handle water-based disinfectants without damage. Don’t leave guards soaking longer than 10 minutes to prevent plastic wear.
- Fill a container with Barbicide as directed on the label.
- Submerge the guards completely in the solution without overlapping.
- Set a timer for 10 minutes to ensure proper sanitizing.
- Remove guards carefully with clean tongs or gloves.
- Rinse thoroughly under running warm water to remove chemical residue.
Never soak entire clippers in disinfectants. Only guards and detachable parts should go in the solution.
Rinsing and Drying Guards
Rinse guards well after disinfecting to remove any leftover solution. Use warm water but avoid very hot water that can warp plastic. Thorough drying prevents mold growth and protects the guards’ shape.
Lay guards on a clean towel or drying mat in a well-ventilated space. Avoid direct sunlight, radiators, or heaters to prevent plastic damage. Store guards only after they are fully dry to keep them sanitary.
- Hold each guard under warm running water to rinse off disinfectant.
- Shake off excess water gently to avoid bending the guards.
- Place guards spread out on a clean towel or drying mat.
- Leave them to air dry completely for at least one hour.
- Store guards in a dry, dust-free container or drawer.
Don’t put guards away while damp. Moisture can cause bacteria growth and unpleasant smells.
Oiling and Maintaining Clipper Blades After Cleaning
Oiling your clipper blades right after disinfecting is important. It reduces friction and keeps the blades running smoothly. Skip oiling, and the blades can drag, pull hair, or wear out faster.
Hold your clipper with the flat part facing away and tilt it downward. Turn it on and apply 3 to 4 drops of clipper oil directly onto the blades. Let the oil spread evenly as the blades move.
Your blades may feel sticky after oiling; try placing a folded paper towel there. Turn the clipper on for a short time. Or move the blades by hand.
This helps soak up old oil and stuck hair. This “paper towel flush” clears gunk and helps the fresh oil work better.
Using Wahl Clipper Oil or a similar blade lubricant is best. A small bottle costs around $5 to $10 and lasts for many uses. Oiling every two uses keeps your clippers in top shape without making it a daily chore.
Clippers that aren’t oiled often may rust or become noisy. The blades get hot and could even burn the skin during use. Regular oiling also helps your clippers last longer, saving you money on replacements.
After oiling, use a clean cloth to remove the extra oil. Excess oil draws in dust and grime. Maintenance means cleaning, disinfecting, and then oiling to avoid future issues.
Fixing Common Problems After Cleaning Clippers
Hair clippers can pull hair when blades are dull. Tiny hair bits stuck between blades also cause pulling. Cleaning alone may not fix this issue.
Dirt and product residue can cause uneven blade movement, leading to tugging. Check the blades closely. Blades that look worn or rough may pull hair.
Sharpening or replacing the blades can stop this. Try that to avoid pulling.
Overheating clippers often mean the blades or motor are not running smoothly. After cleaning, lack of oil can cause friction and heat buildup.
Apply a drop of clipper oil on each blade tooth before turning them on. Run the clippers for about 30 seconds to spread the oil evenly and cool the blades.
When clippers run noisily, it may mean hair or dirt remains trapped deep inside. Cleaning the blade area might not fix noise. Take off the clipper head completely for better cleaning.
Use compressed air or a brush to remove debris. This takes 10 to 15 minutes but can restore quiet, smooth cutting.
Dirt inside can remain after quick cleaning. Take apart the clipper often and clean with alcohol or disinfectant. This helps clear stubborn grime inside.
Soak removable blades in alcohol for 5 to 10 minutes to melt oils and loosen buildup. Never submerge the whole clippers, only parts that are water safe.
Check that blades align properly after cleaning and reassembly. Misaligned blades can pull hair or cause skin irritation.
Adjust screws gently if the blades feel loose or uneven. Test the clippers on a small section of hair to ensure smooth cutting without snagging.
Sanitizing Different Types of Hair Clippers
Different hair clippers need special care to clean them safely and well. Corded, cordless, and waterproof models vary in how you clean and sanitize them. Knowing your clipper type helps avoid damage and keeps your tools working longer.
Cleaning Corded Clippers Safely
Corded clippers require gentle cleaning around their wiring and plug. First, unplug the clipper and remove any loose hair with a small brush. Avoid soaking the clipper body or blades in water to prevent electrical damage.
Detach the blade head if your model allows it. Then, wipe it with a cloth dampened in a disinfectant solution made for metal blades. Dry all parts thoroughly before reassembly and storage to stop rust and electrical problems.
Be careful with the power cord: never spray disinfectant directly on it. Use a damp cloth instead to clean the cord without risking moisture inside the clipper.
Sanitizing Cordless Clippers
Cordless clippers have batteries and electronics sensitive to moisture. Use disinfectant sprays applied to a cloth and avoid spraying directly on the clipper. Carefully wipe the blade and body, paying close attention to vents and buttons.
Charging docks also need cleaning with a dry cloth or a lightly disinfected one. Avoid any liquid pooling on the battery contacts or inside the charging station to prevent damage.
To keep batteries healthy, dry cordless clippers fully after cleaning. Charging or using the clipper when wet can shorten battery life and cause malfunctions.
Waterproof and Showerproof Clippers Care
Clippers rated IPX6 or IPX7 are water-resistant. You can rinse them safely under running water. The Philips All-in-one Trimmer 9000 is one example.
Use warm water to rinse hair and debris off the blade head after each use. Avoid harsher cleaning chemicals that might wear seals over time.
Let these clippers air dry completely before storing or using oil on the blades. Drying prevents moisture buildup that could lead to rust or electrical issues despite waterproof ratings.
This rinsing method is faster and simpler compared to traditional cleaning. Still, regularly check seals and manufacturer instructions to maintain waterproof features effectively without wearing them down.
Never soak non-waterproof clippers or spray cleaning liquids directly on electronic parts.
Step-by-Step Action Plan for Sanitizing Hair Clippers
Follow these steps to keep your hair clippers clean and working well. This plan fits both at-home users and barbershop pros.
- Before each use: Wipe blades with a dry cloth to remove hair and dust. The blades should look free of visible debris.
- After every haircut: Spray clipper blades with an approved disinfectant spray. Let it sit for the recommended time to kill germs.
- Weekly deep clean: Remove clipper blades and soak them in a disinfectant solution for 10 minutes. Check that no hair or residue remains after drying.
- After deep clean: Oil the blades lightly to prevent rust and keep them running smoothly. The blades should move quietly and cut evenly.
- Monthly check: Inspect clipper guards and attachments for buildup and clean them in warm soapy water. They should be clean and free of sticky residues.
- As needed for non-removable blades: Brush the blades to remove hair. Then spray them with disinfectant. Do this without taking the blades apart. No visible hair or dirt should remain on the blades.
- After any issue: Troubleshoot blade dullness or rust by cleaning, oiling, or replacing blades if necessary. The clipper should cut smoothly and quietly once fixed.
Frequently Asked Questions
Does Rubbing Alcohol Disinfect Clippers?
Yes, rubbing alcohol (70% or higher) disinfects clipper blades effectively. Use it after cleaning to kill germs and prevent infections.
How Do Barbers Disinfect Their Clippers?
Barbers clean clippers with brushes then soak blades in Barbicide or use blade sprays. This ensures deep sanitization, especially when used on multiple clients.
Can I Use Lysol to Disinfect My Hair Clippers?
Lysol is not recommended for clippers because it may damage blades and motor parts. Stick with isopropyl alcohol or approved clipper disinfectants instead.
Does Hydrogen Peroxide Disinfect Clippers?
Hydrogen peroxide can clean but is less effective as a long-term disinfectant for clippers. Use it mainly for light cleaning, then follow up with alcohol or specialized spray.
Can I Sanitize Clippers Without Removing the Blades?
Yes, use a spray disinfectant and wipe thoroughly, especially around blade edges. Wait 10 minutes before using to ensure proper sanitization.
What’s the Best Way to Dry Clippers After Disinfecting?
Let the clippers air dry completely or use a soft cloth. Avoid using heat, as it can damage clips or cause rust.
Wrapping Up
Clean, disinfect, and oil your clippers regularly to keep them safe and sharp. Start your next cleanup right now with a good disinfectant spray. Clean clippers help you give better haircuts and avoid skin infections.