How to Use a Hair Wand: A Complete Guide with Best Curling Tips
Learning how to use a hair wand helps you create curls fast and easy. First, choose the right barrel size for your hair length and thickness. Next, set the temperature based on your hair type to avoid damage.
Always start with 100% dry hair before curling to get the best results. Hold the heat protectant spray about 6 to 8 inches away. Spray it evenly over your hair.
Make sure to cover all sections well. This shields your strands and keeps them healthy while styling.
Section your hair carefully to curl all parts evenly and quickly. Smaller sections work better for fine or short hair.
Thicker hair needs larger chunks. With the right wand and technique, your curls will last longer and look natural.
Key Takeaways
- Use a curling wand with a barrel size suited to your hair length.
- Set the temperature between 300 and 350°F for most hair types.
- Keep heat under 200°F for fine or damaged hair to prevent damage.
- Thicker hair can handle higher heat, up to 400°F safely.
- Always curl completely dry hair for best results and less breakage.
- Mist heat protectant 6-8 inches from hair before curling.
What Is a Hair Wand and How Does It Work?

A hair wand is a styling tool that uses heat to curl your hair. Unlike curling irons, it doesn’t have a clamp to hold the hair. Instead, you wrap hair around the heated barrel by hand.
This design lets you create more natural-looking curls and waves. Curling irons often leave uniform, ringlet-style curls because the clamp holds hair tightly. A wand’s open barrel helps curls look softer and less perfect.
The key to curling with a wand is wrapping your hair evenly around its barrel. Start close to the root and wind the hair away from your face. Hold it about 5 to 15 seconds, depending on hair thickness, before releasing.
Temperatures vary for safety and effectiveness. Thick hair can handle heat up to 400°F or more.
Fine hair should stay below 200°F to avoid damage. Most wands allow you to adjust the heat for your hair type.
Unlike curling irons, using a wand demands more care when holding your hair in place. You’ll need to keep your grip steady without a clamp. This takes a bit more practice but gives you control over curl tightness and style.
Wands come in many barrel sizes and shapes. They let you create tight curls or loose waves. Choose the size and shape based on your desired look.
For medium-length hair, an 18 to 25mm barrel works well. Long hair works with almost any size. But very small barrels make curling take much longer.
Choosing the Right Barrel Size and Temperature for Your Hair
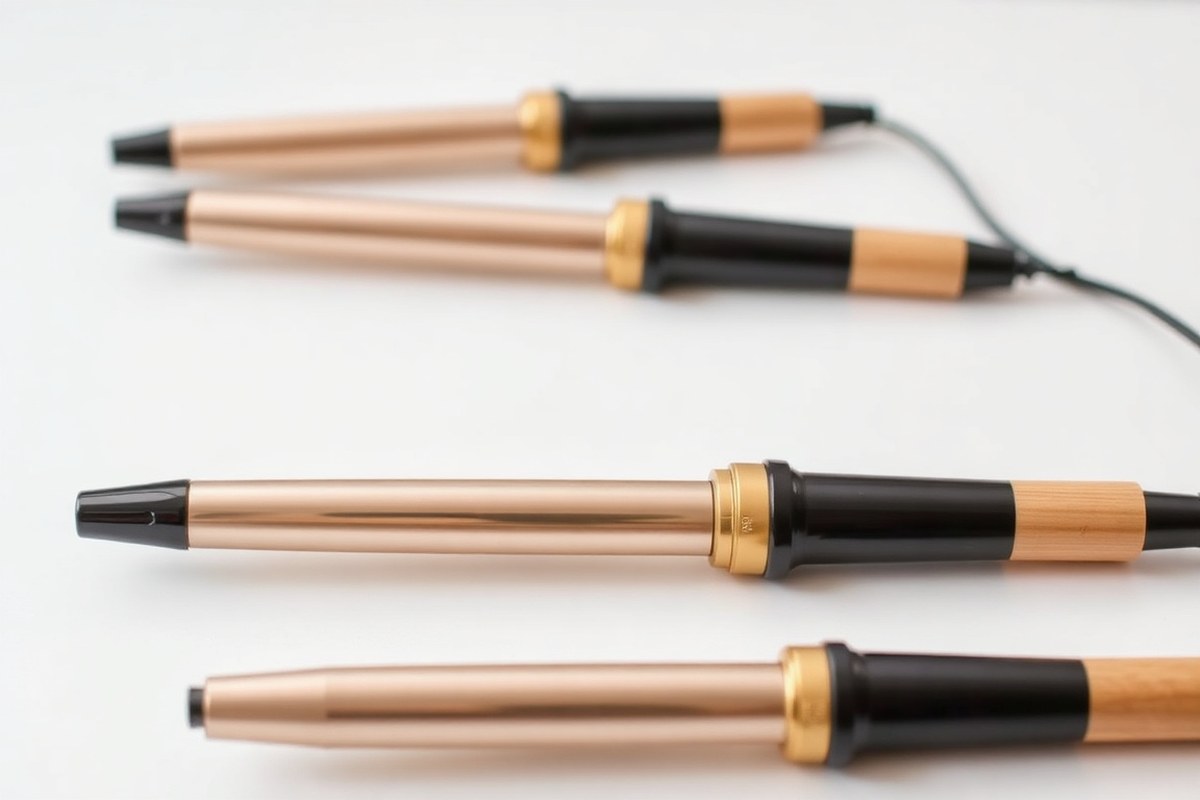
Selecting the right wand barrel size starts with your hair length and the curls you want. Smaller barrels, around 13 to 19 millimeters, create tight curls and work best on short hair.
Medium barrels, about 25 millimeters, give softer curls and fit medium-length hair well. Larger barrels, near 32 millimeters, are for long hair and make big, loose curls or waves.
Barrel shape also changes your curl style. Straight barrels create uniform curls or soft waves. Conical barrels taper, giving large curls at the base and tight ringlets at the tip.
Bubble barrels have bumps, making tousled, natural waves. Spiral barrels form tight, defined spiral curls because of ridges along the barrel.
| Barrel Type | Diameter | Curls It Makes | Recommended Hair Length |
|---|---|---|---|
| Slim/Small | 13-19 mm | Corkscrew curls | Short |
| Medium | 25 mm | Softer, less tight curls | Medium |
| Large | 32 mm | Bigger, looser curls | Long |
Set your wand’s heat according to your hair type to keep your hair safe. Thin or fine hair generally needs lower heat, around 220 to 300 degrees Fahrenheit. Thick, coarse, or long hair can handle higher heat, up to 400 degrees.
Let your wand fully heat before use. Always use a heat protectant on your hair.
Experiment with your hair sections too. Use 1 to 1.5-inch wide sections for a balanced curl. Smaller sections touch more barrel surface and produce tighter curls.
Hold your hair on the wand for 5 to 10 seconds. This usually creates curls that last. It also avoids extra damage.
Lower heat settings work best for fine hair and reduce damage risk.
Preparing Your Hair Before Curling with a Wand
Start with clean, dry hair before using your hair wand. Heat can damage damp hair, so drying and protecting your strands is key. Follow clear steps to wash, dry, and shield your hair for safe curling.
Dry Your Hair Completely
Hair curling works best on fully dry hair. Using a wand on wet hair can cause heat damage. Wet hair may also make your curls not hold well.
Always start with dry hair for best results. Let your hair air dry halfway first.
Then blow dry it the rest of the way. Make sure your hair is completely dry before curling.
Drying your hair well saves you from burning your strands. Heat applied to wet hair causes steam, which weakens the hair shaft and can cause breakage. Make sure your hair feels dry and smooth before you start curling.
Apply Heat Protectant Evenly
Use a heat protectant before you dry and curl. Applying it while hair is still damp helps coat your strands evenly. This shields your hair from high temperatures and reduces damage.
Choose a lightweight heat protectant cream or spray. Spray it from roots to ends, avoiding clumps. This creates a barrier so the wand heats the protectant, not your hair directly.
Products like Curlshield Cream guard hair from heat damage when styling. Applying a protectant costs around $10 to $20 for a bottle. But it’s worth investing to keep hair healthier.
Brush Out Any Tangles
Before curling, detangle your hair using a regular brush or wide-tooth comb. Smooth hair lets you wrap strands around the wand better and avoids snags. Gently remove tangles to prevent breakage.
Use leave-in conditioner or other products before brushing your hair. Apply them now to help with styling and protection.
That helps distribute moisture evenly. Smooth hair looks shinier and holds curls longer.
Follow these steps to prepare your hair for curling with a wand:
- Wash your hair with a gentle shampoo and conditioner.
- Towel dry gently to remove excess water without roughing up strands.
- Let your hair air dry until it’s about halfway dry.
- Spray or apply heat protectant evenly while damp.
- Blow dry your hair completely until it feels dry to touch.
- Brush or comb out any tangles to smooth strands.
- Section your hair to get ready for curling with the wand.
Sectioning Your Hair for Effective Curling
Dividing your hair into sections helps curl every strand evenly. It makes the process smoother and avoids uneven curls or messy tangles.
How thick your hair is also changes how you part it. So you don’t overwhelm your curling wand.
Thicker hair needs smaller sections. Taking about 1-inch strands works best for even heat and curl hold.
Thinner hair can handle slightly larger sections. But using 1-inch pieces still gives better control and neat curls.
Using clips or hair ties, separate your hair into four parts. Put one at the back, one in front, and one on each side. Make sure the sections are roughly equal for balanced curling on all sides.
- Start by detangling your hair using a wide-tooth comb, so sections stay neat.
- Divide your hair into four parts using clips or hair ties.
- Release one section, leaving the others clipped out of the way.
- Take a 1-inch strand from the section to curl at a time.
- Hold the curling wand vertically and wrap the strand around it smoothly.
- Once done, release the next 1-inch strand from the section and repeat.
- After finishing one section, unclamp the next and continue the process.
This method stops hair from sliding off the wand or curling unevenly. Wrapping too large a chunk can cause awkward kinks or missed spots. Sectioning also helps you see what you’ve curled and what’s left quickly.
Thicker hair needs more patience. Smaller pieces mean the heat reaches every strand properly. This avoids some parts staying straight or curling less, which would look uneven.
Step-by-Step Technique to Curl Hair Using a Wand
To curl your hair with a wand, wrap a 1 to 1.5 inch section of hair around the barrel. Hold it for 3 to 10 seconds depending on your hair thickness, then gently release.
Curl away from your face for a natural look. Alternate directions on each section.
Selecting a 1 to 1.5 Inch Section
Pick a hair section about 1 to 1.5 inches wide for each curl. Smaller sections hold curls longer, while bigger ones create loose waves. Use a clip to separate the rest of your hair so it doesn’t get tangled.
Start curling from clean, dry hair that has a heat protectant applied. Divide your hair evenly, working from the bottom layers to the top for the best results.
Wrapping Hair Away from the Face
Hold the wand vertically and wrap your hair around it going away from your face. This opens up your curls and creates volume. For beach waves, start wrapping your hair at the middle.
Leave about an inch at the ends uncurled. This gives a natural, loose wave look.
Make sure to wrap the hair smoothly around the barrel. Avoid overlapping or bunching hair to prevent uneven heat and frizz.
Holding Time According to Hair Thickness
Hold the hair on the wand for 3 to 4 seconds. Do this if your hair is fine or thin. It helps prevent heat damage.
For thicker hair, you might need 8 to 10 seconds. Don’t hold longer than 10 seconds to avoid damage or dryness.
The right hold time lets curls form without stress. Too short and curls won’t last. Too long risks breaking or frying strands.
Releasing Curl Gently
After the hold time, gently unwrap the hair from the wand. Avoid pulling or yanking it off quickly. Let the curl slide smoothly to keep its shape and shine.
Use your free hand to support the curl if necessary. This prevents it from unraveling too fast or getting tangled.
Be careful not to burn your fingers when wrapping hair around the hot wand.
Varying Curl Directions for Natural Look
Alternate curling directions on each section: curl some away from your face, some toward your face. This breaks up uniformity and mimics natural waves. Keep your first curl going away from your face, then change directions for the next.
This variation gives your hair a soft, easy look. It also adds volume by making curls fall differently.
- Separate a 1 to 1.5 inch section of hair from the rest.
- Hold the wand vertically with the tip pointing down.
- Wrap your hair smoothly around the barrel, away from your face.
- Hold the wrapped hair against the wand for 3, 10 seconds, based on thickness.
- Gently unwrap the curl from the wand without pulling.
- Switch curling direction for the next hair section.
- Repeat until all hair is curled.
Styling and Setting Curls for Long-Lasting Results
After curling, letting your curls cool completely helps them last longer. Cooling sets the shape and keeps curls bouncy instead of falling flat. Avoid touching or brushing curls while they’re warm to hold the style better.
Finger styling is your best bet for a natural look. You can gently separate curls by sliding your fingers through them.
Using a wide-tooth comb or a soft brush helps if you want softer waves. But wait until hair cools fully.
Finishing products lock in your style. A heat-protectant serum shields your hair during curling and adds shine.
Texturizing spray or light mousse before curling helps curls hold their shape longer. After styling, a flexible hold hairspray stops curls from drooping but avoids stiffness.
- Wait 10 to 15 minutes after curling to let curls cool fully.
- Gently release curls from the wand without pulling or tugging.
- Finger comb curls to separate and loosen them for a natural look.
- Apply a small amount of hair serum to smooth any flyaways.
- Spray a light, flexible hold hairspray evenly over your curls.
- Optional: Use a wide-tooth comb for softer waves once curls are cool.
- For best overnight results, sleep on a silk pillowcase to keep curls fresh.
Common Mistakes to Avoid When Using a Hair Wand
Common mistakes with a hair wand can cause weak, uneven curls and dry hair. You can fix these by using the right heat, timing, and preparation. Avoid these to get healthy, long-lasting curls without damage.
Using Too Much Heat for Hair Type
Using too high a temperature burns your hair and causes breakage. Fine or damaged hair needs low heat, around 250°F to 300°F. Thick or coarse hair can handle up to 350°F to 400°F but avoid going higher.
Check your wand’s temperature settings and start low. Increase heat only if curls don’t hold after a test strand. High heat is quick but damages your hair over time.
- Fine or damaged hair: Use 250°F, 300°F
- Normal hair: Use 300°F, 350°F
- Thick or coarse hair: Use 350°F, 400°F
- Always test on a small piece first
- Adjust heat based on how your hair curls
Lower heat with the right barrel size and product will give softer curls. Heating your hair beyond its needs leads to dull, frizzy strands.
Curling Damp or Wet Hair
Curling wet or damp hair traps moisture and causes steam damage. Your hair could become brittle and frayed instead of smooth. Use a blow dryer to get your hair fully dry before curling.
If your hair is damp, wait 30 minutes or more after drying before curling. For thick hair, it may take longer to dry fully. Touch each strand to feel if it is dry enough before wrapping.
- Dry hair thoroughly with a blow dryer first
- Don’t curl if hair still feels cool or wet
- Use a quick-dry spray if you’re in a hurry
- Wait 30 minutes after washing before curling
Starting with dry hair helps your curls last longer and stay healthy. Damp hair curls lose shape fast and suffer heat damage from steam.
Wrapping Oversized Hair Sections
Taking too big a hair section leads to uneven heating and loose curls. Hair close to the wand heats faster, while the rest stays straight. Use smaller sections for smooth, consistent curls.
Divide hair into sections about 1 inch wide or less. Smaller sections curl faster and look neater. Thick hair may need more, smaller pieces to curl properly.
- Use 1-inch or smaller hair sections
- Clip away the rest of your hair to avoid tangles
- Wrap hair evenly around the wand
- Don’t overlap hair strands in one wrap
- Curl one section at a time for control
Smaller sections create a uniform curl and reduce heat time. Large sections often stay flat or have uneven curl patterns.
Holding Hair on Hot Wand Too Long
Leaving your hair on the wand for more than 15 seconds causes heat damage. It also makes curls look too tight and unnatural. Aim for 8 to 12 seconds per section to form memory without damage.
Use a timer or count silently to avoid over curling. Once the hair cools on the wand, it holds the curl shape better. Release the hair gently without tugging to keep curls intact.
- Hold hair on wand for 8 to 12 seconds only
- Don’t exceed 15 seconds to prevent damage
- Allow hair to cool before touching or styling
- Use heat-resistant gloves to avoid burns
Long heat times dry out your hair and break strands. Short, timed curls stay bouncy and soft.
Not Using Heat Protectant
Skipping heat protectant leaves hair vulnerable to dryness and split ends. These products create a barrier to reduce damage from high heat. Spritz a heat protectant spray evenly before curling.
Apply protectant to dry hair for the best effect. Reapply if you use the wand multiple times in one session. Protectants keep hair shiny and cut down on frizz.
- Use a heat protectant spray or serum on dry hair
- Cover all strands evenly before curling
- Reapply if you curl multiple times
- Look for products with at least 375°F heat protection
- Avoid heavy oils that weigh hair down
Heat protectants help maintain your hair’s health and shine. Missing this step often results in dull, fragile hair over time.
Special Tips for Curling Short or Fine Hair Safely
Short hair can be tricky to curl because it won’t wrap fully around the wand. Choose a smaller barrel size between ¾ inch and 1 inch. This size fits short strands better, creating natural curls without slipping off.
Fine hair needs gentler heat to avoid damage. Set your wand to a lower temperature, around 250°F to 300°F. Use a heat protectant spray before curling to keep strands healthy and reduce breakage.
Hold the wand vertically and wrap small sections of hair around the barrel. Keep the wand close to your scalp but never touch your skin. Hold each curl for about 5 to 8 seconds, then release gently to keep curls defined.
For short hair near your face or bangs, curl away from your face. This creates a natural look. Keep the curls soft around your face.
Use clips between curls if your hair is very short. This helps curls cool and set better.
Let the curls stay clipped for a few minutes. Avoid rushing; curls last longer when cooled completely.
Higher heat settings suit resistant hair types, like thick straight hair. Your fine hair is very smooth or thin. Stay on lower heat to protect it.
Curl fewer sections to avoid overheating your hair. You can always do a second pass on stubborn strands at a higher temperature.
Since short hair leaves less room to hold the wand, take care not to burn yourself. Keep fingers away from the hot barrel and use a heat-resistant glove if needed. Move steadily to avoid holding the wand too long on one spot.
Use a small barrel for fine or short hair. Keep the heat low to protect strands. This helps prevent damage while curling.
Step-by-Step Action Plan to Master Your Hair Wand
Follow these steps to practice curling hair with your wand safely and effectively. Use each step as a checkpoint to know you’re on the right track.
- Before you start: Clean and dry your hair completely. This protects hair from heat damage and helps curls hold better.
- Day 1: Choose a medium heat setting based on your hair type. Fine hair does best around 300°F, thicker hair can handle up to 375°F.
- Day 2: Section your hair into manageable parts, about 1-inch wide. This keeps curls neat and speeds up the process.
- Day 3: Wrap one section around the wand, hold for 8 to 10 seconds. Let go and check for smooth, bouncy curls without burn marks.
- Week 1: Apply a light heat protectant spray before curling. Notice how curls stay shiny and hair feels less dry.
- Week 2: Use your fingers or a wide-tooth comb to style curls gently. Avoid brushes, which can cause frizz and ruin curl shape.
- Week 3: Set curls with a flexible hold spray. When curls keep their bounce and don’t fall flat by evening, you’re nailing it.
- After 1 month: Adjust heat or barrel size if needed to match your desired curl look. Use this time to get comfortable with different styles.
Frequently Asked Questions
How Do You Prevent Heat Damage When Using a Hair Wand?
Use a heat protectant spray before curling to shield your hair. Always make sure your hair is completely dry before you start styling.
Can You Use a Hair Wand on Damp Hair?
No, hair wands should only be used on hair that is 100% dry. Damp hair can cause damage and won’t curl properly.
What’s the Difference Between a Curling Wand and a Curling Iron?
A curling wand has no clamp. So you wrap the hair directly on the barrel. Curling irons hold hair with a clamp, making them easier for beginners.
How Long Should You Hold Hair on the Wand?
Hold your hair on the wand for 5 to 15 seconds. Thick hair needs longer heat to create lasting curls.
Why Is Sectioning Hair Important When Using a Wand?
Sectioning helps you curl hair evenly and avoid missing spots. It also prevents wrapping too much hair around the wand at once.
Can You Use a Hair Wand on Short Hair?
Yes, use a smaller barrel wand, like 32mm, for short hair. Keep your hair length at least 3 to 4 inches for best results.
Final Thoughts
Using a hair wand right means protecting your hair from heat and creating curls that last. Start slow, learn your hair’s limits, and practice the right steps. Grab your wand, a heat protectant, and try curling just one section today.