How to Cut and Layer Your Own Long Hair: Simple Steps for Perfect DIY Layers
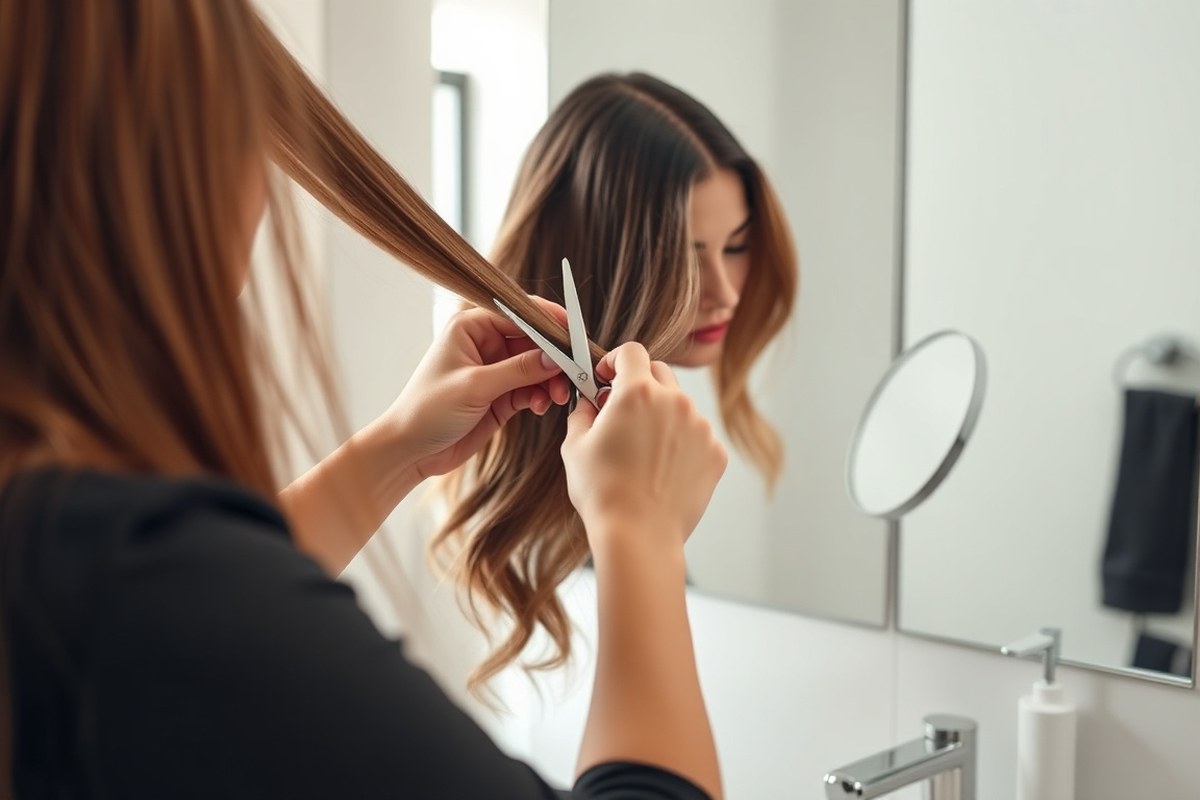
Cutting and layering your own long hair is doable with the right method and tools. Start by trimming small sections, about one to two inches at a time. This prevents cutting too much at once.
It helps you control length better. You also decide the shape as you cut.
Work on slightly damp hair that’s about 70% to 80% dry after applying some hair oil. That way, your hair lies naturally and is easier to manage as you cut. Using the ponytail method can give you even layers without the worry of uneven results.
Be patient, especially if your hair is thick. Take your time to hold the hair firmly and angle your scissors around 45 degrees. This approach helps add natural movement and keeps your layers looking balanced and fresh.
Key Takeaways
- Trim one to two inches off your hair layers for a gradual change.
- Comb hair down at about a 45-degree angle before cutting.
- Use hair oil and blow-dry hair until 70% to 80% dry for best results.
- Use a 135-degree slant to add soft waves in straight hair strands.
- Work slowly and hold hair firmly to avoid uneven cuts.
- For thick hair, expect the process to take longer than 10 minutes.
How to Cut and Layer Your Own Long Hair at Home

Cutting and layering your long hair at home can be simple when you follow clear steps. Start with clean, damp hair to help your scissors glide smoothly. This approach helps get even layers without mistakes.
Balanced layers fall softly around your face and create natural movement in your hair. To keep your cuts steady, work against a solid mirror and keep good lighting. Paying attention to your angles while cutting prevents uneven lengths.
- Detangle and part your hair: Use a fine-tooth comb to remove knots. Part your hair in the middle or wherever you prefer layers to start.
- Divide hair into sections: Make three main parts. One at the back. One on each side. Clip or tie the side sections away to focus on the back first.
- Create your guide length: Take a small section from the back. Pull it straight down. Cut to the layer length you want. This cut acts as the baseline for all other sections.
- Cut the back section: Work from the guide. Pull each subsection straight down, match it to the guide length, and cut. Keep your scissors slightly angled to soften the edges.
- Work the side sections: Let down a side section, pull hair forward or slightly outward. Cut by comparing lengths to the back’s guide, adjusting angle for natural flow toward your face.
- Check for balance: Let all hair down and comb through. Look for uneven spots and carefully trim small bits to even shapes and lengths.
- Finish with minor tweaks: Use point cutting vertically into ends to soften harsh lines. Avoid cutting straight across unless you want a blunt finish.
For curly or coily hair, cut when your hair is dry or partly dry. This helps you see the true shape.
For straighter hair, trimming damp gives more control. Cutting in sections helps control length and layers, making sure everything stays balanced and blends well.
Patience matters here; take your time and do little trims instead of big cuts. This way, you’ll avoid cutting too much and can adjust the style as you go.
Essential Tools and Preparation for Long Hair Layering

Cutting and layering long hair yourself calls for specific tools and prep. Use professional scissors, section hair properly, and prep according to your hair texture. This approach keeps the cut neat and avoids surprises.
Recommended Scissors and Why Professional-Grade Matters
Use hair cutting shears instead of regular scissors. Household scissors have dull blades that can cause split ends and a jagged cut. Hair shears are sharp and designed to cut cleanly through hair strands.
Good shears cost between $20 and $50 at most beauty stores. They often have stainless steel blades for durability. Using the right scissors helps you cut just the right amount without pulling or snagging.
Blunt or uneven blades can ruin long layers by creating choppy edges. Sharp shears give you more control and smoother ends.
Sectioning Clips, Combs, and Mirrors Essentials
Sectioning is key to a tidy and even cut. Use clips to hold your hair back in neat sections.
This keeps hair tidy while you cut only what you need. This keeps your work organized and prevents uneven layering.
- Sectioning clips with a strong grip, ideal for thick hair
- Fine-tooth cutting comb for smoothing hair before cutting
- Wide-tooth comb or fingers for detangling curly or coily hair
- Elastic hair ties for ponytail method and sectioning
- Two mirrors to check your back hair easily
Fine combs smooth straight or wavy hair for precise edges. Curly hair needs gentler detangling to keep curls intact.
Preparing Hair: Wet vs. Dry and Detangling Tips
For straight and wavy hair, cutting damp hair gives you better control. Spray hair with water until moist but not dripping. This prevents hair from stretching and causing uneven cuts.
Use a microfiber towel to gently remove excess water before cutting. Put a small amount of hair oil in your hair.
Blow-dry until it is about 70% to 80% dry. This makes your hair softer and easier to manage.
Curly and coily hair should be cut dry to avoid shrinkage surprises. Detangle carefully using your fingers or a wide-tooth comb to keep curls from stretching out.
Cutting curly hair dry helps you see the true length and shape.
Adjustments for Straight, Wavy, and Curly Hair
Straight and wavy hair is easiest to cut while damp. The ponytail method works well here since damp hair stays relatively still. Cut slowly, removing small amounts to build your layers.
Curly and coily hair is more forgiving of varied lengths because curls shape the layers naturally. Cut each curl individually if possible to avoid unwanted short spots. Avoid pulling curly hair into a tight ponytail when wet.
Make small cuts and work section-by-section regardless of hair type. This cautious approach helps avoid cutting too much and keeps layers looking fresh.
Choosing the Best Method to Layer Long Hair Yourself
Layers add texture and stop long hair from looking heavy. Pick your layering method based on your hair type and skill level. Think about the style you want to achieve too.
These factors help you choose the best way to cut layers. Popular DIY methods include the ponytail method, section-by-section cutting, and the butterfly cut.
The ponytail method is the easiest for beginners. This method uses one or two ponytails. You trim the ends to make layers.
It’s a quick way to layer your hair. It works best on straight or wavy hair. The hair should be longer than your shoulders.
This method suits those hair types well. It can save time but may give uneven layers at the back.
Section-by-section cutting is more precise but needs more skill. You divide your hair into several parts and cut each layer carefully. This method is good for thick, curly, or frizzy hair.
You get better control over the cut. That control helps get the layers right. It takes longer and requires some practice to avoid choppy results.
The butterfly cut makes layers that frame your face. You bring hair to the front for this style. Then cut small sections held with elastics.
It suits most hair textures and offers control when shaping layers near your face. This method usually requires intermediate skill and works well with medium to long hair.
| Method | Skill Level | Best Hair Types | Pros | Cons |
|---|---|---|---|---|
| Ponytail Method | Beginner | Straight, Wavy, Long | Quick, easy, minimal tools | Harder to cut back evenly |
| Section-by-Section | Intermediate to Advanced | Thick, Curly, Frizzy | Precise, better control, neat layers | Time-consuming, needs practice |
| Butterfly Cut | Intermediate | Most Textures, Medium to Long | Good for face framing, balanced layers | Need careful sectioning, more skill |
Pick the ponytail method if you want fast results and have straight or wavy hair. Try section-by-section cutting for thicker or curlier hair. Use the butterfly cut to shape around your face or if your hair texture varies.
Start with a small amount when cutting. Choose shears designed for hair to avoid uneven snips. Your back layers won’t be perfect, so don’t stress over small flaws.
Assess your cut often and trim another half inch if needed. But don’t take off too much at once.
Step-by-Step Guide to the Ponytail Method for Long Layers
The ponytail method is a straightforward way to layer long hair at home. You pull all your damp hair into a single ponytail. Then, pull it forward.
Next, cut straight across the ponytail. Cut the hair at a 135-degree angle.
Take small amounts at a time. This helps keep natural movement and control the layers.
Positioning the Ponytail for Face-Framing Layers
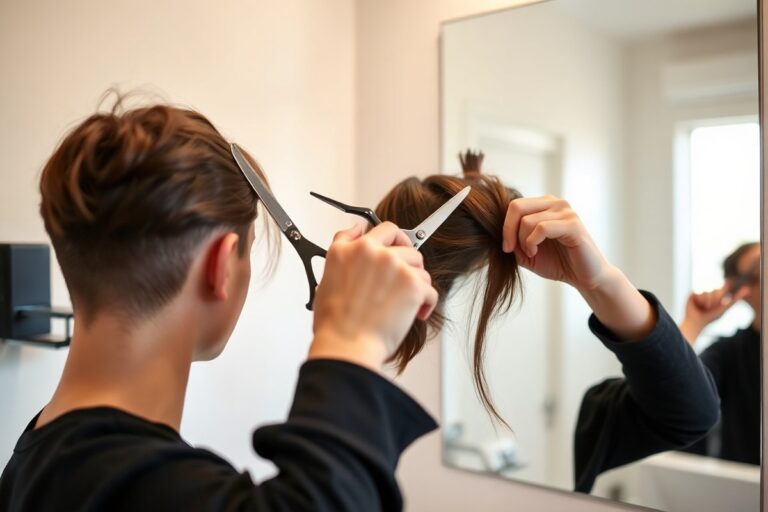
Gather your clean, damp hair into one ponytail right at the crown. Pull the ponytail forward over your forehead so you can easily see and cut the ends. The height of the ponytail affects the shape and flow of your layers.
For face-framing layers, position the ponytail slightly off-center or toward the side you part your hair. This helps the layers blend better around your face. Secure it tightly with a hair tie to keep the hair smooth before cutting.
Making the Initial Blunt Cut
Cut the ponytail using sharp scissors in a straight line. Trim small amounts, about half to one inch, with each cut. Angle the scissors at 135 degrees to create gentle layers.
Smooth the hair down in the ponytail as you cut to keep the cut even. Cutting too much at once can lead to uneven layers and visible lines. You want a clean, blunt base before adding texture with point cutting.
Point Cutting to Add Texture and Movement
Hold scissors vertically and snip small bits at a 45-degree angle. This point-cutting softens blunt ends from the previous cut. It also lowers volume and adds natural flow between layers.
Only cut a quarter inch or less when point cutting. Work your way down the ponytail, snipping lightly. Avoid heavy cuts or you might create gaps or uneven lines in your layers.
Checking and Evening Out Layers After Cutting
Pull the ponytail down and comb it back often. This lets you see how the layers blend together. Cut each layer a bit shorter than the one underneath for smooth layering.
Spot uneven or too-short areas and gently blend them with light point cutting. Avoid trying to add length to any section because haircutting only removes length. Small adjustments will help layers look smooth.
Follow these steps to use the ponytail method for long layers:
- Gather clean, damp hair into a ponytail at the crown.
- Pull the ponytail forward over your forehead and secure tightly.
- Trim the ponytail straight across, cutting no more than 1 inch.
- Hold scissors at a 135-degree angle while cutting.
- Turn scissors vertically to point cut the ends at a 45-degree angle.
- Make small snips, cutting about a quarter inch at a time.
- Comb hair back to check layers and make gentle corrections.
- Repeat point cutting as needed to blend layers smoothly.
How to Cut Face-Framing and Front Layers Yourself
Cutting face-framing layers requires careful sectioning and angled cuts. Start by parting your hair to isolate the front sections from your temples. These angled sections set the shape and length for your layers.
The layers should angle slightly toward your chin or collarbone. Choose the angle based on your preferred length.
This angle helps blend the layers naturally with the rest of your long hair. Avoid cutting straight across, which can create blunt edges that look less natural.
- Part your hair from each temple down to the chin at an angle. This creates two front sections.
- Comb one section straight down and take a small vertical slice to work on first.
- Cut the hair slice at a 45-degree angle to your face. Pick the layer length you want.
- Use this first cut as your guide for the rest. Pull the next slices of hair at a 180-degree angle.
- Pull the hair down to the front. Cut straight across to match the guide length.
- Cross-check by combing hair in the opposite direction to spot uneven pieces.
- Repeat the process on the other front section.
- Trim 1 to 2 inches off the joining sections. This blends the front layers with longer hair.
Trim slowly and check your angles often to avoid cutting too short or blunt edges.
How Much Hair to Cut and Choosing the Right Angles
Start by cutting off 1 to 2 inches of your hair for layers. This length keeps the look natural and lets you adjust more easily later.
You can always cut extra if you want shorter layers. So cut less to begin.
Next, think about the angle at which you cut. For soft, natural layers, hold your scissors at about a 45-degree angle from the hair shaft. This angle helps each layer blend smoothly into the next, giving volume without harsh lines.
Hair texture changes how you cut layers. Thick or coarse hair needs steeper angles near 60 degrees. This helps remove bulk.
It also adds movement to your hair. Fine hair needs lower angles between 30 and 45 degrees.
This keeps hair from looking thin. It also avoids uneven cuts.
Before cutting, part your hair evenly and clip back sections firmly. Comb through carefully to remove tangles and get clean, straight lines. Hold hair sections with your fingers to steady the cut.
This helps you follow your existing layers. It makes layering easier.
Cut clean, dry, and product-free hair only. Clean hair shows its natural fall and texture. So you see exactly how the layers lay.
Wet hair stretches, so cutting can remove too much length. This can cause uneven layers when dry. Be careful cutting wet hair.
Thicker hair should be layered in smaller sections to ensure you control the shape. Take your time cutting slowly, checking the balance of each side frequently. Thin hair needs subtle layering with small cutting angles.
This prevents patchy-looking hair. Use gentle cuts for better results.
As you cut, watch for any blunt or chunky ends. They often mean the angle was too steep or the scissors weren’t sharp.
Smooth and feather the edges by snipping gently at the tips with the scissors pointing upwards. This softens the layers and creates natural movement.
Fixing Common DIY Layering Mistakes and Uneven Cuts
Uneven layers or cuts that are too short happen often when you do your own layering. You can fix most problems by blending shorter pieces or texturizing blunt ends. Waiting a little before fixing overly short layers helps avoid cutting too much.
Uneven Layers: Blending and Trimming Techniques
When layers look uneven, find the shortest section first. Blend the other layers down to that length with gentle trimming. Avoid cutting any pieces too short by trimming carefully.
Use sharp scissors and trim small amounts at an angle. Slowly work around the head to keep lengths balanced on both sides. You can also cut bangs into long front layers to hide uneven spots.
Over-Cutting Fixes: Texturizing and Point Cutting
Cutting hair too short or blunt is easier to fix than growing it out. Light point cutting softens harsh edges and creates more natural movement between layers.
Hold scissors vertically and make small snips along the ends. This removes weight without shortening length further. Point cut around any choppy areas until the layers blend smoothly.
Repairing Blunt Cuts with Softening Techniques
Blunt cuts can look stacked and harsh, especially on long hair. Softening them improves flow and balance without reshaping the whole cut.
Use techniques like light point cutting or slide cutting. Take small sections and gently slide the open scissors along ends to remove thickness. This adds texture and stops layers from looking blunt.
Preventive Tips for a More Confident Cut
Check your hair’s length and balance often while cutting. Stop every few snips to compare both sides with a hand mirror.
- Start with dry, detangled hair for more control
- Cut less than you think at first, better to trim again
- Use sharp shears designed for hair trimming
- Take even sections and work slowly layer by layer
- Secure hair with clips to separate layers
- Point cut ends after blunt cuts to soften them
- Ask a friend to check the back for symmetry
These steps help avoid major errors. You’ll feel more sure and get cleaner long layers. Fixing uneven or harsh cuts early keeps your haircut looking fresh.
When to Call a Professional Instead of Cutting Yourself
Some hair types need a professional to cut or layer them. Very curly, thick, or damaged hair requires careful handling to avoid uneven layers or more damage. Professionals use sharp, specialized shears and techniques that protect your hair and shape it well.
Complex layering, like heavy texturing or very short face-framing layers, tests beginners. It’s not just about cutting; it’s about how layers fall and blend. A stylist knows how to angle scissors and layer to suit your face and hair type.
You should see a stylist every few months even if you trim your own long hair. A professional cut every 8 to 12 weeks keeps layers fresh and corrects any DIY mistakes. Without regular trims, layers can lose shape and look uneven or frizzy.
Check your hair and skills before cutting: Do you have sharp, proper shears designed for hair? Can you create clean, controlled cuts instead of jagged edges? Is your hair free of significant tangles, damage, or unusual texture?
Don’t hesitate. If your hair is tricky, see a pro.
Getting a professional layered cut usually costs $40 to $100. Prices vary across different areas. This is common for layered hair styles.
This cost pays for skill and attention to detail. Pros prevent mistakes that happen with DIY cuts.
This is especially true for hard-to-manage hair. It saves time and frustration often spent fixing a botched cut at home.
Always use hair-cutting scissors, never regular ones. Dull blades cause split ends and uneven layers.
Step-by-Step Action Plan for Cutting and Layering Your Own Long Hair
Follow these clear steps to cut and layer your long hair safely at home. This plan helps you avoid mistakes and get the look you want.
- Before you start: Gather all your tools and make sure your hair is clean and dry. Check your scissors and comb so they are ready to go.
- Day 1: Use the ponytail method to cut your first layers. Look for clean, even edges when you release the hair from the ponytail.
- Day 2: Add face-framing layers by sectioning the front hair with clips. Cut small amounts and check how the layers blend.
- After 3 days: Notice if your hair falls evenly and layers look natural. Gently trim small uneven spots with scissors while looking in the mirror.
- Week 1: Style your hair to see how the new layers feel and move. Decide if you want a little more layering or trimming.
- After 2 weeks: Check for any missed uneven parts. Use a comb and small scissors to fix them carefully.
- Month 1: Review your layering growth and shape. Feeling unsure? Book an appointment with a professional stylist for a clean finish.
Frequently Asked Questions
How to Cut and Layer Your Own Long Hair?
Start by dampening your hair and detangling it well. Use the ponytail method to create soft layers with less risk of mistakes.
What Is the 3:2:1 Rule for Haircuts?
It is a layering guideline where you divide hair into sections in a 3:2:1 ratio. This helps create balanced and well-blended layers across your hair.
Is It Hard to Cut Layers in Your Own Hair?
It can be tricky, especially without practice or the right technique. Starting with simple methods like the ponytail technique lowers the chance of uneven cuts.
Is It Better to Cut Layers Wet or Dry?
For most hair types, cutting layers when hair is wet works best. But curly hair needs dry cutting to accurately shape each curl.
What Is the 7 Day Haircut Rule?
This rule suggests trimming new cuts about seven days later. It helps fix any uneven spots and perfect the shape once hair settles.
Can I Use Regular Scissors to Cut My Own Long Layers?
It’s best to use sharp hairdressing scissors. Regular scissors can cause split ends and uneven trimming.
The Bottom Line
Cutting and layering your own long hair is doable with clear steps and patience. Start small and adjust carefully for the best results. Try the ponytail method first to gain confidence with your cuts.