How to Trim Hair at Home: Simple Steps for Safe, Even Cuts
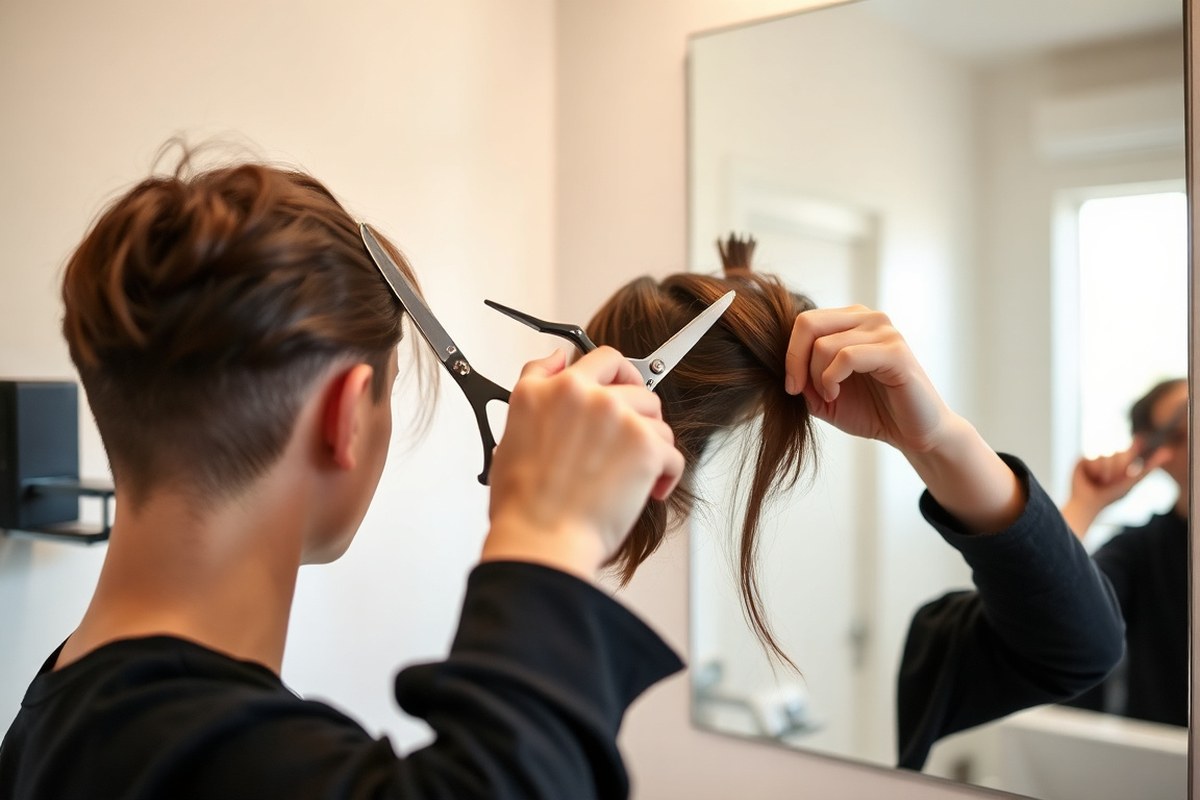
Learning how to trim hair at home saves money and lets you keep your style fresh. Start with sharp hair scissors made for cutting hair to avoid split ends and uneven cuts. Trim small amounts slowly, checking your progress in natural light to prevent mistakes.
Keep your hair clean before trimming. Dry or slightly damp works best.
Choose based on your hair type for easier control. Section your hair into parts to work methodically and avoid missing spots.
Use a comb to gently smooth each section before cutting. Cut just a little off, about a quarter-inch at a time. This helps you keep the shape and avoid cutting too much at once.
Stand in front of a mirror with good lighting. Take your time and be patient, especially if you’re new to trimming. This careful approach helps you get safer, even cuts without a salon visit.
Key Takeaways
- Use sharp hair scissors designed for cutting hair, not craft scissors.
- Trim your hair dry or damp depending on your hair type for control.
- Section hair into manageable parts before trimming.
- Cut small amounts at a time to avoid taking off too much.
- Work in natural light to clearly see what you’re cutting.
- For curly hair, trim curl by curl and avoid cutting straight across.
How to Trim Your Hair at Home Step-by-Step

Start by dividing your hair into neat sections to make trimming easier. Sectioning helps you stay organized and catch uneven spots quickly. Use clips or hair ties to hold each part separately for better control.
Follow a clear step-by-step process to avoid mistakes. Trim small amounts at a time to prevent taking off too much. Checking your progress often helps you keep your cut even and symmetrical.
- Comb your hair thoroughly to remove tangles and smooth out strands. This makes it easier to see which sections need trimming.
- Divide your hair into at least four sections. Put two sections at the front and two at the back. This helps you work more neatly and evenly. Clip each section separately to keep your hair controlled.
- Start trimming the back sections first. Take small horizontal slices of hair. Cut the ends straight across or at a slight angle. Work slowly and trim less than a quarter inch at first.
- Move to the front sections. Trim them the same way you trimmed the back. Use the back sections’ cut ends to keep the length even.
- Check the length by letting your hair down and comparing sides. Use a handheld mirror or ask someone to look, if possible. Adjust any uneven parts carefully.
- For curly or wavy hair, trim when dry and hold shears vertically. Trim curls individually to keep shape and volume intact.
- Run your fingers along your hair regularly and snip off any split ends that stick out.
- Finish by styling your hair to see the final result. Trim any last uneven bits once your hair is settled.
Essential Tools You Need to Trim Hair at Home

Using the right scissors makes a big difference in your home trim. Hair cutting scissors are sharp and angled to cut cleanly without crushing the strands.
Regular scissors can work in a pinch. But they tend to crush or split hair ends, making your trim look rough and dry.
A good pair of hair scissors costs around $20 to $30. The Equinox Professional Shears, for example, last well with careful use. Sharp blades control the cut better and prevent hair from fluffing or moving while you snip.
Combs and clips help you section hair for an even cut. A wide-tooth comb is gentle and detangles.
Clips or scrunchies keep hair out of the way. You will need these to manage layers and trim small parts carefully.
- Hair scissors designed for cutting hair
- Wide-tooth comb to detangle hair gently
- Quality hair clips or scrunchies for sections
- Fine mist spray bottle to dampen hair evenly
- A mirror for checking symmetry and length
Using clean, dry hair is best before trimming because wet hair stretches. A light mist spray helps if your hair is too dry or frizzy. Work with small sections of hair at a time.
Use clips to hold the rest back. This way, you can clearly see what you’re doing.
Sharp scissors reduce split ends and give you a cleaner, smoother trim.
Avoid starting with major cuts or complicated styles until you know your tools and skills. At first, focus on removing split ends or minor adjustments.
Regular scissors are okay for tiny trims. But using hair scissors will protect your hair’s health and your haircut’s neatness.
Preparing Your Hair and Space for a Home Trim
Prepare your hair and space carefully for a neat trim. Section your hair for control and choose wet or dry based on your hair type. Set up good lighting and a clean workspace to avoid mistakes and safety hazards.
Wet vs Dry Hair: Which Is Better?
Most people trim hair when it’s wet because it lies flat. Wet hair is easier to comb straight. This helps make trimming easier and neater.
Wet hair helps you see how much you’re cutting. But it can dry shorter than expected. Curly hair works best when trimmed dry.
You can spot split ends better. Dry trimming keeps the natural curl shape.
Wet hair also hides split ends. Dry hair shows damage better, making it easier to trim only what’s needed. Straight hair cuts well wet or dry.
Be sure your hair is fully dry before trimming. This gives a better length check. Dry hair shows the true length more clearly.
How to Section Hair for Even Trimming
Sectioning your hair makes trimming easier and more precise. Use clips or hair ties to divide your hair into small parts. It’s best to work with ½ inch-wide sections to keep things manageable.
Start by parting hair down the middle from forehead to nape. Then create horizontal sections from ear to ear on both sides.
Twist any face-framing pieces away before cutting for neat layers. Keeping sections small prevents uneven cuts and helps you focus on detail.
Setting Up Your Work Area for Success
Good lighting is key to see what you’re cutting. Use natural light next to a window or a bright lamp indoors. Avoid trimming in dim places or shadows to prevent mistakes and uneven cuts.
Choose a clean, flat surface with a mirror in front and another behind if possible. This setup helps you see the back clearly.
Have towels and hair clips ready to catch cut hair and keep the floor tidy. Keep your scissors, comb, and tools in easy reach to avoid rushing or dropping them mid-trim.
Follow these steps to prep your hair and workspace before trimming:
- Wash and dry your hair according to your haircut plan, wet for straight, dry for curly.
- Comb through to remove all knots and tangles for smooth sections.
- Create a center part from forehead to nape to divide hair evenly.
- Make horizontal sections ear-to-ear, clipping each section out of the way.
- Separate face-framing pieces and twist them away from the rest of your hair.
- Set up a well-lit area with a front mirror and a second mirror behind if possible.
- Lay out all your hair cutting tools within arm’s reach on a clean surface.
- Place towels around your shoulders and on the floor to catch trimmed hair.
Techniques for Trimming Different Hair Types
Trimming hair at home depends on your hair type. Straight, wavy, curly, and natural hair need different cutting methods to avoid damage. Knowing the right ways helps keep your hair healthy and looking good.
Trimming Straight and Wavy Hair
Straight hair is easier to trim when damp, not soaking wet. Slight dampness helps the hair lay flat and makes cutting more even.
Use a fine-tooth comb to smooth out straight strands before cutting. Cut small sections straight across or at a slight angle for a natural look.
Wavy hair needs a bit more care. Trim mostly the ends to keep the waves intact and avoid cutting too much length. Use a spray bottle to keep it slightly damp during the trim.
Methods for Curly and Textured Hair
Curly hair changes a lot from wet to dry. Cutting it dry shows how curls fall on their own. This avoids surprises after cutting.
Comb curls with a wide-tooth comb to prevent breakage. Avoid cutting curls when wet as it can make hair shrink and leave the length uneven.
For natural or textured hair, don’t flat iron or blow-dry before trimming. Trim the hair in its natural state to maintain curl pattern and avoid frizz.
Special Techniques: Dusting and Point Cuts
“Dusting” removes small split ends without changing hair length. It’s popular with curly hair because it keeps curls looking fresh and healthy.
Point cutting means snipping the hair tips at an angle. This technique softens blunt edges and adds texture, especially in straight or wavy hair.
For curly and natural hair, dusting avoids cutting too much at once. For straight hair, point cutting helps blend layers for a natural finish. Here’s a quick comparison of hair types and their trimming needs:
| Hair Type | Cutting Condition | Comb Type | Technique Tips |
|---|---|---|---|
| Straight | Slightly damp | Fine-tooth | Cut straight, clip small sections |
| Wavy | Slightly damp, use spray bottle | Fine-tooth | Trim ends, avoid too much length |
| Curly | Dry | Wide-tooth | Use dusting, cut curls separately |
| Natural/Textured | Dry, no straightening | Wide-tooth | Trim in natural state, dust split ends |
Using the right comb and cutting while hair is in the right state helps avoid damage. Following these techniques can keep your hair healthier between trims. Avoid blunt scissors by choosing a sharp pair designed for hair.
How to Trim Specific Hair Sections at Home
Trimming specific parts of your hair at home calls for careful steps and steady hands. Bangs, layers, and split ends each need different methods to avoid mistakes. You can achieve neat results by following detailed guidance for each type of trim.
Trimming Bangs with Precision
Start with clean, dry bangs so you see their natural fall. Comb them straight down, but avoid pulling too tight to prevent cutting too short. Use sharp scissors designed for hair to make small cuts, working slowly from the center outwards.
Cut bangs a little longer than the desired length to allow for shrinkage. Trim in small, vertical snips for a softer edge instead of a blunt line. Regularly check your work by letting bangs fall naturally before snipping more.
- Comb bangs straight down over your forehead.
- Pin back the rest of your hair.
- Start cutting in the middle with tiny vertical snips.
- Work towards the sides, cutting gradually and checking length.
- Stop frequently to comb bangs into place and reassess.
- Snip a bit less than you think you need to avoid over-cutting.
Cut bangs dry and slowly. Wet bangs appear longer and can result in cutting too much.
Layered Haircuts Using the Ponytail Method
The ponytail method works well for trimming layers at home on long or medium hair. Gather hair into a ponytail at the front near your forehead. Pull hair gently forward to expose the ends clearly and hold them tight.
Use the ponytail as a guide and trim the ends straight across or slightly angled. This helps maintain layers naturally without uneven patches. Avoid cutting large chunks off; small trims prevent blunt cuts and keep layers flowing.
- Comb hair thoroughly and gather it into a ponytail near the hairline.
- Secure the ponytail with an elastic band.
- Pull the ponytail forward to stretch the hair ends.
- Carefully trim the ends horizontally or at a slight angle.
- Release hair and inspect the layers for balance.
- Adjust small areas with vertical snips if needed to soften ends.
Hold hair tightly in the ponytail but avoid stretching it too much. Overstretching can cause shorter-than-expected results once the hair falls naturally.
Removing Split Ends Effectively
Split ends show as frizzy, stringy tips that damage hair health. You can improve your hair’s look by trimming split ends between salon visits. Use the point-cutting method to trim hair ends.
Cut scissors vertically into the ends. Check and remove damaged strands carefully.
Flip hair ends upward before cutting to see splits more clearly. Cut small snips vertically into the ends, always keeping fingers safe. Avoid chopping large sections to reduce the chance of removing necessary length.
- Part hair into small sections and flip ends upward.
- Hold the section and spot the frayed split ends.
- Use sharp scissors to point cut vertically into split ends.
- Trim only damaged or stringy tips carefully.
- Repeat with all hair sections to maintain even health.
- Comb hair gently after trimming to check for missed splits.
Focus on small cuts. Cutting too much leads to shorter hair and uneven shape.
Avoiding and Fixing Common Home Trimming Mistakes
Trimming your hair at home often leads to uneven cuts and trims that are too short. These mistakes happen because cutting more than planned is easy. Poor lighting also causes errors.
Both can mess up your haircut. Avoid rushing and keep your scissors steady. Always start by trimming a small amount; you can cut more later if needed.
You might cut too much on one side or create jagged edges. When this happens, don’t panic. Use thinning shears or very small snips to blend uneven spots.
A section that is too short can only grow out over time. So try to avoid that mistake.
Common mistakes include cutting dry hair instead of wet hair. Not sectioning hair properly is another error. Using dull scissors also causes problems.
Wet hair lies differently than dry hair. So trimming hair after washing helps get a cleaner cut. Dull scissors can pull hair, causing split ends and uneven cuts.
- Cut a little at a time to avoid taking off too much
- Use sharp hairdressing scissors, not regular ones
- Make sure your hair is clean and damp before trimming
- Divide hair into sections to manage cuts better
- Trim in natural light or under bright, white lighting
- Check your progress regularly using a mirror from different angles
- Stop if you feel unsure and wait to ask a pro
Fixing unevenness means trimming the longer side slowly to match the shorter part. Try to cut very small amounts when evening out layers. Wet your bangs and comb them down first.
Then trim small layers off the longer side carefully. Remember, you can always take off more, but you cannot add hair back.
Feels like a DIY trim disaster? Stay calm and avoid chopping more. Try styling tricks to hide flaws, like waves or accessories.
In emergency cases, a hat or headband can cover uneven areas until hair grows out. A professional stylist can fix many mistakes for you.
Prices range from $30 to $100. Cost depends on where you live and how complex the cut is.
How Often and When to Schedule Home Hair Trims
Short hair needs trims more often than long hair. You should trim short hair every 4 to 6 weeks to keep its shape neat. Longer hair grows out slower, so trimming every 8 to 12 weeks works well.
Dry and damaged hair needs trims every 6 to 8 weeks. Trims help reduce split ends. Regular cuts keep hair healthier.
Healthy, thick hair can go longer, about 12 weeks. Trim your hair before it feels rough or tangled for best results.
When your hair looks frizzy or feels brittle at the ends, it’s time for a trim. Waiting too long can cause more damage. A trim freshens your hair.
You’ll notice split ends, uneven layers, or hair breaking easily when the trim is overdue. A small trim might not fix heavy damage, so more frequent checks help.
Visit a salon for major style changes. Also go if your growth is uneven. These issues can be hard to fix at home.
Professionals can also handle tricky sections like layers and blended cuts. Spot scalp issues or hair loss?
See a hairstylist or doctor. Avoid trimming yourself when problems appear.
A good rule is to trim at home only when maintaining current length or small fixes. Use sharp scissors and trim just a quarter-inch at a time. Want bigger hair changes but save money?
Plan a visit to a professional. They can handle more complex cuts safely.
Scheduling salon visits every 3 months keeps hair healthy and styled. You save money by trimming in between. But don’t skip the pros for major shaping.
Professional trims cost $30 to $60. Home trims can cost under $15 for scissors.
Cleaning and Caring for Your Hair Cutting Tools
Wash your scissors and clippers right after trimming your hair. Use warm water, dish soap, and a soft cloth or brush to remove hair and oils. Rinse well and dry completely to stop rust from forming.
After cleaning, apply a drop of clipper oil or scissor lubricant to the blades. This keeps them sharp and prevents them from getting dull. A little oil once a week or after every few uses will do the trick.
- Wipe tools with rubbing alcohol or disinfectant spray to kill germs
- Store scissors and clippers in a dry case to avoid moisture damage
- Keep blades closed when not in use for safety and protection
- Use a soft cloth to clean blades before and after every trim
- Sharpen scissors professionally if you notice snags or dull cutting
- Check clipper blades regularly and replace them if they get nicked
Handle your cutting tools gently to avoid dropping or banging them. Dings and dents ruin the sharp edges on scissors and clippers quickly. Keep your haircutting tools away from kitchen scissors.
Kitchen scissors don’t cut hair well. Using them can damage your haircut.
Don’t use kitchen scissors or craft scissors for hair, they are not sharp enough.
Sharp blades make clean cuts, which help avoid split ends. Keeping your tools clean and lubricated also prevents bacteria and skin irritation.
Failing to clean your tools properly can cause infections. Dirty tools also dull blades that pull hair.
Step-by-Step Action Plan
Follow this plan to start trimming your hair at home with confidence. Each step helps you see progress easily.
- Before you start: Gather all your tools and set up your space well. You’ll know you’re ready when everything feels comfortable and easy to reach.
- Day 1: Wash your hair like you normally do. Dry it completely. Then comb through to find any tangles. A smooth surface means a cleaner trim.
- Day 2: Trim small sections at a time, following the guide for your hair type. The cut should feel even and neat without rough edges.
- Week 1: Check your hair in natural light to catch any missed spots. Your trim looks natural and balanced from all angles.
- Week 3: Repeat the trim on growth or split ends only. Hair stays fresh without losing your style shape.
- Month 2: Clean and oil your scissors thoroughly after trimming. Smooth, sharp blades make each cut easier and safer.
- Month 3: Time for a more thorough trim or style update if needed. You’ll see less damage and healthier hair overall.
Frequently Asked Questions
What Is the Easiest Hair Length to Trim at Home?
The easiest hair length to trim at home is medium length. It’s easier to manage than very long or very short hair.
Can I Trim My Hair at Home Without Professional Scissors?
Yes, you can trim hair with sharp, clean household scissors. Just avoid dull or blunt scissors to reduce split ends.
How Do I Handle Uneven Hair After a Home Trim?
Fix uneven hair by trimming small amounts bit by bit. Always check in natural light to see balance clearly.
Is It Better to Trim Hair When Wet or Dry?
It depends on hair type. Curly hair is best trimmed dry.
Straight hair can be trimmed wet. Dry cutting helps avoid cutting too much on curls.
How Can I Avoid Cutting Too Much Hair at Home?
Trim very small sections slowly and double-check length often. It’s safer to take off less and trim more later.
What Should I Do If I Accidentally Cut a Big Chunk Off?
Stay calm and even out the cut by trimming surrounding areas. Call a professional if you need major reshaping afterward.
Key Points to Remember
Trimming your hair at home is simple when done step by step and carefully. Start with small cuts to build your confidence. Grab your scissors and give your hair a fresh look today.