How to Curl Hair with Clamp for Perfect Curls: A Complete Guide
Learning how to curl hair with clamp is easier than you think. Start by heating your iron to the right temperature for your hair type. Then, section your hair and carefully clamp each piece before wrapping it around the barrel.
The clamp holds your hair steady, so the curls come out smooth and defined. Always begin with hair that’s about 80% dry to avoid heat damage. Remember, don’t touch or brush the curls until they cool completely to keep their shape.
Choosing the right barrel size matters. A 1 to 1.25-inch barrel works well for most hair types, giving you classic curls or waves. Hold the curling iron 90 degrees from your head.
The clamp should face forward. This position gives the best results.
Key Takeaways
- Heat your curling iron to 320°F for fine hair, 430°F for thick hair.
- Divide hair into 2, 3 inch (5.1, 7.6 cm) wide sections before curling.
- Hold the curling iron 90 degrees from the head with the clamp forward.
- Start curling once hair is about 80% dry to avoid heat damage.
- Keep curls in place until they cool completely to last longer.
- A 1.25-inch barrel suits most hair types for loose, classic curls.
How to Curl Hair with a Clamp Curling Iron Step by Step
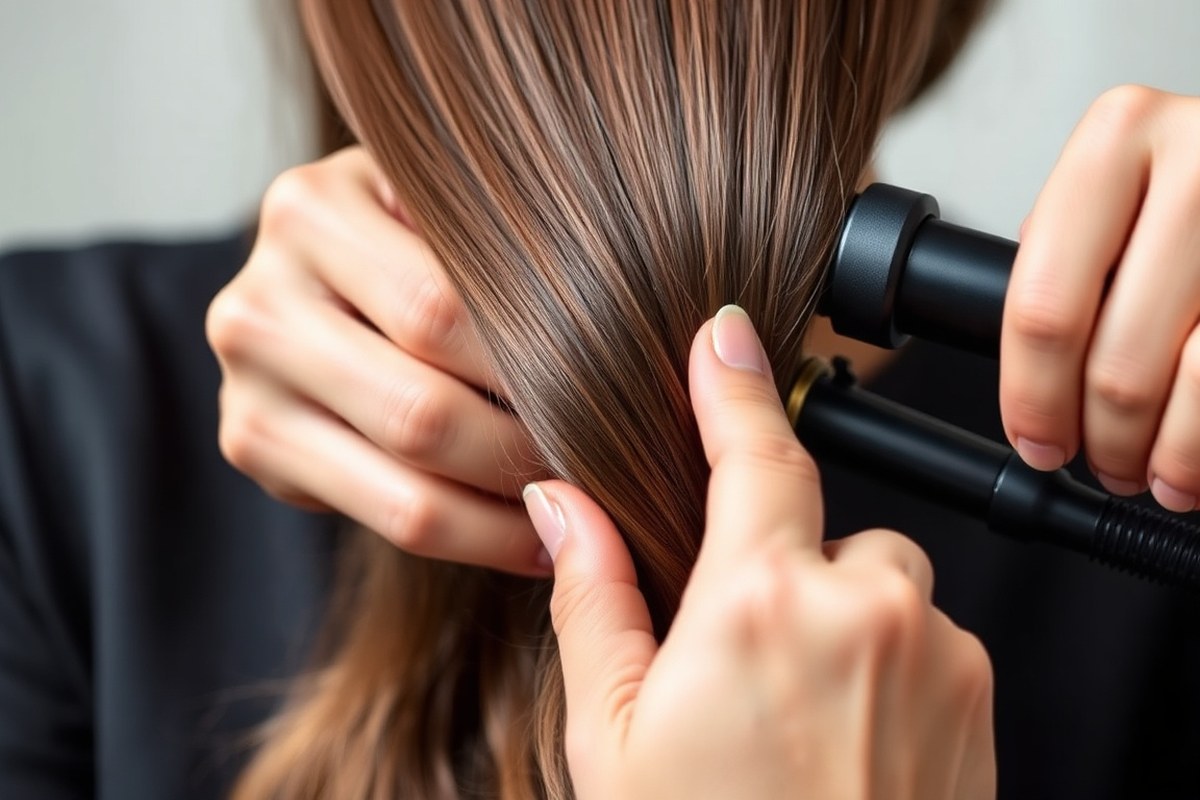
Using a clamp curling iron creates smooth, defined curls that hold their shape well. You clamp a section of hair on the heated barrel. The heat sets the curl while clamped.
Hold the hair until the curl forms well. Holding and releasing the hair properly avoids kinks or damage.
Use small sections of dry hair for even heat and curl hold. Adjust your iron to 320°F for fine hair or 430°F for thick hair. Always use a heat protectant spray before starting to protect your hair.
- Divide your hair into small sections about 1 inch wide. Smaller sections heat evenly and curl better.
- Clamp the curling iron near the root of the section, avoiding too close to your scalp. Hold the iron with the clamp side facing outward.
- Wrap the hair smoothly around the barrel inside the clamp. Turn the iron away from your face. Make sure the wrap is neat and tight. Keep the hair taut but not stretched.
- Keep holding the hair for 5 to 10 seconds. You will feel the heat through your hair. This ensures the curl holds its shape. Do not hold longer to avoid damage or burning.
- Open the clamp gently to release the hair. Slowly slide the curling iron down while holding the curl. This helps the curl keep its shape better. This stops the curl from unraveling.
- Let the curl cool completely in your hand before touching it. Cooling sets the shape for longer-lasting curls.
- Repeat until all sections are curled. For a natural look, curl some sections toward your face and some away.
To release hair, open the clamp while sliding iron down slowly. This method keeps the curl intact. Don’t pull the hair off too fast.
Quick pulling can cause bends or frizz. Cooling the hair while held gently helps curls last longer and look polished.
Choosing Heat Settings and Barrel Sizes for Your Hair Type

Pick the right temperature based on your hair type to avoid damage and get lasting curls. Fine or damaged hair curls best at 250°F to 300°F. Thick or coarse hair needs 350°F to 400°F for the heat to penetrate and hold curls. Medium hair usually curls well around 300°F to 350°F without too much risk.
Barrel size shapes your curls. A 1¼-inch barrel suits long hair, loose curls, and soft waves. Use a ½-inch to 1-inch barrel for tighter curls.
This works well if your hair is short. It also helps you get defined ringlets. Large barrels create relaxed waves; small barrels give bounce and volume.
Section size also changes your curl style. Wrap about one-inch sections for tighter curls.
Two-inch sections give loose, beachy waves. Leave an inch or so out at the ends for softer, natural-looking curls.
| Hair Type | Best Temperature (°F) | Recommended Barrel Size | Curl Style |
|---|---|---|---|
| Fine/Damaged | 250, 300 | ½” to 1″ | Tight curls or light waves |
| Medium | 300, 350 | 1″ to 1¼” | Classic curls or beachy waves |
| Thick/Coarse | 350, 400 | 1¼” | Loose curls, big waves |
| Short Hair | 250, 325 | ½” | Defined tight curls or textured waves |
| Long Hair | 300, 400 | 1¼” | Soft waves or loose curls |
Use heat-protectant spray every time. It reduces heat damage and helps curls last longer.
Start curling near your roots and clamp down firmly. Wrap your hair smoothly to avoid kinks and uneven curls.
Feel heat pulling or smell burning? Lower the temperature. Pick smaller hair sections to curl.
Try wrapping two-inch sections with a 1¼-inch barrel for beach waves. Hold the clamp close to the roots, then slowly slide down and release near the tips. This method prevents crimps and yields relaxed, polished curls.
Thicker hair can hold heat longer. So you can leave the clamp on for eight to ten seconds.
For fine or fragile hair, limit it to about five seconds to avoid damage. Adjust timing based on how well your curls set.
Preparing Hair for Curling to Ensure Lasting Results
Start by making sure your hair is dry and clean before curling. Avoid curling damp or wet hair because it leads to heat damage and frizz. Next, apply a heat protectant and divide your hair into small, manageable sections for even curls.
Drying Hair to the Optimal Moisture Level
You should dry your hair completely before using a clamp curling iron. Curling damp hair traps moisture inside, which boils and damages your hair cuticles. This causes breakage, puffiness, and curls that won’t hold.
Try to air dry your hair until it’s completely dry. If not, use a blow dryer. Set the dryer on low or medium heat to avoid extra damage.
Thick or coarse hair can take 15 to 20 minutes to dry. Use a blow dryer for best results. This helps your hair dry fully before styling.
Using Heat Protectant and Styling Products
Spray your hair all over with a heat protectant before you start curling. It shields your hair from the curling iron’s heat, reducing breakage and dryness. Choose protectants designed for 400°F to 450°F heat, since clamp irons often hit 410°F.
Apply a light holding spray or curl cream after the heat protectant. This helps your curls last longer throughout the day. Avoid heavy products that weigh curls down.
Avoid heavy products that weigh hair down or make it greasy. Apply sparingly, focusing on mid-length to ends, not roots.
- Apply heat protectant spray evenly when hair is dry
- Use a serum or cream for extra curl hold and shine
- Choose products without heavy oils or too much alcohol
- Wait at least 2 minutes after applying protectant before curling
- Use a light hairspray after curling for longer hold
Remember, waiting a few minutes after application lets the product settle on your strands. This better protects your hair as you curl each section.
Detangling and Sectioning Techniques
Start by gently brushing your dry hair to remove knots and tangles. Smooth hair curls easier and prevents pinching or pulling with the clamp. Use a wide-tooth comb or detangling brush to minimize breakage.
Next, separate your hair into 2 to 3 inch-wide sections. Smaller sections help you create tighter curls, while wider ones give loose waves. Clip up the rest of your hair so each section is easy to work with.
Work from the bottom layers up. Take one section at a time and finish curling it before moving on. This avoids mixing sections and gives the best curl shape.
Clamping Direction and Curling Techniques for Different Looks
Angle the clamp so its tip points slightly downward when curling. Hold a one-inch hair section and wrap it around the barrel away from your face. This direction helps curls open up and frame your features nicely.
For short hair, use smaller sections and clamp the hair in the middle. Wrap the ends around the barrel, turning the iron away from your face. This creates natural-looking curls without the clamp slipping off short strands.
Loose waves are easy with a clamp iron too. Choose a larger barrel, around 1.25 inches or more. Wrap your hair loosely around the curling iron.
Hold it for 5 to 8 seconds. Gently release the clamp to create soft waves.
Keep the clamp facing forward when you place hair in it. This grip ensures even heat distribution along the strand. Tilting the iron slightly downward prevents curls from bunching up at the roots.
To add volume, curl one side away from your face. Curl the other side toward your face. This creates balanced, full-looking hair.
This technique creates movement and gives hair a bouncy shape. Avoid curling all strands in the same direction to prevent a flat style.
The key is steady, smooth wrapping instead of rushing. Clamping hair in the middle gives the best hold and curl shape. Shorter clamping times, like 5 seconds, work well on fine hair to avoid heat damage.
Some clamp irons heat up fast and maintain steady temperature, making curls last longer. For loose waves or softer curls, lower heat settings between 300°F and 350°F usually work best. High heat suits thick or coarse hair but can cause damage if held too long.
Avoiding Common Mistakes and Fixing Clamp Curling Issues
Clamp creases occur when the curling iron clamp is too tight. They also happen if you keep the clamp on that section too long. This leaves visible marks in your hair.
These marks show as dents or lines in your curls. To avoid them, clamp your hair gently without forcing the clip closed hard. Hold each hair section for 8 to 12 seconds before you release it.
The exact time depends on your hair texture and heat setting. Don’t leave it longer than needed.
Overheating can damage hair and cause curls to look dry or frizzy. Don’t hold the clamp in one spot for more than 12 seconds.
Use a lower temperature when you have fine or fragile hair to avoid damage. Ceramic irons are better here because they spread heat evenly and reduce hot spots.
Beginners often curl large sections that don’t hold their shape well. They also make the mistake of curling hair that’s still wet.
Curl smaller, dry sections for more defined curls that last longer. Using a lower heat for fine hair or high heat for thick hair helps too.
- Don’t clamp hair too tightly to avoid clamp creases.
- Hold the clamp on each section for 8 to 12 seconds only.
- Use dry hair for curling, not damp or wet.
- Choose heat settings that match your hair type.
- Curl smaller hair sections for more precise curls.
- Release the clamp gently to keep curls smooth.
Flat or loose curls often come from using sections that are too big or curling at too low heat. Both make curls lose their spring. Make sure the iron is hot enough to shape curls well.
But don’t make it so hot that it burns or damages your hair. Start with medium heat and adjust after your first try.
Let hair cool completely before touching curls to set the shape and avoid flattening.
Fix clamp creases by re-curling the affected section quickly without reclamping too long. Trim damaged ends if you get heat damage. Use a deep conditioner regularly to help your hair recover.
Over time, change the heat, the clamp pressure, and the time you curl. This helps you get better curls and keeps your hair healthy.
Finishing and Maintaining Curls for Long-Lasting Style
Curls stay longer when they cool fully before touching and get the right hold products. Proper cooling helps curls set in their shape. Using sprays or serums locks in the style and stops frizz.
Cooling Curls Before Touching
After curling a section, gently drop the curl into your palm. Hold it coiled there for 5 to 10 seconds so it cools and sets.
Letting curls cool fully prevents them from dropping or loosening too fast. Avoid touching your hair until it’s 100% cool to keep curls firm.
Skipping this step causes curls to lose their shape quickly. Cooling keeps them springy and defined longer.
Using Setting Products for Hold
Once your curls have cooled, spritz a light setting spray evenly on your hair. This adds hold without stiffness. Use a flexible formula for soft, touchable curls.
Serums or light oils applied sparingly help reduce frizz and add shine. Apply these mainly to the ends or where your hair feels dry.
Layer products wisely. Heavy sprays or too much serum can weigh curls down and make them fall quicker. Use these tips to help curls last:
- Choose a heat protectant with hold benefits before curling
- Apply a flexible hold hairspray right after styling
- Use a small amount of serum on mid-lengths and ends
- Avoid overloading hair with product to prevent limp curls
- Slightly tousle curls throughout the day to keep volume
Overnight Curl Preservation Techniques
To keep curls fresh overnight, loosely gather hair into a high ponytail or bun. Use a soft scrunchie, not a tight elastic. This avoids flattening curls or causing dents.
Sleeping on a silk or satin pillowcase reduces friction and frizz. Avoid touching curls when you wake up to keep their shape intact.
Curls dropping fast? A light spritz of water or curl refresher spray revives them in the morning.
Comparing Clamp Irons and Curling Wands: Which Is Easier?
Curling irons with clamps and curling wands differ mainly in ease and curl style. Clamp irons hold hair in place, which helps control the curl shape. Wands need you to wrap hair around the barrel.
They have no clamp. This makes curls look loose and natural.
Clamp irons give you more control if you’re new to curling. The clamp keeps the hair steady, so it’s easier to avoid slipping. Wands feel simpler in hand, but wrapping the hair smoothly takes more practice.
Both tools work on short, medium, and long hair. Clamp irons fit short to medium hair better. Both give good results.
Choosing a tool depends on the curls you want and your skill level. Clamps work well for curls that look defined and polished. For softer waves or beachy curls, wands often create a more relaxed style.
| Feature | Clamp Curling Iron | Curling Wand |
|---|---|---|
| Ease of Use | Good for beginners; clamp holds hair steady | Easier to hold but harder to wrap hair smoothly |
| Curl Type | Defined, polished curls | Soft, natural waves or curls |
| Hair Length Suitability | Best for short to medium hair | Works well with medium to long hair |
| Heat Range | Up to 450°F, good for coarse hair | Usually heats up to 400-450°F |
| Skill Level | Beginners benefit from clamp control | Better for users who can handle precise wrapping |
| Speed | Quick, hair clamps in place | May take longer due to wrapping technique |
Using a clamp curling iron works well when you section hair and rotate the iron slowly. Clamp it near the root and hold for about 10 seconds.
For wands, wrap small sections neatly from root to tip, holding for 8 to 12 seconds. Both tools need moderate heat, generally between 300°F and 450°F, to avoid damage.
Clamp irons let you keep the hair still, which means more even curls. Wands are great if you want a casual look or have longer hair to wrap.
Choose clamp irons if you want a fast, controlled curl, especially on shorter hair. Pick a wand if you prefer gentle waves and are comfortable with wrapping hair by hand.
Refreshing and Restyling Curls Without Using Heat Again
Second-day curls can look tired or flat without needing fresh heat styling. You can bring them back with gentle refreshing methods that avoid extra heat damage. These methods keep your hair healthy while reviving your curls effectively.
Using Mist Sprays and Finger Techniques
Lightly mist your curls with water or a water and leave-in conditioner mix. Aim for just enough moisture to loosen curls without soaking them. Then, use your fingers to gently shake and separate curls.
This loosens any clumps and reshapes curls without frizz. Avoid rough brushing; use your fingers instead for better control. Let the curls air dry for a few minutes to regain bounce.
Applying Light Styling Products
A little product goes a long way when refreshing curls. Use a dry shampoo at the roots to absorb oil and add volume. Then, apply a light curl refresher spray or a bit of leave-in conditioner to the lengths.
Follow this with a quick scrunch to revive elasticity. Mist with a flexible hairspray that holds without stiffening your curls. These products help keep curls intact and reduce frizz after restyling.
- Mist curls with water or water + leave-in mix
- Shake curls gently with fingers to separate
- Apply dry shampoo to roots for volume
- Use a light curl refresher or leave-in conditioner
- Scrunch hair carefully to revive shape
- Mist with flexible hairspray to hold curls
These steps take under 10 minutes and keep curls fresh without heat. Results usually last until your next wash or styling session.
Avoiding Frizz During Refreshing
Frizz comes from over-drying or harsh handling. Keep touch-ups gentle by avoiding rough towels or harsh brushes. Use only light sprays instead of saturating your hair.
Try to refresh curls in a humid-free environment for the best effects. Too much moisture with no hold encourages frizz. Always finger comb or scrunch; never brush messy curls.
Too much water or product can lead to frizz and weighed-down curls.
Your Step-by-Step Action Plan to Curl Hair with a Clamp Iron
This plan helps you start curling your hair with a clamp iron confidently. Follow these clear steps to get beautiful curls that last.
- Before you start: Wash and dry your hair completely. Your curls last longer on clean, dry strands.
- Right before curling: Apply a heat protectant spray to each section. This stops damage and keeps hair smooth.
- First curling session: Pick the right heat for your hair type. Use medium for fine hair. Use high heat if your hair is thick. Test a small section. It curls well in 10 seconds. That means your heat is fine.
- During curling: Clamp the hair near the roots first. Twist the iron slowly. Hold the hair for 8 to 12 seconds. Let go gently to avoid dents.
- After curling: Allow curls to cool fully before touching. This sets the shape and helps curls last.
- Finishing touch: Lightly run your fingers or a wide-tooth comb through curls for a natural look. Use a light hairspray if you want more hold.
- Daily care: Refresh curls by misting water and scrunching hair without heat. This keeps curls bouncy for days.
Frequently Asked Questions
Is It Easier to Curl Hair with a Wand or Clamp?
Curling hair with a clamp iron generally feels easier. The clamp holds hair in place, meaning less wrist work. It’s perfect if you want more defined curls and smooth finishes without much fuss.
Which Way Should the Clamp Face When Curling Hair?
The clamp should face away from your face to curl hair properly. Clamping in the middle and curling away prevents crimps and gives smooth curls. It also helps the curls fall naturally when styled.
What Is the Best Clamp Hair Curler?
The best clamp curlers offer adjustable heat and barrel sizes for your hair. For example, the K&K Curling Iron 1.25 inch is praised for its versatility. Match barrel size to your hair length and the curl shape you want.
How Do You Curl Your Hair with Clips?
Use clips to section your hair into small layers for easier curling. Clip away sections you’re not curling to avoid tangles. This keeps hair organized and ensures each curl gets the heat it needs.
Can You Use a Clamp Curling Iron on Wet Hair?
No, you should never curl damp or wet hair with a clamp iron. Damp hair won’t hold curls and risks heat damage. Always dry your hair fully before curling for safe, lasting curls.
How Long Should You Hold Hair in the Clamp When Curling?
Hold the hair in the clamp for about 5 to 10 seconds. This heats the section enough to form a defined curl. Holding too long might cause damage, so watch the time carefully.
Key Points to Remember
Clamping your hair with the right steps makes styling simple and lasting. Try curling small sections first to build confidence. Take your iron out and start practicing today for great curls tomorrow.