How to Plop Curly Hair: A Complete Guide for Defined, Frizz-Free Curls
Mastering the plop method can boost how your curls show up. Use a soft microfiber towel or a cotton t-shirt to wrap wet curls gently. This method helps curls dry without breaking and cuts down frizz.
Start by applying your favorite styling products in the shower or right after washing. Lay your wet curls on the fabric carefully. Fold the fabric over your hair.
Secure it on your head by tying or tucking it comfortably. The fabric absorbs excess moisture without rough rubbing or crushing your curls.
Keep your hair in the wrap for at least 10 minutes. This time helps curls form nicely. You might see better bounce with longer wrapping.
Too short a time leaves curls less defined. Also, avoid cotton towels because they cause frizz more than soft t-shirts.
Key Takeaways
- Use a cotton t-shirt or microfiber towel to plop your curls gently.
- Apply styling products before plopping to lock in moisture and shape.
- Plop your hair for 10 to 20 minutes, adjusting for your hair type.
- Start with shorter plop times to avoid flat roots, then increase as needed.
- Use a dry t-shirt overnight if the first one gets too wet while sleeping.
- Thicker curls benefit from plops lasting up to 45 minutes for moisture absorption.
What Is Hair Plopping and How Does It Work?
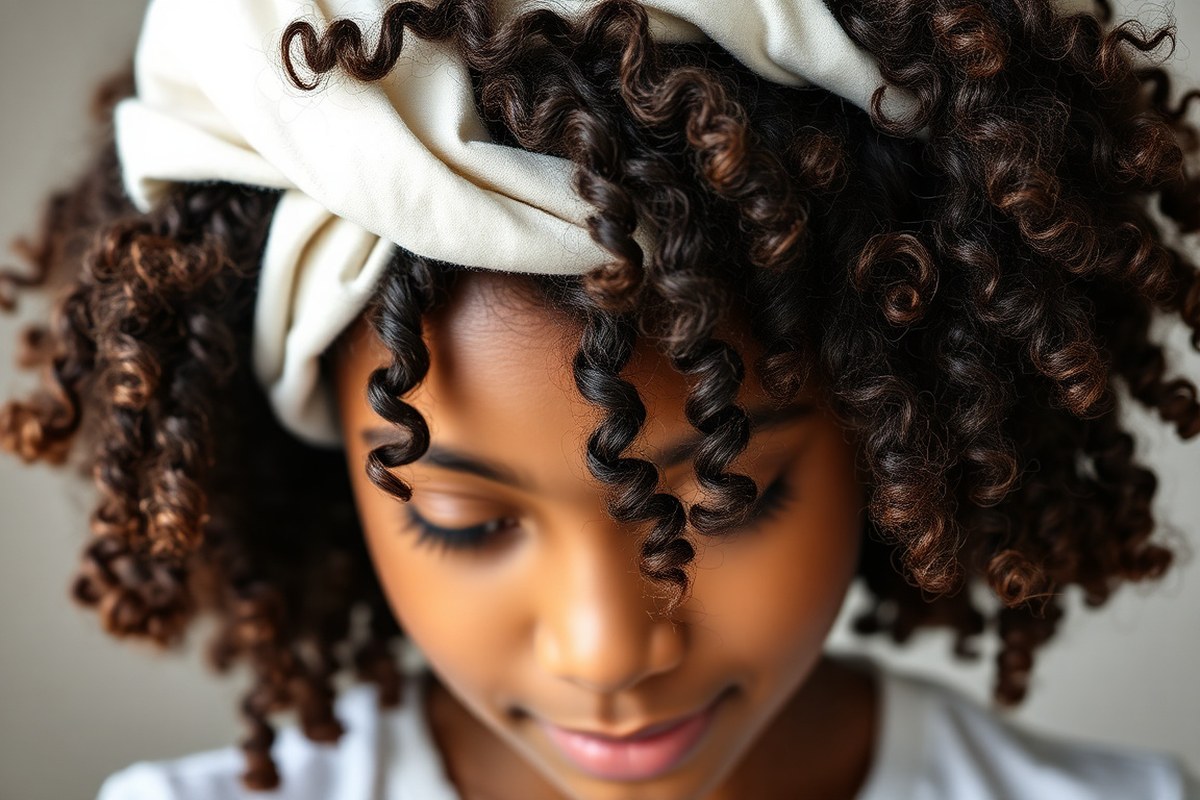
Hair plopping is an easy way to dry curly hair. It keeps your curls defined. It also helps reduce frizz.
You wrap your wet hair in a soft cloth or T-shirt. Then you let it sit for some time. This method uses your hair’s natural shape.
It avoids rough rubbing. It stops heavy drying that causes frizz.
Curly and wavy hair benefit because plopping helps protect the curls from damage as they dry. It reduces friction between strands and prevents curls from stretching out or getting weighed down. Letting hair dry scrunched in fabric keeps curls tighter.
This adds bounce and shape. You see the effect once you unwrap.
The science behind plopping is about moisture control and curl preservation. Curly hair gets frizzy when it dries unevenly. Rough handling when wet also causes frizz.
Plopping keeps moisture in and evenly distributed, minimizing exposure to air and heat that cause frizz. Your curls dry in a scrunched position, which lets them set with better spring and definition.
To plop, gently blot excess water from your hair with your hands. Lay a cotton T-shirt or microfiber towel flat. Flip your head forward.
Lower your curls onto the cloth center. Lift the shirt’s sides and back around your head.
Tie it securely at your neck’s nape. This holds your hair softly in place without pulling or squeezing.
Plopping takes about 10 to 45 minutes, depending on your curl type and hair thickness. Fine or wavy hair usually needs 10 to 20 minutes. Less time keeps curls from flattening.
Medium and tighter curls can handle longer times, up to 45 minutes, for more definition. Leaving it too long can cause curls to dry flat or become overly stiff. So watch how your hair feels and looks.
This technique requires nothing fancy. A soft cotton T-shirt or microfiber towel costs less than $10. Both are gentle enough to avoid rough drying.
The main effort is learning how long to leave hair wrapped. Also, how tight to tie the cloth. Most people find it takes some trial and error to find what fits their curls.
The best results show up in curls that look shiny, bouncy, and well-shaped with minimal frizz. Hair feels light after plopping. The curl pattern stays intact.
You avoid the fuzz from towel drying. Avoid plopping if hair feels too dry or brittle.
It works best when hair is still moist. That helps keep curls hydrated as they set in place.
How to Plop Curly Hair Step-by-Step for Best Results

How to Plop Curly Hair Step-by-Step for Best Results
To plop curly hair, start with soaking wet hair. Apply your styling products. Then wrap curls on top using a 100% cotton t-shirt.
Tie the t-shirt snug but comfortably. So it stays in place while your hair dries. This method helps keep curls defined and reduces frizz.
Preparing Hair Before Plopping
Make sure your hair is thoroughly wet but not dripping. Your hair should feel heavy with water. So it’s ready to absorb the styling products evenly.
Apply products to soaking wet hair to lock in moisture. This shapes curls better than waiting until hair is damp.
Smooth out your hair gently with your fingers or a wide-tooth comb after applying your products. Avoid rough towel drying before starting, as that can cause frizz and break up curl clumps.
Choosing the Right Fabric for Plopping
Use a soft, 100% cotton t-shirt instead of a terry cloth towel. Terry cloth has rough fibers that cause frizz.
A cotton t-shirt absorbs moisture well and is gentle on your curl pattern. Microfiber towels are a good alternative but can feel slipperier and less secure.
Choose a t-shirt large enough to cover all your hair. It should also be long enough to tie at the back.
Avoid old, worn fabrics that might snag or stretch your curls. Fresh, clean cotton gives the best results.
Step-by-Step T-Shirt Plopping Method
Follow these steps to plop your curly hair with a t-shirt comfortably and effectively:
- Lay the t-shirt flat with the neck opening facing you on a smooth surface.
- Bend forward and lower your hair onto the t-shirt’s center. Let your curls rest in the middle.
- Bring the bottom of the t-shirt up over your head. Tuck it under your neck to secure.
- Pull both sleeves around your head to the front.
- Tie the sleeves securely at the front or the back of your head.
- Adjust the t-shirt so your curls feel wrapped but not squeezed.
- Leave your hair wrapped for 20 to 30 minutes, or longer if you want.
Be careful not to twist the t-shirt too tight. It can cause discomfort or leave marks.
Product Application Timing
Apply styling products while your hair is soaking wet. This helps spread the product evenly and encourages curl formation. Common products include curl creams, gels, or leave-in conditioners suited for your hair type.
For thin or low-density hair that gets limp, try a short initial plop. Apply products after to remove water weight. This “damp styling” can give your curls more bounce and volume.
Securing the Plop Comfortably
Tie the t-shirt sleeves firmly but leave enough room for air. Avoid pressure on your scalp for comfort.
You want the curls piled on top without tightness that can flatten or break your hair. Use a second dry t-shirt if needed for overnight plopping to stay comfortable.
Plopping works well if you rest or sleep during drying. Adjust the tightness and fabric layers based on how long you’ll wear the plop. Keeping your neck and scalp comfortable helps maintain your curl shape while drying.
How Long to Plop Curly Hair Based on Hair Type and Goals
Start plopping your curly hair for 10 to 20 minutes. This time fits most people’s hair and balances drying with curl shape. Hair that’s thicker, denser, or more coily needs a longer plop to absorb more water.
Plopping too long can flatten roots or make curls mushy. You want the hair damp, not soaking wet or dry, when you release it.
Too short means your hair stays soggy and frizzes easily. Adjust the time based on your hair’s porosity and how fast it dries.
Here’s a simple table to pick your starting plopping time based on hair density and type.
| Your Hair | Start With | Why |
|---|---|---|
| Fine or low density | 5 to 15 minutes | Holds quickly and squeezes well, but leaving it on too long may cause flat, limp roots. |
| Medium density | 15 to 30 minutes | The comfortable middle. Most people land here. |
| Thick, dense, or long | 30 to 45 minutes | Retains much more water, allowing for a longer time to style before it sets. |
| Very dense or coily | 45 minutes and up, or a net cap | Air circulation becomes limiting, not time. |
Overnight plopping works well for very dense or slow-drying hair. But don’t try overnight if your hair gets flat or gummy easily. You want air to circulate to avoid a damp scalp or heat buildup.
For best results, plop while your hair is soaking wet. Avoid touching it during drying to cut frizz. Try micro-plopping to prevent flat roots by shortening the time or lifting roots with a clip.
Choosing the Right Materials for Plopping Your Curls
Choosing the right fabric makes a big difference when you plop your curls. A regular bath towel may feel soft. But its rough texture can cause frizz and even break your curls.
Many with curly hair use a cotton T-shirt to dry their curls. Microfiber towels are another gentle option for shaping curls. Both help avoid rough drying that can damage hair.
Cotton T-shirts work well because they have a flat, smooth surface that doesn’t snag your hair. Microfiber towels soak up water faster than cotton shirts do. This works well for thick hair or hair that stays wet longer.
It helps speed up the drying process. Using the wrong fabric can cause puffiness or uneven curls.
Hair may stretch or rub too much, changing the curl pattern. Choose soft fabric to protect your hair shape.
| Material | How It Behaves | Best For |
|---|---|---|
| Cotton T-shirt | Flat, smooth jersey knit; little friction with hair | Almost everyone; budget-friendly and widely available |
| Microfiber Towel or Turban | Very absorbent and smooth; faster drying | Dense or long hair that holds lots of water |
| T-shirt Towel | Jersey surface with extra absorbency | People who find plain T-shirts too slow |
| Net or Mesh Plopping Cap | Holds curls in place while letting air circulate | Those wanting curl shape and air drying together |
Microfiber towels feel very smooth on your hair. They absorb water quickly, so drying takes less time. This is helpful if you want fast curl drying.
They tend to be more expensive than cotton T-shirts, often costing around $10 to $20. A cotton T-shirt usually costs only a few dollars and still offers good curl protection. Mesh plopping caps stop curls from getting flat.
They also let air flow around your hair. This helps curls dry evenly and stay defined.
Avoid regular bath towels because terry cloth is textured and rough on curls. It creates friction that raises the hair cuticle, causing frizz. Rough drying with towels can also stretch or damage curls, undoing your styling efforts.
Soft fabrics reduce friction on your curls. They help curls dry in their natural shape. After plopping, curls look bouncy and well defined.
Begin by laying your favorite fabric flat on a surface. Bend forward and gently place your curls onto the fabric’s center.
Wrap the fabric to secure hair on top, keeping curls in place without rubbing. This lets curls dry inside a soft pouch, limiting frizz and breakage.
Common Plopping Mistakes and How to Fix Them
Plopping sometimes causes limp curls or flat roots. This happens if you leave your hair piled up too long or use a heavy towel. Long or thick hair needs less time plopped to avoid weight flattening the roots.
Mushy hair after plopping often means your curls held too much moisture. Leaving hair wrapped too wet can make strands feel soggy. Removing some water before plopping helps avoid that mushy feeling.
Over-drying can happen if you plop too long or use absorbent materials like terry cloth towels. Too much drying creates frizz or rough texture. Choosing lighter fabrics and limiting time prevents this problem.
- Don’t wrap hair too tight; keep gentle tension to avoid breakage.
- Use a lightweight cotton T-shirt or microfiber towel for better absorbency.
- Remove excess water gently by squeezing with hands before plopping.
- Watch your curl type and adjust plop time accordingly.
- Keep your hair piled lightly to avoid flattening the roots.
- Stop plopping as soon as hair feels damp, not bone dry.
- Avoid twisting the fabric too much to prevent hair damage.
Plopping won’t damage hair if done carefully. Avoid tight wrapping, harsh fabrics, or keeping hair wrapped for hours. Overdoing it causes breakage or flat roots, especially for curls prone to weight flattening.
Only plop your hair for 15 to 30 minutes max. Time depends on your curl type and thickness. This will keep your roots lifted and curls bouncy.
To prevent mushiness, gently squeeze water out before wrapping your hair. Micro-plopping is great for removing excess moisture without compressing roots. It lets curls shape better and keeps bounce.
Flat roots happen when heavy hair bunches at the scalp too long. Keep plop time short and check roots often. For thicker hair, use looser wrapping and a softer fabric to reduce pressure.
Different Plopping Techniques and When to Use Them
Plopping curly hair can be done in different ways. It depends on your hair length, texture, and how much time you have. You can choose the way that suits you best.
Traditional plopping uses a t-shirt or towel to lift curls and reduce frizz while drying. Wet plopping, micro-plopping, and net plopping offer different benefits and suit different needs. Choosing the right technique helps keep curls shiny, bouncy, and less frizzy.
Traditional T-Shirt Plopping
This method uses a soft cotton t-shirt to wrap wet curls gently. It helps remove extra water with less rubbing. This stops frizz from building up.
The curls settle gently on top of your head. You’ll want a clean t-shirt to keep your scalp fresh and avoid bacteria.
Here’s how to do it:
- Start with freshly washed and conditioned curls.
- Apply your styling products while hair is wet.
- Flip your head forward so curls fall in front of your face.
- Lay the t-shirt on a flat surface and flip curls onto its center.
- Bring the shirt’s bottom up to cover your neck and hold curls secure.
- Wrap the sleeves around your head and tie them at the nape.
- Leave it on for 20 to 30 minutes, then gently unwrap.
This method works well for most hair types and lengths. It’s quick and gentle, perfect for a morning routine or before styling.
Wet Plopping Technique Explained
Wet plopping means wrapping your curls while they’re still very wet, right after washing or rinsing. This speeds up drying without touching hair too much, which helps curls keep their shape. It’s best if you want to reduce drying time and frizz at once.
Wet plopping uses the same steps as traditional plopping. But you can leave the t-shirt on longer, sometimes up to an hour. Some people plop until their hair is mostly dry.
This saves time with a diffuser or air drying. It works well for many curl types.
Keep in mind, long wet plopping isn’t good for everyone. Wrap your hair looser to avoid scalp pressure and bacteria buildup. Use a clean t-shirt every time to stay fresh.
Micro-Plopping for Quick Refresh
Micro-plopping works well for short curls. It’s good when hair can’t fold fully in a t-shirt. This method keeps curls neat and defined.
It’s great to quickly refresh curls or reduce frizz before styling. You can also use this after a workout or when your hair feels flat.
To micro-plop, use a smaller section of fabric or just a corner of a cotton t-shirt. Gently scrunch curls with it instead of fully wrapping your head. This gives control over curl placement and maintains volume.
Try micro-plopping for five to ten minutes after spritzing curls with water or a light leave-in. It takes less time than traditional plopping and still boosts curl definition and bounce.
Net Plopping and Other Variations
Net plopping uses a mesh fabric, like fishnet stockings, instead of a t-shirt or towel. This lets air circulate while holding curls gently, helping dry hair faster and cut frizz. People with fine or low-porosity hair find this useful because it avoids excess heat or dampness.
To net plop, place the net on a chair or flat surface. Flip your curls onto it and gather the edges up loosely around your head.
Secure the net with clips or hairpins instead of tying. It feels lighter and cooler than traditional plopping.
Other variations use microfiber towels or silk pillowcases to wrap curls. These reduce friction but might not lift curls as much as t-shirts or nets. Choose based on how your hair reacts and what fits your routine best.
How to Refresh Curls with Plopping Between Wash Days
You can refresh curls on day two or day three. Use light moisture. Add only a small amount of product.
This method reactivates curl shape and reduces frizz without washing. Plopping for 10 to 15 minutes helps restore bounce while saving time.
Preparing Hair for Refresh Plopping
Start by lightly dampening your curls with water or a leave-in spray to rehydrate strands. Avoid soaking your hair; a fine mist is enough to soften dried curls. Divide your hair into sections.
Gently scrunch upward from the ends. This reshapes curls and spreads moisture evenly.
This scrunching step helps curls absorb the light hydration you add. It also helps curl definition return before plopping begins.
Product Recommendations for Refreshing Curls
Use lightweight leave-in conditioners or curl refresher sprays that won’t weigh hair down. Choose products with moisturizing ingredients like aloe vera or glycerin. Avoid heavy creams or oils, which can make curls limp on non-wash days.
A small amount of curl cream or mousse can improve definition. But keep it minimal to prevent buildup. You want enough product to boost moisture and shape, not saturate your curls.
Timing and Technique for Best Results
Wrap your damp hair on your head with a soft cotton t-shirt. Leave it wrapped for 10 to 15 minutes. Shorter plopping helps keep your curl volume from flattening.
Secure the wrap comfortably without pulling too tight. After 10 to 15 minutes, unwrap your hair gently.
Let curls air dry. Use a diffuser on low heat only if needed.
- Lightly mist dry curls with water or leave-in spray to add moisture.
- Part hair into four sections for easier handling.
- Scrunch curls gently from the ends upward to reshape.
- Apply a small amount of lightweight curl refresher or leave-in.
- Lay a soft cotton t-shirt flat and flip hair onto it.
- Wrap the t-shirt ends around your head and tie to secure.
- Leave plopped for 10 to 15 minutes to refresh curls.
- Unwrap carefully and air dry or diffuse on low if needed.
How to Combine Plopping with Other Drying Methods Like Diffusing
Plopping works well with diffusing or air drying to boost curl shape and reduce frizz. You start by soft-plopping damp curls for 10 to 20 minutes.
This sets your curl pattern and removes excess water without rough rubbing. Then, gently unwrap your hair to avoid disturbing the curls.
After plopping, you can choose between air drying or diffusing for the final dry. Air drying keeps moisture in but takes longer.
Diffusing speeds up drying and adds volume if you use low heat and airflow. Use a diffuser on the cool or low setting to protect your curls from heat damage.
Combining plopping with these methods cuts down overall drying time. Plopping alone absorbs much water, and diffusing finishes drying without rough scrunching. This helps preserve curl integrity and avoids frizz.
Thick or coarse hair benefits from plopping for up to 45 minutes. This helps lock in moisture before diffusing. It keeps curls juicy and soft.
- Start by applying your styling products to soaking wet hair.
- Wrap curls in a cotton or microfiber towel and wait 10-20 minutes.
- Gently unwrap, then air dry without touching or use a diffuser on low heat.
- When you diffuse, move the diffuser gently around your head. Pay special attention to roots and mid-lengths. This helps curls form better.
- Limit diffuser time to 15-30 minutes to avoid heat stress.
- Thick hair may need longer plopping for extra moisture absorption.
Using plopping before air drying helps curls keep moisture longer. It also reduces the chance of your pattern stretching out as your hair dries. When diffusing after plopping, your curls get more volume without heat damage from fast drying.
Don’t over-dry your hair with a diffuser. Stop when curls feel mostly dry to avoid frizz.
Combining plopping and diffusing requires little extra effort but protects your curls. You get well-defined shapes faster and less frizz compared to air drying alone. Plopping removes much wetness so the diffuser only finishes drying without roughing up curls.
This method suits mornings when you want quick curls. It still keeps them soft and bouncy. Perfect for busy days.
Step-by-Step Action Plan for Plopping Your Curly Hair
This simple plan helps you start plopping your curls right. Follow each step and check how your curls look for best results.
- Right after washing: Apply your leave-in or curl cream evenly through damp hair. Your curls should feel coated but not heavy.
- Immediately after styling: Lay a cotton T-shirt or microfiber towel flat. Flip your head and gather your curls onto the center.
- Within 1 minute: Twist the fabric’s sides. Bring it back and secure it with a knot or clip at your neck.
- 20-40 minutes in: Check if your curls have absorbed excess water without flattening. Your hair shouldn’t feel dripping wet or stiff.
- After 30 minutes (or the time suited to your hair): Unwrap your hair carefully. Your curls should look defined and feel less frizzy than usual.
- Post-plopping: Let your hair air-dry the rest of the way. Use a diffuser on low heat to dry faster.
- Next day: Lightly mist your curls with water. Re-plop for 10 minutes if you need to refresh them.
- After each wash: Repeat your plopping routine. Change the time and fabric based on curl response.
Frequently Asked Questions
Can You Plop Curly Hair Using a Regular Towel?
Yes, you can plop curly hair with a regular towel. Choose a soft, lint-free towel to reduce frizz and protect your curls during plopping.
Is Plopping Suitable for All Curl Types and Lengths?
Plopping works well for most curl types and lengths, including wavy and short curls. Adjust your plopping time and technique to fit your specific hair texture and curl pattern.
Can Men with Short Curly Hair Use the Plopping Method?
Yes, men with short curly hair can plop using slight technique changes. Use a smaller towel or cotton T-shirt to wrap your shorter curls gently.
Is It Bad to Sleep with a Plop on Overnight?
Sleeping with a plop overnight can actually preserve curls and boost definition. Just make sure the wrap is secure but not too tight to avoid discomfort.
How Often Should You Plop Your Curly Hair to See Results?
Plop your curls every wash day for best curl definition and less frizz. Consistency helps improve curl shape and hair health over time.
Can Plopping Reduce the Drying Time of Curly Hair?
Plopping can cut drying time by absorbing excess water before air drying. However, thick or dense hair still needs longer drying even with plopping.
Wrapping Up
Plopping curls locks in shape and softness without much heat. Try starting with 30 minutes and adjust time for your curl type. Grab a soft T-shirt now and see how your curls transform on your next wash day.