How to Sharpen Hair Cutting Scissors: 8 Proven Methods & Expert Tips
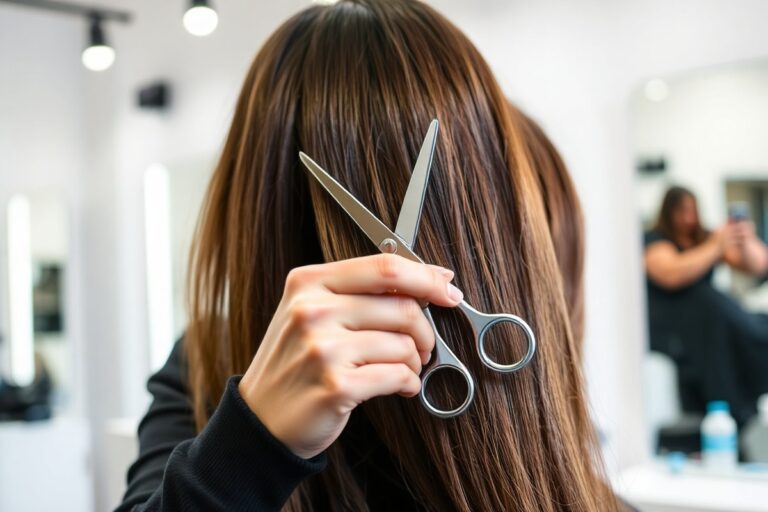
Knowing how to sharpen hair cutting scissors keeps your cuts smooth and clean. Dull scissors cause pulling, which leads to uneven cuts and damaged hair. The best way is to use a sharpening stone or fine metal files.
You can also try quick home fixes like cutting foil. These tools help keep your blades sharp.
Start by cleaning your scissors with rubbing alcohol to remove oils and residue. Test the sharpness on a scrap piece of hair first. You can also try cutting paper to check the blade.
This prevents mistakes on real hair. Sharpen slowly and evenly to avoid damaging the blades or changing their shape.
Regular sharpening also lengthens your scissors’ lifespan. A sharp blade reduces wear and tear. So you don’t replace your scissors as often.
Key Takeaways
- Use a whetstone or fine metal file for the best sharpening results.
- Clean scissors thoroughly before sharpening for a smoother edge.
- Test scissor sharpness by cutting paper or hair before using.
- Sharpen slowly and evenly to keep the blade shape intact.
- Cut aluminum foil to quickly touch up scissors at home.
- Sharpen after every 500 cuts to maintain optimal edge quality.
1. How to Sharpen Hair Cutting Scissors Correctly
- Clean the scissors to remove dirt and hair. Use a soft cloth or warm, soapy water. Dry them completely before sharpening.
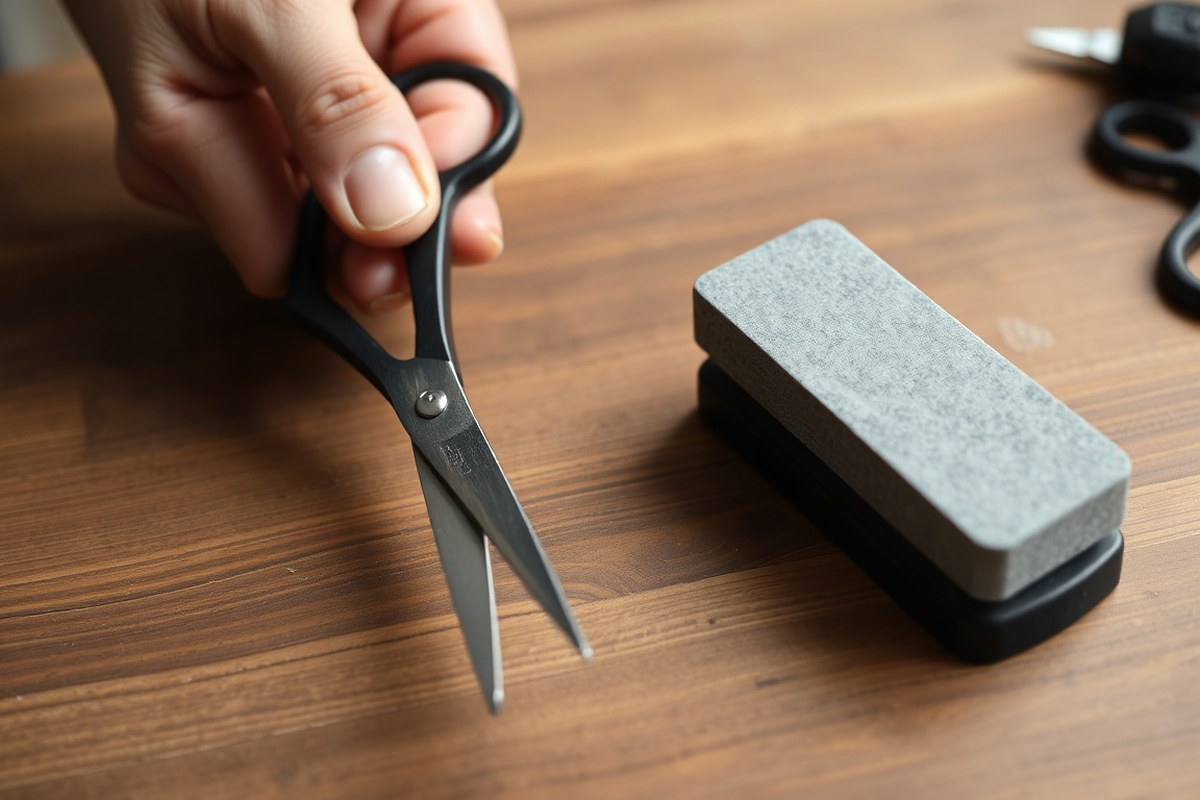
- Choose a sharpening tool like a whetstone or professional sharpener. For most hair scissors, a whetstone with a grit of 1000 to 3000 works well. Make sure the stone is flat and dry.
- Hold the scissors at a 75 to 80-degree angle against the stone. This angle keeps the blade edge precise and avoids damage. Keep your fingers clear of the sharp edge.
- Use gentle, consistent strokes to rub the blade along the stone. Move the blade from the base to the tip in one direction. Apply light pressure to avoid wearing out the edge.
- Repeat this motion 5 to 10 times on each blade side. Flip the scissors carefully to sharpen both edges evenly. Avoid sharpening too long; it can round the blade.
- Rinse and dry the scissors after sharpening. Check the blades by gently cutting a thin strand of hair or paper. The scissors should cut smoothly without pulling or bending hair.
- Tighten the screw or pivot if the blades feel loose after sharpening. Proper tension helps maintain sharpness during use and ensures safety.
Sharp scissors make cutting clean and easy, reducing hair damage. You can sharpen scissors every 3 to 6 months if you cut hair regularly. Avoid heavy sharpening unless blades are very dull to prevent wear.
2. Key Signs Your Hair Cutting Scissors Need Sharpening

Hair cutting scissors that feel dull won’t slice through hair cleanly. Instead, they pinch or pull hair strands, causing split ends and breakage. Sharp scissors cut hair smoothly, which keeps hair healthier and easier to style.
You can tell your scissors need sharpening by watching for these signs. Cuts feel rough or uneven. Cutting hair takes more effort than before.
Sometimes the scissors snag or bend hair instead of cutting it. These all point to dull blades.
- Cuts are uneven or jagged
- Scissors pull or tug on hair
- It takes extra force to cut
- Scissors skip or snag on hair
- Blades show visible nicks or dull edges
- Hair looks frizzy or split after cutting
- Blades don’t smoothly glide together
- More frequent sharpening than every 3 to 6 months
Split ends happen when scissors crush or tear hair instead of slicing cleanly. That rough edge lets hair fray and break quickly. Dull scissors also slow your work and strain your hand muscles.
How often to sharpen depends on how much you use your scissors. Professionals who cut hair daily should sharpen every 3 to 6 months.
Home users who cut hair less often may sharpen once a year. Watch your scissors closely, they’ll tell you when it’s time.
Never use household sharpeners or emery boards on your hair scissors. They damage curved edges and reduce blade life.
Paying attention to these signs helps you avoid hair damage and keeps cutting fast and clean. Regular maintenance saves you from costly scissor replacements and keeps your hair looking its best.
3. Sharpening Methods: Comparing Tools and Techniques
You can sharpen hair cutting scissors at home using different methods. Each method varies in cost, skill, and results. Basic tools like aluminum foil and sandpaper work fast and cheap.
They need more time to get a sharp edge. Advanced tools such as whetstones or professional sharpeners cost more.
They need some skill but give better results. The right method depends on your scissors’ quality, your budget, and how steady your hands are.
| Method | Cost | Skill Level | How It Works | Best For |
|---|---|---|---|---|
| Aluminum Foil | Low (free or <$5) | Easy | Fold foil and cut repeatedly to file edges | Quick touch-ups, beginner use |
| Sandpaper | Low ($5-$10) | Easy to Medium | Cut on fine grit paper to smooth and sharpen | Cheap, emergency sharpening |
| Whetstone | Medium ($20-$50) | Medium to Hard | Wet stone sharpens blade edges precisely | Regular maintenance, professional-grade scissors |
| Glass | Free to Low | Easy | Cutting on the smooth glass surface sharpens blades | Quick fixes using household items |
| Sharpening Rod | Low to Medium ($10-$30) | Medium | Run blades along ceramic or metal rod angled | Routine home sharpening |
| Electric Sharpener | High ($50+) | Easy | Auto-grind blades with precise angle control | Smooth edges fast, little skill needed |
| Professional Service | Varies ($10-$40 per pair) | None | Experts sharpen with correct tools and angles | High-quality scissors needing perfect edges |
Household items like aluminum foil or sandpaper are easy to use. You don’t have to buy special tools for them. Fold aluminum foil a few times before cutting through it smoothly.
Cut about 20 to 30 times with your scissors. Sandpaper requires cutting on fine grit (around 200-400 grit) surface repeatedly to restore sharpness.
These ways cost almost nothing and are good for beginners. They fix dullness but not serious edge damage.
Beginners can use whetstones or rods for better, longer edges. You can find them online or in hardware stores. Whetstones need soaking in water or oil before use.
You’ll also need steady hands to hold the right angle. Sharpening rods need a steady stroke but are quicker to use.
Electric sharpeners do the job faster but cost more money. They don’t always fit every style of scissors.
4. Step-by-Step Guide to Sharpening with a Whetstone
Using a whetstone to sharpen hair cutting scissors takes a bit of practice but works well. You’ll wet the stone and sharpen each blade at about a 15-20 degree angle.
Expect the whole process to take 10 to 15 minutes. It depends on how dull your scissors are.
Preparing the Whetstone
Start by soaking the whetstone in fresh water for about 5 to 10 minutes. This keeps the stone wet during sharpening and prevents metal dust buildup. Use a stone with a grit level between 1000 and 3000 for sharpening hair scissors.
Keep the stone on a stable, flat surface. A wet stone works better than a dry one.
It reduces friction and protects the blade. Make sure your hands stay dry for a firm grip on the scissors.
Sharpening Each Blade
Hold a blade’s bevel flat against the whetstone while keeping a 30-40 degree angle. Move the blade across the stone like you’re slicing a thin layer off. Maintain consistent pressure and angle for the best edge.
Repeat about 10 to 15 strokes on one side. Then flip and sharpen the other blade the same way.
Stay patient and take your time; rushing can damage the edge. Use an angle guide if you find it hard to maintain the right angle.
- Wet the whetstone thoroughly and place it on a flat surface.
- Open your scissors fully and place the first blade bevel-down on the stone.
- Hold the blade at about a 30-40 degree angle relative to the stone.
- Slide the blade carefully across the stone in one smooth motion, 10 to 15 times.
- Wipe the blade clean and check the edge frequently.
- Repeat the process for the other blade.
- Rinse the whetstone to clear metal filings when finished.
Finishing and Testing Sharpness
After sharpening, wipe the blades with a soft cloth to remove any metal dust. Test the scissors by cutting through a piece of paper or hair. The cut should feel smooth and require little force.
The scissors might still feel dull. Sharpen them for a few more strokes.
When done, dry the scissors completely to prevent rust. Regular touching-up keeps the edges sharp and hair cuts clean.
5. Effective Home Remedies for Quick Scissor Sharpening
You can sharpen hair cutting scissors at home with simple items. Use aluminum foil, sandpaper, and rubbing alcohol. These tools can help you sharpen blades effectively.
Each method offers a quick fix but works best for slightly dull blades. Follow safe procedures to avoid damaging your scissors or hurting yourself.
Using Aluminum Foil
Aluminum foil can sharpen your hair scissors by creating tiny friction points that file the blades. Fold a piece of foil into several layers until it feels thick and strong. Cut through the foil multiple times with your scissors, applying steady pressure.
Do about 10 to 15 clean cuts through the foil. Fold the foil differently and repeat to cover all blade edges evenly. Afterward, wipe the blades with a dry cloth to remove any foil residue or dust.
- Use heavy-duty aluminum foil for best results.
- Keep the scissors closed tightly while cutting foil.
- Perform slow, deliberate cuts to avoid slipping.
- Wipe blades afterward to prevent stubborn particles.
- Sharpen every 1-2 years or when cutting feels rough.
Avoid pressing too hard on the blades. Too much force can bend or damage the scissors.
Using Sandpaper
Coarse sandpaper can sharpen scissors by grinding the blade edges slightly. Cut strips of sandpaper, about 2 to 3 inches wide, with your hair scissors. Use 200- or 400-grit sandpaper for this job, which is rough enough without damaging your blades.
Make 15 to 20 smooth cuts through the sandpaper, keeping the scissors tight. Change the sandpaper’s angle or flip it to reach more of the blade quickly. After sharpening, clean the scissors well with rubbing alcohol to remove grit.
- Choose sandpaper grit between 200 and 400.
- Cut slow to avoid slipping and injuring yourself.
- Use several layers for longer sharpening sessions.
- Rinse blades after with alcohol to remove debris.
- Check blade edges visually for smoother lines.
Don’t use sandpaper on very expensive or high-quality scissors without professional advice. It can dull them more.
Using Rubbing Alcohol
Rubbing alcohol doesn’t sharpen blades like foil or sandpaper but cleans buildup between the blades. Removing grime often improves cutting performance. Dip a clean cloth or cotton ball in 70% or higher isopropyl alcohol.
Wipe the edges of the blades carefully. Make sure to clean every part of the blade.
This method is fast and helps maintain sharpness longer. Regular cleaning every few weeks prevents buildup from dulling scissors. Avoid soaking blades in alcohol, as it may damage some handle materials or finishes.
- Use 70% or higher concentration isopropyl alcohol.
- Wipe blades gently, focusing on the cutting edges.
- Clean after every haircut or styling session.
- Dry scissors completely to prevent rusting.
- Use on both metal and plastic handle scissors safely.
Alcohol cleans scissors but won’t fix a dull edge on its own. Pair it with one sharpening method for best results.
6. Maintaining Hair Scissors to Extend Sharpness
Keeping hair cutting scissors sharp depends a lot on regular cleaning and careful handling. After each use, wipe the blades with a soft cloth to remove hair and any moisture. Use a small brush or compressed air to clear out tiny bits stuck near the pivot.
Lubricating the pivot point once a week can stop the blades from sticking or rusting. Apply a drop of scissor oil or clipper oil where the blades meet. Open and close the scissors several times to spread the oil.
Make sure the oil covers all the moving parts evenly. Wipe off any extra oil with a clean cloth.
Storing scissors properly protects the edges from damage. Keep your scissors in a protective case or pouch when not in use. This helps avoid bumps and keeps dust away.
Store them somewhere safe and dry. Avoid tossing them into a drawer with other tools or heavy objects.
- Clean blades with rubbing alcohol or warm soapy water monthly
- Oil the pivot area at least once a week
- Store scissors upright or inside a padded pouch
- Never drop or toss scissors in a toolbox
- Sharpen every 6 to 8 weeks if used daily
- Inspect scissors for dullness before each use
- Wear safety gloves during cleaning and sharpening
Sharpen hair scissors every 6 to 8 weeks when you cut hair daily. Less frequent use means sharpening every 3 to 4 months works.
You’ll notice the blades dulling if you have to cut over the same spot repeatedly. That indicates it’s time to sharpen.
Safety during maintenance matters too, especially during sharpening. Wear gloves to protect your hands from sharp edges. Always place scissors on a stable surface and handle tools carefully to avoid slips or cuts.
7. Common Sharpening Mistakes and How to Fix Them
Sharpening hair cutting scissors takes care and precision. One common mistake is using the wrong angle.
You should hold the blade at a 30 to 40 degree angle against the sharpening stone. Going beyond this can dull the blade or cause uneven edges.
Another problem is rushing the process. Pressing hard or moving too fast wears down the blade quickly and leaves rough spots.
Sharpen slowly with gentle, consistent strokes for 5 to 10 minutes per blade. Check progress often.
Using the wrong grit on your sharpening stone also causes damage. Start with a coarse stone to fix nicks, then switch to a finer grit to polish. Skipping the fine grit leaves a blade that tears hair instead of cutting cleanly.
Here are six common mistakes with quick fixes:
- Sharpening at the wrong angle, keep between 30-40 degrees.
- Applying too much pressure, use light, steady strokes.
- Ignoring blade nicks, carefully smooth them with coarse stone first.
- Using only one grit of stone, progress from coarse to fine.
- Failing to clean the scissors after sharpening, wipe blades with alcohol.
- Sharpening without checking blade tension, adjust the screw before and after.
Nicks in the blade can cause pulling and uneven cuts. To fix them, place the blade flat on a coarse stone. Rub gently along the entire edge until smooth.
This removes the damaged metal bit by bit. Then refine on a finer stone to restore smoothness.
Over-sharpening wears the blade thin and weakens the edge. Notice a thinning tip or quick dulling?
Stop sharpening right away. Consider professional sharpening or replacing the scissors to avoid permanent harm.
Taking scissors apart to sharpen is safe only for some models. Most hair scissors have adjustable screws and come apart easily.
Always loosen the screw fully before removing blades. Don’t force parts or pry them apart, as this can damage alignment.
After sharpening, reassemble the scissors carefully. Tighten the screw just enough so the blades open smoothly but don’t wobble.
Test the blade by cutting hair or thin fabric strips. Make sure the edge feels even and clean.
8. When to Choose Professional Scissor Sharpening Services
Choose professional sharpening when your scissors show severe dullness or damage. Professionals safeguard your expensive tools and avoid costly mistakes. Your scissors need expert sharpening if they have chips or uneven blades.
Indicators You Need Professional Sharpening
Scissors that fail to cut cleanly or tug hair signal damage beyond home sharpening. Look for nicks, chips, or bent blades, which home tools can’t fix well. Also, if you feel the blades slipping while cutting, your scissors need a professional touch.
Replace scissors instead of sharpening when blades are cracked or parts are loose. When scissors still don’t cut well after two sharpenings, they likely can’t be fixed. Saving money on frequent DIY mishaps can justify buying new scissors.
Typical Costs and Turnaround
Professional sharpening usually costs between $10 and $15 per pair. This price includes thorough blade honing, polishing, and adjustment for smooth cutting. Turnaround times vary but most services return scissors within a few days.
Some salons or specialty shops offer express service for an extra fee. Expect to pay a little more for same-day or next-day sharpening at busy locations. Budget-friendly options include mailing scissors to online services with turnaround of one to two weeks.
Benefits of Professional vs Home Sharpening
Experts use precise equipment that maintains your scissors’ exact blade angle and edge quality. Proper sharpening extends your scissors’ life, protecting your investment in costly tools. DIY sharpening often risks uneven edges, scratches, or losing blade alignment.
Home sharpening suits minor touch-ups or emergency fixes. Yet, professional sharpening prevents damage like over-grinding or blade warping. Hiring a pro makes sense if you value blade longevity and consistent cutting performance.
Never sharpen scissors too often. Excessive sharpening can thin the blades and ruin the edge.
Step-by-Step Action Plan for Sharpening Hair Cutting Scissors
Follow these steps to sharpen your scissors quickly and check for sharpness as you go.
- Before you start: Clean your scissors with a soft cloth to remove dirt and hair. This helps the sharpening process work better.
- Step 1: Choose your sharpening tool, like a whetstone or home remedy. Pick the one you feel most comfortable using.
- Step 2: Lubricate the blades lightly with oil if the tool asks for it. This stops metal pieces from sticking.
- Step 3: Sharpen the blades by running them along the tool. Hold them at the right angle, usually 45 degrees. Count 10 strokes each side to start.
- Step 4: Check sharpness by cutting a thin piece of paper or a strand of hair. It should cut cleanly without snagging.
- Step 5: Repeat sharpening in small steps if needed. Stop as soon as cutting improves noticeably.
- After 1 week: Clean your scissors well. Then apply light oil for smooth use. This helps slow down dulling.
- After 1 month: Test the scissors again and sharpen only if cutting feels dull or uneven.
Frequently Asked Questions
Can I Use a Nail File to Sharpen Hair Cutting Scissors?
Yes, a fine-grit nail file can lightly sharpen scissors. Use small, gentle strokes along the blade edge to avoid damage. Repeat this evenly on both blades for best results.
How Do I Prevent Rust After Sharpening Hair Scissors?
Dry your scissors completely after sharpening to stop rust. Store scissors in a dry place to keep them safe. Occasionally apply a light oil to the blades for extra protection.
Can Water Damage Hair Cutting Scissors During Sharpening?
Yes, water can cause rust if scissors are not dried properly after sharpening. Always dry blades thoroughly and avoid soaking them for long periods.
Is It Okay to Sharpen Scissors More Than Once with the Same Stone?
Yes, you can sharpen scissors multiple times on the same whetstone. Clean the stone regularly and check its surface for wear to keep it effective.
Can I Damage Hair Cutting Scissors by Sharpening Too Often?
Yes, sharpening too often can wear down scissors faster. Limit sharpening to when blades feel dull or don’t cut cleanly to extend their life.
Do Different Hair Scissor Brands Require Specific Sharpening Techniques?
Most brands use similar blade types, so standard sharpening techniques work. Check your scissor’s manual or manufacturer advice for any special instructions.
Before You Go
Sharpening your hair cutting scissors at home can save time and improve your work. Start with a clean blade and use the right angle to get sharp edges. Try sharpening today, then test by cutting paper to see the difference.