How Do Thinning Shears Work: A Complete Guide to Choosing and Using Them
How do thinning shears work to remove bulk in hair? They cut some strands while leaving others uncut.
So they thin hair without changing its length. These shears have teeth that slice smaller amounts of hair each time you close them.
This works because the gaps between teeth catch only portions of hair. The higher the tooth count, the smaller the sections cut and the softer the thinning effect. Lower tooth counts cut thicker chunks, leaving more texture and visible layers.
Thinning shears help blend layers and soften sharp edges in hairstyles. They are great for thick, heavy hair that feels bulky or hard to style.
Start thinning at least 2 to 3 inches from your scalp. This avoids a patchy look near the roots and keeps your hair feeling natural.
Key Takeaways
- Thinning shears have teeth that selectively cut strands to reduce bulk.
- Higher tooth counts (30+) create a soft blend and are good for delicate work.
- Lower tooth counts remove bigger chunks and add a textured look.
- Start thinning cuts away from the scalp for an even finish.
- Standard thinning shears typically have 30 to 40 teeth for safe bulk removal.
- Steel shears around 5 to 7 inches long offer good control and precision.
How Do Thinning Shears Work to Remove Bulk?
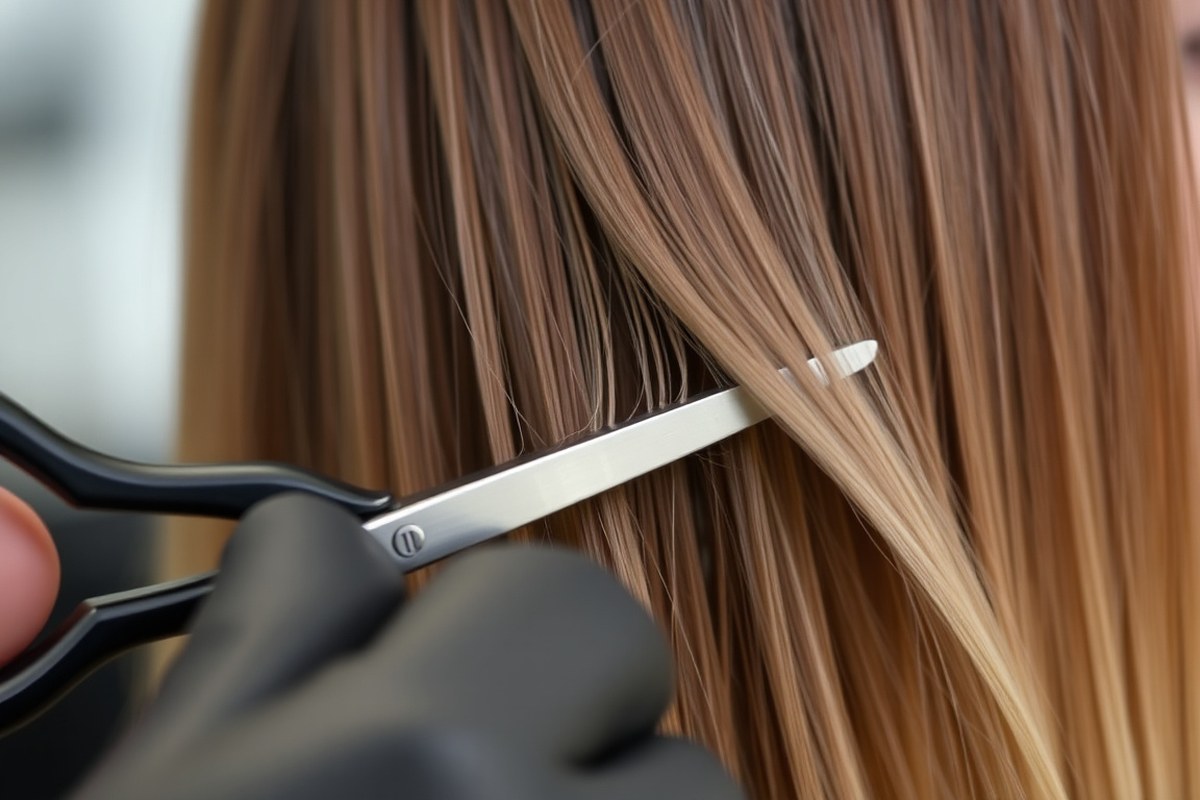
Thinning shears work by cutting some strands of hair and leaving others untouched. One blade has teeth, while the other is smooth.
So they snip only a portion of the hair in each cut. This creates texture and removes bulk without shortening the hair’s overall length.
Thinning shears cut some strands, not all like regular scissors do. They help remove weight from thick hair without changing the style’s shape. The space between the teeth controls how much hair you cut each time.
Thinning shears’ teeth decide how much hair you cut per snip. Shears with 6 to 12 teeth can cut up to 80% of hair fast. Shears with 14 to 20 teeth take off less hair and add soft movement instead.
First, you divide hair into sections. Hold a section with your fingers or a comb. Then, use thinning shears to cut through the section slowly.
Then, angle the shears perpendicular to the hair strands and take a snip. This cuts only some strands and gradually reduces volume while the overall length stays the same.
This mechanism is why thinning shears soften blunt lines and help blend layers. Thinning shears work best on thick or bulky hair. They soften edges in bobs and layered haircuts.
These shears help reduce volume without changing length too much. Instead of cutting bluntly, thinning shears create a natural, blended finish.
Thinning shears can also create movement and direction in hair without losing length. Using them properly avoids removing too much hair at once, which can happen with regular scissors. When done right, they keep the style intact and remove bulk evenly across the hair.
What Types of Thinning Shears Exist and How Do Tooth Counts Affect Results?
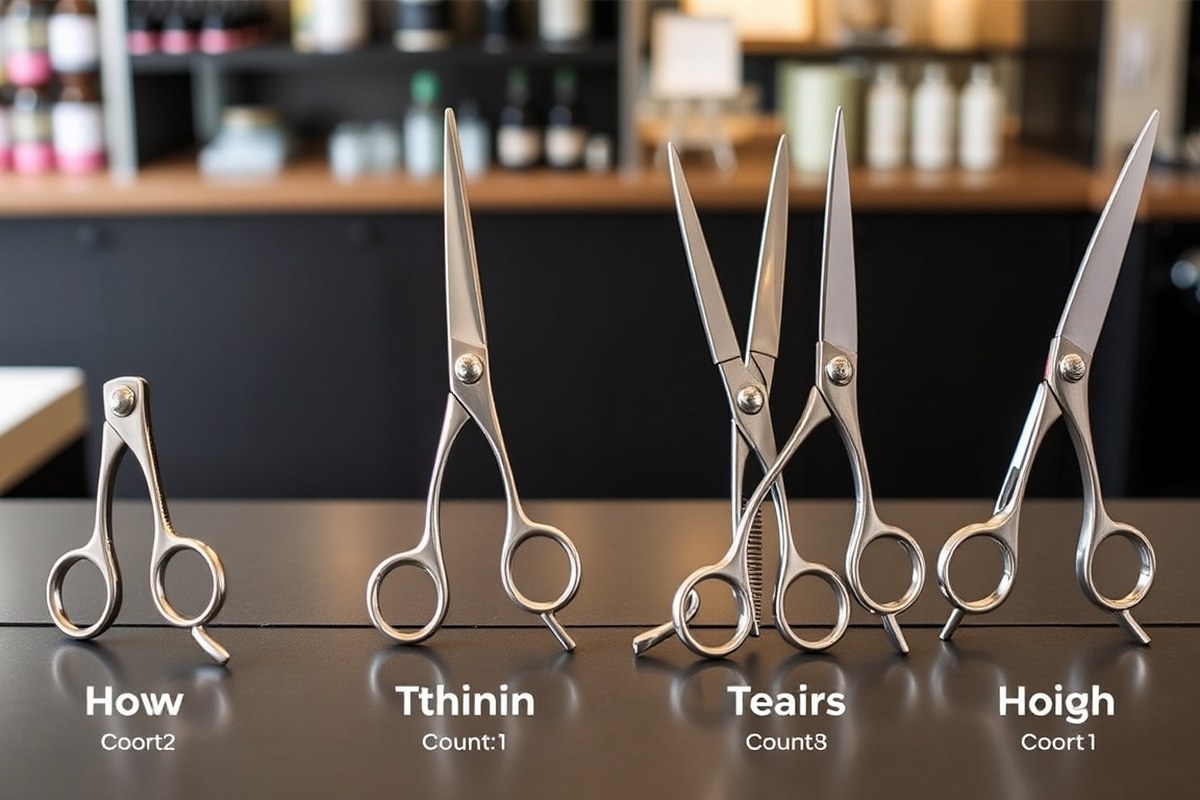
Thinning shears come in different tooth counts, which control how much hair they remove. Lower tooth counts take out bigger chunks.
Higher counts remove less, offering finer control. The right shear depends on the hair’s thickness and the desired effect.
Shears with 6 to 12 Teeth
Shears with very few teeth, usually between 6 and 12, have very wide gaps. They cut large sections of hair at once, so they remove significant bulk fast. This makes them ideal for thick hair or for creating dramatic texturing effects.
Because they take away so much hair, these shears require careful handling. Overusing them can lead to uneven spots or a choppy look. Professionals often use them sparingly to remove visible chunks and add strong texture.
Shears with 14 to 20 Teeth
This range is a middle ground. The teeth are wider than standard thinning shears.
They are not as wide as chunking shears. They create soft texture and movement by removing moderate hair amounts.
These shears suit clients who want some weight reduction but still maintain a natural look. These are often called texturizing shears.
They work well on medium to thick hair. They improve style flow without thinning too much.
Shears with 20 to 40 Teeth
Shears in this count are the most common thinning shears, typically between 28 and 40 teeth. They remove less hair per cut, giving a soft blend and subtle weight reduction. The finer cuts help maintain fullness while reducing bulk gently.
Shears with higher tooth counts are best for fine or thin hair. They keep the look natural without over-thinning, which could cause the hair to look sparse. Stylists use these for finishing touches and blending layers smooth.
| Shear Type | Tooth Design | Primary Use |
|---|---|---|
| Chunking Shears | Very wide teeth, 5, 8 notches | Removing visible chunks for dramatic texture |
| Texturizing Shears | Wider teeth, fewer notches | Creating movement and soft texture |
| Thinning Shears | 28, 40 teeth, moderate spacing | Bulk removal, weight reduction |
| Blending Shears | Fine, close-set teeth | Blending layers with minimal removal |
These tooth designs meet different styling needs, depending on hair thickness and texture. Chunking shears suit thick hair to remove big sections.
Blending shears work best for light finishing on fine hair. Texturizing shears fill the gap with soft shaping.
Always start with dry hair to see the natural bulk before thinning with these shears.
How to Hold and Angle Thinning Shears for Professional Cuts
Hold thinning shears much like regular scissors. But pay close attention to your grip and angle.
Using the right finger placement and a slight cutting angle ensures smooth, precise thinning. Ergonomic options like swivel thumb shears can ease hand fatigue during long sessions.
Proper Finger Placement
Put your thumb in the round thumb ring. Place your ring finger in the finger hole on the opposite handle.
Keep your pinky resting on the tang, the small protrusion on the handle. This grip controls the shears and prevents strain on your hand and wrist.
Hold the shears like this for steady, precise movements. Use your middle and index fingers to hold the handle’s outside.
This gives you full control during the cut. Avoid gripping too tightly; a relaxed hand reduces fatigue and improves accuracy.
Recommended Cutting Angles
Hold the thinning shears at roughly a 45-degree angle to the hair shaft. This angle lets you cut through some strands while leaving others untouched. Aim to cut halfway down each hair section for a natural blend.
Adjust the angle slightly for different effects, a steeper angle will remove more bulk. A flatter angle softens texture. For point cutting techniques, hold the shears vertically and snip the ends to blend softly.
Try sliding the shears down the hair shaft for a gradual texturizing effect. Keep your hand steady and your angle consistent to avoid harsh lines or choppy textures.
Use of Swivel Thumb Shears for Comfort
Swivel thumb shears have a rotating thumb ring that aligns better with your natural hand position. This design reduces wrist and hand strain when thinning hair for long periods. Many professionals prefer swivel shears to avoid discomfort.
These shears also improve control by allowing more fluid movements. The price tends to be higher, often between $100 and $250.
But they can be worth it for stylists cutting multiple clients daily. Consider trying swivel shears if you notice hand fatigue or tightness.
Follow these steps to hold and angle thinning shears correctly for smooth, professional cuts:
- Insert your thumb into the thumb ring and your ring finger into the finger hole.
- Rest your pinky on the tang for balance and support.
- Keep your grip firm but relaxed to prevent hand tension.
- Position the shears at a 45-degree angle to the hair section.
- Cut halfway down the hair shaft to thin without removing too much.
- Use vertical cuts for point cutting or slide the shears for texturizing.
- Switch to swivel thumb shears if you feel wrist or hand discomfort.
Best Hair Types and Situations for Using Thinning Shears
Thinning shears work best on straight, wavy, or fine hair that lacks volume. They help remove bulk without changing the hair length. This makes them ideal for clients needing subtle blending or texturing.
For thick or coarse hair, choose thinning shears with fewer teeth. Aim for about 15 to 25 teeth. This helps remove more weight effectively.
Starting the cut from the mid-lengths, not the roots, helps create a natural look without patchiness. Using them carefully also prevents uneven thinning, which is common on dense hair.
Curly or very wavy hair usually doesn’t respond well to thinning shears. They can cause frizz and disrupt the curl pattern. Chunking shears work well for curls.
They trim bulk without harming texture. Other weight-removal tools work, too.
Don’t use thinning shears on damp or freshly washed hair. Dry hair shows the real pattern and volume.
So you can see where thinning is needed. Trying to thin wet hair leads to over-cutting and uneven results once the hair dries.
Short hair also benefits from thinning shears, though technique changes slightly. Using light snips and working slowly helps maintain shape. A heavy hand can ruin the style by removing too much volume or creating bald spots.
Thinning shears are not suitable when you want to remove large sections or create bold layers. They excel at softening lines and blending, not cutting solid chunks of hair. In those cases, use regular scissors or chunking shears instead.
Step-by-Step Guide: How to Use Thinning Shears Safely and Effectively
Using thinning shears means working carefully to reduce bulk without cutting straight lines. Start by sectioning the hair, then cut at the mid-lengths while keeping distance from the scalp. Work in small sections for smooth, natural results.
Preparing and Sectioning Hair
Dry or slightly damp hair is best for thinning shears use. It helps you see how the hair falls naturally before you start cutting.
Divide hair into manageable sections. Use clips to separate top, sides, and back for even thinning.
This step makes sure you thin in an organized way. Uneven sections cause patchy results that take longer to fix.
Starting at Mid-Lengths, Not Roots
Place the thinning shears around 5 to 10 centimeters away from the scalp. This distance keeps the base volume intact and prevents short hairs from sticking out.
Focus on mid-lengths or near the ends to soften thick hair without harsh lines. For very long hair, aim halfway between roots and ends.
Cutting too close to the roots can create unwanted gaps and uneven bulk. Stick to mid-shaft cuts for a controlled blend.
Cutting in Small, Controlled Sections
Lift small sections of hair between your fingers before cutting. This approach gives you precision and prevents over-thinning in one spot.
Make small, spaced cuts rather than one long slice. This produces a softer texture and a natural finish.
Stop cutting if the shears catch or pull on the hair. It means you’re cutting too much or the blades need adjustment.
- Start with clean, dry or slightly damp hair.
- Divide the hair into clips or sections for control.
- Hold a small hair section between fingers, away from scalp.
- Position thinning shears about 5 to 10 cm from scalp at mid-lengths.
- Make small, spaced cuts along the hair section, moving toward ends.
- Check for smooth texture and stop if cutting feels rough.
- Repeat section by section, blending as you go for even thinning.
- Review the overall look and thin more only to soft blend.
Keep the shears away from the scalp by a safe distance. This avoids cutting too much volume near the roots. This protects hair shape and keeps styling easier.
Common Thinning Shears Mistakes and How to Fix Them
Cutting too close to the scalp is a frequent mistake with thinning shears. This causes short, uneven pieces that stick out as hair grows.
Keep the shears at least an inch away from the roots. This prevents visible gaps and uneven texture.
Over-thinning a single area leads to patchy spots and uneven weight in the hair. Instead of cutting repeatedly in the same place, shift towards the hair ends or nearby strands. This spreads out thinning and keeps the hair balanced and natural-looking.
Curly and kinky hair types need special care. Cutting curls directly with thinning shears often breaks the curl pattern, causing frizz.
For tighter curls, avoid using thinning shears unless you have plenty of experience. It helps keep the texture smooth and predictable.
- Use gentle snips to remove small amounts of hair at one time.
- Do not cut too close to the scalp, stay 1 inch or more away from roots.
- Move down the hair shaft if more thinning is needed instead of repeating cuts.
- Work on nearby sections instead of over-thinning one spot.
- Comb and separate bangs, then cut vertically for a softened edge.
- Avoid thinning shears on tight, kinky curls without professional training.
Fixing damage from improper thinning starts by growing out the uneven spots with minimal cutting. Use regular scissors instead to even out rough patches once the hair grows longer. Conditioning treatments also help reduce frizz caused by harsh or excessive thinning.
Trying to fix over-thinning by cutting even more can make the problem worse. When volume loss or choppy areas appear, focus on styling techniques.
Add body and hide spots. Using mousse or light hair oil can give fullness and shine to thinning areas.
Can Thinning Shears Damage Hair? What to Know About Safety
Thinning shears can damage hair if used carelessly or too often. Using them on wet hair increases the risk of uneven cuts and breakage. Always work on dry hair to keep control and predict how much hair you remove.
Proper technique means trimming little by little and checking your progress frequently. Avoid cutting too much at once; thinning is subtle work where less is more. Stop as soon as the thickness looks right to prevent thin patches or frizz.
Sharp shears reduce pulling or jagged cuts that stress hair strands. Dull blades can snag or shred hair, leading to split ends and damage. Sharpen thinning shears every few months or when you notice resistance during cutting.
How often you thin hair depends on your hair’s thickness and growth rate. For thick hair, thinning every 4 to 6 weeks helps control bulk without harming texture. Fine or fragile hair needs less thinning, maybe once every 8 weeks or longer.
Proper storage helps keep the shears sharp and functional. Always put them in a protective case after use. This prevents damage.
It also keeps the blade alignment from shifting. This also extends their lifespan, saving you money on replacements.
Using thinning shears carefully prevents unintended damage and maintains healthy hair. Taking time to learn the right angle, pressure, and frequency matters most. This keeps hair looking natural, soft, and full without rough edges or split ends.
How Thinning Shears Compare to Blending, Texturizing, and Chunking Shears
Shears come in different types for specific hair cutting jobs. Thinning shears have evenly spaced teeth on one blade and a straight blade on the other. They remove hair evenly to reduce bulk without changing the haircut shape much.
Texturizing shears look a lot like thinning shears. But their teeth vary in size and spacing.
This design helps remove hair unevenly, creating softer, more textured layers. Blending shears are similar, but they focus more on smoothing harsh lines between sections.
Chunking shears have wider teeth gaps and fewer teeth per blade. Their main job is to cut big chunks of hair quickly. This makes them ideal to drastically reduce volume or create bolder, chunkier styles.
Picking the right shear depends on what you want to do. Use thinning shears for subtle bulk removal or blend lines. Choose texturizing shears when you want soft movement and texture.
Use chunking shears to quickly remove large amounts of hair. They work well when you want strong texture effects. These shears save time and add bold style.
| Shear Type | Tooth Design | Hair Removal Amount | Main Purpose |
|---|---|---|---|
| Thinning Shears | Evenly spaced teeth on one blade | Moderate, uniform | Remove bulk, maintain shape |
| Texturizing Shears | Teeth with varying size and spacing | Light to moderate, uneven | Add texture and movement |
| Blending Shears | Similar to thinning but finer blades | Light, smooth transitions | Blend harsh lines |
| Chunking Shears | Wide teeth, fewer per blade | Heavy, large sections | Remove large sections, bold texture |
Using the right shear makes a big difference in your cut’s finish. Thinning shears keep cuts soft without losing length.
Texturizing shears create more visible layers and movement. Chunking shears change hair volume fast but can look rough if overused.
Don’t apply chunking shears near hairline edges to avoid blunt, uneven looks.
Choosing Thinning Shears: Materials, Brands, and Buying Tips
Look for thinning shears made from high-quality steel like Japanese stainless or carbon steel. These materials hold sharp edges longer and resist rust.
Expect to pay about $30 to $50 for a good beginner pair. Cheaper shears often bend or pull hair instead of cutting smoothly.
Pay attention to the tooth count. Shears typically have 30 to 40 teeth with small gaps. This design controls how much hair is cut each time.
It helps you blend hair smoothly. It avoids hard lines in your cut. Too few teeth can take off too much hair too fast, which damages the style.
Ergonomic design matters, especially if you use thinning shears a lot. Models with a swivel thumb reduce hand strain and improve control.
They cost more but protect your joints and let you work longer without pain. You’ll notice less fatigue after a full day of styling.
Choose trusted brands like OSAKA Scissors. They offer shears crafted for precision, comfort, and long life.
A brand with good reviews usually means consistent quality steel and sharpness. Look for any warranty or blade sharpening service when shopping.
Always keep your thinning shears clean, oiled, and check the tension before each use. Proper care keeps blades sharp and cutting smoothly. It helps avoid snagging or pulling hair, which feels uncomfortable for clients.
Alternatives to Thinning Shears for Bulk Removal and Texturing
You can use regular scissors as an alternative to thinning shears for texturing and bulk removal. You can create texture in hair by using point cutting or slide cutting. These methods don’t make the distinct notches that thinning shears do.
They produce a softer, more natural look instead. Point cutting means snipping into the ends of the hair at an angle.
This technique softens the edges of the cut. It also adds more movement to the hair.
Razors also work well to thin and texturize, especially for softer, more feathered results. Razor cutting slices through hair in a sweeping motion, creating a wispy look.
However, razors can be less precise and sometimes cause split ends if used incorrectly. So, take it slow and only work on dry or lightly damp hair to avoid damage.
Clipper guards help remove bulk quickly. But they shape the haircut more than texture it finely. Using clippers with different guard sizes adjusts how much hair you cut at once.
This method works well for short hair or fades. It blends the hair less delicately than thinning shears or standard scissors. It gives a rougher, more textured finish.
Alternatives like regular scissors and razors offer different levels of control compared to thinning shears. Scissors give you more precision since you decide exactly which strands to cut. Razors feel more freeform and require a gentler hand to avoid harsh lines or frizz.
The tradeoff is the time it takes. Using scissors or razors takes more time than thinning shears. You need to work carefully, cutting strand by strand.
This method requires more patience and precision. Thinning shears are faster since they remove small amounts evenly as you close them.
Good results with scissors mean clean, angled cuts that blend layers without leaving blunt edges. You want to avoid chopping straight across, which creates harsh lines.
With razors, a smooth, feathered finish is ideal. But watch for pulling or snagging during the cut.
For people new to these tools, practicing on longer hair or wigs helps build technique. You’ll learn how to control pressure and angle better over time.
For instance, razor cutting best suits dry hair to see exactly where you cut. Scissors work on damp or dry hair.
Step-by-Step Action Plan for Using Thinning Shears
Follow these steps to get comfortable and safe with thinning shears. Each phase helps you see progress.
- Before you start: Choose thinning shears that match your hair type and skill level. Test them on a small hair section to check smooth cutting.
- Day 1: Hold the shears with your thumb in the lower hole. Put your ring finger in the upper hole. Make sure your grip feels comfortable. Angle shears at 45 degrees to blend hair without harsh lines.
- Week 1: Practice sectioning hair into thin layers before cutting. Trim small amounts with slow, controlled snips and check the bulk reduction often.
- Week 2: Try different tooth counts on a hair strand. See if the texture looks fine or chunky. Notice how it changes with each cut. Notice how higher tooth counts remove less hair.
- Week 3: Use thinning shears on thick or curly hair. Change the angle and how often you snip. Watch how the hair looks after each cut. Confirm results by feeling lighter sections.
- Week 4: Stop cutting frequently to comb and inspect the hair flow. Aim for smooth blends without visible gaps or uneven thin spots.
- Ongoing: Clean and oil your shears regularly to keep the blades sharp and safe. Check for damage if hair pulls or cuts unevenly.
Frequently Asked Questions
How Does Tooth Count on Thinning Shears Impact Texture Results?
Tooth count controls how much hair is cut. More teeth means finer thinning; fewer teeth remove bulk faster. Use high tooth counts for subtle blending and low counts for heavy bulk reduction.
Can Thinning Shears Create Movement in Haircuts Without Losing Length?
Yes, they cut some strands while leaving length intact. This adds movement, making hair look less heavy or flat. Use thinning shears to shape hair without making it shorter.
Are Thinning Shears Effective on Curly or Coarse Hair Types?
They can be, but use with care on curly or thick hair. Thinning shears help reduce bulk but might cause frizz if overused. Always check hair’s natural pattern before cutting.
Can You Use Thinning Shears on Wet Hair?
It’s best not to. Wet hair stretches and may cause uneven cuts. Always use thinning shears on dry hair for smoother, controlled results.
Is a Longer Blade Length Better for Thinning Shears?
Not necessarily. Most thinning shears are 5 to 7 inches.
Longer blades cover more area but might feel less precise. Choose size based on comfort and cut style.
How Often Should Professional Stylists Replace Thinning Shears?
Replace or sharpen them as soon as they dull. Dull blades pull hair and cause uneven thinning. Regular maintenance keeps cutting smooth and safe.
Key Points to Remember
Thinning shears remove bulk by cutting select strands without changing length. Use them with care and the right technique to shape hair smoothly. Try thinning shears on a simple trim next time to see the difference in texture.