How to Straighten Back of Hair: 8 Effective Ways for Smooth Results
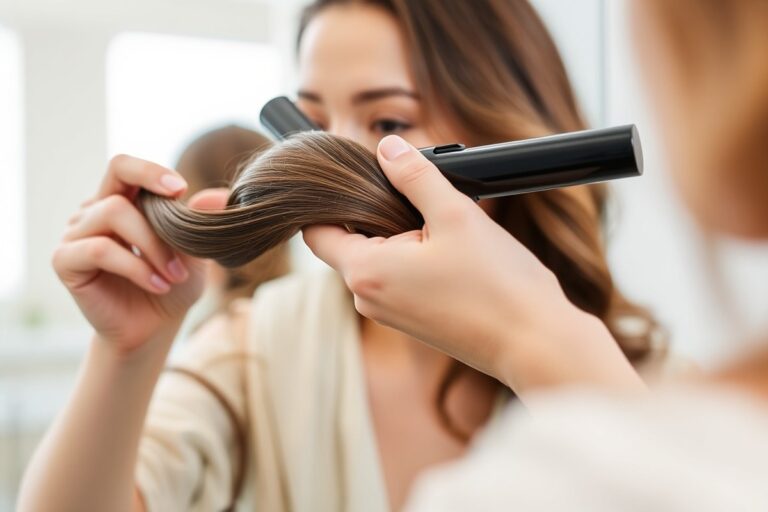
How to straighten back of hair can feel tricky without help. The best way is to section your hair and use the right tools carefully. Starting with dry, detangled hair makes the process easier and prevents damage.
Begin by drying your hair until it’s about 80% dry using rough drying motions. This helps control frizz and speeds up straightening later. Always work in small sections at the back to get smooth, even results.
Pick the right heat setting for your hair type on the flat iron. Using the wrong temperature can cause heat damage. Adjust the heat to keep your hair healthy.
Fine hair needs less heat than thick or coarse hair. Also, keep your iron moving to prevent burning any part.
Key Takeaways
- Straighten back hair by dividing it into small, manageable sections.
- Make sure your hair is completely dry before using heat tools.
- Use rough drying to get hair about 80% dry before the flat iron.
- Adjust your flat iron temperature based on your hair thickness and damage.
- Brush each section straight before ironing for smoother results.
- Keep the flat iron moving steadily to avoid hot spots and damage.
1. How to Straighten the Back of Your Hair at Home

Straightening the back of your hair at home is easy with the right approach. You can do this without professional help by taking your time. Use mirrors to see hard-to-reach areas clearly.
This way, you avoid missing spots on your hair. Sectioning your hair well helps you manage hard-to-see spots.
It makes reaching those areas easier. This keeps the process organized and smooth.
Start by dividing your hair into manageable sections. Using clips keeps each hair section separate and tidy. This lets you focus on one area at a time.
It prevents hair from getting tangled again. Your thick hair needs smaller sections for even straightening.
This helps heat reach every part properly. It makes the style last longer.
- Part your hair in the middle. This helps bring the back hair around your shoulders for easier access.
- Clip the top layers of hair up. Work on the lower sections first, then release the clips as you move up.
- Use a handheld mirror with a larger mirror in front. This “mirror trick” lets you see the back clearly and avoid missed spots.
- Straighten each section slowly. Start from the roots and pull the iron or brush down to the ends.
- Straighten hair by pushing it backward. This direction helps push hair away from your face and smooth the back.
- Check your progress often in the mirrors. Adjust sections or redo any wrinkled spots immediately.
- Finish by running your fingers through hair. This helps spot tangles or unevenly straightened areas to fix them quickly.
Adjust your flat iron temperature to suit your hair type. Fine hair gets 250-300°F, average 300-350°F, and coarse hair 350-400°F. This prevents damage while straightening. Using heat protectant spray reduces damage.
You can skip heat by wrapping damp hair or using rollers. Leaving them overnight stretches curls naturally.
This is a gentler way to straighten hair. Both methods help smooth your hair without breakage.
Straightening the back of your hair usually takes 15 to 30 minutes. Your hair’s thickness and length affect the time needed. Plan accordingly for the best results.
Be patient; rushing often causes uneven results or extra damage. With practice, you’ll master handling the back just like the rest of your hair.
2. Tools and Products Needed for Straightening Back Hair

To straighten the back of your hair well, you need the right tools. A quality flat iron with adjustable heat is key. For most hair types, set the iron between 280°F and 320°F. This range works well for fine or color-treated hair.
It helps prevent damage while straightening. A wide-tooth comb or paddle brush helps detangle and smooth your hair before straightening.
Products are just as important. Use a heat protectant spray to shield your strands from damage caused by hot tools. Shampoo and conditioner that smooth and repair hair make a great base for straightening.
Choose a smoothing shampoo and conditioner if you straighten hair often. Pick products that help repair hair damage. This care keeps hair healthier over time.
Apply lightweight, volumizing mousse on damp hair before blow-drying. It protects fine hair from heat damage. This step adds volume while defending your strands.
- Flat iron with adjustable temperature settings
- Wide-tooth comb or paddle brush
- Heat protectant spray (like Aussie Total Miracle Heat Protectant)
- Smoothing shampoo and conditioner
- Lightweight volumizing mousse (for fine hair)
- Smoothing serum with heat protection (natural ingredients preferred)
- Blow dryer (use only when hair is 40-50% dry)
Protecting your hair from heat matters because straightening tools remove moisture and cause breakage. Always spray heat protectant evenly on the back sections. Blow-dry your hair until it’s about half dry before you start straightening to help reduce damage.
Don’t use the iron’s highest setting unless your hair is thick or very curly. High heat can cause damage to finer hair types. Always choose the safest heat level.
Avoid straightening hair daily at high heat. It leads to dryness and split ends over time.
Heatless options like hair wrapping or smoothing serums can help straighten hair. These methods reduce the risk of heat damage. They are good choices for gentle styling.
Some natural oils absorb better and keep strands smooth without chemicals. These are great for less frequent straightening or to reduce heat use. Knowing your hair type helps you pick the right tools and products for the best results.
3. Choosing the Right Straightening Method for Your Hair Type
Knowing your hair type helps you pick the best straightening method. Fine or wavy hair often needs less heat and simpler tools.
Thick or very curly hair needs stronger heat for smooth results. You must handle it carefully to avoid damage.
Thick or coarse hair should use a flat iron set between 375°F and 450°F. Using too low heat might leave the hair only partially straightened. Fine hair works well with lower temperatures, usually around 300°F to 350°F, avoiding damage and dryness. Add tension by pulling hair tight as you use the iron.
Move the iron from root to tip slowly. This helps smooth curly or wavy hair well.
| Hair Type | Straightening Temperature | Best Tool Features | Recommended Technique |
|---|---|---|---|
| Thick/Coarse | 375°F to 450°F | Wider plated flat irons (1.5 to 2 inches) | Iron in small sections, multiple passes if needed |
| Fine | 300°F to 350°F | Narrow plates, lower heat capacity | One smooth pass with gentle tension |
| Wavy | 300°F to 400°F | Tourmaline and negative ion infusion | Use tension and slow iron glide |
| Curly | 350°F to 450°F | Wide plates, high heat retention | Separate tight curls, straighten small sections |
Curly hair often needs multiple passes to get fully straight. Sectioning your hair carefully helps to straighten every part evenly. For wavy hair, tourmaline-infused tools reduce frizz and keep the cuticle smooth.
Heatless methods like hair wraps work best on wavy or light curls. They don’t completely straighten very curly or coily hair. Permanent relaxers remove curls entirely but take more time and care.
They cost more than daily styling. Flat ironing your hair at home usually takes two to four hours. Thick or long hair needs more time to straighten.
4. Heat Straightening: Step-by-Step Flat Iron Guide for the Back
Flat ironing the back of your hair needs good prep and careful sectioning. Use the right temperature to avoid heat damage. This helps you straighten your hair safely and well.
It usually takes about 15 to 30 minutes, depending on hair thickness and texture. The key is to work in small sections and avoid overheating to prevent damage.
Preparing Hair for Flat Ironing
Start with completely dry hair to protect strands from heat damage. Use a heat protectant spray all over to shield your hair from high temperatures. Comb through your hair gently to get rid of tangles.
This helps the flat iron slide smoothly. It also stops your hair from catching on the iron.
Wait a few minutes after applying the heat protectant so it can set well. This step cuts down on frizz and protects your hair. It creates a barrier between your hair and the iron.
This keeps your hair healthier during straightening. Remember, consistently using a heat protectant reduces the risk of frying your hair.
Effective Sectioning for Back Hair
Divide your hair into four to six manageable sections to keep control. Use clips to hold the top layers away from your face. This lets you focus on straightening the lower parts first.
It keeps hair organized and easier to handle. Smaller sections allow the flat iron to work evenly and efficiently without missing strands.
Take horizontal layers about 1-inch thick for each pass with the flat iron. Keeping sections this size avoids uneven heat distribution, reducing the chance of ridges or kinks. Start flat ironing from the nape of your neck.
Work upward toward the crown by unclipping one section at a time. This method gives you better control and results.
Recommended Temperature and Technique
Set the flat iron temperature between 300°F and 375°F for most hair types. Fine or damaged hair should stay near 300°F to avoid burning. Thicker, coarse hair can handle up to 375°F but don’t go higher to prevent breakage.
Clamp the flat iron close to the roots of each section without touching the scalp. Glide the iron slowly down the hair shaft in one smooth move. Each pass should take about 5 to 10 seconds.
Going too fast can leave your hair uneven. Repeat on each section only once or twice to minimize heat exposure.
Hold a comb in your other hand besides the flat iron. Use it to smooth and catch the hair section right before the iron. This step helps avoid tangles and rough spots.
This extra step helps straighten strands more evenly. Avoid rushing or pressing too hard; gentle tension is enough for sleek results.
- Apply heat protectant to clean, dry hair and comb through.
- Divide hair into four to six sections, clipping the top layers up.
- Set the flat iron temperature based on your hair type.
- Take about 1-inch thick layers from each section.
- Clamp the iron near the roots, avoiding the scalp, then glide down slowly.
- Use a comb ahead of the iron for smoother passes.
- Repeat the flat iron pass once or twice per section as needed.
- Unclip next section and repeat until all hair is straightened.
5. Heatless Methods to Straighten the Back of Hair
Yes, you can straighten the back of your hair without heat. Heatless methods like using rollers, wrapping, or natural masks reduce damage and smooth hair gently. These methods take time but protect your hair’s health while creating a straighter look.
Using Large Rollers Overnight
Large rollers are a gentle way to straighten hair naturally. They stretch hair out while it dries, cutting curls or waves without heat. This method works best on damp hair and can last overnight for maximum effect.
Follow these steps for using large rollers at home:
- Start with damp hair that’s been gently towel-dried but not completely dry.
- Divide your hair into sections around 2 to 3 inches wide.
- Wrap each section tightly around a large roller, rolling from the roots to ends.
- Secure the rollers so they don’t slip while you sleep.
- Cover your hair with a silk scarf or sleep on a silk pillowcase to reduce friction.
- Leave rollers in overnight, allowing your hair to dry fully and set straight.
- Remove the rollers carefully in the morning and gently finger-comb your hair.
Don’t forget silk or satin wraps; they keep hair smooth and cut frizz.
Wrapping and Braiding Techniques
Wrapping hair means pulling it flat around your head. You then secure it with pins or a scarf.
This method works best on damp hair and helps align hair strands for a straighter look. Braiding the back in tight, straight cornrows also stretches naturally curly or wavy hair.
To wrap your hair:
- Start with damp hair and apply a smoothing serum for easier wrapping.
- Comb your hair straight back and wrap it flat around your head.
- Secure ends with pins and tie a silk scarf tightly around the hair.
- Leave the wrap on for several hours or overnight for best results.
For back cornrows:
- Moisten your hair slightly for easier braiding.
- Part your hair into straight sections starting at the nape.
- Braid each section straight back, keeping braids tight but comfortable.
- Finish with a smooth ponytail or bun as desired.
Be careful not to braid too tightly. It may cause scalp pain or hair breakage.
Natural Masks and Oils to Smooth Hair
Natural masks with ingredients like coconut milk or aloe vera help smooth hair and reduce frizz. Applying oils such as argan or jojoba after straightening seals moisture and adds shine. These treatments take time but protect hair from heat damage.
To apply a natural mask:
- Mix coconut milk or aloe vera gel for an easy smoothing mask.
- Apply the mask evenly throughout damp hair, focusing on the back.
- Cover your hair with a shower cap and leave it on for 30 to 60 minutes.
- Rinse out with cool water and follow with a gentle conditioner if needed.
- After drying, smooth a few drops of natural oil onto the hair ends.
Avoid heavy oils at the roots to prevent greasiness while still smoothing ends.
6. Maintaining Straight Hair at the Back: Daily Care and Styling
Keep your straightened hair at the back smooth by using smoothing shampoos and conditioners. These products add moisture and reduce frizz without straightening your hair. Try products with ingredients that coat your strands and keep them soft.
Look for those labeled “smoothing” or “sleek.” These help control frizz and add shine.”
After washing, apply a styling product designed to hold straight hair, such as a plant-based smoother. This helps lock in the style and fights humidity. Use a dime-sized amount on damp hair.
Focus on the back to avoid buildup. Too much can weigh down roots and flatten hair.
Humidity can curl your hair back quickly. Protect your straight hair by applying an anti-frizz serum or cream before heading outside. These products form a barrier against moisture that causes hair to swell and bend.
A good pick is a silicone serum. It usually costs $15 to $25. One bottle can last for several months.
To keep your hair straight longer, don’t touch or brush it a lot. Too much handling causes waves or frizz. Let it rest during the day.
Frequent contact causes oils and sweat to break the straight style. Instead, tie your hair loosely in a bun or wrap it around your head before bed. This prevents overnight creasing and helps preserve the smooth texture.
Heat styling tools keep your hair straight only until the next wash. Between washes, freshen up your style with a flat iron. Use low heat to avoid damage.
One quick pass is enough if needed. Use a heat protectant spray to reduce damage. This daily step takes about five minutes and helps your hair stay straight.
Hair type makes a difference in how long straightening lasts. Curly hair (Type 3) often needs more heat and stronger hold products. Be careful not to overdo heat or product to avoid dryness or breakage.
Lighter products keep fine or straight hair shiny and soft. They won’t weigh your hair down. Use these for better shine and control.
7. Common Mistakes When Straightening the Back Hair and How to Fix Them
One common mistake is not smoothing your hair well before straightening. Curls or waves that stay tight mean the flat iron won’t fully straighten hair.
Blow drying with a round brush helps loosen curls and smooth the strands first. This step removes coil shapes that catch heat unevenly.
Another problem is uneven straightening, often caused by taking too large sections of hair. When sections are thick, the heat doesn’t distribute evenly, leaving some parts still wavy.
Use smaller sections around 1 inch wide. You’ll spend more time but get a straighter, consistent look.
Frizz after straightening usually means your hair didn’t dry fully or wasn’t protected. Straighten only dry hair to avoid heat damage and frizz.
Applying a heat protectant spray before you start helps lock in moisture and smooth hairs. Also, avoid touching hair too much after you finish; this causes static and frizz.
- Use a blow dryer with a nozzle to smooth hair before straightening.
- Separate hair into 1-inch sections to ensure even heat distribution.
- Apply a heat protectant spray before using a flat iron.
- Only straighten completely dry hair to prevent breakage and frizz.
- Limit passes of the flat iron to 1 or 2 per section.
- Keep flat iron temperature between 300°F and 350°F for most hair types.
- Use a fine-tooth comb to guide hair while straightening the back.
Heat damage happens when the iron is too hot or applied too often. Dryness or split ends mean you should lower the temperature. Use fewer passes too.
Most hair gets damaged above 350°F, so staying below this range helps. Use conditioning treatments weekly to repair minor damage.
Fixing uneven straightening at the back can be tricky without help. Use two mirrors to check behind your head. Ask a friend to help spot missed spots.
A comb can help pull the hair tight before you slide the iron down. Keeping calm and patient gives the best results.
8. When to Choose Professional Treatments for Back Hair Straightening
Consider professional straightening if you want long-lasting straight hair. Chemical treatments change your hair’s structure, unlike temporary DIY methods. These treatments suit hair that’s very curly or frizzy and hard to manage with home tools.
Types of Professional Straightening Treatments
Popular options include keratin treatments, Japanese thermal straightening, and hair rebonding. Each uses chemicals to alter your hair’s natural texture. Japanese straightening offers permanent pin-straight results but requires a salon visit.
Keratin treatments smooth hair with less damage but usually last 3 to 5 months. Hair rebonding creates straight hair for several months but may damage fragile strands if done wrong. Your stylist will pick one based on your hair type and condition.
Pros and Cons of Chemical Straightening
Chemical straightening delivers permanent or semi-permanent results that last months. With these treatments, you don’t need daily heat styling, which can save time and reduce breakage. However, chemicals weaken hair and may cause dryness or breakage if not done right.
Using a licensed professional helps minimize risks by applying the correct products safely. Not following aftercare guidelines can lead to frizz, damage, or uneven texture. Always check if the salon tests for allergies or do strand tests first.
Never try chemical straightening without consulting a hair professional to avoid damage.
Maintenance and Touch-Up Scheduling
Touch-ups depend on how fast your hair grows and the treatment type. Usually, you’ll need a touch-up every 3 to 6 months to keep new growth straight. Avoid overlapping chemicals on already treated hair to prevent serious damage.
Keep hair 100% dry before styling to maintain straightness and reduce heat damage. Check your hair’s back using a handheld mirror to spot any missed spots after straightening. Good aftercare products can extend the smooth look between salon visits.
Step-by-Step Action Plan to Straighten the Back of Your Hair
Follow these easy steps to get smooth, straight hair at the back. Test each step to see how well your hair responds.
- Before you start: Choose the right tool and products for your hair type. This avoids heat damage or ineffective straightening.
- Day 1: Wash hair with a smoothing shampoo and conditioner. Hair feels softer and less frizzy once dry.
- Day 1: Apply heat protectant spray evenly to the back. Hair should feel coated but not sticky.
- Day 1: Section your hair in layers starting from the bottom. Check that you can reach all parts easily.
- Day 1: Use a flat iron on small sections slowly and evenly. Hair should feel warm but not burn or smoke.
- Day 2 and beyond: Keep hair moisturized daily with a light serum. Hair looks shiny and stays straight longer.
- After 1 week: Adjust your method if needed, try different temperatures or products. Notice if straightening lasts or hair feels dry.
Frequently Asked Questions
How Can I Use a Second Mirror to Straighten the Back of My Hair?
Hold one mirror in front of you and the other behind your head. This way, you can clearly see the back of your hair. It makes straightening easier in spots you cannot see.
You get better control over those hard-to-reach spots. Adjust the flat iron as needed after checking.
What Temperature Should I Set My Flat Iron for Thick Hair?
Use 350-400 degrees for thick or coarse hair. This heat level smooths the hair without burning it. Always start at a lower setting to test before going hotter.
Can I Straighten Naturally Wavy Hair Without Heat?
Yes, you can use large rollers to stretch hair overnight. This method reduces damage and leaves hair smooth and straight. It works best on wavy rather than curly hair.
How Does Rough Drying Help with Straightening Hair?
It dries your hair until about 80% done by shaking the dryer back and forth. Rough drying helps reduce setting time with the flat iron. It keeps your hair less damp and easier to style.
Is It Necessary to Comb Hair Before Straightening the Back?
Yes, use a fine-tooth comb while hair is damp for an even base. This step prevents tangles and helps the flat iron glide smoothly. It improves the final straight look.
What Are Some Heatless Ways to Straighten Hair at the Back?
Try overnight hair bands or flat wraps to keep hair stretched. Natural masks with ingredients like milk can also smooth curls. These methods are safe and reduce heat damage.
Final Thoughts
You can get the back of your hair straight with the right steps and care. Start with good products and work carefully. Try one method today to see the difference.