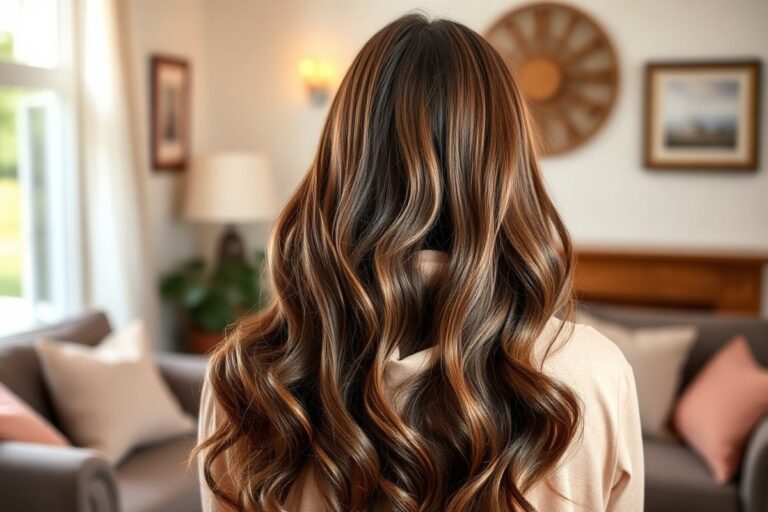
How to Curl with a Wand: Simple Steps for Long-Lasting, Perfect Curls
Learning how to curl with a wand can make your hair look easy styled. The best way is to start with clean, completely dry hair. Wet or damp hair breaks easily and won’t hold the curl well.
Choose sections about 1 1/2 inches wide for the best curl shape. Wrap the hair slowly around the thickest part of the wand to get smooth curls. Leaving the ends out a bit creates trendy beach waves instead of tight rings.
Set the right heat for your hair type before you start. Thin or color-treated hair needs lower heat around 300°F. Thick or coarse hair can handle 380°F to 400°F. This protects your hair and makes curls last longer.
Key Takeaways
- Always curl 100% dry hair to avoid damage and hold curls better.
- Use 1 1/2 inch sections for medium curls, or adjust to hair type.
- Wrap hair around the fattest part of the wand slowly for smooth curls.
- Leave 1 to 2 inches of hair ends out for a natural, beachy look.
- Set your wand temperature based on your hair type. Use 300 to 350°F for fine hair. For thick hair, set it up to 400°F.
- Start with lower heat and increase only if curls don’t hold well.
How to Curl Hair with a Wand: Step-by-Step Process
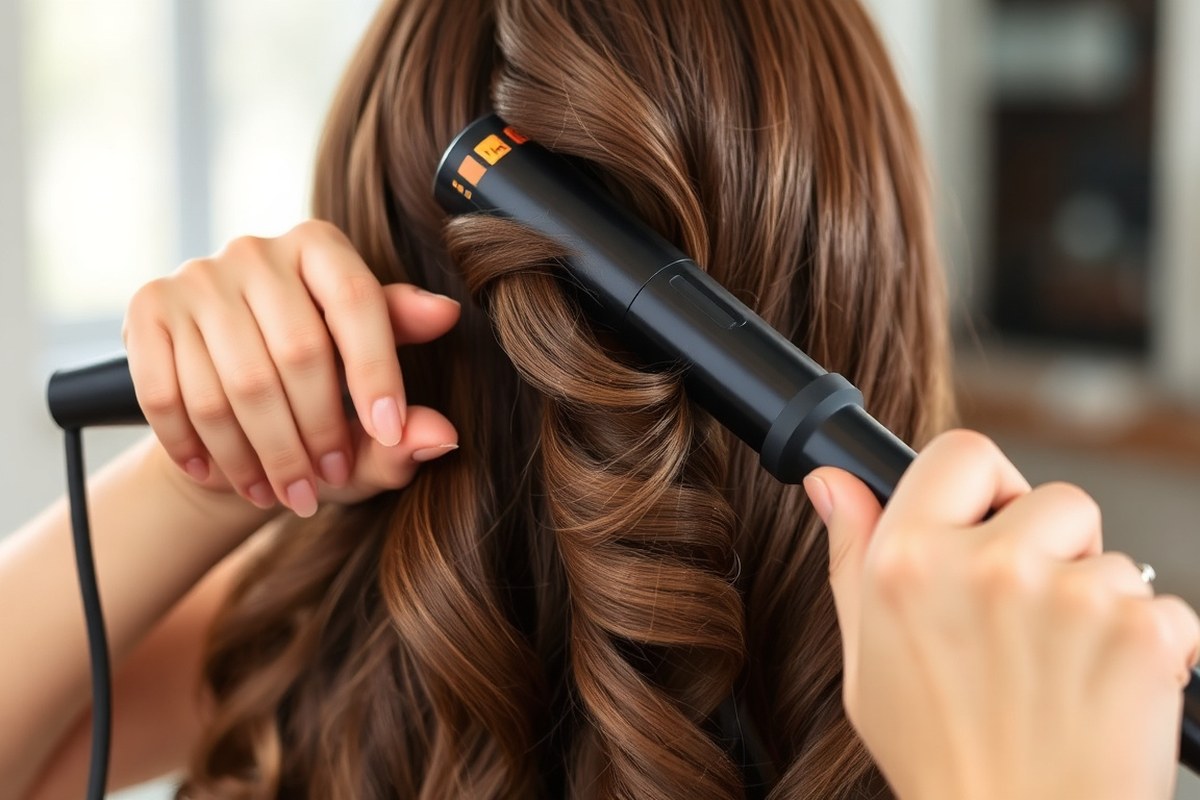
Start by dividing your hair into manageable sections. Each section should be about 1 inch wide for the best curls. Smaller sections help the heat reach your hair evenly and create tighter curls.
Use a curling wand at a comfortable heat setting. Start wrapping your hair around the barrel from the roots. Begin at the thickest part if the wand narrows.
Wrap your hair to the tips for best results. Wrapping the hair tightly lets you control the curl shape precisely.
- Separate a 1-inch section of hair from your head.
- Hold your curling wand vertically and place the barrel near the roots.
- Wrap the section of hair around the barrel, moving from the root toward your ends.
- Keep your hair wrapped for 5 to 10 seconds, depending on hair thickness.
- Release the hair gently into your palm to let the curl cool and hold shape.
- Repeat with all sections until your whole head is curled.
Leave about a half-inch of ends out for loose waves. Curl the ends fully for tighter spirals if you want. Choose your style based on how much hair you wrap.
Cooling the curl fully in your hand helps it keep the shape longer. Avoid rushing this step to prevent curls from falling flat.
For layered hair, twist the section once before wrapping. This adds more definition to your curls. Be careful not to burn your fingers when curling.
Keep your fingers clear, especially near the hot wand. Stay alert as you wrap hair close to it.
Choosing the Right Curling Wand and Barrel Size

Barrel size greatly impacts the shape and size of your curls. A smaller barrel creates tighter curls or waves, which work well for short hair or bangs. Larger barrels suit long hair and give loose, beachy waves.
Curly styles change depending on the barrel shape too. A tapered barrel starts narrow and gets wider at the end. It makes curls tighter at the roots.
The ends of the curls are looser. A uniform barrel curls hair evenly from root to tip. Knowing your goal helps you pick the right wand.
Choosing the right curling wand starts with matching barrel size to hair length and curl style. Use the table below for easy guidance on barrel size range and curl effects.
| Hair Length | Recommended Barrel Size | Typical Curl Style |
|---|---|---|
| Short (chin to shoulders) | 13mm to 25mm | Tight curls, defined waves |
| Medium (shoulder to mid-back) | 18mm to 25mm | Natural curls, soft waves |
| Long (mid-back and longer) | 25mm to 32mm+ | Loose waves, voluminous curls |
Short hair or bangs respond better to smaller barrels. They let you grip and twist hair easily around the wand. Longer barrels can be hard to manage with short strands and might not hold curls well.
The barrel shape matters when you want curl variation. Use a tapered wand for curls that loosen toward the ends. Choose a straight barrel for consistent curls all over.
Hold your hair on the wand for 3 to 4 seconds. This depends on your hair’s thickness. Also, consider how tight you want your curls.
Pick a curling wand that feels comfortable in your hand and heats evenly. Some wands have heat ranges from 250°F to 450°F. But start lower to protect your hair. Test your wand on a small, hidden section before doing a full head.
Setting the Right Heat for Your Hair Type
Set your curling wand temperature by your hair type. This helps protect your strands. It also helps your curls last longer.
Fine or damaged hair needs lower heat. Thick hair requires higher settings for best curl results. Color-treated and hair extensions need special care to avoid damage from heat.
Temperature Range for Fine or Damaged Hair
Fine or damaged hair is fragile and burns easily with too much heat. Keep your curling wand between 250°F and 325°F to protect your strands. This temperature range will help curl your hair without causing breakage or dryness.
Start at the lowest heat setting and test a small section before curling all your hair. The curl should hold after 10 seconds.
Stick with that temperature. Avoid going above 325°F, even if curls seem weak, or you risk damage.
Here’s a quick checklist for curling fine or damaged hair:
- Set temperature to 250°F, 325°F.
- Use small sections for better curl control.
- Limit heat exposure to 8-10 seconds per section.
- Always apply heat protectant spray before curling.
- Test one strand first before styling your whole head.
Temperature Range for Thick or Coarse Hair
Thick or coarse hair holds curls less easily and needs higher heat to shape curls. Aim for 375°F to 400°F with your wand for effective curling. This heat breaks down the heavier strands enough to mold the curl.
Use 1-inch sections for even heat distribution and quicker styling. Holding each section for about 10 seconds usually works well. Don’t exceed 400°F because it can dry out hair and lead to breakage.
Use these tips for curling thick hair safely:
- Set your wand from 375°F to 400°F.
- Divide hair into 1-inch sections for uniform curls.
- Hold each curl for about 10 seconds, no longer.
- Use a heat protectant specifically for thick hair.
- Allow curls to cool completely before touching them.
Adjustments for Color-Treated and Extensions
Color-treated hair can lose vibrancy and break with too much heat. Keep your curling wand temperature at or below 350°F. Use even lower heat around the hairline or damaged spots with adjustable settings.
Hair extensions often react differently to heat than natural hair. Use the lowest effective temperature for them, usually below 350°F. Avoid holding heat too long on extensions to prevent melting or warping synthetic fibers. Follow this checklist when curling treated or extended hair:
- Set heat to 300°F, 350°F for color-treated hair.
- Use the lowest heat possible on hair extensions.
- Apply a heat protectant that suits treated hair.
- Avoid curling the same section repeatedly.
- Test the temperature on a small hidden area first.
Preparing Your Hair for Curling: Tools and Protection
Curling wand works best on completely dry hair. Damp hair can bubble and weaken inside when heated. Spray your hair evenly with a heat protectant before drying and curling.
Heat protectants guard your hair by soaking up heat to prevent harm. Choose sprays made specifically to defend hair against heat styling damage. The Mark Hill Curl Lock Heat Protection Spray is popular and feels light when applied.
Use a comb or brush to smooth your hair before curling. This removes tangles and helps the product spread evenly. Comb section by section after spraying heat protectant to avoid knots.
- Start with dry or day-old hair, it holds curls better.
- Before drying, mist heat protectant all over your hair.
- Comb your hair to remove tangles and distribute product.
- Divide your hair into sections for easy curling.
- Let your curling wand heat before starting.
To curl damp hair safely, try overnight heatless methods like braids or twists. Once fully dry, you can reheat your wand and style. Avoid curling hair that’s partly wet to prevent damage.
Having every tool ready before you start saves time and stress. Good prep means smooth curls and less breakage. Take a few extra minutes to protect, comb, and dry your hair first.
Techniques to Make Curls Last Longer
Cooling your curls right after you style them helps the shape hold better. The curl sets when it cools, so don’t rush this step. Styling products added after curling keep moisture locked in and curls looking fresh all day.
Here are clear steps to make your curls last longer without needing to fix them often:
- Hold the curl on the wand for 8 to 10 seconds. For thicker hair, hold it closer to 15 seconds to set the shape firmly before releasing.
- After removing the wand, cup the curl in your hand. Let it cool in your palm for 3 to 5 seconds. This locks the curl’s shape firmly before it drops.
- Work in small sections to curl your hair. Smaller sections cool better and hold curl longer than big chunks, which fall out faster.
- Apply a heat protectant spray before curling. It shields hair from damage and helps curls stay smooth and glossy.
- Finish with a light hold hairspray after all curls cool. Spray evenly, about 8 to 12 inches away, to keep curls locked in place without stiffness.
- Avoid touching or brushing your curls too soon. Let curls cool completely before styling with fingers; touching too early loosens curls.
- For extra hold, restyle on second-day hair. Hair that isn’t freshly washed sometimes holds curls better and lasts longer.
Using these steps, your curls will stay defined and bouncy throughout the day. The right timing for cooling and setting curls is what really makes the difference.
Hold each curl in your palm for a few seconds. This helps lock its shape. Keep it steady so your curl lasts longer.
Avoiding Heat Damage and Common Curling Mistakes
Not using heat protectant before curling is a common mistake. Heat can damage hair, causing dryness and breakage. Always spray or apply a heat protectant product before turning on your curling wand.
Another issue is holding the hair on the wand too long. This leads to too-tight curls or burns.
Wrap the hair around the wand for about 8 to 12 seconds for most wands. For fine hair, cut curling time to 6 seconds to prevent damage.
Uneven curls usually happen when your hair sections are not the same size. Taking large or uneven sections causes curls to look inconsistent. Use a comb to divide hair into equal 1-inch sections for uniform curls.
- Apply a heat protectant spray evenly on dry hair.
- Use hair clips to section hair for consistent curl size.
- Keep wand temperature between 300°F and 370°F depending on hair type.
- Wrap hair around the wand without touching the base to protect scalp.
- Hold each section for 8 to 12 seconds, then release gently.
- Use fingers or a wide-tooth comb to separate curls once cool.
- Finish with a light mist of flexible hold hairspray to keep curls smooth.
Frizz comes from overheating or curling damp hair. Always curl only dry hair that has heat protection.
Cool your curls completely before brushing or touching to avoid frizz and breakage. Running your fingers through curls will soften them without ruining the shape.
When curls are too tight or uneven, loosen them gently by hand or wide-tooth comb. Avoid brushing firmly as it can create frizz and destroy the curl pattern. Adding a little leave-in conditioner or smoothing serum helps smooth flyaways and reduce frizz after curling.
Curling Techniques for Different Curl Styles
You can make lots of curl styles with one curling wand. Change how you wrap your hair to get different looks. Each way you wrap gives a new style.
Wrapping larger sections loosely gives soft waves, while smaller sections wrapped tightly create spirals. Adjusting where you start wrapping and the barrel size also changes the curl’s shape and volume.
Creating Loose Waves
Loose waves look natural and relaxed. Use larger hair sections and leave the ends out to avoid tight curls at the tips. This method produces beachy waves that work well for casual styles.
- Divide your hair into 2-inch sections for looser waves.
- Hold your curling wand with the barrel facing down.
- Wrap each hair section around the barrel, starting about 2 inches from the roots.
- Leave about 1 inch of hair end free from the barrel.
- Hold the hair for 5 to 8 seconds without tension.
- Release the hair gently from the wand.
- Repeat on all sections, then run fingers through for a tousled look.
Making Defined Spiral Curls
Tight spiral curls need smaller sections wrapped all along the barrel. Using a spiral or conical wand helps guide the hair into well-defined ringlets. Smaller barrel sizes (13 to 19 millimeters) work best for this style.
- Take hair sections about 1 inch wide for tight curls.
- Start wrapping hair tightly from the root down to the tip.
- Wrap the entire section, leaving no hair loose at the ends.
- Hold each wrap for 8 to 10 seconds to set the curl.
- Slowly release hair from the barrel to keep curls intact.
- Use hairspray to keep curls defined and frizz-free.
Volume-Boosting Flat Wrap Curls
The flat wrap technique helps create bigger, bouncier curls with a lot of volume. Don’t pinch your hair flat with the wand. Lay it flat against the barrel instead.
Then wrap your hair around the barrel. This method spreads each strand for fuller curls.
- Divide hair into 1-inch sections for more volume.
- Hold your wand vertically and lay hair flat against the barrel.
- Wrap hair flat and smooth around the wand, keeping it spread wide.
- Hold the section on the barrel for 6 to 8 seconds.
- Release hair carefully to maintain the curl’s bounce.
- Repeat all over and shake out curls gently for volume.
Vintage 70’s Farrah Fawcett Curls
To get that classic 70’s look, start curling lower on the hair near the scalp. Wrap hair away from your face for an elegant sweep. Using a medium barrel (around 25 millimeters) creates the soft but full shape of these curls.
- Part your hair and section about 1.5-inch strands.
- Position the wand 2 inches from your scalp to start curling.
- Wrap hair backwards, away from your face, around the barrel.
- Hold each curl for 7 seconds for shape without tightness.
- Let curls cool before gently brushing for smooth waves.
- Apply a light hairspray to hold the vintage style all day.
Styling Short Hair and Bangs with a Curling Wand
You can curl short hair with a curling wand. Use the right barrel size. Be gentle with your technique.
Smaller barrels work best for short hair. They help create curls without slipping. They also reduce scalp burns.
Learn how to wrap your bangs around the wand. Hold the wand correctly for better results. This makes your style last longer and look natural.
Best Barrel Sizes for Short Hair
Choose a curling wand barrel between 13mm and 25mm for short hair. Smaller barrels give you tighter curls that suit shorter lengths better.
Using a 19mm barrel is popular because it works well to curl hair under 4 inches. A 25mm barrel can create looser waves if your short hair is a bit longer.
- Use a 13mm barrel for very short or layered hair to create defined curls.
- Try a 19mm barrel for loose spiral curls on chin-length styles.
- A 25mm barrel works well for soft waves on short hair just touching your shoulders.
- Ceramic barrels help distribute heat evenly and reduce damage.
- Pick a wand with a tapered or fixed barrel depending on your desired curl shape.
Smaller barrels let you wrap your hair more precisely and stay in control. This is important when working close to your scalp or around your ears.
Techniques for Curling Bangs
Separate your bangs into small sections. Wrap each section around the barrel quickly to avoid overheating and frizz.
Curl your bangs away from your face for a natural look. Hold the hair on the barrel for about 8 to 10 seconds before releasing.
- Comb bangs thoroughly before curling for even heat distribution.
- Use your fingers to hold the ends gently during wrapping for a soft finish.
- For a relaxed wave, only curl from mid-shaft to ends.
- Pin curls after removing the wand to set the shape while cooling.
Pay attention to your bangs after curling to smooth any stray hairs. A light mist of hair spray helps keep the shape without stiffening.
Avoiding Heat Damage on Short Hair
Short hair and bangs can get fragile at the edges. Use lower heat settings, around 300°F or less, to protect hair health.
Limit the time you hold hair on the barrel to 8-10 seconds for fragile areas. Work quickly to prevent dryness and breakage.
- Always apply heat protectant spray before using the curling wand.
- Pick ceramic or tourmaline wands that offer consistent, gentle heat.
- Allow curls to cool pinned before styling or touching.
- Avoid going over the same section multiple times with the wand.
- Give your hair breaks between styling days to recover moisture.
Use a heat protectant every time to keep your short hair safe and shiny.
Careful temperature control and quick hold times help you curl short hair safely. This keeps your curls looking fresh and your hair healthy.
Step-by-Step Action Plan for Curling Hair with a Wand
Follow these steps today to get curls that last without damage. Each step helps you build the right habits.
- Before you start: Wash and dry your hair completely. It works best on clean, dry strands.
- Right before curling: Spray a heat protectant evenly. Your hair should feel light, not sticky.
- Minute 1: Plug in your curling wand and set to the right heat. Check your hair type against the heat chart to avoid burning.
- Minute 5: Divide your hair into manageable sections. Start with small sections for better control.
- Minute 10: Wrap one section around the wand, hold for 5 to 10 seconds. Release carefully to see a springy curl form.
- Minute 20: Repeat the curling on all sections. Avoid touching curls until they cool to keep their shape.
- After curling: Run your fingers through curls or use a wide-tooth comb to loosen them. The curls should feel bouncy, not crunchy.
- Last step: Finish with a light hairspray for hold. Your curls stay put but still move naturally.
Frequently Asked Questions
How Do I Hold the Curling Wand to Avoid Hand Fatigue?
Hold the wand vertically and use your wrist, not your arm, to wrap hair. This reduces strain and helps you curl more smoothly and consistently.
Can I Curl My Hair with a Wand on the Highest Heat Setting?
Using the highest heat can burn your hair, especially if it’s fine or damaged. Stick to a moderate temperature to protect your hair and still get good curls.
Should I Use a Heat Protectant Before Curling with a Wand?
Yes, always use a heat protectant to shield your hair from heat damage. This layer helps keep hair smooth and prevents dryness and breakage during curling.
How Can I Make My Curls Look More Natural with a Wand?
Curl alternating sections away from and toward your face. This creates a more casual, natural look instead of perfect uniform curls.
Is It Okay to Sleep with Curls from a Wand?
Sleeping on curls can flatten them. To keep curls longer, try loosely pinning your hair up or sleep on a silk pillowcase.
Can I Curl Wet or Damp Hair with a Curling Wand?
No, curl only dry hair. Curling damp hair can cause damage and won’t hold the curl as well. Always dry completely before you start.
The Bottom Line
Curling hair with a wand takes practice and the right technique. Start with small sections and protect your hair well. Now, grab your curling wand and try your first curl gently for best results.