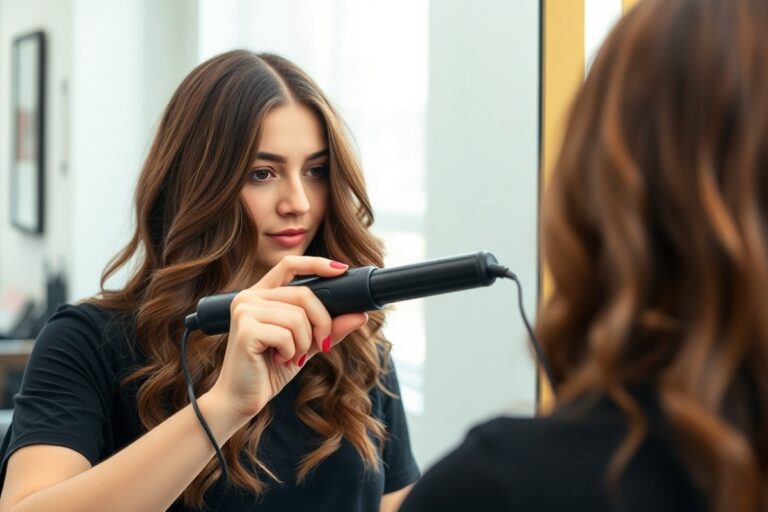
How to Curl Hair with Curling Wand: Simple Steps for Perfect Lasting Curls
Curling your hair with a wand is simpler than most expect. Begin by selecting the heat level suited to your hair’s texture. This step helps protect your hair from damage while styling.
Use lower heat for fine or damaged hair and higher heat for thick or coarse hair. Then, separate your hair into small sections for the best results.
Wrap each section evenly around the barrel, holding it for 5 to 10 seconds. Let the curl cool in your hand before letting it go to keep its shape tight. Apply a heat protectant spray before styling to limit heat damage and reduce frizz.
Work on dry or nearly dry hair to make curls last longer throughout the day. Avoid rushing by letting curls cool fully while pinned with clips. This keeps them bouncy and fresh, preventing early flattening or frizz.
Key Takeaways
- Use 1-inch sections of hair when curling thick hair with a wand.
- Set the wand temperature between 250°F and 325°F for fine or damaged hair.
- For thick hair, set the curling wand between 375°F and 400°F for best curls.
- Hold the hair on the wand for about 5 to 10 seconds to form curls.
- Spray heat protectant 6 to 8 inches from hair before curling.
- Pin curls while still warm and let them cool before touching.
How to Curl Hair with a Curling Wand Step-by-Step
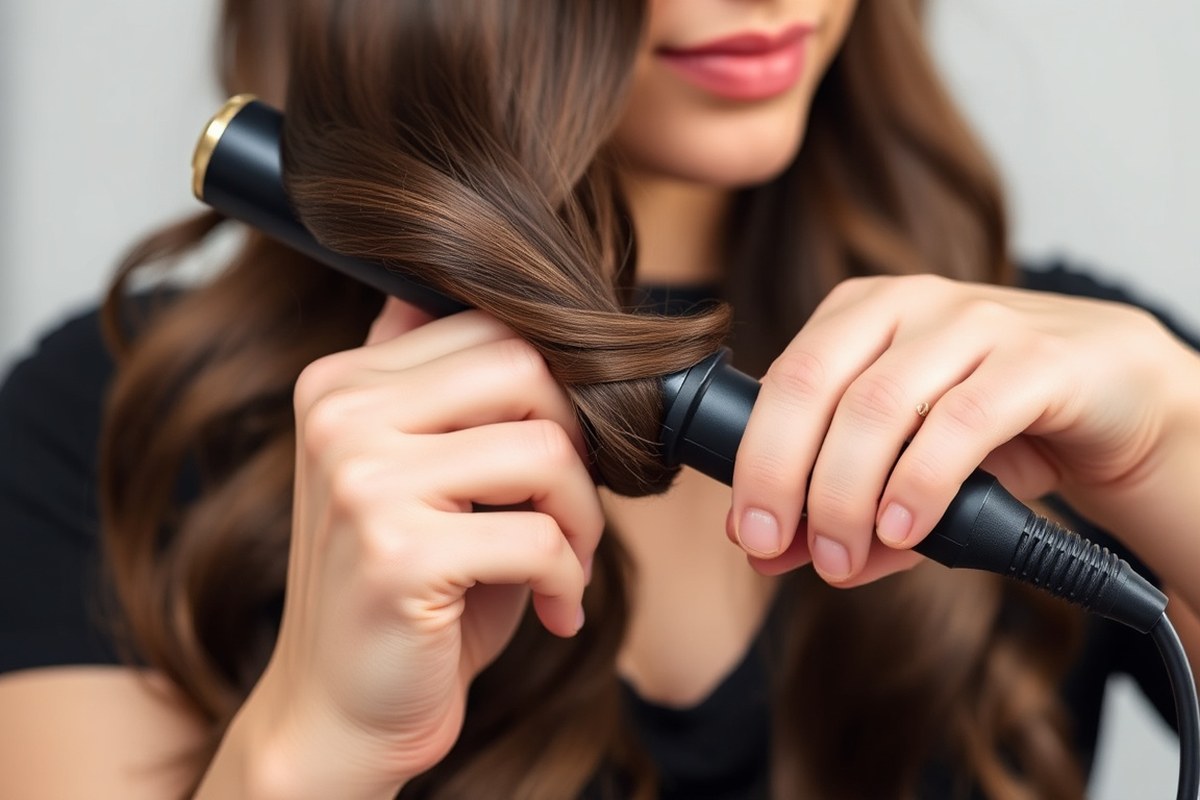
To curl hair with a curling wand, first section your hair. Take each section and wrap it around the heated barrel. Make sure the wand is hot before wrapping hair around it.
Hold your hair on the wand for 5 to 10 seconds. The time depends on how thick your hair is.
Thicker hair needs a longer hold to curl well. Release the curl gently by holding it in your hand before letting it fall.
Sectioning Hair for Best Results
Start by dividing your hair into manageable sections. You can use clips to hold the sections you’re not working on. Smaller sections create tighter curls, while bigger ones give loose waves.
For a full look, work on layers separately, curling the bottom layer before the top. Sectioning helps the heat reach each strand evenly and speeds up the process.
Wrapping Hair Around the Wand
Take one section of hair and start wrapping it around the barrel from root to tip. Hold the wand so it points away from your face for a natural curl direction. Avoid the very roots; start wrapping about 2 to 3 centimeters down.
Wrap the hair smoothly without overlapping large chunks. For layered hair, twist the section slightly before wrapping to add curl definition.
The curling wand has no clamp. So you hold the hair in place with your hand.
Holding and Releasing the Curl
Hold each wrapped section around the wand for 5 to 10 seconds. Use around 8 to 10 seconds for thicker or coarse hair. Holding the hair too long may cause damage, so stick within this range.
Gently slide the wand away and let the curl drop into your hand to cool. Holding the curl in your hand sets its shape better. After a few seconds, release the curl carefully to avoid losing the bounce.
Follow these steps for curling your hair with a curling wand:
- Plug in and heat your curling wand to the right temperature.
- Divide your hair into sections using clips.
- Take a 1-inch section of hair from the bottom layer.
- Wrap the hair around the wand, starting 2 to 3 cm from the root.
- Hold the hair on the wand for 5 to 10 seconds, depending on hair thickness.
- Slide the wand out gently and catch the curl in your hand.
- Hold the curl for a few seconds, then release it softly.
- Repeat on all sections, working from bottom to top layers.
Choosing the Right Heat Setting for Your Hair Type

Start by assessing your hair’s texture, thickness, and condition. Fine or damaged hair needs lower heat between 250°F and 325°F to avoid burning or breakage. Thick hair requires higher heat, up to 400°F, to hold curls properly without long styling times.
Choose the lowest possible temperature that creates curls you like. Set the wand to about 300°F for normal hair. Increase heat slowly if curls don’t hold.
Use a lower or higher temperature based on your hair type. Avoid the highest heat on thin hair.
400°F damages strands quickly and causes dryness. Use lower heat to keep hair healthy.
Curly or coarse hair types often need more heat because curls form slower. Straight hair, especially type 1c, can resist curling.
So higher temps near 400°F might be necessary to shape the curls. Always use a heat protectant before styling to reduce damage risk, regardless of your hair type.
Completely dry your hair before curling. Damp hair can bubble and weaken from the heat, damaging the shaft inside. Curling second-day hair can hold curls better.
Natural oils protect strands and help curls stick. Freshly washed hair may not hold curls as well.
Look for curling wands with variable temperature settings and mineral-infused barrels. They offer better heat control and reduce damage by distributing heat evenly. Spending more on a wand with 13+ heat settings is helpful.
This lets you match heat exactly to your hair. It prevents damage and improves curl results.
Start with a low setting and test a small hair section. Increase heat only if curls won’t last. Avoid max heat on fine hair.
Tools, Products, and Preparation Before Curling
Start with fully dry hair before using a curling wand. Using the wand on damp hair can cause damage and uneven curls.
When your hair is damp, wrap it in a silk scarf or braid it. Leave it overnight to dry naturally and reduce frizz.
Apply a heat protectant spray evenly on your hair after drying. This spray shields your strands from the high temperatures of the curling wand. Skipping this step can lead to dryness and breakage over time.
- Curling wand with adjustable heat settings
- Heat protectant spray suitable for your hair type
- Hair mousse to boost volume and hold
- Hair spray for long-lasting curls
- Comb or brush to detangle hair
- Hair clips to section hair for easier curling
- Silk scarf or bonnet for drying damp hair overnight
Choose a curling wand size depending on the curl style you want. Smaller barrels create tight curls, while larger barrels make loose waves. Work with 1-inch hair sections, especially if you have thick hair.
Freshly washed hair should air dry or use a blow dryer first. Make sure it is completely dry before you start curling. Day-old hair tends to hold curls better than freshly washed hair.
Apply mousse to your hair before curling for added texture. Use a light mist of hair spray after curling. This helps your curls last longer.
Different Curling Wand Barrel Sizes and Their Uses
Choosing the right curling wand barrel size depends on your hair. Think about your hair length first. Also consider what kind of curls you want.
Smaller barrels suit short hair and tight corkscrew curls. Larger barrels work better on longer hair for loose waves or big curls.
Small Barrels (19-25mm) for Tight, Defined Curls
Barrels between 13 and 19 millimeters create tight, corkscrew curls that suit short hair well. They give you more control for precise curls, especially around bangs or shorter layers. Using a small barrel takes more time.
You curl smaller sections for tight curls. This keeps the curl shape defined better.
You want ringlets or tight curls on short or shoulder-length hair. Pick a small barrel. It works best for this style.
Just wrap one-inch sections neatly and hold for 8 to 12 seconds before releasing. Avoid wrapping hair too thickly, or the curls won’t hold tightly.
Medium Barrels (32mm) for Versatile Curls and Waves
The 32mm barrel is perfect for loose curls that look natural and soft. It fits most hair lengths, especially medium to long hair. Beginners often start with this size to create easy everyday curls or soft waves.
Wrap sections around the barrel, holding for 10 seconds for a long-lasting curl. This size generates volume without tight spirals, so curls stay bouncy but relaxed. It also works well if you want beachy waves or classic, loose curls without extra tools.
Large Barrels (38-40mm) for Loose Waves and Volume
Barrels around 38 to 40 millimeters create big, loose waves that add volume and bounce. They are best for long hair or extensions since the curls stay wide and soft. Using a large barrel is faster because you can wrap bigger sections.
This size is great if you want a natural, tousled look without tight curling. Hold each hair section on the barrel for 6 to 8 seconds. This avoids making the waves loose.
Don’t leave it on too long. The waves blend well into subtle styles like classic Hollywood or casual beachy looks.
| Type | Diameter | Curls It Makes | Recommended Hair Length |
|---|---|---|---|
| Slim/Small | 13 to 19 mm | Corkscrew curls | Short |
| Medium | 25 to 32 mm | Softer, less tight curls | Medium |
| Large | 38 to 40 mm | Bigger, looser curls | Long |
Your hair length and desired style guide your barrel choice. Smaller barrels offer tight curls for short hair or bangs. Medium and large barrels create softer curls and waves on longer hair.
How to Curl Different Hair Types and Textures
Curling your hair depends a lot on its type and texture. Fine, thick, or color-treated hair each needs different heat and handling. Adjusting your curling wand use protects your hair and shapes long-lasting curls.
Curling Fine or Damaged Hair Safely
Fine or damaged hair needs lower heat to avoid breaking or drying out. Use a temperature between 250°F and 325°F for safest results. Work with small hair sections to avoid overexposing strands to heat.
Keep curls loose by wrapping the hair around the wand more gently. Take 5 to 8 seconds per section, then release to hold the curve without frying. Applying a heat protectant spray before curling adds extra shield.
Since fragile hair curls quickly, don’t hold the wand for more than 8 seconds. Overheating fine hair often causes flat curls or frizz instead of smooth waves. Let curls cool before touching or styling them for best hold.
Techniques for Thick or Coarse Hair
Thick or coarse hair needs higher heat, usually between 375°F and 400°F, to form curls. Divide hair into 3 or more layers so you can focus on curling each layer properly. Start curling from the bottom layers, then work up.
Take bigger sections, about 1 to 1.5 inches wide, to speed up styling. Hold the wand on each section for 10 to 15 seconds to lock in the curl. Use a curling wand with titanium barrels if possible since it heats evenly.
Thicker hair can resist heat. So try wrapping your hair on the wand slowly but firmly.
Avoid rushing; letting your hair cool completely after curling helps curls last longer. Finish with light hairspray to tame frizz and hold shape.
Handling Color-Treated and Resistant Hair
Color-treated hair should stay under 350°F to preserve color and avoid damage. Freshly dyed or porous hair curls best at the lower end, around 300°F to 320°F. Use a gentle heat protectant made for color-treated hair before curling.
Resistant hair may take longer to curl or lose its shape quickly. Wrapping hair slowly in smaller pieces helps the heat penetrate better. If curls fade fast, try re-curling only the outer layers after the main section cools down.
Extensions can be curled with a wand if they are heat-safe. Check the type: human hair extensions handle heat like natural hair.
But synthetic ones may melt or frizz. Use the lowest heat setting first and test a small piece.
Test the wand temperature on a small hair section before curling your entire head.
Tips and Tricks for Long-Lasting, Frizz-Free Curls
To make curls last longer, let them cool completely before touching them. Pin each curl with a clip right after you wrap the hair around the wand.
Leave the pins in place for about two minutes to lock the shape. Skipping this step often makes curls fall apart quickly.
Cooling down in place is key. When curls cool, their protein bonds reset, holding the curl’s shape. Avoid running your fingers through hot curls or brushing them too soon.
This causes frizz and loosens the curl. Patience here pays off with tighter, longer-lasting curls.
To keep curls frizz-free, use a heat protectant spray with negative ions before curling. It shields your hair up to 450°F (230°C) and seals the cuticle.
That added seal smooths hair strands and reduces frizz all day. Also, work in small sections so each curl gets even heat and sets well.
Once curls are cool and pins are removed, gently scrunch or finger-comb them to shape. Avoid harsh brushing or combing after curling; it breaks curls and creates flyaways. Finish with a light mist of flexible-hold hairspray to keep curls in place without stiffness.
Humidity and dryness affect frizz levels differently. For humid days, a stronger anti-frizz serum helps seal hair. On dry days, use a leave-in conditioner to add moisture.
You can also apply a light oil to your hair. This helps stop static and breakage. Adjust your products to your climate and hair type for best results.
Common Mistakes When Using a Curling Wand and How to Fix Them
One common mistake is using too high a heat setting. This can fry your hair and cause breakage. Try starting with a lower temperature and only increase if curls don’t hold well.
Another error is holding hair on the wand too long. Fifteen seconds is usually enough for most hair types. Keeping hair wrapped longer risks burns and uneven curls.
Many beginners struggle with burning their fingers. You can avoid this by using a heat-resistant glove, which usually comes with the wand. Or, wrap your hair neatly and slide your fingers away quickly after wrapping.
- Use a heat protectant spray before curling
- Don’t wrap too much hair at once; use small sections
- Keep the wand moving to avoid heat damage spots
- Allow curls to cool before touching or brushing them
- Always unplug and let the wand cool on a heat-safe surface
A mistake many make is curling hair toward their face on both sides. Switching directions creates more natural, voluminous curls. Also, avoid using the highest heat setting on fine or damaged hair to reduce damage.
Winding hair neatly and evenly around the wand helps curls look smoother. Using different barrel sizes or interchangeable attachments changes your curl style without extra tools. Less time, less fuss, better results.
Safety Tips and When to Consult a Professional Stylist
Always use a heat protectant spray before touching your curling wand to hair. This spray helps shield your strands from heat damage and keeps curls smooth. Never skip this step, especially if you use temperatures over 300°F (149°C).
Check your curling wand for a cool tip or insulated handle before curling. This reduces the risk of burning your fingers. Wearing heat-resistant gloves also gives added protection when wrapping hair around the barrel.
Avoid curling wet or damp hair. Damp hair heats unevenly and breaks more easily. Wait until your hair is fully dry before starting your curling routine.
Keep your curling wand on a heat-safe surface during breaks. Avoid placing it on fabric or near water. This prevents burns and fire hazards in your home.
Don’t touch the barrel while it’s hot. Unplug the wand right after use to stay safe.
Pay attention to how your scalp feels during curling. Stop right away if you see redness, irritation, or burns. Applying too much heat or curling too close to the scalp can cause pain and damage.
Call a professional stylist for very fragile or chemically treated hair. They also help with complicated curls. Professionals know how to use the right tools and products without risking your hair’s health.
Professionals can create special styles like tight spiral curls or pin curls. These can be hard to do at home.
Professional styling costs range from $40 to $150. Prices vary by salon and location. Spending on a styling session can protect your hair from damage.
You’ll also get the look you want. Also, stylists can suggest the best curling wand and heat level for your hair type.
Practice and patience are key for safe curling with a wand. Take time to learn the technique step by step. Watching your hair closely prevents mistakes and keeps your style lasting longer while protecting your strands.
Step-by-Step Action Plan to Curl Your Hair Today
Follow these steps to curl your hair smoothly with a curling wand. You’ll see soft, lasting curls by the end.
- Before you start: Wash and dry your hair completely. Your curls last longer on dry hair.
- Right before curling: Apply a heat protectant spray evenly. This prevents heat damage during styling.
- First curls: Set your curling wand to the right heat. Warm it up before using. Choose heat based on your hair type. Check the temperature with your hand (not too hot).
- Section your hair: Divide hair into manageable pieces. Curl one section at a time for even results.
- Start curling: Wrap each section around the barrel for 8 to 12 seconds. Release gently to keep the curl shape.
- Finish curls: After curling all sections, let hair cool untouched for 10 minutes. Curls set better when cool.
- Final step: Use a light hairspray or finishing serum to reduce frizz and hold curls. Avoid heavy products that weigh curls down.
Frequently Asked Questions
How Do I Curl My Hair with a Curling Wand Without Burning My Fingers?
Always use a heat-resistant glove when wrapping hair around the wand. This helps protect your fingers from burns.
Can I Curl My Hair with a Curling Wand When It’s Damp?
It’s best to curl hair when it’s completely dry to avoid damage. Damp hair takes longer to hold curls and can break more easily.
How Long Should I Wait Before Touching Curls After Using a Curling Wand?
Let curls cool completely before touching or styling them. Cooling helps set the curl shape and makes them last longer.
Can I Use a Curling Wand on Hair with Extensions?
Yes, but be gentle and use a lower heat setting to protect the extensions. Too much heat can melt or damage them.
Is It Better to Use a Ceramic or Metal Curling Wand?
Ceramic wands heat evenly and protect hair better than metal ones. They reduce frizz and keep curls smooth.
How Often Should I Clean My Curling Wand?
Clean your curling wand once a month to remove product buildup. Use a soft cloth and avoid harsh chemicals to protect the coating.
Before You Go
Curling your hair with a wand works best with patience and practice. Keep the heat moderate and protect your strands. Try your first curls today and enjoy a fresh, styled look.