How to Curl Hair Using Straightener: Simple Steps for Gorgeous Lasting Curls
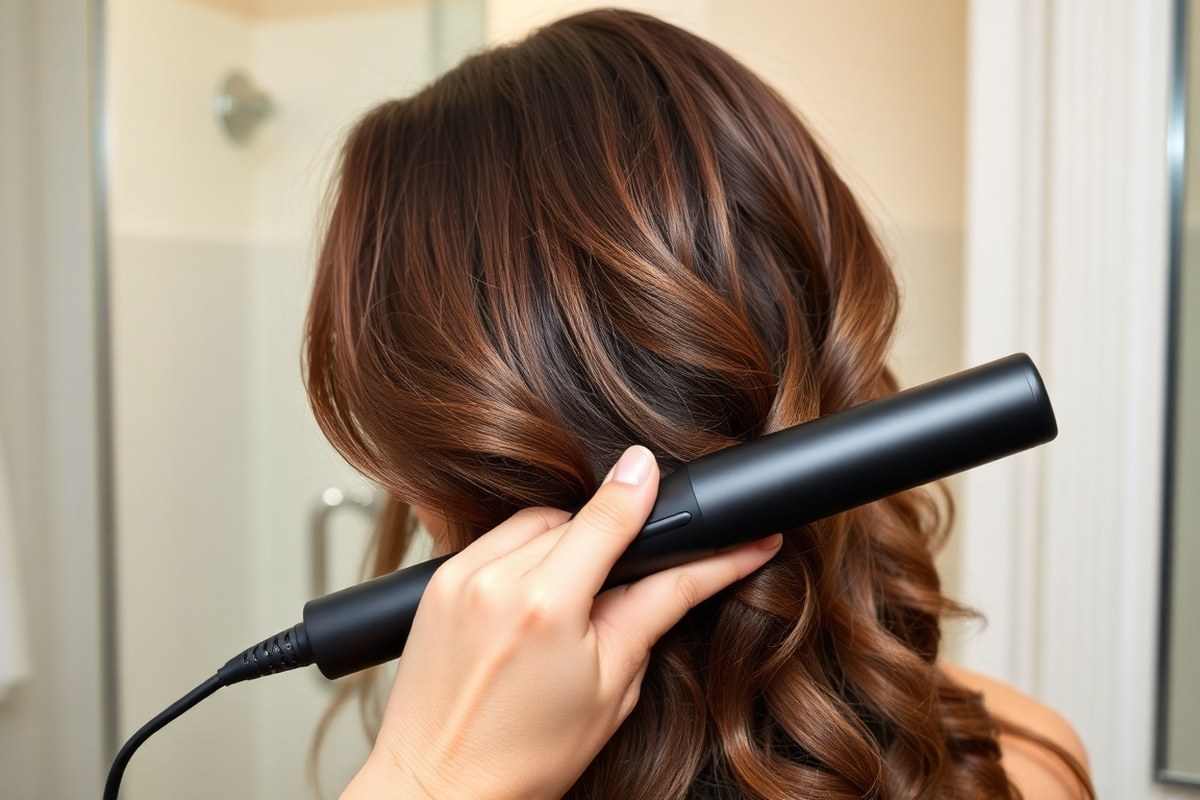
Wondering how to curl hair using straightener? It’s easier than you think. Clamp a small section of hair with the straightener.
Twist it 180 degrees. Glide the straightener down the hair.
This creates curls without special tools. Using a straightener lets you control curl size by adjusting section width.
Start with clean, dry hair to get the best results. Heat can damage hair, so pick a straightener with good temperature control.
Use lower heat if your hair is thin or fragile. Applying a heat protectant spray before styling helps prevent damage and keeps hair smooth.
Hold the straightener at a slight angle away from your face. After clamping, rotate it 180 degrees in the curling direction.
This basic move gives your hair a smooth curl shape fast. You can make curls looser by sliding the straightener down slower or using bigger sections.
Key Takeaways
- Clamp small 1-2 inch sections near the roots for even curls.
- Twist the straightener 180 degrees away from your face to curl.
- Set your straightener below 300°F for fine or thin hair.
- Use 350-400°F for thick or coarse hair to get lasting curls.
- Clean hair holds curls better; wash within 24 hours before curling.
- Medium-width plates (1-1.5 inches) work best for most curl styles.
How to Curl Hair Using a Straightener Step by Step

Curling your hair with a straightener is quick and easy once you know the steps. Start with dry, smooth hair and a heat protectant spray. Use small sections to get neat curls that last longer.
- Grab a 1- to 2-inch slice of hair. Clamp the straightener about 2 inches from your scalp. Hold the straightener at a slight angle away from your face.
- Hold the straightener on the hair. Turn it 180 degrees away from your face. This twist wraps hair around the tool’s edges to curl it.
- Slowly glide the straightener down the hair while keeping it twisted. Move at a steady pace, about 3 to 5 seconds per section, to set the curl.
- Release the hair gently from the straightener once it reaches the ends. Avoid pulling or tugging to keep curls smooth and intact.
- Repeat on the remaining sections, curling all away from your face for a polished look. For beach waves, use larger sections and move faster while twisting lightly.
- Finish by running your fingers through the curls or brushing softly for softer curls. Add a light mist of hairspray on freshly curled sections for long-lasting hold.
The clamp-and-rotate method works because it bends the hair around the straightener’s flat, heated surface. Keep the straightener clamped for 3 to 5 seconds.
Heat reshapes hair proteins to create lasting curls. Holding longer might cause damage or frizz, especially on fine hair.
For tighter curls, use smaller sections and slow down your glide. For loose waves, clamp larger sections and move the iron faster. Keep the straightener vertical for bouncy curls or tilt it slightly for relaxed waves.
Choosing the Best Straightener and Settings for Curling

A straightener made for curling should have smooth, rounded plates with a medium width. Choosing the right temperature also depends on your hair type to avoid damage. Some straighteners combine curling and straightening features, which can be good or bad for your style.
Plate Width and Shape Options
Choose a straightener with plates about 1 to 2 inches wide for the best curls. Rounded edges are key because they let you wrap your hair around smoothly. Flat plates with sharp edges won’t hold curls well and can create harsh lines.
The shape lets you twist and slide the hair without snags. A medium plate width works well on most hair lengths and thicknesses. Your plates should match your hair thickness and length for faster curling.
Narrow plates work slower on thick hair. Wide plates might be tough to use on short hair.
Heat Settings by Hair Type and Condition
Match the heat to your hair to prevent damage and get lasting curls. Fine hair needs lower heat, around 300°F to 350°F, to avoid breakage. Thick or coarse hair usually handles 375°F to 450°F for good definition.
Always use a heat protectant spray or oil suited for your hair type. A lightweight spray works best for fine hair. Thick hair needs oil-based products.
These moisturize hair during heat styling. Check your straightener’s adjustable temperature settings and start low, raising heat only if needed.
| Hair Type | Recommended Heat Protectant | Protection Features |
|---|---|---|
| Fine Hair | Lightweight spray | Protects up to 450°F |
| Thick Hair | Oil-based product | Adds moisture and shine |
| Curly Hair | Hydrating treatment | Extra hydration and frizz control |
Using these heat protectants helps keep hair healthy despite the heat. They also improve curl hold and look when styling with a straightener at the right temperature.
Two-in-One Tools: Pros and Cons
Two-in-one straighteners and curlers can save space and offer convenience. They usually have adjustable temperature settings and plates designed to smooth and curl. Some models have rounded plates that flex for curls and straighten evenly.
However, these tools sometimes don’t curl as well as straighteners made just for curling. Flat irons with dedicated rounded edges can form curls faster and more smoothly. Consider your hair type and styling goals before choosing a 2-in-1 tool.
Tip: Always test your straightener on dry hair with heat protectant to avoid heat damage.
How to Prep Your Hair for the Best Curl Results
Curling your hair with a straightener works best on clean, dry hair that’s been prepped well. Start by washing and conditioning your hair for smoothness. Dry your hair completely.
Apply products that protect your hair and help curls hold. A good prep routine helps your curls last and keeps hair healthy under the heat.
Washing and Conditioning
Wash your hair with a shampoo made for your type. This removes oils and buildup. Clean hair is key to good curls.
Use a conditioner focusing on the ends to smooth and hydrate without weighing hair down. This balance prevents frizz and helps curls form neatly.
Use light conditioner away from your roots. Heavy conditioner near roots can make hair limp. Limp hair causes curls to fall out faster.
Dry your hair first if it feels very dry. Use leave-in conditioner only on the ends.
This helps keep your hair soft without weighing it down. This keeps your hair soft but still ready to hold curls well.
Drying Techniques for Styling
Make sure your hair is totally dry before curling. Damp hair won’t hold curls well. It can also get damaged from heat easier.
Blow-dry your hair on medium heat with a round brush. This smooths your hair and adds volume. Don’t use too high heat to avoid damage.
Have fine or silky hair? Use a light mousse or textured spray first. This helps curls last longer.
Apply before you dry your hair. These products give your hair grip, helping curls last through the day.
Applying Heat Protectants and Styling Products
Spray a heat protectant evenly on dry hair before you start curling. This shields your strands from damage and preserves your hair’s health. Apply from mid-length to ends, then comb through to spread the product evenly.
Use mousse or sea salt spray before drying to add texture and lift. After curling, spray flexible hold hairspray to keep your curls soft but in place.
- Use a heat protectant spray before any heat styling
- Apply mousse or texture spray on damp hair before blow-drying
- Dry hair fully, avoid curling damp strands
- Condition hair focusing on ends to prevent heaviness
- Comb through products for even coverage
- Finish with flexible hold hairspray to lock curls
- For extra volume, consider root lift spray before drying
Proper prep gives your curls shape and staying power. Skipping products or curling damp hair often leads to flat curls and frizz. A little effort before styling means healthier hair and better-looking results.
Different Curl Styles You Can Achieve with a Straightener
You can make many curl styles with a straightener. Change how you hold it. Also, move it differently to get new looks.
Adjust the angle, direction, and section size to get different waves or curls. You can curl hair without twisting the straightener.
Slide it smoothly. Wrap hair around the plates while gliding.
Loose Waves and Beachy Styles
For loose waves, hold the straightener almost horizontal and wrap larger sections of hair around it. Glide the iron smoothly down, keeping it moving to avoid heat damage. This makes relaxed, natural waves that look like you spent a day at the beach.
For beachy waves, use vertical hair sections. Avoid horizontal sections. This helps curls fall in a smooth wave pattern.
Use a wide barrel flat iron for tousled waves. The Cloud Nine wide iron is a good option.
It gives more natural textures. These waves are great for a casual look and add volume without tight curls.
Tight Spirals and Ringlets
Make smaller hair sections for tight curls. Curl toward or away from your face. Choose the direction based on your preferred shape.
Position your straightener near the scalp, twist it halfway backward, and pull slowly down. The twisting motion helps the hair wrap tightly around the plates.
To get defined coils, pull hair firmly. Rock the straightener quickly as you glide it down. This adds more bend to curls.
This technique builds more curls along the strand, giving a springy, bouncy effect. Tight curls like these last longer since the hair is heated on both sides evenly.
S-Waves and Textured Looks
S-waves come from alternating the curl direction between sections. Curl one section away from your face, then the next toward it. This pattern creates a natural, textured look with body and movement.
You can also change section shapes for texture. Horizontal sections add volume and plump curls, while vertical sections give softer waves. Mix different section sizes when curling.
Change the direction of each curl too. This creates a unique, more natural look.
Using Pineappling for Curl Preservation
Pineappling is a way to keep curls looking fresh overnight without flattening them. Gather curls loosely at the top of your head. Use a soft scrunchie for the high ponytail.
This keeps the style gentle. This keeps curls intact and prevents frizz while you sleep.
This style works well with straightener curls. The curls hold their shape longer. It keeps hair set all day.
Pineappling saves time the next day by reducing the need for heat or restyling. Plus, it helps maintain volume and curl shape without pressure or tangling.
How to Section Hair for Easier and Even Curling
Sectioning your hair makes curling easier and faster. Start by parting your hair into 2 or 3 horizontal layers. Begin from the bottom near your neck.
Work your way up as you go. Thick hair needs 3 sections for easier handling and control.
This method keeps your hair organized while styling. For thin or normal hair, 2 sections usually work well.
Take one layer at a time and split it into 1-inch wide pieces. Smaller pieces give tighter curls; bigger ones create loose waves.
Consistent section size ensures you get even curls throughout your hair. For short hair, use narrower sections and a straightener with slim plates to control the curl.
- Divide hair into 2 or 3 horizontal sections, based on thickness
- Separate each section into 1-inch or smaller pieces
- Use narrow sections for short hair, wider for long hair
- Wrap hair evenly and curl in the same direction
- Focus on bends rather than full curls on short hair
- Leave ends straight for relaxed, beachy waves
- Curl each section for about 3-4 seconds mid-shaft to ends
For short hair, focus on bending small sections instead of making full curls. A narrow-plate straightener controls tight bends better.
Curl each section slowly, sliding the iron down gently. For long hair, clamp the flat iron about an inch from roots.
Always take even sections to avoid uneven curl patterns and tangle-free styling.
Tips to Make Curls Hold Longer and Avoid Common Issues
Curls last longer when your hair is clean and dry before you start. Using a heat protectant spray helps hold the style and reduces damage. Aim for the right temperature based on your hair type to avoid limp curls or breakage.
Small hair sections give you more control and tighter curls. Avoid clamping too hard to prevent dents or crimps. Let each curl cool fully before touching it; this locks the shape in place.
- Use low to medium heat for fine or color-treated hair (280-320°F).
- Work in one-inch sections for medium hair for balanced curls.
- For thick hair, use 320-390°F and take smaller sections.
- Avoid going over the same section more than once to prevent heat damage.
- Alternate curl direction for a natural, textured look.
- Catch the curl in your hand after releasing the straightener to keep its shape.
- Use a light hairspray spray after curling to hold without stiffness.
Dents happen when you clamp the straightener hard or pause too long on one spot. Keep the tool moving smoothly to avoid crimps. Wrist pain often shows you’re holding the straightener too tight.
The tool might be too heavy for quick curls. Try easing your grip and using a lighter straightener.
Common mistakes include curling damp hair and using too high heat on fine or damaged hair. This leads to limp or frizzy curls. Also, rushing through the sections can cause uneven curls and messy results.
Adjusting Techniques Based on Hair Type and Thickness
Curling your hair with a straightener changes depending on your hair type and thickness. Fine hair needs less heat to avoid damage.
So set your iron below 300°F. Thick or coarse hair can handle higher heat, usually 350 to 400°F. This helps curls form properly. Use caution to avoid damage.
Section size matters too. Using smaller sections on thick hair creates more even curls. It heats each part better.
This helps the curls last longer. For fine hair, use slightly bigger sections.
Heat spreads faster here. Curls form more quickly this way.
| Hair Type | Heat Setting | Section Size | Number of Sections |
|---|---|---|---|
| Fine or Thin | 250-300°F | Medium | 2 |
| Normal | 300-350°F | Medium to Small | 2 |
| Thick or Coarse | 350-400°F | Small | 3 |
Thick hair tends to hold curls longer, but it takes more time and patience. Pull smaller sections slowly through the straightener to give curls proper shape. Thin hair curls faster, so move quickly to avoid extra heat exposure.
Daily heat styling can cause damage. Use a heat protectant spray before curling every time.
Try to curl your hair only two to three times a week to keep it healthy. On other days, use no-heat styles or let your hair air dry.
Keeping your hair clean and moisturized also helps curls last longer and look better. Use deep conditioning treatments once a week if you curl often. That prevents dryness and breakage, especially for thick or coarse hair.
Post-Curl Care and Styling to Maintain Healthy, Beautiful Curls
Let curls cool completely to set their shape. Hold each curl in your hand for about 10 seconds after releasing it from the straightener. This lock-in step keeps curls bouncy and less prone to frizz.
To fix frizzy or fake-looking curls, use your straightener again. Run it gently back over the curl. Add a slight twist in reverse as you go.
This softens overly tight or uneven curls without flattening them. Avoid brushing curls right away; it causes frizz and breaks the shape.
Adding volume starts before curling. Use a volumizing mousse while your hair is damp, especially at the roots. A root-lifting spray, like Color Wow’s, adds volume.
It also gives texture that helps curls hold better. This makes your curls last longer.
- Let curls cool for 10 seconds in your hand
- Fix tight curls with a gentle backward straightener pass
- Use volumizing mousse at the blow-dry stage
- Apply root spray for extra lift and hold
- Finish with a light hold hairspray for long wear
- Deep condition weekly to keep hair healthy
Choose light hold hairspray or curl-friendly products to keep curls looking natural yet controlled. Apply spray from about 8 inches to avoid a crunchy feel. You want your curls to bounce without stiffness.
Daily care matters a lot if you style often. Use a deep conditioning treatment once a week to prevent dryness and breakage. Also, sleeping on a silk pillowcase reduces friction that damages curls overnight.
Don’t brush curls harshly after styling; finger combing helps maintain shape and reduce frizz.
Quick-Start Action Plan for Curling Hair with a Straightener
Follow this simple plan to create your first curls using a straightener. Each step helps you build skills and confidence.
- Before you start: Wash and dry hair fully. Check hair feels smooth and clean to prevent damage.
- Day 1: Apply heat protectant spray evenly. Spray enough so hair stays shiny and not greasy.
- Day 1: Heat your straightener to 300°F if hair is fine. 350°F for thicker hair. Test on a small strand to avoid burning.
- Day 1: Section hair into 1 to 2-inch parts. You should see smooth, separated layers for even curling.
- Day 1: Curl one section by clamping and twisting the straightener. The curl should hold after a few seconds of cooling.
- Day 1: Repeat curling for all sections. Check each curl feels firm but not stiff once it cools.
- After curling: Lightly finger-comb curls or use a wide-tooth comb. The style will look natural and soft.
- Before bed: Spray curls with a light hold hairspray. Curls will last longer and resist frizz overnight.
Frequently Asked Questions
How Do You Curl Hair Using a Straightener?
Clamp a section near the roots and twist the straightener 180 degrees. Slowly slide down while holding the twist tight to form a curl. This method works well on most hair types for quick curls.
Can You Curl Your Hair with a Straightener?
Yes, you can curl your hair with a straightener. Twist the iron and slide it through hair sections. This creates curls without a curling iron.
It’s a quick alternative to curling irons. You can create many curl styles with one tool. Save time by using your straightener this way.
What Is Pineappling Your Hair?
Pineappling means gathering your hair on top of your head in a loose ponytail. This protects curls while you sleep, helping them keep shape and reduce frizz overnight.
How Long Does It Take to Curl Hair with a Straightener?
Curling your hair with a straightener takes about 10 to 20 minutes. The time depends on your hair length and thickness.
Longer or thicker hair takes more time. Using larger sections speeds up the process but may give looser curls.
Is It Better to Use a Flat Iron or Curling Iron for Curls?
A flat iron gives you versatile curl styles and a smooth finish. Curling irons make bouncier curls more easily.
Each tool creates different curl shapes. Flat irons take practice but can save space in your styling kit.
How Do You Keep Curls from Falling When Using a Straightener?
Spray a light hairspray before curling for better hold. Use smaller hair sections for best results.
Don’t touch the curls until they cool completely. This helps curls keep their shape longer.
Key Points to Remember
Curling your hair with a straightener takes some practice but works well for many styles. Start with clean, protected hair and use the right section size for your hair type. Try this curling method today and watch your hair take on a whole new look.