How Can I Cut My Own Hair Easily a Complete Guide with Pro Tips
How can I cut my own hair without messing it up? You can do it safely and effectively by taking simple steps and using the right tools. Start by working slowly.
Trim just a little at a time. This helps avoid cutting too much.
Section your hair neatly before cutting to make sure every part is even. Hold your hair straight down at a 0 degree angle to get a clean, precise cut. Trim about ¼ inch every 6 to 8 weeks.
This keeps hair healthy. It also prevents split ends.
Cutting your hair yourself saves money and gives you control over your style. It might take 30 minutes to an hour depending on your hair thickness. So be patient and steady with your scissors.
Key Takeaways
- Use sharp hair scissors specifically made for cutting hair.
- Section hair into small parts before cutting for better control.
- Decide whether to cut hair wet or dry based on your hair type.
- Trim a little bit at a time to avoid mistakes or unevenness.
- Keep your hair straight and tight when cutting for cleaner lines.
- Check for uneven spots and carefully fix them as you go.
How Can I Cut My Own Hair Safely and Effectively?
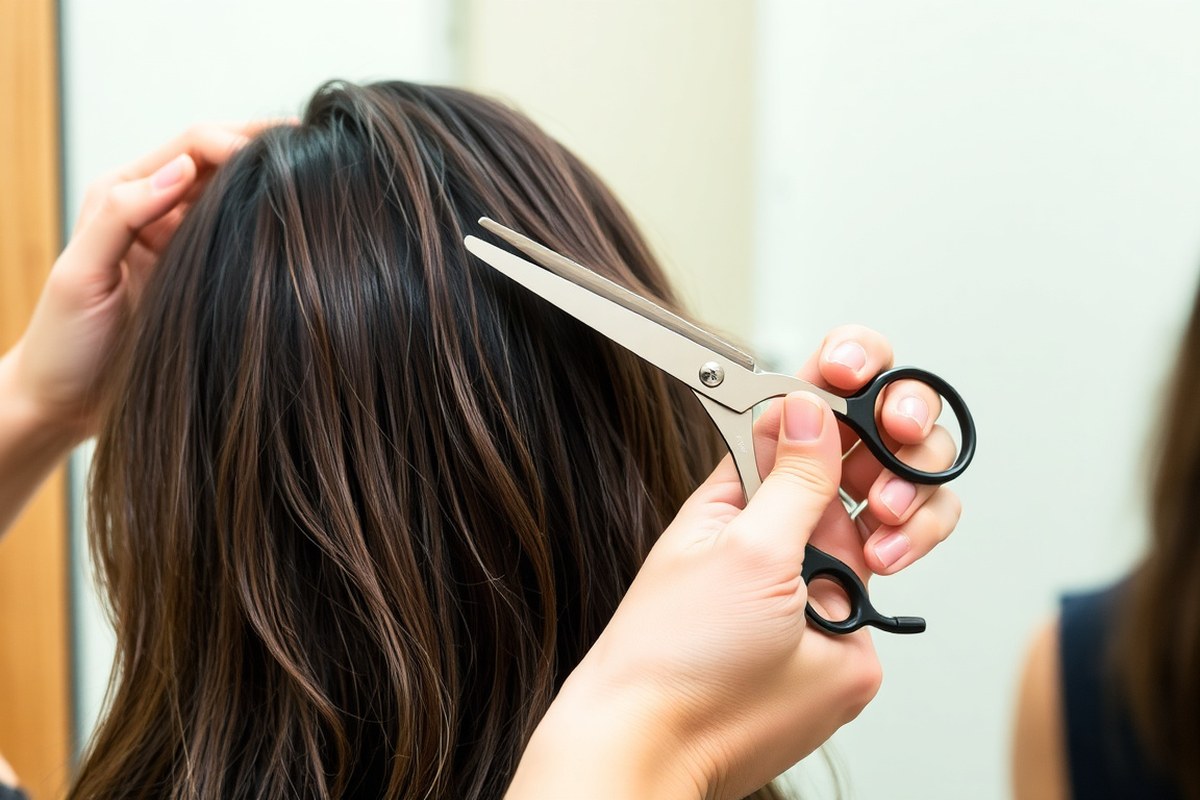
Cutting your own hair safely starts with clear planning and steady control. Preparing properly helps prevent mistakes like cutting too much or uneven strands. Keep your focus slow and methodical rather than rushing through the cut.
You want to remove small amounts each time. Usually, cut a quarter to half an inch. Take it slow to avoid cutting too much.
This amount keeps your ends healthy without drastically changing your style. Knowing when to trim or restyle matters. Trims fix damage and keep shape.
Do trims regularly to stay neat. New styles require more careful measuring and technique.
- Decide how much you want to cut off. Use a ruler or tape measure to mark about ¼ to ½ inch for trims. Cutting less first keeps you safe from major errors.
- Section your hair into even parts. Clip hair into 4 to 6 sections, like top, sides, and back. This keeps your cut even and easier to manage.
- Use sharp hair scissors and work in good light. Dull blades cause jagged cuts, and poor lighting hides uneven spots. A second mirror helps check hard-to-see angles.
- Cut your guide strand slowly. Start with one clean strand as your length guide. Trim each section to match it carefully, little by little.
- Trim small amounts regularly every 6 to 8 weeks. This method maintains healthy ends without big surprises. Don’t cut large chunks at once.
- Check your work often with your fingers and mirrors. Watch for stray or uneven hairs. Brush hair out each time you finish a section and trim any stragglers.
- Trim bangs longer than your goal and cut when dry. Hair shrinks when dry, so starting longer prevents cutting too short. Make small snips incrementally.
Detangle your hair fully before starting. Decide to cut dry or damp based on type. This helps get better and cleaner cuts.
Dry hair can show how the natural fall looks. Damp hair can be easier to comb and manage. Avoid cutting too much length at once, especially on your first try.
Slowing down and keeping your hair neatly sectioned gives you the most control. Using sharp tools and good lighting makes precise cuts easier. These tips help you avoid common mishaps like uneven edges and cutting much more than intended.
What Tools Do I Need to Cut My Own Hair at Home?
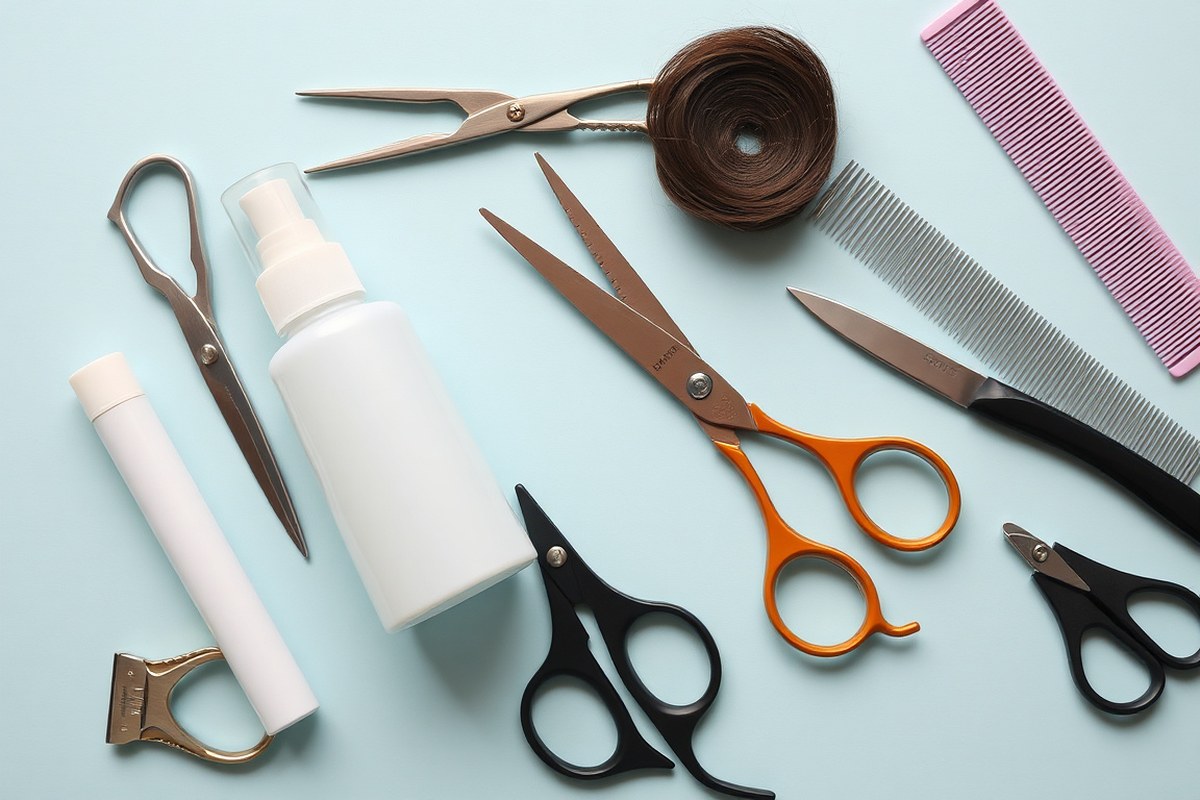
Sharp hair-cutting scissors are a must-have for any DIY haircut. Regular household scissors will damage your hair ends and create split or frayed ends.
Proper hair shears, like the Equinox Professional pair, cost about $20. They cut hair cleanly and last for years.
Hair clippers help with shorter styles or fading. They work well for buzz cuts and trimming sideburns.
Scissors alone work if you’re trimming length or layering. Clippers usually cost $30 to $70, depending on quality and features.
| Tool | Use | Price Range | When to Choose |
|---|---|---|---|
| Hair-Cutting Scissors | Cutting and shaping hair ends | $20 – $50 | All hair types; essential for clean cuts |
| Hair Clippers | Short hairstyles, fades, sideburns | $30 – $70 | Use with buzz cuts or close trims |
| Rat-Tail Comb | Sectioning hair precisely | $5 – $15 | All hair types, especially layered cuts |
| Hair Clips | Holding sections in place | $5 – $10 | Working in multiple sections, curly hair |
| Spray Bottle | Lightly dampening dry hair | $5 – $15 | Controlling curls or unruly hair |
Sectioning tools like rat-tail combs help you work methodically. Clips allow you to keep sections separated while you cut. A spray bottle keeps hair damp but not soaking wet, which is key for some textures.
Curly and textured hair often needs firm sectioning and trimming curl by curl for good results. Use strong clips and detangle gently before cutting. For tighter curls, cutting dry helps avoid shrinkage surprises.
Do not use kitchen or household scissors for cutting hair. They cause split ends and uneven cuts.
For beginner-friendly brands, Equinox offers reliable scissors, and brands like Wahl or Andis make good clippers. Expect to pay $20 for basic scissors and $40+ for decent clippers. Avoid super-cheap tools, as dull blades cause damage and frustration.
How to Section and Prep Your Hair Before Cutting
Start by dividing your hair into four sections. This makes cutting easier. It also helps you be more precise.
How you part and hold the hair depends on your hair type and length. Proper sectioning stops you from cutting unevenly or missing spots during the trim.
Basic Four-Section Technique
Part your hair down the middle from front to back. Then, create a horizontal part from ear to ear to split top and bottom sections. This simple division gives you four manageable parts.
Keep each section clipped away using strong clips. This lets you focus on one part at a time. The other hair stays out of the way.
You get better control while cutting. Sectioning evenly matters, so double-check the lengths with a comb.
- Start with clean, damp hair, combed out and tangle-free.
- Make a middle part from forehead to nape using a comb.
- Create a horizontal part from ear to ear.
- Clip the top-left section up using a clip.
- Clip the top-right section the same way.
- Divide the bottom half into left and right and clip separately.
- Work section by section when cutting, releasing clips as you go.
Sectioning for Curly Versus Straight Hair
Straight hair cuts best when slightly damp, so wash and towel dry it first. Comb each section smoothly, then section while the hair is still damp. This gives more control and a cleaner line.
Curly hair often needs to be cut dry or stretched with heat before cutting. Dry curls let you see exactly how they fall, preventing unexpected length loss. Use a blow dryer with a diffuser on low to stretch tight curls gently before sectioning.
For very curly hair, cut coil by coil to keep natural shape. Section with smaller pieces and hold each coil between your fingers. This method helps you avoid uneven cuts and preserves the curl pattern.
Tools and Accessories for Sectioning
Use clips designed for hair, like black duckbill or alligator clips, which hold thick hair securely. Plastic or metal clips with tight grips work best over spring clips that might slip.
A fine-toothed comb helps create precise parts and smooth sections before clipping. Use the pointed end of the comb to part hair evenly. A detachable mirror helps you check sections at the back.
You may want hair ties or small elastics for very thick or long hair. These keep bulk controlled and make it easier to trim layers or bangs separately. Keep all tools within reach to avoid losing focus.
Should I Cut My Hair Wet or Dry and Why?
Cutting your hair wet or dry depends on your hair type and style goals. Wet hair is easier to manage and control, especially for straight or wavy hair. Curly or textured hair cuts better when dry.
You see its true shape and shrinkage. This helps you cut more accurately.
Wet cuts help with clean, blunt edges since damp hair lies flat. Dry cutting lets you spot mistakes easier and layer more naturally. Dry hair shows how your style will look.
Many stylists prefer trimming textured hair dry. It reveals the final shape clearly.
| Aspect | Wet Cutting | Dry Cutting |
|---|---|---|
| Suitable Hair Type | Straight, wavy | Curly, textured |
| Ease of Control | Better, hair lies flat and is manageable | Harder, requires more precision |
| Cutting Precision | Good for blunt cuts | Better for layering and blending |
| Visibility of Results | Less accurate for shape after drying | Shows true final look |
| Common Uses | Initial trims, blunt bobs | Touch-ups, textured layers, curly trims |
| Risk of Overcutting | Higher if you forget shrinkage | Lower with cautious cutting |
Use a spray bottle to dampen dry hair for more controlled cutting. Avoid soaking hair when cutting, since too much water can distort the length.
For curly hair, let it air dry or style as usual before cutting. This way, you see how curls bounce and shrink.
Try cutting straight or wavy hair when freshly washed. The hair lies flat, making it easier to judge length and straight edges. For layers or point cutting, dry hair reveals uneven spots better.
So cut in small vertical snips. Let bangs dry completely before trimming.
Wet bangs look longer than they really are. This prevents cutting them too short.
Following your usual stylist’s method helps if you’re unsure which way to start. When doing a large cut, wet hair cutting makes it simpler and cleaner.
Switch to dry cuts for regular trims or ending touches to avoid surprises after drying. Experiment with both ways carefully to see what fits your hair and style best.
How to Cut Specific Hairstyles on Your Own at Home
Cutting your own hair into bangs, layers, or a bob takes patience. Each style has a simple method to follow that helps avoid mistakes. Getting the right angle and using small cuts will be your key to success.
Cutting Straight Bangs Safely
Start with dry hair to see the actual length and how bangs will fall. Pull your bangs straight down in front of your face to keep an even line.
Use sharp scissors and cut little by little. Always cut less than you think, since you can always trim more later.
- Comb bangs straight down over your forehead.
- Pin back the rest of your hair to keep it out of the way.
- Hold scissors horizontally and cut below your eyebrows in small sections.
- Check the length by letting bangs fall naturally.
- Trim a little more if needed, using point-cutting for a softer edge.
Cut bangs dry, trimming slowly to avoid cutting too short at once.
Creating Layers with a Ponytail Method
Pulling your hair into a high ponytail lets you trim layers evenly. It works best on damp hair with moderate length.
Hold the ponytail straight up and cut from the tip upward to build soft layers. Small cuts are safer since hair can’t be uncut once trimmed.
- Gather hair into a tight high ponytail at the crown.
- Comb through the ponytail to smooth it out.
- Trim the ends straight or at a slight angle.
- Cut less than your desired length at first, trimming more if needed.
- Release hair and check layers for evenness around the head.
Layers are tricky; use small cuts and check your work with mirrors often.
DIY Blunt Bob Trim
A blunt bob stays one length all around and looks neat when cut right. Cutting on damp hair gives you better control and a clean line.
Section your hair into two or three parts to take even cuts. Pull hair straight down and trim gradually until you reach your desired length.
- Part hair evenly in the middle or slightly off-center.
- Comb hair straight down on each side.
- Trim the bottom edges straight across both sides using scissors.
- Use a mirror to check the back for evenness or ask for help.
- Make small adjustments and cut any uneven strands carefully.
Trimming your bob in sections helps prevent uneven lengths around your head.
Basics of Fading Men’s Hair at Home
Buzzing or fading men’s hair needs patience and the right clipper guard sizes. It’s best to start longer and shorten slowly.
Use a hand mirror to see hard-to-reach areas, like the back of your head. Work with steady motions and blend guards for a smooth fade.
- Start with longer clipper guards for the top and sides.
- Trim hair evenly, moving clippers against the grain.
- Switch to shorter guards as you move down the sides and back.
- Blend between lengths with a medium guard using upward strokes.
- Use scissors to clean up the edges around ears and neckline.
Buzz with guards longer than you expect and trim gradually to avoid mistakes.
Tips for Cutting Curly, Textured and Natural Hair Yourself
Cut curly and natural hair when it’s dry, not wet. Dry hair shows the real shape and length of your curls. Wet hair straightens and looks longer, which can lead to cutting too much.
Use sharp scissors designed for hair to avoid frizz and split ends. Regular kitchen scissors can damage textured hair. A good pair costs around $15 to $25 and will make your trim neater.
Section your hair into small parts before trimming. This helps you work evenly and prevents missing curly chunks. Hold the curls gently and trim one small twist or coil at a time.
Trim curls by snipping a little at the ends, about 1/4 inch or less. Cutting too much at once causes uneven curls. You can always trim more later if needed.
Use leave-in conditioner or curl cream before cutting to soften hair and reduce frizz. This makes curls easier to separate and cut cleanly. Products with natural oils work best for hydration and slip.
Avoid cutting straight across when trimming curly hair. Instead, follow the curl’s natural curve or snip with scissors pointing up or sideways. This blend helps curls stay springy and less choppy.
The biggest mistake is cutting curls wet or in big sections. Wet hair shrinks as it dries, so you might cut too short. Cutting small sections dry protects your style and shape.
Hold the curling section between your fingers and cut a bit at a time. Watch how the curls bounce back. Stop when you see the length you want.
Use a handheld mirror to check the back when trimming at home. Dry hair shows uneven spots faster, so correct them gently and slowly. Textured hair often looks uneven at first, but curls usually settle into shape.
You might want to try styles like a layered trim to shape your curls. Layers help curls sit better and avoid a boxy look.
Cut the top layer about 1/2 inch shorter. Then move to the next layer.
Remember, patience pays off. Trimming natural and curly hair at home takes time and gentle care.
Cut a little every month to shape curls. Avoid big chops.
How to Check and Fix Uneven Cuts or Mistakes at Home
Checking and fixing uneven cuts needs the right mirror setup and steady hands. Using a handheld mirror with a wall mirror lets you see your whole head. Small trims and blending cuts fix most uneven layers without major damage.
Setup for Full 360° Haircut Inspection
Use a large wall mirror and a handheld mirror to see your haircut from all angles. Place your handheld mirror behind your head while standing in front of the wall mirror.
Bright, natural light or a bright lamp helps spot uneven sections better. Turn your head slowly to check the sides and back carefully.
Evening Out Uneven Layers Safely
Fixing uneven layers means trimming small amounts at a time. Aim to cut only the longer strands sticking out beyond the rest.
Using professional hair shears gives cleaner cuts and avoids rough edges. Avoid regular scissors as they can cause crooked lines and split ends. Follow these steps for safe evening:
- Hold the section of hair you want to fix between your fingers.
- Snip the longest hairs just below your fingers’ edge.
- Check with your mirrors if the lengths now match.
- Repeat trims on other uneven spots.
- Trim slowly and avoid cutting large chunks at once.
- Rinse your hair to remove cut strands before checking again.
Blending Edges for a Natural Finish
Blending missed spots or rough edges prevents a stark, uneven look. Use point cutting, which means snipping into the ends vertically.
This technique softens blunt cuts and creates a smooth transition between layers. Cut small snips into the edges holding hair upright in small sections. Try blending edges by:
- Hold a small hair section between your fingers at the ends.
- Use scissors to make tiny snips straight up into the ends.
- Repeat around rough or chunky spots to smooth them out.
- Check your mirrors often to see the effect from all angles.
Recognizing When to Get Professional Help
Stop cutting at home if you see very uneven lengths or big, rough patches. Fixing major mistakes can lead to worse results if done without practice.
Also consider a pro if you want a complex style or feel uncomfortable with back cuts. A stylist can fix errors safely and shape your hair evenly.
Professional trims usually cost between $30 and $80, saving time and stress. If you notice split ends beyond just uneven cuts, a pro’s trim is best.
How to Maintain Your DIY Haircut and When to Trim Next
Touch up trims every three to four months to keep your hair healthy. Split ends usually become visible around that time, signaling that a trim is needed.
Your hair feels good and looks fresh after a pro cut. You can wait a bit longer before trimming it again.
Look for rough ends that split or peel. Notice frizz that won’t smooth out. Check if your hair shape doesn’t hold well.
These signs mean your haircut needs refreshing. Trimming split ends regularly stops damage from moving up. It also keeps your style neat and tidy.
Keeping your haircut’s shape longer means gentle daily care. Avoid rough brushing and harsh heat styling, which can cause breakage. A leave-in split-end serum can protect your hair and keep it looking fresh between trims.
- Detangle your hair carefully before trimming.
- Cut small sections to spot split ends easily.
- Use sharp scissors made for hair cutting.
- Trim hair gently when it’s dry for better control.
- Trim just the ends, about 1/4 inch or less.
- Aim to trim longer than you want your final length.
- Keep trims simple: split ends, bangs, or light layering.
You can trim split ends at home by bringing hair forward in small sections. Use elastics to secure sections if your hair is lob, bob, or shoulder length. Cut carefully at the ends afterward.
Dusting the ends is a simple way to keep hair healthy. Do this to maintain your style between full haircuts.
Use only hair-cutting scissors to avoid fuzz and uneven ends during trims.
Step-by-Step Action Plan for Your First DIY Haircut
Follow these simple steps to cut your hair safely and get a neat result. Check your progress after each step.
- Before you start: Gather quality scissors, a comb, clips, and a mirror. Make sure your hair is clean and dry or slightly damp. This prep helps you see your hair’s natural fall.
- Section your hair: Divide your hair into 4 to 6 sections using clips. Even sections make it easier to cut evenly.
- Start with small trims: Cut a little off each section. Take about a quarter inch at a time. Stop to check the length regularly to avoid cutting too short.
- Focus on one style element: Trim your ends first if you want a simple cleanup. For layers or bangs, do those in separate sessions to keep control.
- Fix uneven spots: Use a comb and scissors to even out any mistakes. Cut very small amounts until your hair looks balanced.
- After the cut: Wash and style your hair as usual. Check again for any spots that need small trims once dry.
- Maintain your cut: Set a reminder to trim every 4 to 6 weeks. This keeps your DIY haircut fresh and tidy.
Frequently Asked Questions
What Is the 3 Rule for Hair?
The 3 rule means sectioning hair into three parts for easier cutting. It helps you manage hair better and get an even trim across your head.
Is It Better to Trim Your Own Hair Wet or Dry?
It depends on your hair type and style. Wet hair cuts cleanly but dry hair shows the real length and shape. Follow what your regular stylist does for best results.
Is It Okay to Cut Your Own Hair at Home?
Yes, cutting your own hair at home is fine and cost-saving. Just prepare well with good tools and lighting to avoid mistakes.
What Does the 3:2:1 Rule for Haircuts Mean?
The 3:2:1 rule guides haircut layering to balance length and volume. It’s a method some stylists use to create texture and shape evenly.
How Can I Cut My Own Hair?
Section your hair, use sharp scissors, and trim little by little. Check your angles often with mirrors for an even cut.
How Often Should I Trim My Hair to Keep It Healthy?
Trim a quarter inch every 6 to 8 weeks to keep ends healthy. More often if your hair feels dry or tangles easily.
Wrapping Up
Cutting your own hair is doable if you take it slow and prepare well. Start with small cuts, and you’ll avoid big mistakes. Grab your scissors today and try a small trim to build your confidence.