How to Use a Curling Wand Without Clamp: Simple Steps for Perfect Curls
Using a curling wand without a clamp means wrapping dry hair around the barrel by hand. Hold your hair there for 5 to 15 seconds. This creates smooth curls without clamp marks or pressure.
Start with clean, dry hair to avoid damage or bunching. Section hair into small, even pieces to help curls hold better. Adjust heat according to your hair type to reduce burn risk.
Apply heat protectant spray before styling for protection. Wrap strands away from your face for a natural curl. Keep the wand steady to avoid uneven curls or tangles.
Let curls cool before touching to set their shape. Finish with light hairspray or serum for hold and shine. Practice helps improve your technique and curl quality.
Key Takeaways
- Always work with 100% dry hair to protect strands from heat damage.
- Wrap hair around the barrel by hand, holding for 5 to 15 seconds.
- Use smaller sections of about 1 inch for tighter, more defined curls.
- Adjust heat between 200°F and 400°F depending on hair thickness.
- Choose a wand barrel size that matches your desired curl type.
- Hold the wand barrel downwards for easier wrapping and safer curls.
How to Use a Curling Wand Without a Clamp Correctly

Using a curling wand without a clamp means wrapping hair around the barrel by hand. The key is steady hands and timing. You need to hold your hair on the wand for 5 to 15 seconds.
The time depends on your hair type. Thicker hair might require longer heat.
Hold the wand vertically close to your head. Wrap your hair around the barrel. Start a little below the roots.
Keep the strand smooth without overlapping strands too much. After holding the hair on the barrel, gently unwrap it.
Pull the hair away from the wand carefully. This helps avoid kinks or frizz.
- Put on a heat-resistant glove. This protects your hand from the hot barrel during curling.
- Take a 1-inch section of dry, styled hair. Smaller sections give more defined curls but take longer.
- Hold the wand vertically close to your head. Place the wand under the section, near the roots but not touching your scalp.
- Wrap the hair around the barrel. Wind hair smoothly toward the tip of the wand, keeping strands flat against it.
- Hold the hair on the barrel for 5 to 15 seconds. Fine or damaged hair needs less time, thicker hair needs closer to 15 seconds.
- Release the curl gently away from the wand. Let the curl drop naturally without tugging to avoid sharp kinks.
- Use your fingers or a wide-tooth comb to separate curls. This adds a loose, beachy look, typical of a clampless wand.
- Repeat on all sections until your hair is curled. Work steadily and patiently, especially if your hair doesn’t hold curls well.
You avoid clamp lines and have more control wrapping hair at any point along the strand. The curls look more natural and tousled. For very curly or thick hair, a little longer heating helps curls last without burning hair.
To release curls smoothly, don’t pull them off fast or bend the wand sharply. Let each curl slide off naturally while holding it in place briefly after unwinding. This stops frizz and weird bends that happen if you yank hair too fast.
Choosing the Right Curling Wand and Barrel Size
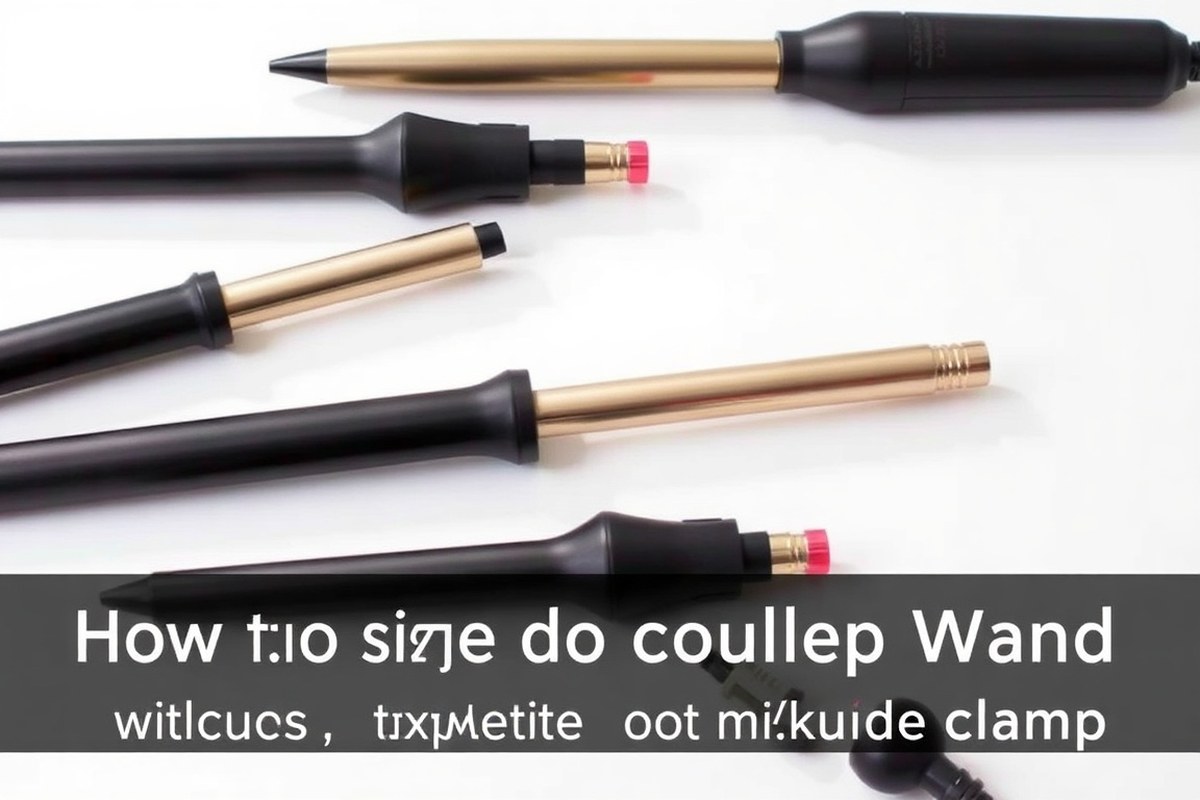
The right curling wand and barrel size depend on the curls or waves you want. Also, your hair type changes which wand works best. Picking the right size helps you get curls that last and look great.
Small Barrels for Tight Curls
Small barrels, about ¾ inch, create tight, springy curls. These are perfect if you want spirals that hold shape well. People with short hair get the most benefit.
Small sections wrap easier around the barrel. This helps create better curls quickly.
These barrels work great on fine or normal hair textures. Thin hair holds tight curls better without needing really high heat. Avoid wrapping large chunks of hair, or curls might look loose and uneven instead.
Medium Barrels for Defined Curls
Barrels around 1 inch work well for small to medium curls and beachy waves. They provide curls that are visible but not too tight. This size works on most hair lengths, especially bob, lob, or medium hair.
Medium barrels suit most hair textures. On tougher hair, use more heat if needed. Hold hair around the wand longer.
This helps lock in curls better. Smaller pieces wrapped evenly give the best result.
Large Barrels for Loose Waves
For loose, flowing waves, pick a 1¼-inch or larger barrel. These barrels produce soft curls that look natural and relaxed. People trying to mimic beach waves usually go with larger barrels.
This size is especially good for thick or coarse hair. Bigger barrels cover more hair at once, which works better on heavier textures. Avoid wrapping thick strands too tightly or you risk uneven heat distribution.
| Barrel Size | Curl Type | Hair Length | Hair Texture | Example Use |
|---|---|---|---|---|
| ¾ inch | Tight curls, spirals | Short to medium | Fine to normal | Pixie cuts, bobs |
| 1 inch | Small to medium curls, waves | Medium to long | All | Beachy waves, lob hair |
| 1¼ inch or more | Loose waves, soft curls | Medium to long | Thick, coarse | Relaxed beach waves |
Using the right barrel size ensures your hair heats evenly and curls last longer. Large sections won’t heat properly on smaller barrels, causing loose waves instead of curls. Adjust how much hair you wrap around the wand based on barrel size.
Hold smaller sections when using small barrels to avoid uneven curls or missed heat.
Prepping Your Hair and Choosing the Best Heat Setting
Start by fully drying your hair and applying heat protectant to avoid damage. Pick a curling wand heat setting that matches your hair type. Using the right heat and products helps create lasting curls without harm.
Applying Heat Protectant and Styling Products
Heat protectant spray is a must before using any hot styling tool. Spray it evenly on dry hair and let it absorb completely. This forms a shield that reduces heat damage during curling.
Besides heat protectant, you might want to add styling products for extra hold or smoothness. Use a volumizing mousse if your hair is thin or flat. For dry or frizzy hair, a smoothing serum helps tame flyaways and adds shine.
- Start with a heat protectant spray on dry hair
- Apply volumizing mousse for fine hair
- Use smoothing serum for frizzy or dry hair
- Let products fully absorb before applying heat
- Avoid using too much product to prevent buildup
Wait a few minutes after applying these products so your hair can fully absorb them. This ensures the best protection and styling support.
Dry Hair Thoroughly Before Curling
Never curl damp or wet hair. It risks burning your strands and causes uneven curls. Use a blow dryer to get your hair completely dry before curling.
Your hair should be towel dried if it’s freshly washed. Then blow dry on medium heat until there’s no moisture left. Your curls will be smoother and last longer on dry hair.
Let your hair air dry about halfway before styling. Apply heat protectant after that.
Then finish drying your hair with a blow dryer. This helps lock in protection while removing moisture.
Matching Heat Settings to Hair Texture
Choosing the right temperature prevents damage and creates better curls. Here’s a simple guide based on hair type and hold time:
| Heat Setting | Hold Time | Best Hair Type |
|---|---|---|
| Low (~300°F) | 10, 15 seconds | Fine or thin hair |
| Medium (~350°F) | 8, 12 seconds | Normal hair |
| High (~400°F) | 5, 8 seconds | Thick or coarse hair |
Start with the lowest heat setting for delicate or thin hair. Increase gradually if curls don’t hold. Thick hair needs higher heat and shorter hold times to shape well.
Let the wand fully heat up before curling to keep the temperature steady. Most digital wands offer customizable heat control for a safer, precise styling experience.
Sectioning Hair for Easy Curling with a Wand
Dividing your hair into sections makes curling with a wand easier. You want each section to match the size of your wand’s barrel. This helps the hair wrap evenly without slipping off or tangling.
Start by parting your hair down the middle or side, whatever you prefer. Clip the top half away.
Focus on the lower layers first. Curl small sections from the bottom up, releasing clips as you finish each row.
- Use clips to hold the upper layers neatly out of the way.
- Take 1-inch wide sections for medium barrels (around 1 inch diameter).
- For thicker or longer hair, reduce section size to avoid bulky curls.
- Shorter hair benefits from smaller sections, about half an inch wide.
- Grab hair near the root. Leave 1 to 2 inches at the ends. This keeps your curls looking natural.
- Try curling away from your face for a flattering style.
Using smaller sections helps the wand heat each part thoroughly. This avoids uneven curls and speeds up curling time. Larger sections might not curl well and can slip off the wand during styling.
Be patient while learning. Handling clampless wands takes some practice to get comfortable.
Watching your hair in a mirror and controlling sections is key for neat, bouncy curls. Over time, you’ll find the right section size that matches your wand and hair texture smooth.
Safety Tips to Avoid Burns and Hair Damage
Using a curling wand without a clamp increases the risk of burns and hair damage. The wand’s barrel can reach up to 400 degrees, so keeping control is key. Protect your skin by wrapping hair carefully and staying aware of where the barrel touches.
Preparing your hair well helps prevent damage. Make sure hair is fully dry before styling, since damp hair burns easier. Using a heat protectant spray also guards strands from excessive heat.
Experts at Redken say keep heat below 200 degrees for fine hair. Use heat between 200 and 300 degrees for thicker hair.
- Wear a heat-resistant glove to shield your fingers and hand
- Use a silicone mat or heat-proof surface to rest the wand
- Keep the wand moving, don’t hold it in one spot longer than 10 seconds
- Separate small hair sections to avoid tangling and uneven heat
- Turn off and unplug the wand immediately after use
- Check the wand’s power cable for any damage to avoid shocks
- Use a wand with an insulated tip for easier handling and safety
The heat-resistant glove is usually affordable, around $5 to $15. It helps you grip the hair near the barrel safely.
Hair sections about 1 inch wide work best for even curls and faster styling. Rest the wand on a silicone mat to avoid burning your countertop or fabrics.
Never wrap hair too tightly around the wand. It raises burn risk and hair damage.
The biggest mistake is leaving the wand on hair too long or touching skin. Burning your scalp or fingers is painful and can cause blisters. Your wand must be properly earthed to avoid electric shocks.
Use well-reviewed brands to stay safe. Taking these basic precautions ensures safer, smoother curls every time.
Common Mistakes When Using a Curling Wand Without Clamp
One common mistake with curling wands without clamps is using too much hair. It’s better to wrap smaller sections around the wand. This helps form better curls.
This can cause uneven heating, leaving some strands straight and others too curled. Try working with smaller sections, about 1 inch wide, for more consistent curls.
Another problem is letting the hair slide off the wand. This often happens because the hair isn’t wrapped tightly enough or the wand is too smooth. Wrap your hair snugly around the wand.
Hold it there for 8 to 12 seconds. This keeps the curl tight and lasting longer. You can also try using a wand with a textured or tapered barrel for more grip.
A lot of people curl too quickly and don’t give the hair enough time to set. Hold your hair on the wand for about 10 seconds. This usually makes curls last longer.
Avoid holding too long to prevent damage. Overheating the hair by holding it too long can cause damage. So stick to the recommended time for your heat setting.
- Use smaller hair sections to avoid uneven curls
- Wrap hair tightly to prevent slipping off the barrel
- Hold hair on the wand for 8, 12 seconds, not longer
- Choose a wand with a textured or tapered barrel for grip
- Keep the wand moving smoothly for even heat distribution
- Avoid curling near the scalp to prevent burns
- Let curls cool before touching or brushing them
Uneven heat is often due to quick, uneven wrapping or rushing the process. Take your time to wrap each slice carefully and keep your hands steady. Curls will look smooth when you avoid curling multiple strands inconsistently.
Sometimes curls turn out awkward or have a kink. This usually happens when the hair twists back under itself.
To reduce kinks, wrap your hair in one direction only and avoid overlapping on the wand. Smooth the hair with a finger as you wrap it around for better curl flow.
How to Make Your Curls Last Longer
Curls last longer when you let them cool without touching. After wrapping a hair section around the wand, hold it tight. Keep the curl in your hand 10 to 15 seconds.
This helps set the curl shape well. You can clip the curl to your head to hold it.
Pin it tight until it cools completely. This keeps the curl secure and longer lasting.
Using the right products can prevent frizz and keep curls defined all day. Apply a heat protectant spray before curling to avoid damage. Spray a light mist of hairspray after curling your hair.
It locks curls without stiffness or sticky feeling. This keeps hair flexible and styled.
- Use a heat protectant spray before styling
- Let each curl cool in your hand or pinned up
- Use a light-hold hairspray for flexible hold
- Apply a curl-improving mousse before drying hair
- Don’t brush curls after styling to avoid frizz
- Use anti-frizz serum sparingly if hair is dry
- Avoid touching curls too much during the day
For fine or straight hair that won’t hold curls easily, try applying mousse before blow-drying. This adds grip and volume, helping curls stay. On thick or coarse hair, a stronger hold hairspray works better to maintain the curl shape.
Using too much product or brushing curls too soon can cause frizz and lose curl shape. Wait until curls fully cool before arranging or teasing. Handle hair gently right after curling to keep curls smooth.
Use products suited to your hair type for best results. This helps curls last longer and look better.
Professional Tips for Best Results with a Clamp-Free Wand
Using a curling wand without a clamp offers control and variety for your curls. Pros suggest small technique tweaks to suit your hair type and get the shapes you want. Knowing how long to hold curls and how to wrap strands makes a big difference.
Adjusting Hold Time for Hair Texture
Fine hair curls fast and needs less heat to avoid damage. Hold each section on the wand for about 5 seconds at roughly 300°F. Coarse hair needs higher heat, about 375 to 410°F. Hold the wand on your hair 8 to 10 seconds for better curls. These steps help curls last longer.
Medium or normal hair needs 350 to 375°F heat. Hold the curling wand 5 to 8 seconds to get curls. This works well for most hair types.
Increase heat by 25°F steps when curls don’t form right away. Adjusting heat helps get the curls you want.
Keep testing in small jumps. Check often to prevent overheating and keep curls healthy.
Varying Wrap Direction for Natural Looks
Wrap hair strands clockwise or counterclockwise to change the curl shape. Swapping directions every few sections prevents curls from looking too uniform or stiff. This gives your style a natural, tousled look.
For tighter curls, wrap hair closely and smoothly around the wand. For softer waves, let the ends stay loose and bend the hair less tightly. These variations customize your curl style based on your hair’s natural texture and your desired look.
Timing and Reheating Curls for Perfect Shape
After curling, don’t immediately comb or touch your hair. Let curls cool on the wand or clip them to set shape better. This helps them last longer without falling flat.
Reheat curls quickly if they loosen later. You can touch them up 1 or 2 times without damage. This keeps curls looking fresh longer.
Avoid reheating the same section too often or it can dry out and frizz. Using a spray-on heat protectant before your curling session extends your hair’s health.
Always test heat with a small hair section first to avoid damage or weak curls.
Step-by-Step Action Plan for Using a Curling Wand Without a Clamp
Follow these steps to get great curls with your curling wand quickly and safely. Check each step so you know it’s working before moving on.
- Before you start: Choose a wand barrel size that matches the curls you want. Smaller barrels make tighter curls; bigger ones give loose waves.
- 10 minutes before curling: Wash and dry your hair completely. Dry hair curls better and reduces heat damage.
- Just before curling: Apply a heat protectant spray evenly. This protects your hair from heat damage and keeps curls smooth.
- Right now: Section your hair into manageable parts. Smaller sections curl easier and look neater when done.
- Start curling: Wrap a 1-inch section around the wand, hold for 8-12 seconds. Let it cool fully before touching or releasing to set the curl.
- Halfway through: Spray curls lightly with a flexible hold hairspray. This helps curls last without stiffness.
- After curling all hair: Gently separate curls with fingers for volume. Avoid brushing to reduce frizz and keep curl shape.
- Before finishing: Check for any missed spots and quickly touch up if needed. Use the same timing and heat to stay consistent.
Frequently Asked Questions
What Type of Heat-Proof Glove Should I Use with a Curling Wand?
Use a heat-proof glove made from silicone or similar material. It protects your hand from burns while wrapping hair around the hot barrel. Gloves improve safety and control when styling with no clamp.
How Do I Avoid Tangling Hair While Using a Clamp-Free Curling Wand?
Divide hair into small, smooth sections before curling. Make sure strands are detangled and dry to prevent knots on the barrel. Taking your time reduces tangles and makes curling easier.
Can I Use Styling Products Before Curling with a Wand?
Yes, apply heat protectant spray before curling. It shields hair from heat damage and helps curls last longer. Avoid heavy oils that can weigh hair down or cause uneven curls.
Is It Better to Curl Hair Away from or Toward the Face?
Generally, curl hair away from the face for a natural, open look. You can alternate directions for a more tousled style. Adjust direction based on your preferred curl shape and facial framing.
How Often Should I Clean My Curling Wand Barrel?
Clean the barrel after every few uses to remove product buildup. Use a damp cloth with rubbing alcohol when the wand is cool. This maintains heat efficiency and protects your hair.
Should I Curl My Hair in One Pass or Multiple Wraps?
One smooth wrap per section usually works best for defined curls. Multiple wraps can cause heat damage or uneven curls. Adjust time and number of wraps based on your hair texture.
Final Thoughts
Using a curling wand without a clamp takes practice. It gives you control over how your curls look. You can style your curls exactly how you want.
Start with small sections and give curls time to cool before handling. Try curling a few strands today. You’ll see how easy it becomes to create lasting curls you love.