How to Sharpen Shears: 8 Essential Steps for Sharp, Long-Lasting Blades
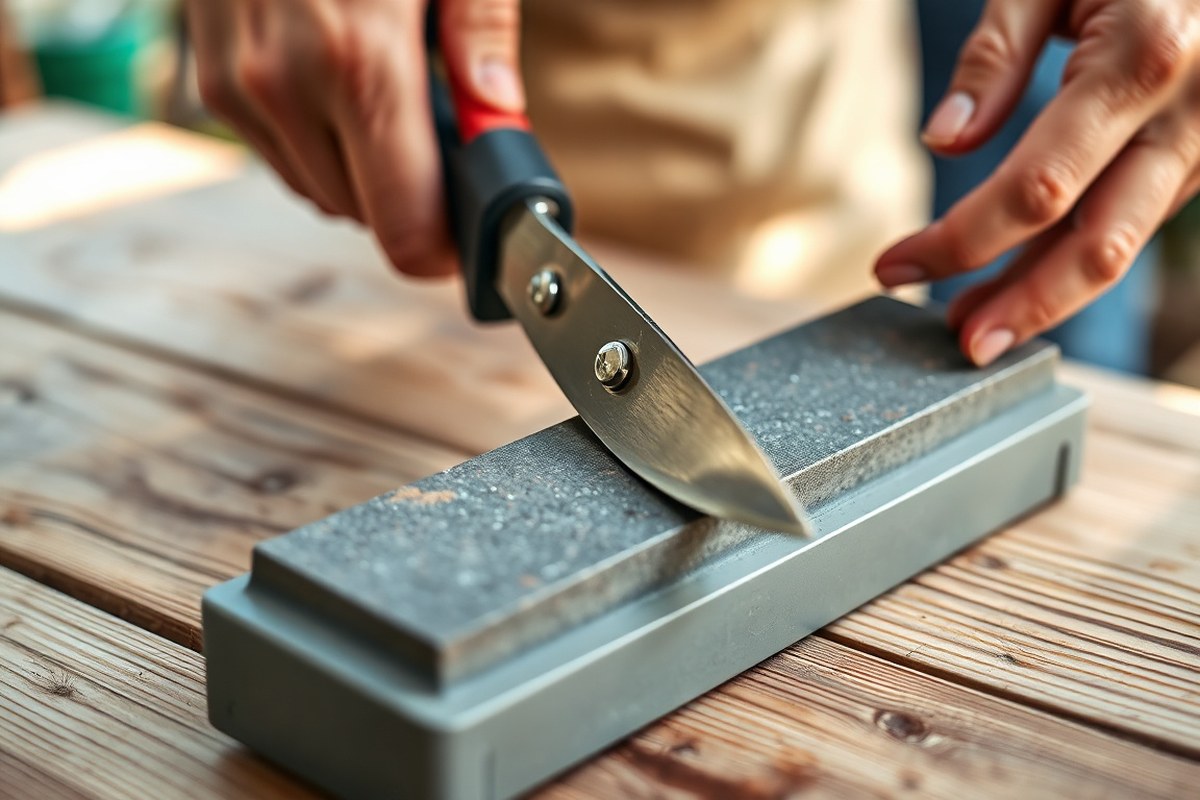
How to sharpen shears is simple when you use a sharpening stone or handheld sharpener. Hold the tool at a 25 to 30 degree bevel angle. This angle works well for garden shears.
First, clean your shears to remove dirt and rust. This protects the blades and helps sharpening go smoothly. Avoid sharpening too hard to protect the bevel angle.
Use light, even pressure with long, smooth strokes along the blade. Test sharpness by cutting a scrap plant stem. Don’t grind away too much metal to keep your blades lasting longer.
When done, wipe blades clean and apply light oil to prevent rust. Store shears dry to keep them sharp. Regular sharpening gives clean cuts and makes your gardening easier.
Key Takeaways
- Match the sharpener angle to the blade’s bevel, about 25 to 30 degrees.
- Clean rust with WD-40 and let it soak for 10 minutes before sharpening.
- Use 5 to 20 strokes per side, depending on how dull the blade is.
- Apply a few drops of oil on the sharpening stone to reduce friction.
- Let the oil soak in for 5 to 10 minutes before sharpening.
- Hold shears steady and use smooth strokes to keep an even edge.
1. How to Sharpen Shears: Essential Steps for a Sharp Edge

Sharpening shears at home takes about 5 to 20 strokes per side, depending on dullness. Start by cleaning the blades and setting the right angle, usually around 25 to 30 degrees. Use a whetstone or file to sharpen the bevel evenly.
Slide it along the bevel carefully. Finish by removing burrs and applying oil.
Prepare Shears for Sharpening
Clean blades remove dirt and sap to avoid damage while sharpening. Disassemble if blades are stuck or rusty, so you can reach all edges well.
Remove rust with steel wool or a wire brush to get a smooth surface. Add oil to pivot points to keep shears opening and closing easily later.
Set and Maintain the Correct Bevel Angle
Locate the beveled edge, usually angled 25 to 30 degrees on garden shears. Hold your sharpening tool to match that angle precisely for best results.
Keep the same angle through all strokes to restore the original bevel. Changing the angle can ruin the edge and make cutting harder.
Use the Proper Sharpening Technique
Move your whetstone or file in long, steady strokes along the cutting edge. Start from the thick base near the handle and work toward the blade tip.
Apply gentle, consistent pressure so the blade sharpens evenly while preserving its shape. After sharpening, check the flat opposite side for burrs.
Run the tool flat against the blade to remove burrs. This smooths the edge and improves cutting. Usually, 5 to 20 strokes per side are enough.
Finish and Test the Blade
Wipe the blades clean with a cloth to remove metal particles after sharpening. Apply a drop of light oil to the blades to prevent rust and keep them smooth.
Reassemble the shears and tighten the pivot screw properly so they cut well without sticking. Test the cut on a plant stem to check for smooth, clean slicing.
- Clean the blades and remove any rust or sap.
- Disassemble shears if needed to access all edges.
- Identify the bevel angle, usually about 25, 30 degrees.
- Hold the sharpening stone or file at the bevel angle.
- Sharpen with long, even strokes from the base to the tip.
- Check and remove any burrs on the flat side.
- Wipe clean and apply oil to the blades.
- Reassemble shears and test the sharpness on plant stems.
2. When and How Often Should Shears Be Sharpened?

How often you sharpen your garden shears depends on how much you use them. For casual gardeners, sharpening once a season, like after winter, usually works fine. When you prune a lot, sharpen your shears more often.
A quick touch-up every few hours in heavy use keeps blades sharp. This helps your cuts stay clean and smooth.
Watch for signs your shears need sharpening. Blades crushing or tearing stems mean they are dull. You need to sharpen them for clean, easy cuts.
Struggling to cut thick branches means your blades are dull. You also might need to squeeze the handles harder.
Both signs show it’s time to sharpen. These clues help you avoid pushing dull blades, which can damage plants and tire your hands.
A quick touch-up is a light sharpen done often. Do this every two to three hours during long pruning sessions. It keeps blades ready without overdoing it.
It only refreshes the cutting edge without taking the shears apart. Full sharpening sessions happen less often. Typically, deep maintenance occurs once per season.
Full sharpening means restoring the edge completely. You also clean and check the shears during this process. This keeps them working smoothly and lasting longer.
Regular touch-ups keep your shears ready for any job during the day. Deep maintenance fixes bigger issues and keeps the blades in top shape.
Both are important to extend your shears’ life and save time when you prune. You’ll cut cleaner and feel less strain with sharper blades.
Always hold shears firmly and point blades away from you when sharpening to prevent injuries.
Keeping a simple routine helps. After every few hours of work, do a quick touch-up. At the end of the season, spend a bit more time on deep maintenance.
This sharpening schedule fits how you use your tools. It helps keep blades sharp when you need them most. You avoid rough cuts or broken parts.
3. Choosing the Right Tools for Sharpening Shears
You have several options for sharpening your shears, each with pros and cons. Manual files and stones give control and low cost.
Diamond stones offer precision and last long. Electric sharpeners save time on very dull blades but cost more and need care.
Manual Files and Sharpening Stones
Manual files are simple metal tools with rough surfaces for grinding. They cost about $10 to $20. These sharpeners work well for slightly dull shears.
They’re a good choice for light touch-ups. A flat file with fine teeth helps remove nicks and restore the edge.
Whetstones are blocks of fine-grained stone. They require water or oil to lubricate before use. You rub the blade at the right angle.
For garden shears, this is usually 38 degrees. This makes a clean and sharp edge. Whetstones cost between $15 and $40 and can give smooth, precise results with some practice.
Diamond and Ceramic Stones
Diamond stones have tiny, sharp particles permanently embedded on the surface. This lets them cut quickly and last for years.
You need just 2 to 3 sweeps on the fine side for a smooth, sharp finish. These stones cost around $20 to $50.
Ceramic stones feel smoother and remove less metal per pass. They polish the edge, improving sharpness without changing the blade shape.
Ceramic stones are good for maintenance after coarser sharpening with diamond or files. Both types help keep an even edge angle to avoid uneven cutting.
Electric and Multi-Use Sharpeners
Electric sharpeners like the Work Sharp Ken Onion save time. They are good for very dull or many shears. This speeds up the sharpening process.
They usually use abrasive belts or wheels to grind edges evenly. Make sure to use them carefully to avoid removing too much metal or overheating blades.
Electric sharpeners cost more, around $100 to $150 or higher. They save time but are less handy for small touch-ups compared to stones or files. Avoid electric sharpeners on delicate blades.
Fine blades like manicure shears can get damaged. Aggressive grinding may ruin their edge.
You can see the differences in cost, effort, and best use clearly below.
| Tool Type | Cost Range | Ease of Use | Best For | Notes |
|---|---|---|---|---|
| Manual File | $10-$20 | Easy | Small touch-ups, minor dullness | Low cost, manual control |
| Whetstone | $15-$40 | Moderate | Precision sharpening | Needs lubrication, angle control |
| Diamond Stone | $20-$50 | Moderate | Quick, long-lasting sharpness | Fast cutting, durable |
| Ceramic Stone | $15-$40 | Moderate | Polishing, fine edges | Removes little metal |
| Electric Sharpener | $100-$150+ | Easy (with caution) | Very dull blades, many tools | Fast but can overheat blade |
Choosing your tool depends on how dull your shears are and how often you sharpen. Basic manual files and stones work well for occasional sharpening.
Diamond stones give quick, sharp edges that last longer. Electric sharpeners suit heavy use or very dull blades but demand caution to avoid damage.
4. Cleaning and Preparing Shears Before Sharpening
Start by wiping your shears with a damp cloth to remove loose dirt. Use warm, soapy water and a sponge scourer to clean off tree sap and sticky residue.
Sap can dull your sharpening tool and cause uneven edges. So getting it off is essential.
Rust on blades weakens the metal and leaves rough edges when sharpening. Soak the blades in warm, soapy water for 10 to 15 minutes to soften rust spots. Then scrub gently with fine steel wool or a cleaning eraser designed for blades.
Disassemble your shears if possible. Take apart the pivot bolt to separate the blades safely.
It is easier to sharpen each blade evenly without the handle in the way. Be sure to remember how to reassemble them to avoid problems later.
- Wipe dry with a cloth to get rid of all moisture.
- Use a cleaning eraser or steel wool for stubborn rust and sap.
- Loosen the central bolt and take blades apart carefully.
- Keep all screws and washers in a safe place.
- Mark the blade bevel with a pen to track sharpening progress.
Removing sap and rust reveals the clean metal beneath your blades. This helps you see the sharpening angle clearly.
Once clean and taken apart, your shears will sharpen more smoothly for better cuts. Taking 15 to 20 minutes for this step saves time and wear on your tools later.
5. Sharpening Techniques for Different Types of Shears
Different types of shears need different sharpening angles and methods to work best. Garden shears and pruning shears usually sharpen around 23 to 30 degrees.
Hairdressing scissors need a finer angle of about 38 degrees or less to stay precise. Hedge shears have larger blades that often require electric sharpeners or files.
Garden and Pruning Shears
Garden shears and bypass pruning shears have one sharp blade angled on one side. Anvil pruning shears have blades angled on both sides.
Their sharpening angle is usually between 23 and 30 degrees. This keeps cuts clean and avoids plant damage.
Use a flat file or whetstone fixed in a vice for safety. Sharpen only the beveled side for bypass shears and both sides for anvils. You want smooth brushing strokes along the original angle until sharp.
- Clamp the shears securely in a vice with blades open.
- Check the blade’s angle and choose a matching file or whetstone.
- Sharpen only the beveled edges, following their current angle.
- Use long, even strokes, pushing away from the blade edge.
- Flip the anvil blade and repeat on both sides, if applicable.
- Wipe the blade clean and test sharpness on a piece of paper.
Always sharpen the original bevel angle to keep blade alignment intact.
Hedge Shears
Hedge shears have large blades that need careful handling to avoid uneven edges. Electric sharpeners with adjustable angles or coarse and fine files help speed up the process.
Set the angle close to 25 to 30 degrees. This keeps a sharp edge without removing too much metal.
Hold the blade steady and sharpen along the outer bevel. Use smooth strokes that follow the blade’s curve. Power sharpeners help but check progress often to avoid overheating the blade.
Hairdressing and Precision Scissors
Hairdressing scissors have much sharper angles, usually about 38 degrees or less. This allows finer, more precise cuts for hair.
Use a fine whetstone or leather strop for polishing. Do this after sharpening with a small diamond stone or fine file.
Sharpen slowly with a light touch to keep the blade edges perfect. Stropping removes tiny burrs and polishes the edge for a smooth cut. Avoid coarse stones that could chip or ruin the blade.
6. Aftercare: Deburring, Lubrication, and Storage
After sharpening, a thin burr often forms on the blade edge. You remove it by running a fine-grit file or whetstone gently along the blade’s back side.
This stops the blade from catching or tearing when you cut. Turn the shears over and work along the edge until the burr disappears.
Lubrication helps shears open and close smoothly. Apply a few drops of light machine oil or garden tool oil on the pivot joint.
Wipe the blades lightly with an oily rag to coat the sharp edges and stop rust. Avoid too much oil; a thin layer prevents gumming up during use.
Plant sap and dirt harbor germs that cause plant diseases. After cleaning and sharpening, wipe blades with rubbing alcohol or a 70% isopropyl solution.
This disinfects your shears to keep plants healthy. Make sure all tool parts dry fully before storing.
- Run a fine file over the blade backs to remove burrs.
- Oil the pivot joint lightly with garden tool or machine oil.
- Wipe blades with an oily cloth to prevent rust.
- Disinfect blades using rubbing alcohol or 70% isopropyl.
- Dry completely before storing shears away.
- Store shears in a dry place, off the ground.
Keep shears in a dry, shred-free drawer or hang them on a wall hook. Avoid leaving them outside or in damp sheds. Moisture causes rust that dulls blades quickly.
Proper storage preserves sharpness and extends your shears’ life. A cheap cloth case or dedicated tool pouch also keeps blades safe from damage.
7. Common Sharpening Mistakes and How to Fix Them
A common error is honing the incorrect blade edge on your shears. Each blade usually has one side with a beveled edge to sharpen.
Focus on sharpening only this angled side, leaving the flat part alone. Sharpening the flat side can damage the blade and won’t make cuts cleaner.
Another error is using the wrong angle while sharpening. The factory bevel usually ranges from 40 to 50 degrees.
Using a file at a different angle creates a dull edge quickly. Match your hand-powered file angle to the factory bevel to maintain sharpness.
Uneven edges happen if pressure varies or you skip strokes. This leaves nicks or dents that reduce cutting quality.
To fix, rub the file firmly and evenly along the entire beveled edge. Use medium coarseness to smooth out damage from rough use.
Sharpening both sides of the blade is unnecessary and can ruin the edge. One side is for cutting, the other is flat.
Focus on the cutting bevel only. Small nicks on the flat blade should be filed down gently to preserve its shape.
When sharpening, angle the blade away from you and push the file firmly. Consistent strokes keep the edge true.
After sharpening, smooth any roughness by lightly using a fine sharpening stone. This step improves the final sharpness and prevents snagging.
8. When to Call a Professional Sharpener
Call a professional sharpener when your shears have deep nicks, chips, or broken tips. These types of blade damage usually need special tools and skill to fix properly. Sharpening severe blade damage at home can make it worse.
You might remove too much metal or change its shape. Avoid DIY for badly damaged blades.
Complex blades like scissors for thinning hair or gardening calls often require expert handling. They mix different grind angles or blade types. These are hard to copy with home sharpeners like the FELCO 906.
Professionals use diamond stones, belt grinders, or electric sharpeners. These tools handle stubborn edges or complex bevels better.
The rule to call a pro is simple. Test your shear’s edge first by cutting paper. The blade likely needs expert sharpening if it tears paper.
This is after your best DIY sharpening attempts. A loose shear or tough blade adjustments after sharpening need pros. They fix these without risking damage from DIY disassembly.
Do not try to repair cracked or bent blades yourself. It’s safer and often cheaper to use a professional sharpener.
Professional sharpeners also properly align blades during sharpening, which helps prevent wobble and uneven cuts. Their experience means they preserve the blade’s original angle and thickness, extending tool life.
Costs for professional sharpening vary but expect to pay between $15 and $40. It’s usually faster and less frustrating than fixing bad sharpening results on your own.
Step-by-Step Action Plan to Sharpen Your Shears at Home
Follow these clear steps to sharpen your shears properly. Check each step’s result to ensure success.
- Before you start: Clean your shears with warm water and soap. Dry completely to prevent rust.
- Gather your tools: Use a sharpening stone or fine file suited for your shear type. Make sure the tool feels sturdy in your hand.
- Day 1: Secure your shears in a clamp or hold firmly. Run the sharpening tool along the blade at the original bevel angle. Check if the edge feels smoother.
- After each pass: Wipe the blade clean. Check for a smooth edge. Make sure there are no nicks on the blade.
- Day 2: Deburr the opposite blade side with a fine stone or sandpaper. Test by gently running your finger across (not along) the edge for smoothness.
- Post-sharpening: Apply a drop of light machine oil along the pivot and blades. Open and close the shears to spread it evenly.
- Weekly: Wipe blades with a cloth after use. Store shears in a dry place to keep the edge sharp longer.
- Monthly: Check the blade edge for dull spots. Repeat sharpening if cutting feels harder or uneven.
Frequently Asked Questions
How Do You Sharpen Shears at Home?
Use a fine sharpening stone or a handheld sharpener. Hold the blade at a 25, 30 degree angle and gently stroke along the beveled edge. Clean and oil the blades after sharpening to keep them sharp longer.
Does Aluminum Foil Sharpen Shears?
No, aluminum foil does not effectively sharpen shears. It may help remove small rust spots but won’t restore a sharp edge. Using proper sharpeners is key for maintaining your shears’ cutting ability.
Can You Sharpen Hair Shears at Home?
Yes, you can sharpen hair shears at home with the right tools. Use a fine-grit sharpening stone and maintain the original bevel angle. But professional sharpening may be needed for a precise, smooth finish.
Can I Sharpen My Shears with a Knife Sharpener?
Some knife sharpeners work on garden shears. Electric ones are best. The Work Sharp Ken Onion 2 is a good example.
They’re useful for very dull blades or large quantities of shears. Handheld knife sharpeners are less ideal for fine shears like hair scissors.
How Do I Know When My Shears Need Sharpening?
Dull shears show signs like uneven cuts, difficulty cutting, or blade slipping. Regularly inspect blades for nicking or damage. Sharpening restores cutting power and reduces hand strain.
Can Sharpening Shears Remove Factory Bevels?
Yes, poor sharpening can alter the original bevel, reducing blade efficiency. Aim to follow the factory bevel angle of about 25, 30 degrees. This keeps your shears cutting cleanly and saves blade life.
Final Thoughts
Sharp shears make your garden and DIY tasks easier and safer. Keep an eye on the blade’s cutting quality and care for it regularly. Start by cleaning and sharpening your shears today to see better results tomorrow.