How to Use Thinning Shears: A Complete Guide for Perfect Hair Thinning
Learning how to use thinning shears helps you reduce bulk and soften thick hair easily. These special scissors cut sections of hair without changing the entire length. Hold the shears about 2 to 3 inches from your scalp to avoid cutting too close.
Thinning shears have one blade with sharp teeth and a smooth blade opposite it. This design cuts only part of the hair strand.
Usually between 40 and 70 percent of hair is cut per snip. Starting with a small section, around 1 to 2 inches wide, makes the thinning process smoother.
Choose shears with more teeth for gentle blending and fewer teeth for removing more hair quickly. A good pair of shears generally costs between $30 and $50. Cheap tools can damage your hair instead of thinning it cleanly.
Key Takeaways
- Hold thinning shears about 2 to 3 inches from the scalp when cutting.
- Cut small hair sections, about 1 to 2 inches wide, for control.
- Shears with 30+ teeth create soft blends, while fewer teeth remove more bulk.
- Expect to remove roughly 40% to 70% of hair with one cut.
- Invest $30 to $50 in quality thinning shears to avoid hair damage.
- Start thinning mid-shaft, not at the roots, to prevent uneven spots.
What Are Thinning Shears and How Do They Work?

Thinning shears look like regular scissors but have a very different blade design. One blade is smooth. The other has sharp teeth, usually between 28 and 40 teeth.
These teeth catch and cut some strands with each snip. This way they remove bulk without shortening hair length.
Regular scissors cut all hairs in a section. Thinning shears only cut some hairs, not all. This partial cut removes about 40 to 70 percent of hair.
It thins hair in the snipped area. The result is softer, blended hair that stays the same length but loses excess weight.
The number of teeth determines how much hair the shears remove. A blade with 30 to 40 teeth cuts less hair each time. It’s good for subtle thinning jobs.
Blades with 16 to 24 teeth cut more hair quickly. They work best on thick or very bulky hair.
Thinning shears work by slicing some strands while leaving most untouched. Point cutting with these shears cuts hair vertically, softening blunt lines and creating more natural-looking texture. They’re great for shaping layers and blending between different lengths, adding movement without shortening hair.
Hold the hair section firmly when using thinning shears. Cut perpendicular to the hair’s length for best results.
You angle the shears so only some strands fall between the teeth. Avoid snipping too close to the scalp to prevent uneven thinning or visible gaps in hair.
Regular scissors are for cutting hair length. But thinning shears focus on managing volume and texture.
They remove weight gently and create flow in hair without messing with the overall style. That’s why they’re popular for thick, dense hair and styles needing soft transitions between layers.
Choosing the Right Thinning Shears for Your Hair Type

Choosing the right thinning shears hinges on your hair type and the look you want. Tooth count lets you control how much hair the blades cut in one pass.
Fewer teeth mean bigger cuts, perfect for thick hair needing bulk removal. More teeth give a softer, blended effect for thin or fine hair.
Here’s a simple rule: thick hair benefits from shears with fewer teeth, around 15 to 20. Fine hair works best with 30 to 40 teeth shears for gentle thinning. Curly hair usually needs medium tooth shears to keep the natural shape while reducing bulk.
| Hair Type | Tooth Count | Thinning Effect |
|---|---|---|
| Thick Hair | 15, 20 teeth | Bulk removal, reduce heaviness |
| Curly Hair | 20, 30 teeth | Bulk control with texture retention |
| Fine or Thin Hair | 30, 40 teeth | Blending and soft thinning |
Tooth count also affects how much hair these shears remove. Lower tooth shears can cut up to 40% of hair in one pass. They are best for thick hair.
This helps quickly reduce bulk. High tooth shears cut less hair.
They remove around 10% to 20%. These work well on fine hair so you don’t thin too much.
Professional thinning shears usually have a more precise finish and better steel quality. They’re more expensive, often around $30 to $100.
Home-use shears cost less but might be less sharp or durable. Pick professional ones if you plan to use them often for styling others.
Use thinning shears with fewer teeth carefully on thick hair. Go slowly to avoid cutting too much hair at once.
Always match the shears to your hair type and style goal. Thick, heavy hair loses bulk nicely with fewer teeth shears. Fine hair looks natural and full with higher tooth counts, avoiding a flat or scraggly look.
How to Prepare and Section Hair Before Thinning
Start thinning on dry hair for better control and clear visibility. Comb hair carefully to spot thick spots. Then divide hair into small sections, about 1 to 2 inches wide, for balanced thinning.
Drying and Combing Hair Thoroughly
Hair should be completely dry before using thinning shears. Wet hair can hide bulk and make thinning uneven. Dry hair lets you see exactly where thick patches are.
Use a fine-toothed comb to smooth out the hair gently. Comb through in the natural fall direction. This makes it easier to pick out small sections for thinning.
Dividing Hair into Small, Manageable Sections
Divide hair into subsections about 1 to 2 inches wide. Smaller sections give you more control and prevent over-thinning. Bigger sections can lead to uneven thinning and patchy results.
Start at the bottom layers and work your way up to the crown. Take care to keep each subsection separated as you work. This method helps balance thinning throughout all hair layers.
Using Clips and Holding Tools for Precise Access
Use hair clips to secure sections you are not thinning yet. Clips keep hair out of the way for clearer access to each small section. They also help maintain the shape and order of your hairstyle.
Hold each subsection firmly with your fingers or a comb while thinning. This steady grip prevents slips and uneven cuts. You want precision, so take your time with each small piece.
Follow these steps to prepare and section hair before thinning:
- Wash and towel-dry hair thoroughly, then finish drying with a blow dryer if needed.
- Comb through hair to remove tangles and align strands in their natural fall.
- Divide hair into horizontal layers with a comb, clipping upper layers away.
- Create small subsections about 1 to 2 inches wide within each layer.
- Secure uncut sections with clips to keep clear access.
- Hold each subsection firmly as you thin to maintain control.
Proper Technique: Holding and Positioning Thinning Shears
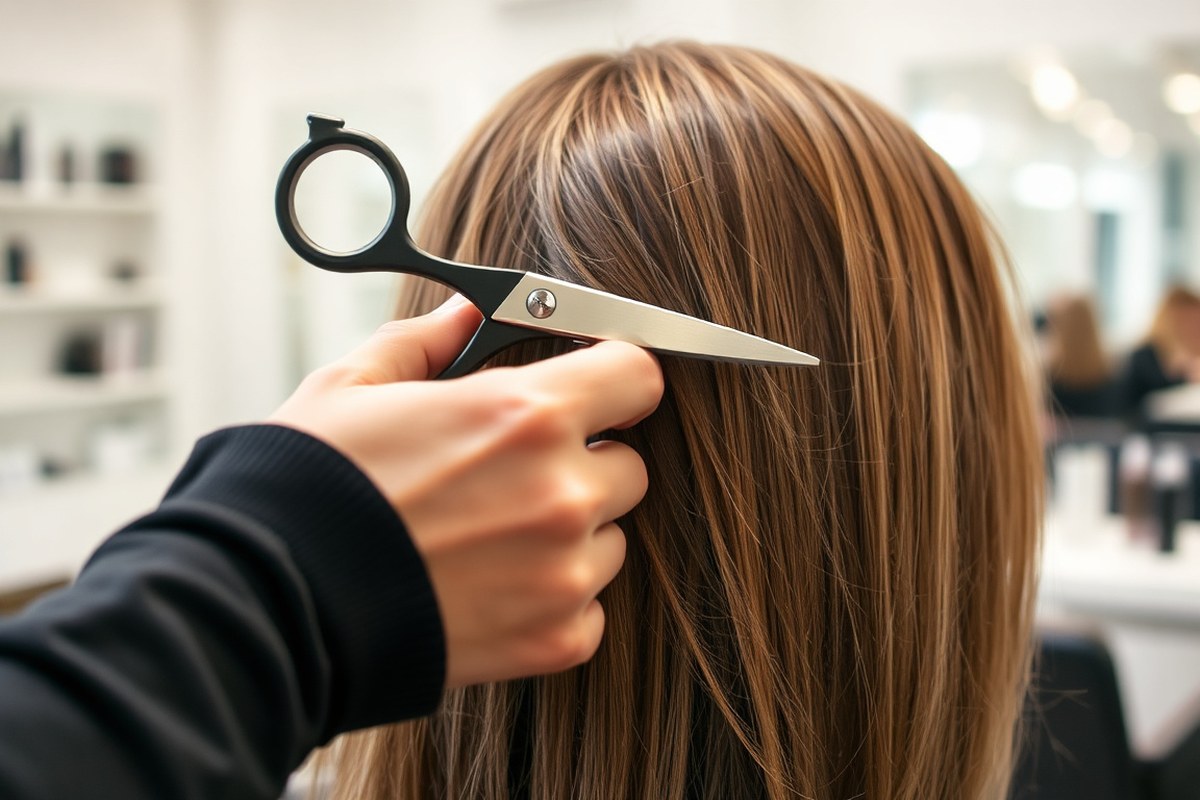
Hold thinning shears comfortably by using your thumb and ring finger. Rest your middle finger on the finger rest for better control. Avoid gripping too tight to prevent hand fatigue and ensure smooth cuts.
Position the blades at about a 45-degree angle to the hair shaft. This diagonal hold blends weight lines naturally and prevents harsh cutting lines. Keep the angle consistent for even thinning results.
Place the shears about 2 inches from the scalp. Position them near the middle of the hair strand. Keep this spot consistent on each section you cut.
Cutting at this spot supports shorter hairs with longer ones. It reduces the risk of hair sticking out unevenly or looking patchy.
Use small sections of hair about one inch wide for steady, controlled thinning. This size matches your finger grip and keeps thinning balanced. Avoid taking larger sections to prevent over-thinning or creating visible gaps.
- Hold hair straight out, grasping a 1-inch section with your fingers
- Keep shears slightly open, then slide down mid-length before closing blades
- Twist the hair lightly before cutting for added texture
- Make one or two small snips per section to avoid removing too much hair
- Don’t cut too close, stay 5 to 10 cm from the scalp
- Weave the shears in and out for softer, natural blending
Good technique lets you shape hair without harsh lines or uneven spots. Using the right hand position and angle keeps cuts clean and comfortable. Control is key when thinning to maintain style flow and avoid damage.
Step-by-Step Guide to Using Thinning Shears on Hair
Start thinning hair a few inches from the scalp, focusing on mid-lengths first. Work slowly and avoid over-thinning any area to keep hair looking natural. Follow a clear order to blend layers and maintain volume.
Start Away from the Scalp at Mid-Lengths
Position thinning shears about 2 to 3 inches from the scalp at mid-shaft or mid-lengths. This stops too much volume loss right at the roots.
It also avoids prickly, short hairs near the crown. Work on one section at a time to keep control.
For very long hair, thinning mid-lengths removes bulk without breaking hair near the scalp. Hold the shears closed and glide smoothly down toward the ends with a single cut. Thinning here reduces weight but keeps the hair’s natural movement.
Thin Ends and Layered Sections for Texture
Thin sections near the ends only if the style calls for texture and softer edges. Never use thinning shears on the very ends to avoid split or ragged looks. Focus on blending harsh layers to create smooth transitions.
Work the thinners along layers that look choppy and create gentle snips to soften those lines. This makes the cut appear natural and prevents blunt edges from standing out. Take care to blend evenly and keep volume balanced.
Repeat on All Sections Conservatively
Move methodically through the hair, repeating the thinning process on each section. Keep snips light and conservative, about 5 to 10 snips per section, to avoid over-thinning. Start with fewer cuts; you can always thin more later.
Space each snip evenly, and don’t stay too long in one area. This approach prevents patchiness or thin spots. Use the shears vertically or diagonally for an even texture that fits your style.
Start with one or two snips per section then check your work before continuing.
Check for Evenness and Refine as Needed
After thinning all sections, let the hair fall naturally and check for consistency. Look for spots that feel bulky or too thin and adjust with a few gentle snips. Blend uneven areas by thinning a little more, not more than 5 snips per problem spot.
Use your fingers to lift sections and see how the hair moves. Smooth blending means no harsh lines or visible thinning spots. Touch up gradually to keep the hair’s natural body and flow.
- Section the hair into manageable parts using clips.
- Position thinning shears 2 to 3 inches away from scalp at mid-length.
- Make one smooth cut, gliding down toward the ends.
- Thin layering sections gently to soften harsh lines.
- Repeat thinning lightly on all sections, 5 to 10 snips each.
- Check hair’s fall and look for uneven areas.
- Refine problem spots with a few additional snips.
Using Thinning Shears for Different Hair Lengths and Styles
Thinning shears work well on different hair lengths and styles but require adjusting your technique. Short hair, bangs, and men’s cuts all need slightly different approaches to avoid damaging the shape. Curly and layered hair also need attention to maintain natural texture while reducing bulk.
Techniques for Short Hair and Fades
Short hair and fades ask for very careful use of thinning shears. You should remove only a little hair each time. This keeps the cut looking clean.
Avoid cutting too much at once. Open and close the shears slowly. Use gentle, light snips to blend areas without messing with the fade edges.
To avoid over-thinning, work in small sections and frequently check the hair’s shape. For a close fade, use thinning shears on longer areas. Avoid near the skin where the cut is tight.
This keeps the fade smooth. This prevents patchy spots and keeps the look sharp.
Thinning Bangs Without Losing Shape
Bangs need special attention because you want to keep their style but reduce heaviness. Hold bangs straight down. Snip lightly with thinning shears from mid-length to edges.
Avoid cutting near the roots. This thins without chopping off length or creating uneven gaps.
Work slowly and comb through after every few cuts to check the shape. Over-thinning bangs can make them look wispy or uneven.
So stop once you feel the bangs are lighter but still full. This technique helps them frame your face nicely.
Applying Shears in Men’s Hairstyles
Men’s haircuts often benefit most from thinning shears, especially for thick or coarse hair. Use them to blend tough, bulky areas into the surrounding hair for a natural finish. This keeps the style controlled but not flat or heavy.
Cut with the shears open. Move them side to side slightly. This breaks up thick clumps of hair.
Avoid heavy thinning at the top if the client prefers fuller volume there. Use thinning shears mainly on the sides and back to keep the shape tidy.
Approaches for Curly and Layered Hair
Curly hair requires a careful touch as thinning shears can sometimes mess with curl patterns. Use light, targeted snips to reduce bulk. Avoid cutting close to roots where curls form.
This keeps natural curl shape. This keeps the natural bounce and fullness intact.
Layered hair benefits from thinning shears to soften edges between layers. Work in layers. Thin only 10 to 20 percent of hair per section.
This keeps the hair balanced. This method blends layers more smoothly without losing the layered style’s volume.
Common Thinning Shears Mistakes and How to Fix Them
Signs of over-thinning show up as uneven patches or holes in the hair. You might notice certain spots look much lighter or feel too thin compared to others. Over-thinning one area makes the hair lose natural weight and shape, leaving a choppy look.
Cutting too close to the scalp causes visible gaps and can create a patchy effect. Thinning shears should never be used near the roots. Keep thinning shears 1 to 2 inches from the scalp.
This prevents frizz and stops extra volume around the base. Avoid cutting too close to the scalp.
Uneven texture happens when you use thinning shears improperly on curls or section hair carelessly. Cutting into curl clumps too much causes frizz. It breaks up the curl formation and looks messy.
You want to cut gently to keep curls intact. Also, cutting the perimeter heavily creates a thin, wispy edge that looks damaged rather than natural.
- Use gentle, controlled snips instead of deep cuts.
- Avoid thinning the same section repeatedly.
- Work in small sections to keep evenness.
- Hold shears vertically or at an angle, never flat against hair.
- Stay 1 to 2 inches away from the roots at all times.
- For soft ends, use just the tips of the shears lightly.
- Check hair texture often before moving to a new section.
To fix over-thinning, add lightweight styling products that bulk up hair gently. Avoid heavy oils that weigh hair down. Use a razor or sharp scissors for uneven patches.
Blend edges slowly to keep the look smooth. Work carefully to avoid harsh lines.
For choppy texture, use thinning shears only on the mid-lengths or ends, not the perimeter shape. Slow down your pace and take a break to assess the cut. Fix gaps by letting hair grow out for a few weeks before your next trim.
How Often to Use Thinning Shears and When to See a Professional
Use thinning shears sparingly, no more than every 4 to 6 weeks. This gives hair time to recover and prevents over-thinning. Focus on the thickest sections to reduce bulk without creating uneven spots.
Maintain healthy hair by moisturizing and minimizing heat styling between thinning sessions. Avoid removing too much hair at once.
Taking off around 10 to 20 percent per session helps keep hair looking full. Pay attention to how your hair feels and looks after use to avoid damage.
Talk to a pro if you want a big style change. Fragile hair that breaks easily needs expert care. A stylist can help prevent damage during cutting.
Professionals know how to blend thinning smoothly and repair uneven cuts. Visit a stylist if heavy thinning looks rough or patchy.
DIY fixes might not solve these problems. Experts can make your hair look better and even.
Keep thinning shears clean by wiping blades after each use with alcohol or a disinfectant wipe. Oil the pivot screw monthly to keep motion smooth and prevent rust. Store shears in a protective case to avoid dulling and physical damage.
Never rush when using thinning shears; slow, small snips prevent accidental overcutting and patchiness.
Step-by-Step Action Plan for Using Thinning Shears
Follow these steps to thin hair confidently and avoid common mistakes. Each step tells you what to do and what to look for.
- Before you start: Wash and dry hair to remove oils and tangles. Hair should look smooth and feel clean.
- Start small: Begin thinning a small section at the crown. The hair should look less bulky without thinning spots.
- After 5 minutes: Check your work in the mirror from different angles. Even texture and no visible gaps are good signs.
- Midway through: Thin the sides and back using light, gentle cuts. Hair should feel lighter and easier to style.
- After 15 minutes: Comb through the hair to see how it falls. Any uneven patches must be carefully blended.
- Final step: Use thinning shears sparingly around hair ends to avoid over-thinning. Ends should look soft, not choppy.
- After 2 weeks: Evaluate how the thinning holds up after washing and styling. If hair feels too thin or uneven, consider a professional touch-up.
Frequently Asked Questions
Can Thinning Shears Damage Hair If Overused?
Yes, overusing thinning shears can cause uneven texture. Give time between uses to avoid making hair look patchy or frizzy.
Are Thinning Shears Effective on Curly Hair?
Thinning shears work but can alter curl pattern. Use them sparingly to avoid frizz or disrupting natural curls’ shape.
How Do Thinning Shears Differ from Regular Scissors?
Thinning shears have one blade with teeth and one smooth blade. They remove hair in sections instead of cutting straight across.
Can You Use Thinning Shears to Blend Hair Color?
Yes, thinning shears can blend colors by softening harsh lines. They help create a natural transition in multi-tone hairstyles.
Do Thinning Shears Work Well on Thick Hair?
Thinning shears are great for thick hair thinning and controlling bulk. Use high-tooth-count shears for better results with dense hair.
Is It Safe to Use Thinning Shears on Children’s Hair?
Yes, but caution is needed to avoid cutting too much. Keep the shears away from the scalp and work slowly to avoid mistakes.
Wrapping Up
Thinning shears help reduce bulk and shape hair for a natural look. Test on small sections first to avoid over-thinning. Try it out today on a small patch and see how it changes your style.