How to Make Waves with a Flat Iron: A Complete Guide for Perfect Beach Waves
Wondering how to make waves with a flat iron? You simply twist small sections of hair while pulling the iron down.
This method creates natural-looking waves much faster than curling with a wand. It also helps you avoid tight curls and gives a more relaxed, beachy look.
Start by using a one-inch flat iron set to no more than 310 degrees. Clamp a 1- to 2-inch hair section near the roots.
Twist the iron 180 degrees away from your face. Slide the iron down the hair while holding the twist steady to shape the wave properly.
Using a flat iron with rounded edges helps create smoother waves without sharp bends or kinks. Keep your sections even in size and work quickly for consistent results. Applying a heat protectant spray before styling minimizes damage and keeps hair healthy.
Key Takeaways
- Use a one-inch rounded flat iron for smooth, defined waves.
- Set heat to 310°F to protect hair and style effectively.
- Clamp 1-2 inch sections near roots before twisting the iron.
- Rotate the iron 180 degrees away from your face while sliding down.
- Work in small sections for consistent waves throughout your hair.
- Start at the nape and work upward toward your hairline.
How to Create Waves Using a Flat Iron Step-by-Step

Creating waves with a flat iron takes some practice. The trick is getting your wrist movement right. Once you learn it, the process feels straightforward.
Use a small, one-inch flat iron with rounded edges to get smooth waves. Section your hair into manageable chunks about 1.5 inches wide to keep control and consistency.
Hold the flat iron at a slight angle. This helps you shape the waves better. The wrist twist is the key movement here.
You twist the iron away from your face. This forms bends in the hair that make waves. Start near the roots but don’t clamp too close or you risk burning your scalp.
- Divide your dry hair into sections about 1.5 inches wide. Clip other hair out of the way.
- Pick up a one-inch subsection from your chosen section. This size helps you control the wave shape better.
- Clamp the flat iron at the middle of each hair section. Leave the ends free to avoid harsh lines. This keeps the waves soft and natural.
- Twist your wrist to turn the iron away from your face, starting the wave bend.
- Glide the iron down smoothly and keep your wrist moving fluidly. This guides the hair into a smooth curve. Don’t rush the motion.
- Release the clamp gently near the ends to create a natural finish without a harsh edge.
- Repeat this motion on all sections, alternating the wrist twist direction for a relaxed, natural look.
Twist the flat iron to create natural bends in your hair. Avoid stiff or tight curls by adjusting the wrist movement. This gives soft, flowing waves.
Move the iron to form an ‘M’ shape with your hair. Guide it inward toward your face first.
Then push it outward, and finish inward at the ends. Smaller sections create tighter waves, while larger ones give a looser effect.
Drop the middle of your hair between the flat iron plates. Turn the iron away from your face as you glide down. This makes even, uniform waves.
Just don’t rush or clamp too tightly, or your waves will look uneven or frizzy. Practice this rhythm, and waves will fall smoothly every time.
Essential Tools and Products for Flat Iron Waves

You need the right tools and products to make waves with a flat iron. Use a flat iron the right size for your hair type. Apply heat protectant before styling.
Finish with styling sprays to keep waves longer. These choices reduce damage and help hold your style.
Choosing Your Flat Iron Size and Shape
A 1-inch wide flat iron works best for creating waves. It strikes a balance, allowing you to grab sections comfortably and create gentle bends. Bigger plates can flatten the hair, while smaller ones may make styling take longer.
Look for flat irons with adjustable heat settings. Set the temperature between 300°F and 380°F depending on your hair type. Fine or damaged hair does better at around 300°F. Thicker hair may need up to 380°F. Avoid higher heat to reduce damage.
Best Heat Protectant Sprays and Serums
Spraying a heat protectant before styling reduces damage from the flat iron. Choose dry aerosol sprays or light serums for easy application. These shield hair and keep it smooth without weighing it down.
Some popular options include Kenra Professional Platinum Heat Cast Spray 12. It protects and adds hold, making waves last longer.
Apply the spray evenly to dry hair before using the flat iron. Let the product set a few minutes for best results.
Styling Products to Finish and Hold Waves
Once your waves are set and cooled, use a light-hold finishing spray. It helps keep the style without a stiff feel. Spray a texturizer or thickener on fine hair before styling.
It helps your waves hold better. This adds volume without extra heat.
A few products that work well include:
- Light-hold hairspray for flexible finish
- Texturizing spray for added movement
- Thickening spray on fine hair
- Serum to smooth flyaways after styling
- Salt spray to improve beach waves
After styling, brush waves gently to break up any hard cast from product. This softens the look and makes waves flow naturally.
Put on heat protectant before using the flat iron. Do not go over the same hair section twice. This avoids extra damage.
Adjusting Techniques for Different Hair Lengths and Types
Adjusting your flat iron technique depends on your hair’s length, thickness, and texture. Short or fine hair needs less heat to avoid stiff waves. Move the iron faster for natural-looking curls.
This helps keep the waves soft and flexible. Thick or long hair benefits from higher heat and slower passes to get smooth, defined waves.
Take small hair sections so the flat iron fits them well. Roll the iron gently to stop tight curls and burns.
Men with short thick hair should use 1-2 inch sections. Turn the iron twice fully while moving it down.
| Hair Type/Length | Section Size | Flat Iron Temperature | Movement Speed | Rotation Technique |
|---|---|---|---|---|
| Short or Fine Hair | 1 inch or less | Lower heat (300°F to 350°F) | Quick passes | 2 full rotations, iron mostly down |
| Medium Length, Normal Thickness | 1 to 2 inches | Medium heat (350°F to 400°F) | Moderate speed | 2 full rotations under and over |
| Long or Thick Hair | 2 inches or more | Higher heat (400°F to 450°F) | Slow, smooth passes | Angle iron down then under and over |
Thick hair takes longer to style. Slow your passes and use higher heat. This helps the wave set properly and look natural.
Long hair looks great with slow, careful rotations. Pull the iron gently down the hair length. This creates smooth, flowing wave patterns.
Fine hair often loses its wave quickly. So use a texture spray before flat ironing. This also lets you skip hairspray afterward.
Two full turns create nice beachy waves for any hair length. Keep the flat iron mostly pointed downward. This angle helps shape soft, natural waves.
Preparing and Protecting Hair Before Heat Styling
Make sure your hair is completely dry before using a flat iron. Wet or damp hair will suffer from more damage and won’t hold waves as well.
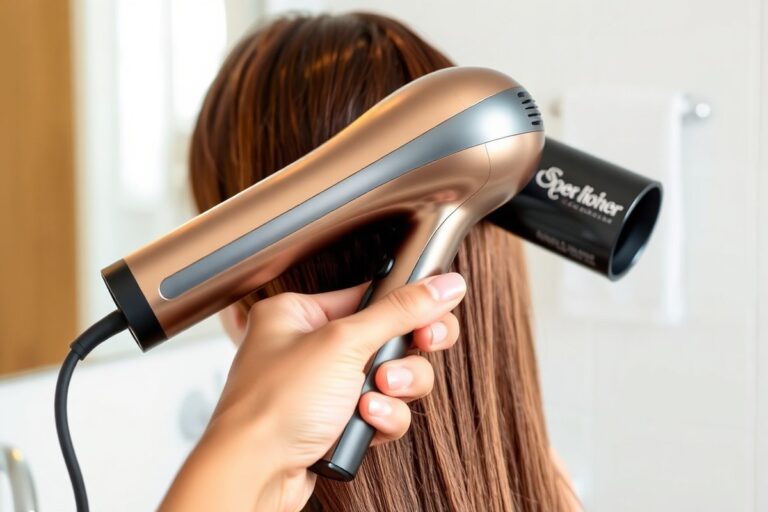
Use a blow dryer on medium heat and a brush to smooth hair while drying. This removes knots and speeds up the process.
Apply a heat protectant spray or serum to clean, dry hair after brushing out tangles. Spray evenly from roots to ends or apply a small amount of serum with your fingers. A good heat protectant forms a shield on your hair strands.
It cuts down moisture loss. It also guards hair from flat iron heat damage.
Use products with ingredients like silicones or polymers, which help shield hair and reduce frizz. You can find sprays priced between $10 and $25 that work well. Spray a light mist while styling your hair.
Keep your hair protected and smooth. Reapply mist often during the whole process.
Comb hair before styling to spread the heat protector evenly. Skipping this step can leave some strands unprotected, leading to patchy damage and frizz.
For extra protection, apply a styling cream after the heat protectant. It adds definition and locks in moisture.
Lower the flat iron’s heat setting depending on your hair type. Fine or damaged hair needs 300°F or less to avoid burning.
Thick hair might need 350°F to 400°F for styling. Do not go higher than 450°F. Higher heat can seriously damage your hair fast.
You can also reduce damage by working in small sections. Smaller sections take less time to style, so heat isn’t on hair too long. Glide the flat iron along your hair smoothly.
Don’t keep it still on one section. This stops burns and split ends from forming.
Popular Wave Techniques: S-Waves, Beach Waves, and More
Flat irons can create many wave styles by changing how you twist and pull the tool. S waves and beach waves use different wrist motions to shape your hair. Each style gives a distinct look, from smooth zigzags to loose, tousled waves.
Creating the Classic S Wave Pattern
S waves look like flowing zigzags down your hair. This happens when you make S shapes with your flat iron.
Bend the hair in one direction. Then bend it in the opposite direction.
Keep your flat iron heated to around 310 degrees to avoid damage. Twist your wrist 180 degrees away from your face as you glide the iron down.
- Clamp a small hair section at the root with your flat iron.
- Twist your wrist away from your face about 180 degrees.
- Pull the iron slowly downward to the tip of your hair.
- Repeat on the opposite side by twisting your wrist toward your face.
- Continue alternating each section for an even S shape pattern.
- Run your fingers lightly to soften the wave pattern.
Work with small sections to get clean S waves. Larger chunks toss the pattern off.
Techniques for Loose Beach Waves
Beach waves look relaxed and slightly messy. Use your flat iron like a curling iron.
Clamp your hair. Twist your wrist and pull down gently.
Pull the iron about three-quarters down your hair. Don’t pull all the way. This gives you a looser curl.
- Set your flat iron to no more than 310 degrees.
- Take a 1-inch hair section and clamp near the root.
- Twist the iron away from your face about 180 degrees.
- Pull the iron down smoothly but stop before the hair tip.
- Repeat through your hair, curling away from your face.
- Break apart the curls with your fingers for that undone look.
- Spray texture spray to hold waves and add volume.
Don’t hold the iron too long in one spot to avoid heat damage and kinks.
Twist and Pull Method Explained
This method shapes waves using a smooth wrist twist and steady downward pull. It works for both S waves and loose curls depending on your wrist angle.
Twisting the iron 180 degrees while pulling lets you wrap hair around the flat iron plates. This creates waves without tight curls.
- Clamp hair section near the roots.
- Twist your wrist either toward or away from your face.
- Pull the flat iron straight down along the hair shaft.
- Adjust how far you pull to control wave tightness.
- Repeat on all sections to build consistent wave patterns.
Snap your wrist slowly to keep waves smooth, not jagged or broken.
Finishing Touches for Long-Lasting Waves
To make your waves last all day, you need to set and maintain them properly. Use pin curls right after styling to lock in the shape.
Follow this by a light spray of hairspray. Separate the waves carefully without breaking them up.
Using Pin Curls to Set Waves
Pin curls help your waves cool down in the right shape, so they last longer. Right after using the flat iron, section your hair in 1-inch parts. Roll each section into a loose pin curl.
Use a bobby pin to secure every curl. Let them set for 20 minutes or until cool.
This method works well because it stops curls from falling flat too soon. You can even do this step before bed for waves that hold overnight. Make sure the curls are loose to avoid tight crimps that ruin the natural wave look.
Choosing the Right Hairspray for Hold
A hairspray that holds without weighing hair down keeps your waves looking fresh and bouncy. Look for a lightweight, flexible hold hairspray designed for volume.
Spray lightly from 8 to 12 inches away. Use 2 to 3 spritzes to cover evenly.
This technique holds waves but doesn’t make hair crunchy or stiff. Avoid heavy or sticky formulas as they weigh down your waves and dull shine. You want a finish that lasts but still moves naturally.
Tips for Touching Up and Separating Waves
Separating waves gently keeps the look soft and natural without losing the curl shape. Use your fingers or a wide-tooth comb to lightly lift and loosen the curls after setting. Avoid using a brush, as it can turn waves into frizz or straight strands.
Touching up waves with a flat iron can damage hair if done repeatedly. Instead, refresh waves by redoing pin curls or applying a little hairspray. Here’s a checklist for maintaining your waves:
- Let pin curls cool fully before unpinning
- Spray hairspray lightly and evenly
- Separate waves gently with fingers or wide-tooth comb
- Avoid heat touching up too often
- Protect hair from humidity with an anti-frizz spray
These steps help your waves stay defined and soft all day long without extra heat damage.
Common Mistakes and How to Fix Them
Using too much heat on your hair can cause damage and frizz, making waves fall flat. Set your flat iron between 300°F and 350°F for most hair types. Fine hair needs lower heat, around 300°F. Coarse hair may tolerate up to 350°F.
Working with uneven or too-large hair sections leads to uneven waves. Take smaller, consistent sections about 1 inch wide. This helps your flat iron glide smoothly and curls form evenly.
Over-twisting the hair tightens the waves too much, causing kinks or no wave at all. Twist your hair gently just one full turn around the iron. Hold the iron sideways for looser, natural waves.
- Use a heat protectant spray before styling to avoid damage.
- Divide hair into neat, equal sections for uniform waves.
- Keep your flat iron moving steadily at a slow pace.
- Don’t hold the iron in one spot longer than 5 seconds.
- Comb through waves gently to prevent frizz and breakage.
Frizz often comes from skipping heat protectant or using too much heat. Moisturize hair before styling and finish with a light serum for smooth waves.
Waves may not hold if your hair is too clean or too oily. Style on day two or three after washing for better hold.
To fix waves that fall out fast, spray light hairspray. Do this while your hair is still warm from styling. It helps keep waves in place longer.
It helps waves set and last longer. Avoid squeezing or brushing hair too much after styling to keep waves intact.
Quick Wave Styling: How to Make Waves in 5 Minutes
Making waves quickly with a flat iron is all about smart sectioning and smooth motions. Using larger sections speeds things up but can risk less defined waves. Leaving the ends out of the iron keeps your waves looking natural and fresh.
Picking the right product also helps your waves last. A light styling cream or a heat protectant with hold can make waves stay put longer. Avoid heavy gels because they can weigh hair down or cause stiffness, especially when working fast.
- Divide your hair into 3 large sections: top, middle, and bottom. This cuts your styling time significantly.
- Take a 1-inch wide section from the bottom layer. Clamp the flat iron near your roots without catching your scalp.
- Twist the iron away from your face and slowly glide it down towards the ends. Leave about an inch free at the ends.
- Slide the iron over your hair ends once. This loosens curls. It helps you get a natural look.
- Repeat on remaining sections, working from bottom layers to top. Keep sections large to save time.
- Gently comb through your waves with fingers or a wide-toothed comb. This helps soften them. It also smooths out sharp lines.
- Use a light hold spray or flexible styling cream. It keeps waves set without feeling stiff. Apply just a small amount.
Don’t use a hairbrush after curling; it causes frizz and ruins the wave texture.
Step-by-Step Action Plan for Creating Waves with a Flat Iron
Follow this plan to get waves with your flat iron quickly and safely. Each step helps you see clear results.
- Before you start: Wash and dry your hair completely. Your hair should look smooth and feel dry to the touch.
- 10 minutes before styling: Apply a heat protectant spray evenly through your hair. You’ll notice a light, non-greasy coating that shields your strands.
- During styling: Divide your hair into small sections. Look for uniform waves forming as you clamp and twist the flat iron over each piece.
- After styling: Let the waves cool without touching them. When they hold shape without falling flat, you’re set.
- 5 minutes later: Use a light hairspray or texturizing spray to lock the waves. Check that your hair keeps its wave pattern without crunchiness.
- End of the day: Avoid brushing your hair harshly. Feel the waves still intact and glossy for lasting style.
Frequently Asked Questions
How Do You Make Waves with a Flat Iron?
Clamp a 1-2 inch section of hair and twist the iron while pulling down. This creates bends that mimic natural waves without curling rods or wands.
What’s an Easy Way to Create Waves in Hair for Beginners?
Start with small sections about 1 inch wide and drop the middle in your flat iron. This helps you control the bend and get consistent waves every time.
How Can I Get Mermaid Waves with a Straightener?
Use a 1-inch rounded flat iron and clamp down near roots, then twist outward. This moves hair in big, loose bends for that flowing mermaid look.
How Do I Make My Flat Hair Wavy Without Curling Irons?
Apply heat protectant, then add mousse to damp roots for volume. Follow by twisting small sections with your flat iron to build lasting waves.
What’s the Fastest Way to Get Waves in 5 Minutes?
Grab larger sections, 1.5 inches wide, and drop the middle part through the iron. It saves time and still creates smooth, beachy bends.
Can You Make Waves with Any Flat Iron?
You need a small, rounded-edge flat iron for smooth waves. Flat irons with sharp edges won’t create the bends needed for waves.
Before You Go
Creating waves with a flat iron takes practice. But following clear steps helps you do it safely.
Start with small, even sections and use heat protectant every time. Keep styling regularly to get comfortable with your best technique.