How to Style Curly Hair: 12 Proven Tips for Perfect Curls Every Day
How to style curly hair is a question with one clear starting point. You want defined, frizz-free curls that last all day. The best results come from using the right products for your curls.
Dry your hair carefully to avoid damage and frizz. This combination helps maintain healthy, styled curls.
Begin with moisturizing your curls when they’re wet to lock in hydration. Avoid rough towel drying, which causes frizz and breakage. Instead, gently scrunch your curls with a microfiber towel or an old cotton T-shirt.
Use a leave-in conditioner or cream to set your curls without weighing them down. Let your hair dry naturally or with a diffuser on low heat. This protects your curl shape and keeps frizz under control.
Key Takeaways
- Start with wet hair and apply a moisturizing leave-in conditioner.
- Use a microfiber towel or cotton T-shirt to gently scrunch hair dry.
- Avoid rough towel drying to prevent frizz and breakage.
- Apply a silicone-free hair oil only after hair is 100% dry.
- Use root-lifting clips before drying to add volume at the scalp.
- Dry hair with a diffuser set on low heat to keep curls defined.
1. How to Style Curly Hair for Defined, Frizz-Free Curls

Styling curly hair for defined, frizz-free curls needs wet hair and the right amount of product. Dry curls won’t absorb styling products well, which leads to frizz and uneven shapes. Detangling gently while hair is wet helps curls form smoothly without breakage or disruption.
Use a quarter-sized amount of product to start. Add more only if your curls need extra hold or moisture. Use products sparingly to avoid buildup.
Too much product weighs curls down and causes buildup. Avoid brushing curly hair once dried to keep natural curl patterns intact.
- Spray your hair with water until damp but not dripping wet to prep for styling. Spritzing helps products spread evenly and locks in moisture.
- Apply a leave-in conditioner or curl cream to distribute moisture and start curl shaping. Use about a quarter-size amount for medium-length curls.
- Use your fingers or a wide-tooth comb to gently detangle and spread product through the hair. Never comb dry curls to prevent frizz.
- Scrunch your curls upward towards your scalp to encourage curl formation and avoid stretching them out. This technique helps define ringlets without damage.
- Optionally, add a small amount of gel to hold curls in place without stiffness. Use a dime-sized amount for medium curls and adjust as needed.
- Let hair air-dry or use a diffuser on low heat to prevent frizz and shrinkage. Avoid towel rubbing, which can roughen hair cuticles and cause fuzz.
- Once dry, gently scrunch out any crunchiness from gel to soften curls while keeping definition. Avoid touching curls too much afterward to reduce frizz.
Keep your hands moist and avoid applying too much product at the root to prevent greasiness. Curls feel heavy or sticky when you use too much product.
Reduce the amount to keep them light and fresh. Refresh curls by spritzing water and lightly scrunching without full restyling on non-wash days.
2. Essential Products Every Curly Hair Routine Needs
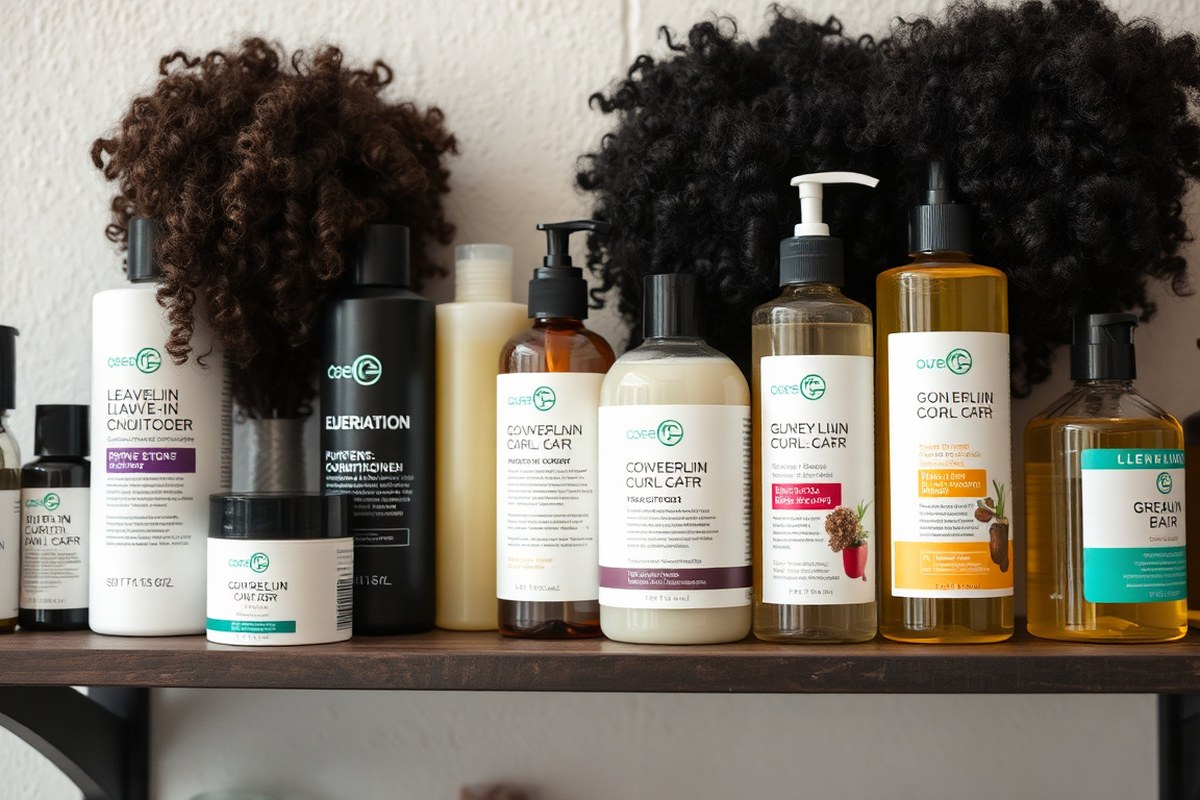
Styling curly hair needs products that lock in moisture and improve your natural shape. Use gels for strong hold, creams to soften and define, and mousse for lightweight volume.
Your curl type and hair thickness guide the best pick. So experiment with small amounts first.
Natural oils like jojoba and coconut hydrate curls from the inside out. They add shine and reduce frizz by sealing the hair shaft. Put a few drops on drying curls for smoothness.
You can also mix oil into your cream or gel. Use this for extra control and shine.
| Product Type | Purpose | Best For | How to Use |
|---|---|---|---|
| Gel | Strong hold, frizz control | Thicker curls needing definition | Apply to wet hair, scrunch, then air dry |
| Cream | Softening, curl definition, moisture | Dry or coarse curls | Rub into damp hair, focus on ends |
| Mousse | Lighthold, volume | Fine curly hair | Spread evenly on wet hair, then style |
| Natural Oils (jojoba, coconut) | Hydration, shine, frizz reduction | All curl types, especially dry hair | Use a few drops on damp or dry hair |
Styling products should go on while your hair is still wet. This seals in water and shapes your curls better. You can mix styling products for a better hold.
Apply cream first to define your curls. Then add gel to lock the style without crunchiness.
Applying styling products on damp hair locks in curl definition better than on dry hair.
Natural oils don’t replace your daily moisturizer but boost it with extra hydration. Avoid heavy oils if your hair is fine, or you risk weighing curls down. For maximum shine, choose serums with jojoba, pequi, and coconut oils designed for curly textures.
3. How to Prep Curly Hair for Styling: A Complete Checklist
Start your styling by gently detangling and moisturizing your curls. Apply leave-in conditioner on damp hair to lock in hydration. Taking care during prep prevents breakage and keeps curls defined.
Detangling Techniques for Curly Hair
Detangling curly hair before styling stops knots that can break strands. Use your fingers or a wide-tooth comb to avoid pulling too hard. Start from the ends and slowly work your way up to the roots.
Detangling wet hair works best because curls hold moisture and stretch less then. If your hair feels dry, mist it with water from a spray bottle first. This reduces breakage and keeps curls looking neat.
- Use a wide-tooth comb or finger detangle gently
- Start detangling from hair ends to roots
- Mist dry curls with spray bottle water before detangling
- Work slowly and avoid yanking knots apart
- Do it on damp, not soaking wet, hair
Using Leave-In Conditioners Effectively
Always apply leave-in conditioner to damp hair to keep curls hydrated. Spread a small amount evenly from mid-lengths to ends, avoiding heavy application at the roots. This method prevents weighed-down curls and improve natural bounce.
Gently squeeze the product in without crushing your curl pattern. Layering a balm or cream on top helps lock in moisture. It also softens curls, making styling easier and longer lasting.
Avoiding Damage During Prep
Handle your curls softly to maintain their health and shape. Avoid using harsh brushes or rough towels that cause frizz and split ends. Use a soft microfiber towel or an old cotton t-shirt to blot excess water instead.
Keep tools and products lightweight and silicone-free when possible. Heat protectant sprays guard curls during any heat styling later. Protecting curls during prep lowers the risk of dryness and damage.
4. Choosing the Right Haircut for Your Curl Type and Lifestyle
Choosing the right haircut affects how your curls hold their shape and volume. Tight curls like 3C or 4A need layered cuts. These cuts remove bulk and keep curls bouncy.
This keeps your curls springy and alive. Loose curls like 2B or 3A look great with long layers.
The layers frame your face and add bounce. They do not shorten your hair length.
Regular trims keep curls healthy and easier to style. Every 8 to 12 weeks works well for most curl types.
But tighter curls often need more frequent trims to prevent split ends and maintain shape. Less frequent trims can make curls look heavy and less defined.
Shorter cuts or styles with fewer layers reduce morning styling time. For instance, a well-shaped bob on loose curls sets a natural style that needs minimal heat.
For tighter curls, ask your stylist for tapering rather than blunt cuts to cut down bulk. So your curls can spring up without extra work.
Think about your haircut and your daily routine. Consider how much time you want to spend styling. This helps pick the right cut for you.
Choose haircuts that let your curls fall naturally. These styles need little product or heat to style.
They save time and protect your curls. Tell your stylist about your lifestyle and styling habits to find a look that fits you.
Use this script when booking a haircut: “I want a cut that suits my curl type. It should cut styling time and keep curls healthy. I want it to work until my next trim.”This script tells your stylist to focus on your curls and lifestyle.
It helps you get a practical, easy-to-manage style. You get a look that fits your needs.
5. Best Drying Techniques for Curly Hair Without Causing Frizz
Dry your curls gently to keep their shape and avoid frizz. Air-drying preserves texture but takes time. Diffusing speeds drying while protecting curl form if done right.
Using a Microfiber Towel or T-Shirt
Regular towels cause friction and rough up curly hair cuticles. A cotton t-shirt or a microfiber towel absorbs water without disrupting curls.
After washing, lightly blot your hair instead of rubbing. This helps reduce frizz and keeps curls intact.
- Pat hair gently with a microfiber towel or cotton t-shirt.
- Wrap hair loosely to “plop” curls and encourage shape.
- Leave wrapped for 10 to 20 minutes to absorb moisture.
- Unwrap hair gently, avoid rough handling.
Press the towel or shirt against your hair instead of rubbing it to avoid frizz.
Diffusing Hair Without Disturbing Curls
A diffuser spreads heat evenly and stops curls from flying apart. Use a blow dryer with a diffuser to dry fast.
It helps keep your curl definition. This way, your curls stay bouncy and shaped.
Set the dryer to low or medium heat. This avoids drying out your hair. It also helps reduce frizz while you dry.
- Attach a diffuser to your blow dryer.
- Flip hair upside down or section it for better volume.
- Set dryer to low or medium heat.
- Gently place curls in diffuser bowl without shaking or raking.
- Move diffuser slowly, drying each section for 30 seconds to 1 minute.
- Finish with a cool shot to set curls.
Using high heat or rough drying hands disrupts curls and causes frizz.
When and How to Air Dry Properly
Air drying is the gentlest way to dry curls but can take hours. Start with towel blotting or plopping to remove excess water before letting hair dry naturally.
Keep hair loose and avoid touching curls during drying. This prevents breakage and frizz while curls set in their natural shape.
- Blot hair with a soft towel or t-shirt to remove water.
- Apply your favorite curl-improving product for hold and moisture.
- Let hair hang naturally or loosely scrunch curls.
- Avoid touching or combing hair until fully dry.
- Allow 1 to 3 hours depending on hair thickness and environment.
Air drying indoors in humid places can cause hair to absorb moisture and frizz.
6. How to Refresh Curly Hair on Non-Wash Days
Refreshing curls without washing keeps your style intact longer. Use a spray bottle with water to lightly mist your hair. This softens dry curls and awakens natural shape without making hair wet enough to cause frizz.
Next, squeeze a small amount of curl refresher or leave-in conditioner into your hands. Smooth it over your curls to revive moisture and reduce flyaways. Avoid the roots to prevent buildup and grease.
You can reshape curls without heat by finger-coiling or gently scrunching damp sections. Twist individual curls around your finger to bring back definition. Scrunch from the ends upward to create bounce and volume.
- Use a diffuser on low heat to gently lift roots and soften curls.
- Add a small drop of hair oil after your curls are dry. Use it to tame frizz. This also adds shine to your hair.
- Pineapple your hair at night to protect curls. Loosely gather curls on top. Use a silk scrunchie to keep it gentle.
- Refresh with a curl-specific mousse for lightweight hold and volume.
- Separate curls carefully with your fingers instead of combing to avoid breakage.
Different situations call for slight changes. For morning touch-ups, water mist and light styling cream usually work best.
After gym sessions, use a refreshing spray with extra moisture to combat sweat dryness. For sweaty scalp days, dry shampoo on roots helps prevent oiliness without disturbing curls.
Giving curls breathing room while preserving definition saves time and keeps them lively between washes. Avoid heavy products or over-wetting, which can flatten curls or cause frizz. Your curls should look bouncy, soft, and well-shaped, not weighed down or stiff.
7. Combating Humidity: Tips to Keep Curls Intact and Frizz-Free
Humidity makes curly hair frizz because moisture from the air breaks down your hair’s natural structure. Curly hair tends to be more porous, absorbing water easily and causing curls to lose shape. This extra moisture pushes the hair strands apart, which leads to frizz and undefined curls.
To fight frizz in humid weather, use anti-frizz products with silicone or natural oils. Products like leave-in conditioners or hair serums coat the hair, blocking excess moisture. Apply a dime-sized amount of silicone-based serum to damp hair.
This locks in moisture. It won’t weigh curls down.
Avoid alcohol-based products, as they dry out curly hair and make frizz worse. Instead, treat your hair weekly with a deep conditioning mask to maintain hydration and strength. These masks usually cost between $10 and $30.
They take about 20 minutes to work. They help keep curls shiny and smooth.
Styles that keep hair up or pulled back also help shield curls from humidity. Try ponytails, buns, or bandanas to reduce hair exposure to moisture. Protective styles stop curls from puffing up.
They reduce hair movement. They limit contact with humid air.
For daily humidity battles, refresh curls with a water spray mixed with a leave-in conditioner. Lightly spritz your hair and scrunch curls to reactivate your style. This method takes less than five minutes and helps keep curls defined when outside humidity rises.
Using a diffuser on low heat helps dry your curls without roughing up the hair cuticle. Heat spread evenly prevents over-drying that adds frizz. Diffusers usually cost between $15 and $40.
They’re useful in humid seasons. They help keep curls intact.
8. Common Styling Mistakes and How to Fix Them
Flat or crunchy curls usually come from using too much product or applying it unevenly. When you overload curls with heavy creams or gels, the hair gets weighed down or stiff. To fix flatness, use about half the usual product amount.
Scrunch it into damp hair starting at the ends. Work your way up toward the roots.
Uneven curl patterns happen when hair dries unevenly. Sometimes, product isn’t spread well on all areas. This causes some curls to look different.
You can even out curls by separating and re-scrunching sections while your hair dries. For instance, clip curls at the roots to add volume where curls look loose or stretched.
Too much product causes crunchy curls by coating each strand thickly. Start with leave-in conditioner on your hair first. Then apply a small amount of gel only where you need hold.
This targets problem spots better. For fine curls that flatten easily, try layering your haircut.
Layering adds natural lift without extra product. It gives your curls more body.
- Use a curl refresher spray instead of heavy leave-ins on second-day hair
- Apply product in small amounts, starting with a nickel-size portion
- Scrunch product from ends up to roots for consistent curl shape
- Clip roots while drying to prevent flatness at the scalp
- Avoid touching curls too much during drying to reduce frizz
- Layer haircuts to add volume, especially with fine or wavy curls
- Use a diffuser on low heat to maintain curl bounce without crunch
Healthy curls hold product better and look more defined. Keep hair hydrated by regularly deep conditioning and using moisturizing products suitable for your curl type. Your curls may feel stiff right after styling.
Lightly scrunch the crunch out with wet hands. Use a bit of water to soften them again.
Try clipping curls at the roots during drying to boost volume and stop flat spots.
9. Tools and Accessories That Work Best for Curly Hair
Choose wide-tooth combs or brushes made especially for curly hair. They avoid breakage and help detangle curls without messing up their pattern. Plastic or wood materials often work better than metal because they slide through curls more smoothly.
You want clips that hold curls gently without causing dents or pulling. Large claw clips fit best and keep strands secure while styling or drying.
Bonnets in satin or silk protect curls from friction at night. They reduce frizz and moisture loss, unlike cotton caps which can rough up hair.
| Tool or Accessory | Why It Helps | Use Tips | Typical Cost |
|---|---|---|---|
| Wide-Tooth Comb | Detangles curls gently, prevents breakage | Use when hair is damp, start from ends and work up | $5, $15 |
| Curly Hair Brush | Shapes curls without fluffing or damage | Brush when dry or lightly damp for styling | $10, $25 |
| Large Claw Clip | Secures hair without sharp creases | Use to section hair or pin curls back | $5, $20 |
| Satin or Silk Bonnet | Protects curls while sleeping, reduces frizz | Put on before bed, fits snugly without squeezing | $10, $30 |
| Heat Tools with Adjustable Temps | Allows styling but limits heat damage | Set to 300, 350°F; use heat protectant spray first | $30, $150+ |
Heat tools can work if you keep the temperature low. The best range is 300 to 350 degrees Fahrenheit. Always apply heat protectant spray before styling to avoid breakage or dryness.
Steer clear of fine-tooth combs and stiff brushes. They tug on curls and cause frizz. Avoid cotton head wraps when you sleep.
They soak up moisture. This can make your curls dry and rough.
10. How to Protect Curly Hair from Damage During Styling
Protect your curls from heat damage by always using a heat protectant spray before styling. These products coat your hair strands and shield them from temperatures up to 450°F (230°C). Spread the spray while your hair is still damp.
Cover roots and tips evenly. This fully protects your curls.
Avoid using heat on wet hair, which causes breakage and dryness. Let your curls air dry or use a diffuser on a low heat setting instead.
Use heat tools at less than 300°F for fine curls. Thicker coils can handle about 350°F. Keep the temperature low to avoid damage.
Heatless styling methods keep your hair safe from damage. They let you change your look easily. Try them when you want to avoid heat.
Try styles like twist-outs, braids, or roller sets. These options take a few hours or overnight but keep your curls healthy and hydrated.
Avoid heat styling completely if your hair feels dry, brittle, or shows signs of split ends. Frequent heat use can worsen these issues. Use curl creams or gels instead of heat tools on dry days.
They refresh curls without heat damage. This keeps your hair healthy.
Friction causes breakage. So use microfiber towels or old cotton T-shirts to blot your hair gently. Comb wet curls only with a wide-tooth comb.
Always use conditioner in your hair first. This prevents snapping and breakage. Apply leave-in conditioners that offer UV protection to stop sun damage during outdoor styling.
Good results mean curls stay defined, soft, and frizz-free after styling with minimal breakage. Overheating or skipping heat protectants often leads to dull, dry hair and breakage along the strands. Switch to low heat or no-heat styles to strengthen curls.
Over time, your curls stay lively and healthy. It’s better for your hair.
11. Understanding Your Curl Pattern and Hair Porosity for Better Styling
Knowing your curl type and hair porosity helps pick the best styling approach. Curl patterns affect how your hair reacts to products, while porosity controls moisture intake. Together, they guide you to styles that last and look natural.
Identifying Curl Types 3A to 4C
Curl types range from loose waves to tight coils, labeled 3A to 4C. Types 3A to 3C have defined curls.
4A to 4C feature tight coils that bend close to the scalp. Identifying your type helps you choose products and avoid styles that cause breakage or frizz.
Look at a dry section of your hair without product. Loose curls (3A) form large loops.
Type 4C curls look like small, tight zigzags. Your styling tools and methods should support your curl shape and pattern.
What Hair Porosity Means for Your Styling
Porosity measures how well your hair absorbs and holds moisture. High porosity hair soaks up water quickly but loses it fast, causing dryness. Low porosity hair resists moisture until treated with heat or specific products.
Test porosity by placing a clean, dry strand in water. Hair that sinks fast usually means high porosity.
Hair that floats or sinks slowly usually has low porosity. This test helps decide how long to leave products or when to use deep conditioning.
Matching Products to Curl and Porosity Type
For loose curls (3A-3C) with low porosity, use lightweight leave-in conditioners and gels. These won’t weigh curls down or leave residue that blocks moisture. High porosity coils (4A-4C) need heavy creams and oils to seal in hydration.
Apply products to damp hair for better absorption. For high porosity curls, finish with a sealant like shea butter. Low porosity hair gets help from warm water rinses.
Warm water opens the cuticle. This helps styling products work better.
Test your hair’s reaction to products over a few days to avoid overload or dryness.
12. Easy Hairstyles That Show Off Your Natural Curls
Showing off your natural curls is easy with simple hairstyles that fit any length. Quick everyday looks can refresh curls without much fuss. Styles like loose buns, ponytails, and half-updos protect hair while looking natural and chic.
Start with damp or freshly refreshed curls for a curly bun. This makes it polished yet easy to style.
This keeps your hair manageable and helps reduce frizz. For ponytails, keeping volume at the roots gives a more lifted look, especially for shorter curls.
- Moisturize curls lightly by spritzing with water or curl refresher spray. This makes strands soft and less prone to breakage.
- Gather your curls into a loose ponytail or a low bun. Use a soft scrunchie or fabric-covered elastic to secure it. Avoid tight bands that can cause dents or breakage.
- Pin curls as needed around your face for a softer framing effect. Use bobby pins that match your hair color for a neat finish.
- Loosen around the edges by gently tugging some curls out from the bun or ponytail. This adds volume and prevents a flat look, especially on shorter hair.
- Set with lightweight gel or mousse if you want extra hold. Apply sparingly to avoid crunchiness and maintain curl bounce.
- Protect by wrapping hair at night with a silk scarf or using a satin pillowcase. This preserves style and limits frizz between washes.
Short curls can look chic with a bixie style. It combines the bob’s length with a pixie cut’s shape. This style is forgiving and simple.
Just use some styling cream to define curls each morning. It’s a great option if you want a stylish low-maintenance cut.
Try a half-up hairstyle for long curls. Pull back the top section and clip it in place.
This keeps curls away from your face while showing off length. Use fingers instead of a comb to avoid disrupting the curl pattern.
Step-by-Step Action Plan for Styling Your Curly Hair
Follow these steps to style your curls right and keep them healthy. Track your progress after each step to see what works best.
- Day 1: Start with a hydrating shampoo and conditioner to prep your hair. Your curls should feel soft and moisturized afterwards.
- After washing: Apply a leave-in conditioner and curl-defining cream on damp hair. Your curls will start to form shape without frizz.
- 30 minutes later: Use a microfiber towel or cotton T-shirt to gently scrunch your curls dry. Look for less frizz and more bounce.
- After drying: Apply a small amount of lightweight oil to seal in moisture. Your curls should feel smooth, not greasy.
- Every day: Refresh curls with a water spray mixed with leave-in conditioner. Curls should soften and spring back without crunchiness.
- Weekly: Deep condition your hair once a week to prevent dryness. Your curls will retain better shape and shine.
- Monthly: Trim split ends regularly. This keeps curls looking neat and helps them bounce up.
- Before styling: Use a wide-tooth comb or your fingers to detangle. Avoid breakage and uneven curls.
Frequently Asked Questions
How Do I Style Short Curly Hair Without Making It Look Too Puffy?
Start by using lightweight products to avoid extra volume. Layered cuts and shags also help keep short curly hair neat and easy to manage.
Can I Style Curly Hair Without Using Heat Tools?
Yes, air-drying with curl creams or leave-in conditioners works well. Avoid heat to prevent damage. Use a diffuser only when you need quicker drying.
How Can I Make My Curls Look Shiny and Healthy?
Use moisturizing leave-in treatments and oils to add shine. Avoid heavy products that weigh curls down. Choose formulas suited for your curl type.
What’s the Best Way to Lift Roots for More Volume in Curly Hair?
Use double prong root lifting clips before drying your hair. This technique lifts curls at the roots without causing frizz or damage.
How Do I Style Curls to Suit an Oval Face Shape?
Oval faces can pull off many styles. Try a layered cut or side-swept curls for soft framing.
Can I Switch Styles Easily with Curly Hair, Like from Loose Curls to a Bob?
Absolutely, there are cuts for every curl type and length. A coily bob or afro gives distinct looks that suit different moods.
Before You Go
Styling curly hair well takes care and the right steps. Try one new tip from this plan today to see the difference. Your curls will thank you with shine and shape.