How to Make Curls with a Flat Iron: Simple Steps for Perfect Curls
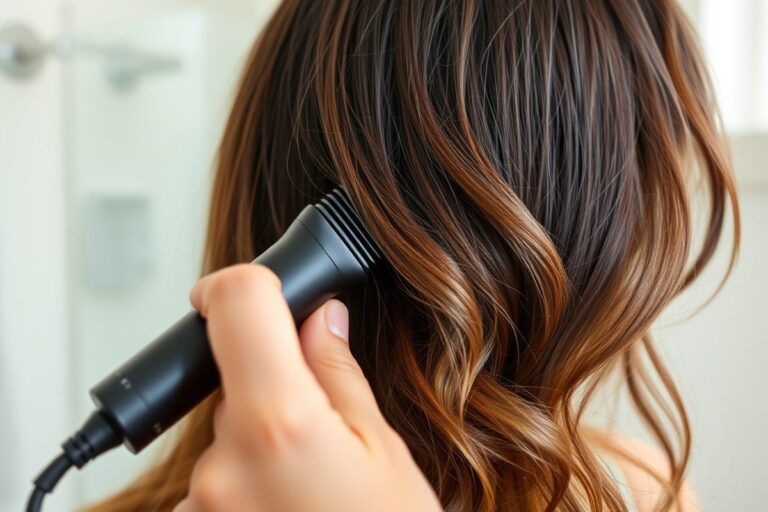
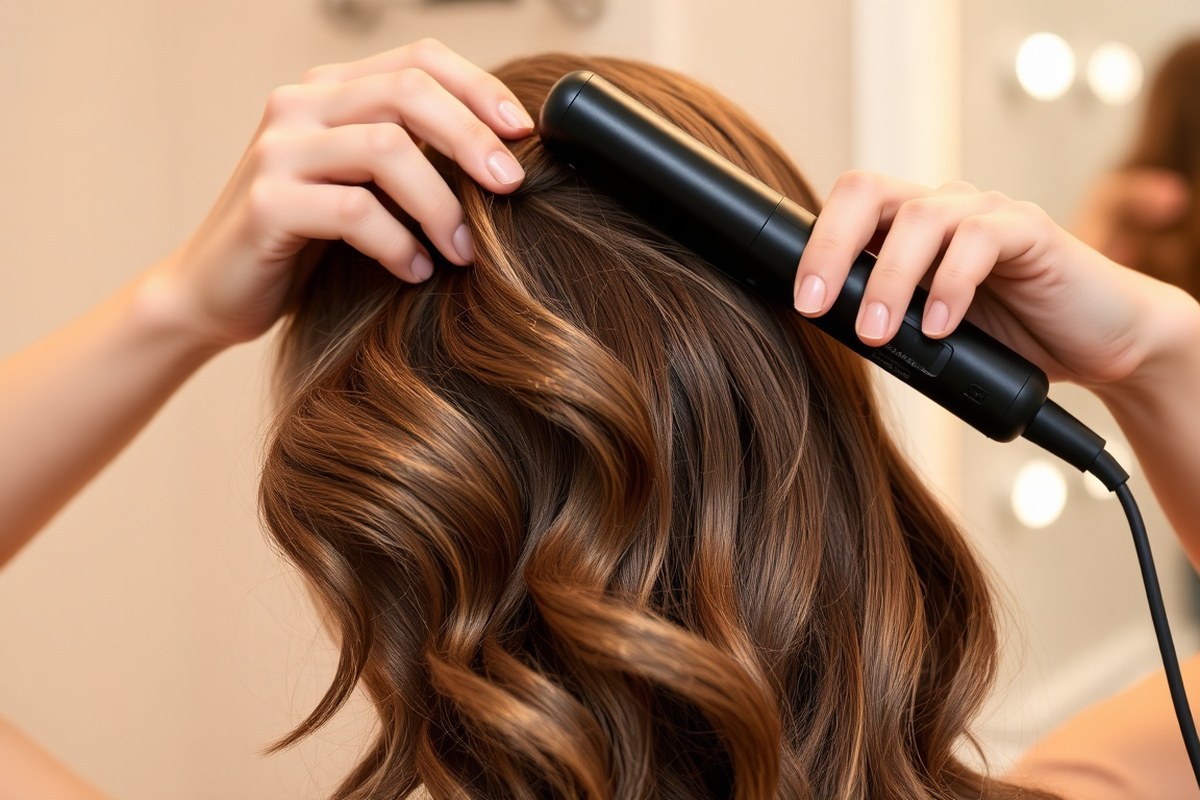
Learning how to make curls with a flat iron can change your styling game. You just need to use the right technique and tools. Curling with a flat iron means twisting it while sliding down hair.
You twist the iron as it moves through each hair section. This motion creates the curl shape on your hair.
Start with clean, dry hair for the best hold. Section your hair so you can manage each curl easily. Watch your flat iron’s heat setting to avoid damage and get lasting curls.
Using a flat iron for curls gives you smooth, long-lasting results. The plates heat the hair evenly, which helps curls hold better than some curling irons. Small adjustments in movement change the curl shape and volume.
Key Takeaways
- Use a one-inch flat iron with rounded edges for smooth curls.
- Match heat levels to your hair type: lower for fine, higher for thick hair.
- Start curling about 1-2 inches from your roots for natural volume.
- Twist the flat iron 360° outward as you pull down for face-framing curls.
- Alternate curling direction to avoid curls clumping together.
- Section your hair before curling for easier, more controlled styling.
How to Curl Hair with a Flat Iron Step by Step
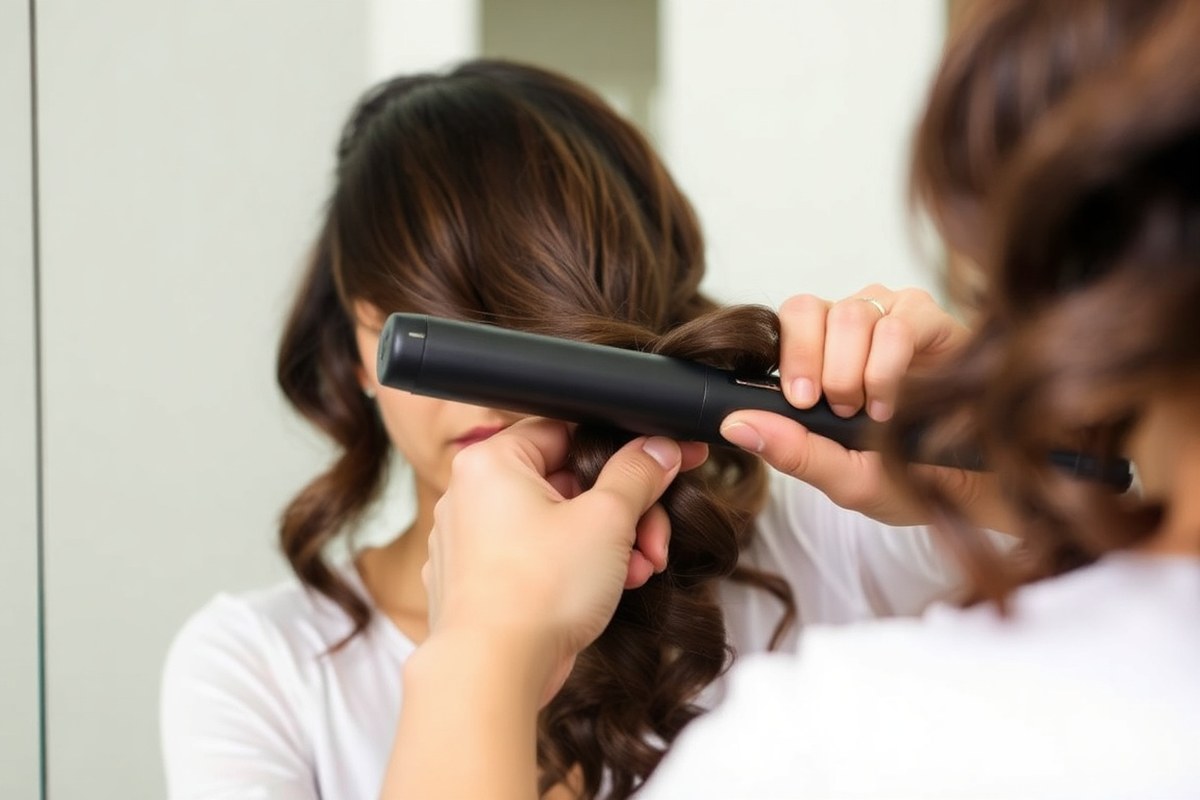
Curling hair with a flat iron takes some practice. The steps are simple once you know them. Keep trying to get it right.
The right section size and curling motion impact the curl shape and how long it lasts. Use smaller sections around 1 to 1.Use 5-inch-wide sections for tighter curls.
These curls keep their shape up to 35% longer. Larger sections don’t hold curls as well.
Hold the iron on each section just long enough to shape the hair without overheating it. Glide the flat iron slowly for 5 to 8 seconds. This helps make clear curls.
It also reduces hair damage during curling. Twist the iron and pull it downward to create natural-looking curls or waves. Here’s a step-by-step method to follow:
- Pin the top hair layer up. Comb a 1- to 2-inch section from the bottom layer. Work with clean, small sections.
- Clamp the flat iron near the scalp, with the flat iron held vertically for tighter curls.
- Twist your wrist backward halfway through the motion. Slowly glide the iron down the hair. Pull the hair downward as you go.
- Let go of the hair after curling a section. Move on to the next section quickly. Small sections improve how the curls hold.
- Curl all around your head like before. Change curl direction on some sections for volume. This adds a nice body to your hair.
- Gently run your fingers through the curls to break them up slightly for a natural look.
- Finish by setting your style with a light hair spray, applied after the curls have cooled.
Using a flat iron with curved edges helps create smoother curls. Going too fast causes curls to look uneven. Holding the iron too long may damage hair.
Move steadily and time your sections right. Change curl direction with each section. This adds body to your hairstyle.
It stops curls from falling straight down in one way. This step-by-step approach gives you stylish curls that last and keep your hair in good condition.
Choosing the Right Flat Iron and Heat for Your Hair

Choose a flat iron with smooth, rounded plates sized about one inch wide. This size handles curling best, giving you control and versatility. Choose plate material and heat level based on your hair type.
This helps create better curls and lowers damage. Use the right setting each time you curl.
Flat Iron Plate Materials Explained
Ceramic plates heat evenly and keep temperature stable within ±10°F. This makes them safer for fine or color-treated hair. Titanium plates warm up quickly and get hotter than others.
They can shift by 20°F, causing uneven heat. Thin hair may suffer damage from this heat change.
Titanium suits thick, coarse hair because it reaches higher heat levels efficiently. Ceramic is gentler.
So it’s ideal if your hair is fragile or you want less heat stress. Look for flat irons with smooth, rounded edges to wrap hair smoothly for curls.
Recommended Heat Settings by Hair Type
Fine or color-treated hair curls best at lower heat, around 250°F to 300°F. Keep the heat under 300°F to prevent drying out and breakage. For thick, coarse hair, use higher settings from 375°F to 410°F to shape curls effectively.
Temperatures above 400°F can cause stringy or burnt spots in almost a third of styles. Adjust the heat gradually until curls hold without damage. Use tools with adjustable temperature controls for precise settings suitable for your hair type.
| Factor | Problem | Solution |
|---|---|---|
| Plate Material | Titanium fluctuates ±20°F, causing inconsistent curls | Switch to ceramic for ±10°F stability |
| Sectioning Effects | Large sections increase uneven curls by 3x | Use clips to divide hair into 1-inch sections |
| Heat Settings | Using temperatures above 400°F can cause parts of your style to look stringy. This happens in about one-third of cases. Lower temps help avoid this problem. | Set your curling iron to 250°F for fine hair. Use around 375°F for thicker hair types. Adjust the heat to suit how thick your hair is. |
Best Flat Iron Sizes for Different Curl Styles
A one-inch plate width works best for most curl styles, from loose waves to defined ringlets. Smaller plates make tighter curls but take longer and suit shorter hair. Wide plates are better for straightening and don’t curl well.
Flat irons with rotating plates or floating elements help shape curls better than fixed plates. You can control curl direction and tension with a one-inch iron more easily. This size also lets you section hair properly for consistent curls.
Divide hair into one-inch sections before curling to avoid uneven curls and protect your hair.
Preparing Hair Safely Before Curling with a Flat Iron
Start by washing and drying your hair completely before curling with a flat iron. Use a heat protectant spray evenly on dry hair to prevent damage. Clean, dry hair curls better, and heat protection helps curls last longer while reducing breakage.
Using Heat Protectants Correctly
Heat protectants form a barrier between your hair and the flat iron’s heat. Apply them to dry hair before curling to cut cuticle damage by about 38% at 392°F. This step is especially important for color-treated, fine, or damaged hair.
Spritz your heat protectant evenly on all sections before styling. Use a copolymer-based product for best results. These protectants also add texture, helping curls hold better and last longer.
- Choose a spray designed for heat protection up to 400°F
- Apply about 4-6 spritzes for shoulder-length hair
- Comb through lightly to spread the product evenly
- Let the protectant dry for one or two minutes before curling
- Reapply if you curl your hair in multiple rounds
Drying Hair for Best Curling Results
Flat irons work best on completely dry hair. Any leftover moisture can cause uneven curls or heat damage. After washing, towel-dry gently, then use a blow dryer on a medium heat setting.
Dry small sections at a time to avoid heat stress. For fine hair, keep drying time shorter to prevent frizz. Thick or coarse hair might take longer, dry until hair feels cool to the touch.
- Use a microfiber towel for faster drying and less frizz
- Set the blow dryer to medium heat and medium airflow
- Focus on roots and mid-lengths to speed drying time
- Use a round or paddle brush to smooth strands while drying
- Finish with a cool shot of air to lock in moisture balance
Sectioning Hair for Efficient Styling
Divide your hair into sections before curling. This helps you work evenly and protects strands from overexposure to heat. Small sections allow the flat iron to clamp down properly and curl the hair effectively.
Clip away the top layers to reach the underneath easily. For medium to thick hair, create four to six sections. Use smaller sections for thin or fine hair to avoid multiple passes.
- Part hair into left, right, front, and back sections
- Use clips to hold sections firmly in place
- Curl one section at a time, unclipping as you go
- Limit the flat iron passes to two per section to reduce damage
- Alternate curl directions in adjacent sections for natural volume
Techniques for Different Curl Styles with a Flat Iron
You can make spiral curls, beach waves, and loose waves with one flat iron. Each style uses different section sizes, twisting motions, and clamp times. Understanding these methods helps you get the exact curl shape you want.
Creating Spiral Curls with a Flat Iron
Spiral curls look tight and bouncy. They need small hair sections and a full 360-degree twist of the flat iron. This technique wraps the hair around itself for a defined coil shape.
Use thin sections about 1/2 inch wide to ensure each curl is precise. Clamp the flat iron close to your scalp for strong curl roots. Wrap the hair strand around the iron with a slow rotation.
- Divide hair into small 1/2 inch sections.
- Clamp the flat iron at the root of one section.
- Twist the iron 360 degrees away from your head while slowly sliding down the hair.
- Release the curl when you reach the ends.
- Repeat on all sections until the head is covered.
- Let curls cool fully to set the shape.
Don’t slide too fast; the twist and steady heat create a lasting spiral. The section is too big, so the curl loosens and waves form.
How to Make Beach Waves
Beach waves are soft and tousled with a relaxed look. Use medium sections around 1 inch wide.
Twist the hair 180 degrees with the iron. Gently bend the strand while pulling the iron down.
Lower heat settings of 150-170°C work well for finer hair to avoid heat damage. Coarser hair can use 170-210°C safely for better wave hold.
- Section hair into 1-inch wide pieces.
- Clamp the flat iron near the root.
- Rotate the iron 180 degrees outward (away from your face).
- Slowly glide down the hair, keeping the flat iron twisted.
- Alternate the twist direction on sections for natural dimension.
- Let waves cool and spray light texturizer for volume.
This method mimics a loose curl but with less bend at the ends. You get a beachy, undone feel when the sections aren’t tightly twisted.
Forming Loose, Bouncy Waves
Loose waves have a gentle curve with bouncy volume. Use larger sections, about 2 inches wide, and a quick twist of 180 degrees. The goal is smooth curls with root lift and soft ends.
Clamp the iron near the roots and twist outward as you slide down. Use a medium speed to avoid sharp bends or flat spots.
- Separate hair into 2-inch sections for bigger waves.
- Clamp near the root area.
- Rotate the flat iron 180 degrees away from your face while sliding down.
- Move the iron quickly enough for waves, not curls.
- Release and tousle with fingers for natural bounce.
Large sections and quicker glides help create soft waves. Slowing down too much or using small sections creates tighter curls.
Adjusting Technique for Hair Length and Texture
Hair length changes how you handle the flat iron to make curls. Short hair looks best with a smaller flat iron, about 1 inch wide. This size lets you wrap hair around at least once.
It helps create tighter curls. You won’t miss spots using this size.
Longer hair needs a wider iron, typically 1.5 to 2 inches, to cover more hair in one go. Start curling about an inch away from your roots to avoid burning your scalp. Then twist the iron and slowly glide down the hair, keeping the tension steady.
Hair texture also guides your heat and styling choices. Fine hair burns easily, so keep the flat iron at 300°F or lower. Use quick passes of about 1 to 2 seconds.
This reduces damage to your hair. Keep your hair looking healthy this way.
Thicker or coarse hair needs higher heat, between 370°F and 400°F, and usually holds curls better. Hold the iron longer in each spot, about 3 seconds, to get a strong curl. Avoid overdoing heat or repeats, or you risk dryness and breakage.
Always test a small hair section first. Use your chosen heat setting. This avoids damage or poor curl results.
Divide your hair into very small sections for tight curls. Each section should be about ½ inch wide. This works best on short hair.
Clamp the flat iron near the middle of the section. Twist it 180 degrees away from your face.
Slowly pull the iron down. Repeat this section quickly if the curl seems loose, but don’t linger too long.
Thicker hair also benefits from multiple passes with medium heat if one pass doesn’t curl fully. Patience matters more than higher heat or rushing through curls. Fine or damaged hair needs the coolest effective temperature and a gentle touch.
Common Curling Mistakes and How to Fix Them
Curling hair with a flat iron often leads to uneven curls or limp waves. This happens when sections are too thick or you spin the iron inconsistently. Adjust the section width as you move up your head.
Make upper layers thinner. Start the twist lower for a natural flow.
Heat damage happens if the temperature’s too high. Holding the iron on one spot too long causes burning. Keep it moving.
Set the iron between 300°F and 375°F for most hair. Glide slowly but steadily from root to tip.
Don’t rush. Always apply heat protectant spray before curling to avoid frizz and damage.
Frizzy curls are usually caused by skipping frizz control or working in a humid environment. About 87% of users get frizz without proper measures. Use smoothing serums before curling.
Avoid combing curls right after. This helps curls set without fuzz. Hold the iron horizontally instead of vertically.
This makes bouncier curls, not soft waves. It also reduces frizz.
| Common Mistake | Cause | Fix |
|---|---|---|
| Uneven curls | Too thick sections, inconsistent spin point | Vary section size, lower spin point as you go up |
| Limp curls | Hair not cool before touching, too thick sections | Use thinner sections, let curls cool fully before touching |
| Heat damage | High temperatures, slow iron movement | Use 300-375°F, glide slowly and evenly |
| Frizz | No heat protectant, humidity | Apply heat protectant, use frizz control products, avoid combing |
| Unnatural curls | Flat spin angle, tight wrap around iron | Wrap hair loosely, use horizontal iron angle for bounce |
Holding the curl loose around the iron mimics natural waves. A tight wrap often looks stiff and fake. Shift your spin start point slightly from bottom to top.
This gives softer curl variation. Move gradually up the head.
Using titanium plates helps protect your flat iron from scratches. These last 3 to 5 years work better than ceramic. Ceramic may wear out in 2 to 3 years.
Choose wisely. A well-maintained iron also prevents uneven heat, reducing curl issues and hair damage.
How to Maintain and Make Your Flat Iron Curls Last Longer
Let your curls cool fully before touching or using any products. Cooling sets the shape and helps curls hold longer. It usually takes about 10 minutes for curls to cool and firm up.
Use a flexible hold hairspray after cooling to keep curls bouncy without stiffness. Spray from about 8 to 10 inches away in light layers. Avoid heavy sprays that weigh curls down or make them crunchy.
Brush curls only if you want loose waves. Use a wide-tooth comb or fingers to gently separate curls. Brushing too much makes curls fall flat faster.
- Let curls cool completely before applying product
- Use a light, flexible hold hairspray
- Refresh curls next day with a quick flat iron touch-up or curl cream
- Avoid heavy oils or creams that weigh down curls
- Sleep on a silk pillowcase to reduce frizz and flattening
Next day, revive curls by spritzing water or curl refreshing spray. Then, run the flat iron quickly over sections to reshape. This takes only 5 seconds per section and boosts bounce.
Silk pillowcases help curls last by reducing friction while you sleep. Cotton cases can cause frizz and flatten curls fast. A quick trick keeps curls lively even after a full night.
Pay attention to your hair’s porosity and texture. High porosity hair may need stronger hold sprays.
Low porosity hair might benefit from lighter products that avoid buildup. Adjust your products to fit your hair type for best curl life.
Flat Iron Care and Safety Tips for Curling
A flat iron works best when its plates stay clean and smooth. Dirt and leftover styling products can build up on the plates. This buildup reduces heat transfer and might cause uneven curls or damage your hair over time.
Wipe the plates with a damp cloth after every few uses. Use a soft, damp microfiber cloth to remove any residue safely without scratching the surface.
Keeping your flat iron in good condition also means checking the plates for damage. Cracks or chips in the plates can snag your hair and ruin curls. Spot any damage?
Replace the plates or buy a new tool. Most flat irons let you replace the plates alone.
The cost is around $20 to $40. This depends on the brand.
Heat damage to your hair and scalp is a real risk when using flat irons. Avoid burns by keeping the hot plates at least one inch away from your scalp. Temperatures above 250°F can cause burns in under two seconds.
Use the right heat for your hair type. Fine hair needs about 300°F. Thick hair can handle up to 400°F. Never hold the flat iron on one section longer than 7 to 10 seconds.
- Clean plates regularly with a damp cloth to prevent buildup
- Check plates for chips or cracks; replace if damaged
- Keep the iron at least one inch from scalp to avoid burns
- Match temperature to your hair type to prevent heat damage
- Do not hold the flat iron on hair longer than 10 seconds
- Use steady, smooth gliding motions to create even curls
- Section hair into narrow 2, 3 cm parts for better curling
Glide the iron steadily for 3 to 5 seconds per section. This timing helps make smooth curls. Angle the flat iron evenly on both sides of the hair strand for consistent curls.
Clamp near the roots, then lift the iron straight up. This adds volume by 10 to 18 percent. Put your flat iron in a heat-safe pouch after use.
Or place it on a heat-resistant surface. This keeps it safe and working well.
Keep your flat iron at safe heat levels. Take your time curling to protect hair and skin.
Step-by-Step Action Plan to Curl Hair with a Flat Iron
Follow these steps today to start curling your hair safely and effectively with a flat iron. Each step helps you build the right habits and skills to get great curls.
- Before you start: Choose a flat iron with adjustable heat and ceramic plates. Check its temperature setting to match your hair type for safe heat use.
- 15 minutes before curling: Wash and dry your hair completely. Apply a heat protectant spray evenly to prevent damage during curling.
- Right before curling: Section your hair into small parts using clips. Smaller sections let you create more defined curls.
- First curls: Start curling a single section by clamping the flat iron near the root. Rotate the iron slowly and smoothly down the hair strand.
- After curling each section: Let the curl cool without touching it. Cooling helps the curl hold its shape longer.
- When all curls are done: Gently loosen curls with your fingers for a natural look. Avoid combs or brushes that can frizz curls.
- After styling: Apply a light hold hairspray or serum. This gives your curls a longer-lasting finish without stiffness.
- Daily maintenance: Sleep with a silk scarf or on a silk pillowcase. This keeps curls smooth and reduces frizz overnight.
Frequently Asked Questions
Can You Curl Your Hair with Any Flat Iron?
Most flat irons can curl hair, but thinner plates work best. Wide plates are better for waves, while narrow plates create tighter curls.
How Do You Add Volume When Curling Hair with a Flat Iron?
Twist the flat iron 360 degrees outward near roots for volume. This lifts hair at the scalp and frames your face nicely.
What Temperature Is Best for Curling Fine Hair with a Flat Iron?
Use 350°F to 360°F for fine hair to avoid damage. Lower heat keeps curls safe and lasts longer without burning strands.
Should You Use a Heat Protectant Before Curling with a Flat Iron?
Yes, always apply heat protectant before styling with heat tools. It prevents damage and keeps hair healthy and shiny.
How Long Do Flat Iron Curls Typically Last?
Flat iron curls last a few hours to one day, depending on heat and hair type. Avoid touching curls too much to keep them intact longer.
Is It Better to Curl Small or Large Sections of Hair with a Flat Iron?
Curling 1- to 1.5-inch sections gives distinct and defined curls. Larger sections create looser waves, which might blend together more easily.
Key Points to Remember
Curling hair with a flat iron is easy when you use the right tools and steps. Start by practicing on small sections to master control and technique. Your curls will look better and last longer with care and patience.