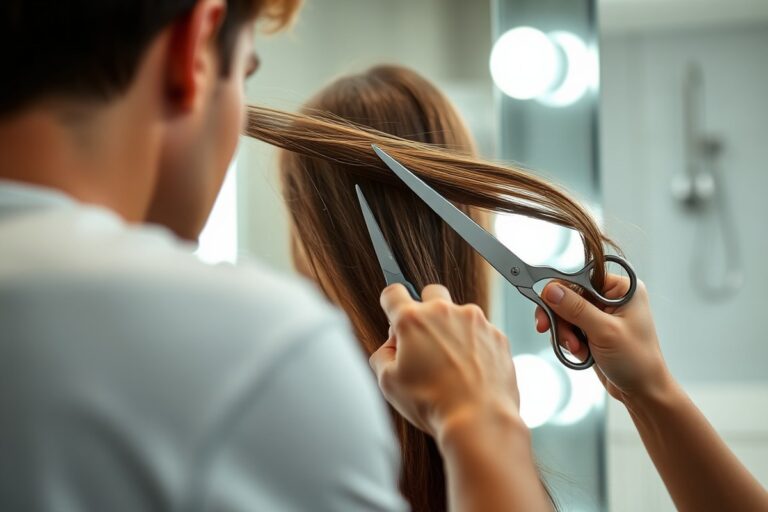
How to Trim Your Own Long Hair: A Complete Guide for Safe, Even DIY Trims
How to trim your own long hair starts with knowing the right tools. Sharp scissors and a fine-tooth comb make the process smooth and precise. Using dull scissors can lead to uneven cuts and split ends.
Your hair grows about half an inch each month. So trim only a little every 8 to 12 weeks.
This keeps ends healthy without losing much length. Avoid cutting too much at once to prevent surprises you can’t fix easily.
Start by washing and drying your hair completely, so it shows its natural texture. Section your hair into 4 to 6 parts to manage it better while cutting. Small sections help keep your trim even and balanced all around.
Key Takeaways
- Use sharp hair-cutting scissors for clean, precise trims every time.
- Trim no more than half an inch every 8 to 12 weeks to maintain length.
- Wash and dry your hair before trimming to see its true length and texture.
- Divide hair into 4 to 6 small sections to control the haircut easily.
- Trim in small sections of 1 to 2 inches around the face for accuracy.
- Cut dry hair curly by curly at an angle to keep natural volume.
How to Trim Your Long Hair Safely and Evenly at Home

Trimming your own long hair is doable with steady hands and patience. The goal is to remove just a tiny bit of hair. Cut about a quarter inch to keep your ends healthy.
This helps stop split ends from spreading further. Snipping too much or doing it unevenly can cause more damage than good.
Working carefully where you cut helps you avoid a crooked look. Dividing your hair into sections makes the process manageable. Use scissors made for cutting hair because kitchen scissors can cause split ends.
- Decide how much to remove. Trim between ¼ and ½ inch to keep ends healthy. Mark this length clearly on a ruler or tape measure. Cutting more can shorten your length too much.
- Section your hair. Split your hair into 4 to 6 sections, top, sides, and back. Clip each section so you focus on one at a time. This prevents cutting unevenly or missing spots.
- Comb each section smoothly. Run a wide-tooth comb gently from roots to ends. It detangles hair and creates a straight line for trimming.
- Select a guide strand. Pick a small strand at the front or side to trim first. Cut it carefully to your marked length. Use this as a guide for other sections.
- Trim each section evenly. Hold hair between your fingers right below the guide length. Cut straight across or slightly angled for layers. Avoid cutting too far above your fingers.
- Check your work frequently. Look in a handheld or secondary mirror to see the back. Adjust your angle if the ends don’t look even. Small fixes right away save headaches later.
- Feel for split ends after cutting. Run your fingers down your hair to spot ragged ends sticking out. Trim these tiny pieces one by one with the scissors tip to keep hair healthy.
Keep your hair slightly damp or dry while trimming, dry hair shows uneven cuts better. Good lighting and steady scissors cut down mistakes. Avoid rushing your trim.
It usually takes 20 to 30 minutes. The time depends on your hair’s thickness and length.
Essential Tools and Preparation for Trimming Long Hair

Start with the right tools. You’ll need sharp haircutting scissors, a comb, and clips to separate your hair into sections. Avoid kitchen or craft scissors since they can damage your hair ends.
These tools help you make clean cuts. Clean cuts keep your hair healthy. They also stop split ends.
Preparing your hair properly is key. Wash and then condition your hair to smooth out tangles and add moisture. Comb through gently with a wide-tooth comb to remove knots before trimming.
Cutting either dry or slightly damp hair works. But don’t cut when your hair is soaking wet, as it shrinks when dry. Your hair type affects your trim choice.
Fine or curly hair trims best dry. This gives you a more accurate length. Thick or straight hair trims easier when damp.
- Use sharp haircutting shears, not regular scissors
- Comb and clip hair into 4 to 6 sections
- Wash and condition hair before trimming
- Detangle thoroughly with a wide-tooth comb
- Trim when hair is dry or slightly damp only
- Cut small amounts at a time to avoid mistakes
Divide your hair into manageable sections with clips. This keeps everything neat and lets you focus on one part at a time. Small sections mean more control, which helps you avoid cutting too much.
Curly hair needs special care. Section your hair first. Then gently press down to hold curls while cutting.
Never cut soaking wet hair to avoid ending up with too short results after drying.
Key Sectioning Methods for Trimming Long Hair Alone
Dividing your long hair into sections helps you cut evenly and avoid mistakes. Four main sections usually work well.
But thicker or longer hair may need more divisions. Using clips to hold these sections keeps your hair organized and makes trimming easier.
Four Main Sectioning Approaches
A simple way to divide long hair is into four parts. Separate the top, back, left side, and right side. This makes trimming easier.
This method helps you focus on small areas instead of the whole head. For very thick or long hair, split each main section in half.
This creates eight parts total. It helps you manage thick hair better.
The ponytail method pulls hair forward into one ponytail. You cut the ends in front of a mirror. It works well for straight trims.
You can also twist small sections and cut split ends that stick out. These methods work well with layered cuts and give you more control.
Tips for Securing Hair with Clips
No-slip hair clips are essential for holding hair firmly while you cut. Use clips to isolate each section so you don’t battle tangled strands or overlap. Place clips close to your scalp to keep sections tight and neat.
Mirror the sections on each side of your head to keep symmetry in your cut. Work from the back sections first, then move to the sides and top. This order helps keep your trimming balanced and manageable.
How to Check Your Work Between Sections
After trimming one section, let down the clip. Comb the hair straight down. Check if the length looks even.
Check your work with a handheld mirror and the bathroom mirror together. Pay extra attention to the back, where unevenness is easy to miss.
Spot uneven strands? Go back to that section and trim a little. Trim slowly to avoid cutting too much.
Repeat this checking process before moving to the next section. Taking time to check helps avoid big mistakes and keeps the cut looking professional.
Follow these steps for sectioning your hair before trimming:
- Start with clean, dry, and detangled hair for best results.
- Create a center part from your forehead to the nape of your neck.
- Divide hair into four main sections: top, back, left, and right sides.
- Clip each section separately using no-slip clips to keep hair secure.
- Hair feels extra thick or long? Split each main section in half again. This gives smaller parts that are easier to trim.
- Work on one section at a time, releasing clips only when ready to cut.
- After cutting, check length evenness using your mirrors before moving on.
Choosing the Right Cutting Method for Your Hair Type
Choosing the right cutting method depends on your hair texture and the style you want. Blunt cuts give a clean edge, while layered or point-cutting add texture and movement.
Each technique suits different hair types and goals. So pick the one that fits your hair’s needs.
Blunt Cut Overview
A blunt cut means cutting straight across your hair with no layers. It works best for straight or slightly wavy hair types. You want hair that looks thick at the ends.
This method helps achieve that look. This method is fast and easy to use.
It is great for trimming split ends. It also helps keep a neat shoulder-length style.
To do a blunt cut, comb your hair straight and cut horizontally across the ends. Try cutting small sections evenly to avoid uneven lines. Using sharp scissors helps prevent frayed ends and uneven cuts.
Layered and Point Cutting Explained
Layered cuts create different lengths to add volume and movement to your hair. You cut at an angle or in sections to build these layers. This suits long hair needing more shape and reduces bulk for curly or thick hair.
Point cutting means snipping into the ends with scissors held vertically. This softens the edges and blends layers for a natural look. This method works well for straight or wavy hair.
It can also work for curly hair. For curly hair, cut it dry first.
To try point cutting, take a thin section and cut upward in small snips. Keep your scissors’ tips parallel to your hair for texture, not a blunt edge.
Technique Suitability by Hair Type
Straight and wavy hair generally respond well to blunt and point cuts. Point cutting can add needed texture without removing too much bulk. Curly hair prefers cutting dry to see the actual curl shape before cutting.
Layered cuts with longer layers suit curly hair best, especially if it’s very long. They avoid a heavy “blocky” look and help curls bounce better. Cutting curly hair dry helps you avoid making mistakes.
It also helps you get a shape that fits your curls. This way, your curls look natural.
Sharp scissors make a big difference in all types. Don’t use dull scissors that can cause damage or split ends. You don’t need expensive shears, but quality matters.
Here’s a quick comparison of the cutting methods and hair types:
| Cutting Method | Hair Type | How to Cut | Style Result | Common Issue |
|---|---|---|---|---|
| Blunt Cut | Straight or Wavy | Comb hair straight, cut horizontally | Thick, even ends | Can look heavy on thick hair |
| Layered Cut | Curly, Long | Cut at angle to add layers | Volume and movement | Uneven layers if not careful |
| Point Cutting | Straight, Wavy, Curly (dry) | Snip vertically with tips of scissors | Soft, textured ends | Too much point cutting thins ends |
Knowing your hair type and desired look helps you pick a method. Use blunt cuts for simple trims.
Try layered or point cuts for texture and volume. Adjust your technique to your hair’s unique needs and trim carefully.
Using the Ponytail Method and Other DIY Cutting Techniques
Trimming long hair yourself can be done well with the right methods. The ponytail technique, Unicorn cut, and twisting create various layer effects. Each method suits different needs and skill levels, letting you shape your hair simply and quickly.
Ponytail Method Explained
The ponytail method is great for soft, long layers. You gather hair high on your head, usually near the hairline. Cutting the ends here creates a natural layered effect when you let your hair down.
This method works well if you want gentle layers without much fuss. It also helps you control how much length you remove because you cut gradually.
- Brush your hair smooth and gather it into a high ponytail near the forehead.
- Secure the ponytail with a hair tie so it’s tight and even.
- Decide how much length to trim off the ends of the ponytail.
- Hold the ponytail straight out in front of you.
- Cut the ends gradually in a straight line or a slight angle for softness.
- Release the ponytail and check the layers frame your face evenly.
- Repeat trimming if you want shorter layers, but cut less each time.
Keep your head level when cutting the ponytail to avoid uneven layers.
The Unicorn Cut Technique
The Unicorn cut is also called the ponytail method. It gets its name from the high “unicorn” ponytail you make.
This ponytail is used to guide the haircut. It focuses on pulling hair forward and trimming only the ends at the front.
This style suits long hair that needs soft front layers. It’s quick to do and can add a fresh face-framing shape without changing the whole length.
- Brush dry hair forward over your face and form a ponytail at the very top hairline.
- Secure it tight just above your forehead.
- Examine the ponytail length and trim the desired amount from the ends.
- Cut straight across or at a slight angle for natural layers.
- Loosen the ponytail and style hair to see if the face frame fits well.
Don’t tilt your head down while cutting; it creates uneven layers when standing.
Twist and Trim Layers
Twisting hair before trimming is great for textured, lively layers. You work with sections, twist the hair tightly, and cut the ends of the twist. This varies the length within each layer.
This technique is good if you want dynamic, edgy layers instead of smooth, even ones. It can add volume and motion, especially in thick, long hair.
- Divide your hair into manageable sections.
- Brush each section well and twist it tightly from roots to ends.
- Hold the twist close to the bottom, where you want to cut.
- Cut the ends of the twisted section with hair scissors.
- Repeat for all sections, adjusting how much length you remove per twist.
- Release all twists and comb through to check the layer texture.
Be careful to cut straight across each twist to avoid uneven chunkiness.
How to Check and Even Out the Back of Your Hair Alone
Hold a handheld mirror behind your head with one hand. Use your bathroom mirror in front of you at the same time. This two-mirror setup lets you see the back clearly and check your hair’s evenness.
Comb the back section carefully before checking it. Use a wide-tooth comb first to detangle, then a fine-tooth comb to smooth. Clipping the sides back tight helps isolate the back hair for a more precise look.
To fix uneven areas, bring the back hair strands forward over your shoulders. Hold the ends between your fingers in a figure-three shape. Wrap the hair under your index finger, over the middle finger.
Then wrap it under the ring finger. This grip keeps hair steady and lets you trim straight across.
Notice any long spots at the back? Trim them in small sections slowly.
Cut less than you think you need because you can always snip more later. Avoid rushing to prevent chopping too much unevenly.
Using this method works well unless your hair is very short or layered. In those cases, trimming with mirrors alone can be tricky. You might want help with trimming.
Try the ponytail method pulling hair forward. This method makes cutting much easier.
Check your progress in the mirror frequently. One side look longer?
Trim a tiny bit more carefully to even it. Repeat the combing and smoothing to catch all uneven hairs before finishing.
Avoiding Common DIY Haircut Mistakes and How to Fix Them
Using dull or regular scissors is a common mistake when trimming your hair. Dull blades crush hair strands and cause split ends, making hair look choppy and frayed. Switch to sharp professional hair shears to slice cleanly and avoid damaging your hair.
Cutting dry hair or not sectioning it properly can lead to uneven results. Hair isn’t damp, the strands move around a lot. Divide hair into small, controlled sections.
This helps get a straight cutting line. Work with hair that’s damp, not dry.
Twist 1-2 inch sections away from your face. Trim the ends at a slight angle for smooth edges.
To fix uneven hair, start by spotting longer pieces and trimming in smaller, careful cuts. Trim a little at a time instead of a large chunk to avoid overcutting. Use small scissors and take your time.
Trim slowly to even out length gently. Avoid causing damage or choppiness.
- Check your scissors’ sharpness before use
- Trim hair when damp, not dry
- Divide hair into small, 1-2 inch twisted sections
- Trim ends with clean, straight or slightly curved cuts
- Use small, precise snips to fix choppy spots
- Add multiple elastics on long hair to prevent shifting
- Avoid trimming large chunks at once to prevent unevenness
Split ends usually appear when scissors crush the hair instead of cutting it cleanly. Using scissors meant for paper or fabric causes this crushing effect. Always use sharp hair shears for trimming.
Make small, clean cuts with each snip. This helps keep split ends from forming.
Trim off split ends as soon as you see them. Split ends don’t repair themselves and only get worse if left alone. Trim your hair every 6 to 8 weeks.
This keeps hair healthy and stops splits. Regular trims make home haircuts work better.
When to Trim Your Own Hair Versus Seeing a Professional
Trim your own hair only if your cut is simple and small. Snipping a quarter inch to fix split ends or even out length is usually safe. For big changes or layered styles, book a stylist instead.
Look at your hair’s condition before cutting. Thick, curly, or fragile hair needs expert hands. They prevent uneven cuts and damage.
Hair with severe split ends or breakage needs professional care. This avoids making damage worse.
Technical cuts, like precise bobs or transition styles, require skill. These cuts shape your hairstyle dramatically and must be balanced on both sides.
Professionals use shears and know how to make sharp lines. DIY cuts often don’t have this precision.
Here’s a simple rule: trim less than half an inch evenly at home. It’s safe and easy. Anything more complex calls for a stylist.
Big cuts can change your hair’s volume and shape. A pro can handle that safely.
Professional stylist visits usually cost $40 to $100. It depends on salon and location.
They can spot uneven layers and fix small mistakes fast. Your hair will look healthy and styled once they finish.
Cutting beyond small trims can cause uneven hair and damage. Go slow and avoid reshaping at home.
Step-by-Step Action Plan for Trimming Your Own Long Hair
Follow these clear steps to trim your long hair safely and see real results. Each step helps you gain confidence and notice healthier ends.
- Before you start: Gather sharp scissors, a comb, clips, and a mirror. Check that tools are clean and sharp for a smooth cut.
- Day 1: Section your hair into small parts using clips. This helps keep your hair organized and makes trimming easier.
- Day 1, next: Use the ponytail method for an easy trim. Cut a small amount, about ¼ inch, and check for evenness.
- Day 2: Check the back with two mirrors or a handheld mirror. Trim any uneven spots you spot carefully.
- After 1 week: Notice if your hair feels less frayed or split at the ends. If yes, your trim worked well.
- After 2 weeks: Repeat trimming small amounts if needed. Regular trims keep your hair healthy and prevent damage.
- After 1 month: Review your hair’s overall shape and health. Adjust your trimming method if your style or hair has changed.
Frequently Asked Questions
Can I Trim My Long Hair When It’s Wet or Dry?
Trimming dry hair shows the natural fall and split ends clearly. Wet hair stretches, so cuts may end up shorter than intended. You might trim dry for more control on length and shape.
How Often Should I Trim My Long Hair to Keep It Healthy?
Trim every 8 to 12 weeks to maintain healthy ends and length. Hair grows about half an inch a month, so this schedule prevents split ends. You can trim less if your hair feels strong and smooth.
Can I Use Regular Scissors Instead of Hair-Cutting Shears?
Regular scissors can cause split ends and uneven cuts. Hair shears are sharper and designed for smooth trimming. Using proper scissors helps keep your hair healthy and looking better.
What’s the Best Way to Handle Split Ends While Trimming at Home?
Trim just a quarter inch to remove split ends without losing length. Look for frayed or uneven tips and snip those small sections carefully. Regular trims prevent splits from traveling up the hair shaft.
How Do I Avoid Layering Mistakes When Trimming Long Hair Myself?
Avoid cutting angles unless you plan the layers precisely. Layering takes skill and careful sectioning to look even. Start with small cuts and check results often to fix any unevenness.
Can I Trim My Own Hair Bangs with the Ponytail Method?
The ponytail method isn’t best for bangs because it pulls hair tight. Bangs usually need precise, small snips while hanging naturally. Use a comb, cut dry bangs slowly in small sections instead.
Final Thoughts
Trimming your own long hair is doable with care and the right steps. Start with small cuts and check your results often.
Take your time to get the hang of it. Enjoy healthier ends that last longer.