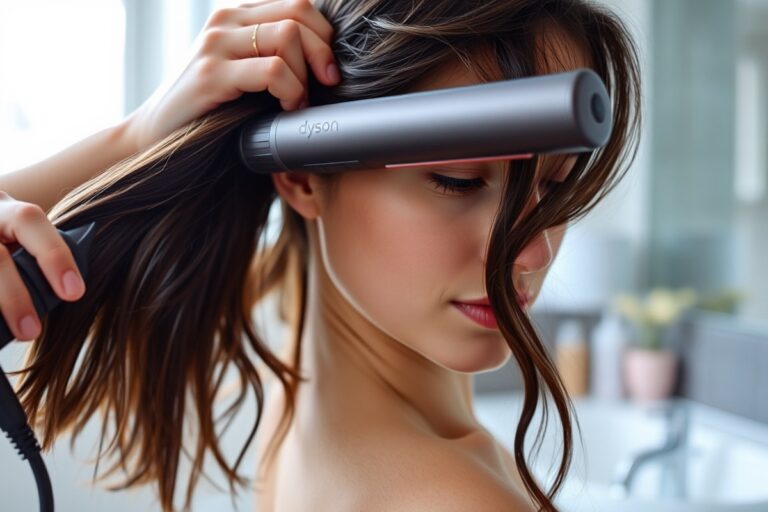
How to Achieve Wavy Hair: 8 Proven Methods for Natural, Lasting Waves
How to achieve wavy hair is a common question for many. The easiest way is to use simple techniques that add texture and movement. These methods give you natural-looking waves without much fuss or damage.
Start by prepping your hair with a good shampoo and conditioner that adds moisture. Then, try scrunching your hair while it’s damp or using heat tools carefully. The key is to protect your hair from heat and keep it from getting frizzy.
You want your waves to last all day. So let your hair dry fully before styling or touching it.
Avoid heavy products that weigh your hair down. Instead, choose light textures and refresh your waves gently as the day goes on.
Key Takeaways
- Use a moisturizing shampoo and conditioner to prep hair for waves.
- Scrunch hair gently while damp to encourage natural wave formation.
- Always protect your hair before using heat tools to avoid damage.
- Wait until hair is completely dry before removing pins or touching it.
- Avoid heavy products that can flatten or weigh your waves down.
- Touch up waves lightly throughout the day to maintain texture.
1. How to Easily Achieve Wavy Hair at Home

Wavy hair looks great when it’s natural and soft, not stiff or crunchy. You don’t need fancy tools. You don’t have to visit a salon.
You can get gentle, beachy waves that move with you. This method works well if your hair is straight or has a slight wave.
Gather a few basics first. You’ll need a spray bottle filled with water.
Also get a lightweight leave-in conditioner and a blow dryer with a diffuser. These things cost less than $30 if you don’t already have them at home.
- Wash your hair: Use a gentle shampoo and a moisturizing conditioner. Use a lightweight conditioner. Look for one with coconut or vanilla scent. It hydrates without weighing down your hair.
- Towel-dry lightly: Pat your hair with a soft towel to remove excess water. Avoid rubbing because it can cause frizz.
- Mist with water or leave-in: Spray a fine mist on your hair. Keep it damp but not soaking. Use a leave-in conditioner if your hair is dry or prone to damage.
- Scrunch your hair: Take sections of your hair in your hands. Squeeze them upward toward your scalp. This encourages natural waves to form.
- Attach the diffuser: Put it on your blow dryer. Use the dryer on low heat and speed to avoid damage and frizz.
- Dry your hair with the diffuser: Gently press the diffuser against your hair. Lift hair at the roots while drying. Move slowly to let waves set without disturbing them.
- Finish by scrunching: Once your hair is nearly dry, scrunch again to boost waves. Let your hair air dry completely if possible.
This approach works best with Type 2 wavy hair or straight hair wanting that soft wave. It avoids extra chemicals and heat damage.
You’ll see natural, bouncy waves that are easy to style and refresh daily. Avoid high heat or rough drying, or your waves may become frizzy or lose shape.
2. Heat-Free Techniques to Create Natural Waves

Heat-free methods like braids, twists, and hair wraps create natural waves without damage. These styles work best on damp hair and need time, usually overnight, to set. Different heatless styles work for hair that is short or long.
They add gentle waves without damage. You get versatile looks to fit your hair length.
Braiding and Twist Styles for Waves
Braids and twists are popular heat-free ways to get natural waves. Braiding slightly damp hair and leaving it until dry changes its shape, making soft waves. You can do simple three-strand braids or try fishtail braids for different wave textures.
Tight braids create smaller waves, while loose braids result in bigger, relaxed waves. Twist styles involve dividing hair into sections, twisting them, and securing with elastics or pins. These also create gentle, beachy waves after drying, perfect if you prefer less defined curls.
- Start with clean, damp hair, avoid soaking wet or dry hair for best results.
- Detangle your hair thoroughly to prevent knots when braiding or twisting.
- Divide hair into sections depending on wave size, more sections for tighter waves.
- Braid or twist each section, keeping your grip consistent but not too tight.
- Secure ends with small elastics or clips to keep the style intact.
- Let your hair dry completely, ideally overnight, to set the waves.
- Release braids or twists carefully and run fingers through to separate waves.
Leaving braids or twists in too tight can cause tension and breakage. Keep them snug but gentle.
Overnight Wave Options
Overnight methods give hair enough time to form lasting waves without heat. Start on damp hair to help waves set as your hair dries. Braids are a popular heatless style before bed.
You can also twist buns. Wrapping hair around foam rollers works well too.
For shoulder-length hair, bun styles or twists often create softer waves. Braids work well on longer hair. Sea salt spray adds texture before styling.
A light mousse can help waves hold better. Use these on damp hair for best results. Just avoid heavy products that can weigh hair down.
Using Accessories Like Bobby Pins and Headbands
Bobby pins and headbands help create waves by holding hair in place without heat. Roll small damp hair sections and pin them to your head. Leave them to dry completely.
This method helps create natural waves. This technique often results in spiral or pin curls with gentle volume.
Headbands suit medium to long hair well. Wrap your damp hair around the band. This forms nice waves as hair dries.
This method is easy to sleep in and lets you avoid tension points that cause discomfort. These accessories are budget-friendly, usually under $10, making them great tools for styling.
3. Using Heat Styling Tools for Defined Waves
Heat tools like flat irons, curling wands, and hair wavers create waves. Each tool shapes waves in its own way. You can pick one based on your style.
Flat irons give you versatility for loose or tight waves. Curling wands and hair wavers make shaping waves faster. Use heat protectant products and moderate temperatures to avoid damage.
Flat Iron Twisting Technique
A flat iron can create natural-looking waves by twisting your hair as you press it. This method works well on dry hair and fits many hair types. Set your flat iron between 300°F to 350°F to protect hair from overheating.
Take 1-inch sections of hair to work on at once. Slide the flat iron down while rotating it 180 degrees from your face. This makes your hair look wavy, not curly.
- Spray heat protectant evenly on dry hair.
- Divide hair into sections for easier styling.
- Clamp the flat iron near the roots of one section.
- Twist the flat iron away from your face by 180 degrees.
- Slowly slide the flat iron down the hair strand.
- Repeat twisting and sliding steps on all sections.
- Let the waves cool before gently running fingers through.
- Finish with light hairspray for hold.
Curling Wand Wrapping Method
The curling wand is great for defined waves with a bit more bounce. This tool requires wrapping hair around the barrel without clamps. Choose a barrel size of 1 inch for standard waves or 1.5 inches for looser waves.
Use medium heat settings around 300°F. Wrap hair sections around the wand and hold for 8 to 10 seconds. Release carefully and allow the curl to cool before touching.
- Apply a heat protectant spray to dry hair.
- Separate hair into manageable 1-inch sections.
- Wrap a section around the wand barrel, starting near roots.
- Hold the hair on the barrel for 8 to 10 seconds.
- Unwrap gently and let curl cool before moving on.
- Continue wrapping until all hair is styled.
- Break up curls with fingertips for natural waves.
Wave Styling with Hair Wavers
Hair wavers create consistent, deep waves by pressing hair between heated plates. They work best on thicker or coarser hair types that need more definition. Choose a waver with adjustable heat, aiming for 320°F to 350°F.
Use on dry hair with heat protectant applied. Clamp the waver on a hair section near the roots.
Hold for 5 to 7 seconds, then move down the strand slowly. Repeat until all hair sections are waved.
- Apply heat protectant to completely dry hair.
- Divide hair into sections of 1 to 2 inches.
- Clamp the hair waver at the roots of a section.
- Hold the waver for 5 to 7 seconds.
- Move the waver down the strand and repeat the clamp.
- Continue until all sections have defined waves.
- Allow waves to cool, then gently separate with fingers.
4. Choosing the Best Wave Method by Hair Type and Length
Picking the right wave method depends on your hair texture, thickness, and length. Fine hair gets weighed down easily.
So go for light mousse or sea salt sprays. Thick hair needs stronger hold and moisture to define waves without frizz.
Short hair shapes waves differently than long hair. Short strands benefit from quick, texture-improving styles like finger waves or light scrunching.
Long hair can handle heat styling or braids. But curls might shrink length and create tighter waves.
Delicate hair, often fine or textured with coils, reacts best to gentle, heat-free methods. Avoid frequent heat tools to prevent damage. Using nourishing products and air-drying techniques keeps waves soft and healthy.
Here is a clear comparison table. It helps match your hair type and length to wave methods. This list balances easy use, time needed, and hair health.
| Hair Type & Length | Best Wave Method | Time Required | Damage Risk | Effect |
|---|---|---|---|---|
| Fine, Short | Finger waves or light mousse scramble | 10 to 20 minutes | Low | Controlled texture, natural soft waves |
| Fine, Long | Sea salt spray + braid waves or heat styling | 20 to 40 minutes | Medium (if heat used) | Loose, beachy waves with movement |
| Thick, Short | Scrunching with mousse or gel | 15 to 30 minutes | Low | Defined waves, controlled volume |
| Thick, Long | Heat tools or braid/bun overnight | 30 to 60 minutes | Medium to High (heat risk) | Tight ringlets or loose curls |
| Delicate, Any Length | Heat-free scrunch + moisturizing products | 20 to 40 minutes | Very Low | Soft, natural waves without frizz |
To decide, start by matching your hair texture and length in the table. For fine, short hair, finger waves take about 10 minutes. They also won’t weigh hair down.
Thick, long hair works well with overnight braids. Heat tools can damage hair if used often.
For delicate hair types, skip heat tools. Moisturize well and style on damp hair with light scrunching. This protects your hair and promotes soft waves.
Thick hair might need firmer hold gels, but balance it to avoid stiffness. Timing and product choice ensure your waves last without breakage or heaviness.
5. Preparing and Protecting Your Hair Before Styling
Start with washing your hair using sulfate-free shampoo. This cleans your scalp without stripping natural oils that help form waves. Follow with a conditioner that hydrates and detangles, focusing on mid-lengths and ends.
After washing, gently towel-dry hair by squeezing out water instead of rubbing. This helps reduce frizz and damage.
Apply a leave-in conditioner or a lightweight styling cream on damp hair to keep strands moisturized. These products protect your waves and add shine without weighing hair down.
Use a heat protectant spray or cream before styling with heat tools. These products protect your hair from damage caused by temperatures over 300°F. Apply the spray evenly from roots to ends two minutes before using a curling wand or flat iron.
Let your hair dry fully before removing pins or headbands for natural waves that last longer. Waves tend to hold better when the hair is cool and completely dry. Avoid touching your hair too much during drying to keep wave clumps intact.
For fine or thin hair, opt for lighter heat protectants to avoid weighing hair down. Use products with added volume benefits or texturizing sprays applied after styling. These help waves hold shape without making hair stiff or greasy.
Mix half a tablespoon of regular conditioner with one tablespoon of dissolved lavender Epsom salt. Add half a tablespoon of salt to the mixture.
This homemade solution adds extra texture to your hair. Apply this before heat styling to improve wave formation and protect hair moisture.
Always apply heat protectant before using hot tools. Skipping it can cause lasting damage to your hair.
6. Maintaining and Refreshing Wavy Hair for Longevity
Keeping your waves looking fresh for days needs the right care and products. Use lightweight styling products like sea salt sprays and hair oils to maintain texture. You can refresh waves without heat.
Spritz sea salt spray. Then scrunch your hair gently with your hands.
Using Sea Salt and Texturizing Sprays
Sea salt and texturizing sprays add natural grit and hold to your waves. They help create volume and keep waves from falling flat too quickly. Spritz a small amount evenly through damp or dry hair to avoid stiffness.
Lightweight mousse or hair oils also help keep hair soft and wavy. Use sparingly, especially if your hair tends to get greasy fast.
Low-Heat Refresh Techniques
Refreshing your waves without heat saves your hair from damage and keeps the style lasting longer. Spritz a bit of sea salt spray on second- or third-day hair to bring back texture. Then, gently scrunch the waves with your fingers to lift and reshape them.
Your roots look flat. Use a blow dryer with low or cool air to add volume. Avoid using high heat to protect hair health.
Proper Night Care for Waves
Caring for your waves overnight helps them last longer and look better the next day. Use a loose braid or pineapple your hair.
This helps avoid crushing waves while sleeping. A silk or satin pillowcase reduces frizz and keeps waves smooth.
Refreshing your waves in the morning is easier if you avoid brushing at night. Brushing can break apart waves and create unwanted frizz.
- Start with dry or slightly damp hair and spray sea salt or texturizing spray evenly.
- Use your fingers to scrunch hair, improving wave shape without disturbing natural texture.
- Apply a small amount of lightweight hair oil to ends for shine and softness.
- To refresh second-day waves, spritz sea salt spray, then scrunch gently by hand.
- For low-heat volume boost, use a blow dryer on a cool setting focusing on roots.
- Before bed, loosely braid hair or gather it in a high ponytail to protect waves.
- Sleep on a silk or satin pillowcase to reduce friction and frizz overnight.
- Avoid brushing waves before bed to keep their shape intact for the next day.
7. Adding Volume and Texture to improve Waves
Flat waves lack bounce and look limp without volume. To boost volume, start by flipping your hair upside down when drying. Use a diffuser on your blow dryer at low heat.
It lifts roots while defining waves. This also helps reduce frizz effectively.
Products that add texture without weighing hair down include dry shampoo and lightweight texture pastes. Spray dry shampoo onto your roots or scrunch texture paste into the ends for instant grip. Avoid heavy creams or oils, which can make waves fall flat quickly.
Use a wide-tooth comb or your fingers to boost wave volume. These tools don’t break up the wave pattern. They keep your waves looking natural.
Avoid fine-tooth combs or brushes that flatten waves. For quick volume, gently rake your fingers through your roots after applying a volumizing spray.
- Spray a root-lifting volumizer before blow drying
- Use sea salt spray on damp hair for light grit and texture
- Try hair knotting or scrunching for fine hair to add fullness
- Diffuse hair upside down for natural volume boost
- Apply dry shampoo or texture paste only at ends to avoid weight
- Finger comb waves instead of brushing for better shape
Fine hair benefits from gentle scrunching or knotting techniques. After applying sea salt spray, twist or scrunch small hair sections to build volume. Thick hair needs minimal product but reacts well to diffusing.
Overuse of hairspray or heavy products can make waves stiff or flat. Less is more when working with volume and texture products. Volume appears when roots lift and strands have light separation, not stickiness.
8. Common Mistakes and How to Fix Wavy Hair Styling
Overusing heat is a common way to damage wavy hair and cause limp waves. Use your straightener or curling iron on a medium heat setting, around 300°F. Always apply a heat protectant beforehand to avoid frizz and dryness. Too much heat breaks down your hair’s natural texture and makes waves fall flat quickly.
Choosing the wrong products often weighs down fine, wavy hair and blocks waves from holding. Look for lightweight mousses or sea salt sprays designed for 2A hair types.
Heavy creams or oils can flatten waves and cause buildup. Apply products sparingly, starting with just a dime-sized amount and adding more only if needed.
Improper drying techniques can ruin waves by causing frizz or limpness. When blow drying, attach a diffuser and set the heat to low. Keep your hands still and avoid rubbing your hair with a towel.
Instead of rubbing, scrunch your hair gently while drying. Use a soft cotton t-shirt or a microfiber towel. This helps keep your hair cuticles smooth and less frizzy.
Flat, lifeless waves need extra lift at the roots. Try the twist and clip method on damp hair. Twist small sections away from your face and clip them.
Let your hair air dry or use a diffuser for best results. This adds volume and helps waves set better. Spritz a light hold hairspray from about 12 inches away to lock waves without stiffness.
Frizz can be a sign you’re spraying hairspray too close or using the wrong kind. Hold the hairspray at least 30 cm (about 12 inches) away to mist evenly.
Avoid alcohol-heavy products that dry hair out and worsen frizz. Instead, spray a light, flexible formula to keep waves soft but secure.
Don’t rub your hair when drying. Scrunch gently instead to reduce frizz and protect wave shape.
Step-by-Step Action Plan to Achieve Wavy Hair
Follow these simple steps to get waves you’ll love. Each step helps you check your progress.
- Day 1: Start with clean, damp hair. Use a lightweight mousse or sea salt spray to add texture before styling.
- Day 1: Choose heat-free or heat styling based on your hair type. Test a small section to see if waves hold well.
- Day 1: Apply heat protectant if using tools. Use a curling wand or flat iron for defined waves on straight hair.
- Day 1: For heat-free, twist or braid damp hair before bed. Check next morning for natural waves.
- Day 2: Refresh waves with a spray bottle of water and scrunch hair gently. Avoid overbrushing to keep texture.
- Week 1: Experiment with adding volume using dry shampoo or light root lift spray. Notice improved hold and bounce.
- Week 2: Adjust styling frequency based on hair health and wave durability. Use deep conditioner weekly to prevent dryness.
- Ongoing: Avoid common mistakes like using too much product or applying heat on dry, brittle hair. Your waves will look natural and last longer.
Frequently Asked Questions
Can I Get Wavy Hair with a Diffuser Attachment on My Hair Dryer?
Yes, a diffuser is great for improving natural waves or creating soft ones. It dries hair gently and reduces frizz, which helps your waves last longer.
How Do I Avoid My Waves Falling Flat on Fine Hair?
Use lightweight products to avoid weighing down your fine waves. Also, apply styling products to damp hair and dry with a diffuser to boost volume.
Is There a Simple Way to Refresh Wavy Hair Without Re-Washing?
Spritz your hair with water or a leave-in conditioner and scrunch to reactivate waves. This method adds moisture and revives your waves quickly.
Can Short Hair Look Wavy Too?
Yes, short hair can hold waves well, often looking bouncy and textured. Use small sections and light styling products to define waves on shorter hair.
Do I Need Different Products for Heat Styling Versus Heat-Free Waves?
Yes, heat protectant sprays are a must for heat styling to prevent damage. For heat-free methods, a light mousse or sea salt spray helps boost texture and hold.
How Often Should I Deep Condition to Keep Waves Soft and Healthy?
Deep condition once a week or every two weeks, depending on hair dryness. It nourishes your waves and helps keep them soft and manageable.
Key Points to Remember
Wavy hair takes practice but is totally achievable at home. Pick methods that suit your hair and daily routine. Start styling today to see what works best for you.