How to Wave Hair with Flat Iron: Simple Steps for Lasting Waves and Volume
Learning how to wave hair with flat iron is easier than you think. Start by clipping a one to two-inch section of hair. Clamp your flat iron near the roots and twist it 180 degrees away from your face.
This method creates natural-looking waves quickly. You heat your hair evenly, so curls last longer than from a curling iron. Just avoid overlapping hair in one place to keep your waves smooth and neat.
Set your flat iron temperature based on your hair type to avoid damage. For fine or thin hair, stick below 300 degrees. That small step helps protect your strands while you style.
Use a heat protectant spray before styling to minimize heat damage. Work through your hair section by section for consistent waves. Finish with a light mist of hairspray to hold the shape longer without stiffness.
Key Takeaways
- Use a 1 to 2-inch section of hair for each wave to control curl size.
- Twist the flat iron 180 degrees to start the wave away from your face.
- Keep the flat iron moving; don’t leave it on hair longer than 10 seconds.
- Choose a flat iron with adjustable heat for better control over styling.
- Dry hair thoroughly before waving to prevent breakage and damage.
- For fine hair, keep your heat under 300 degrees to stay safe.
How to Wave Hair with a Flat Iron Step-by-Step
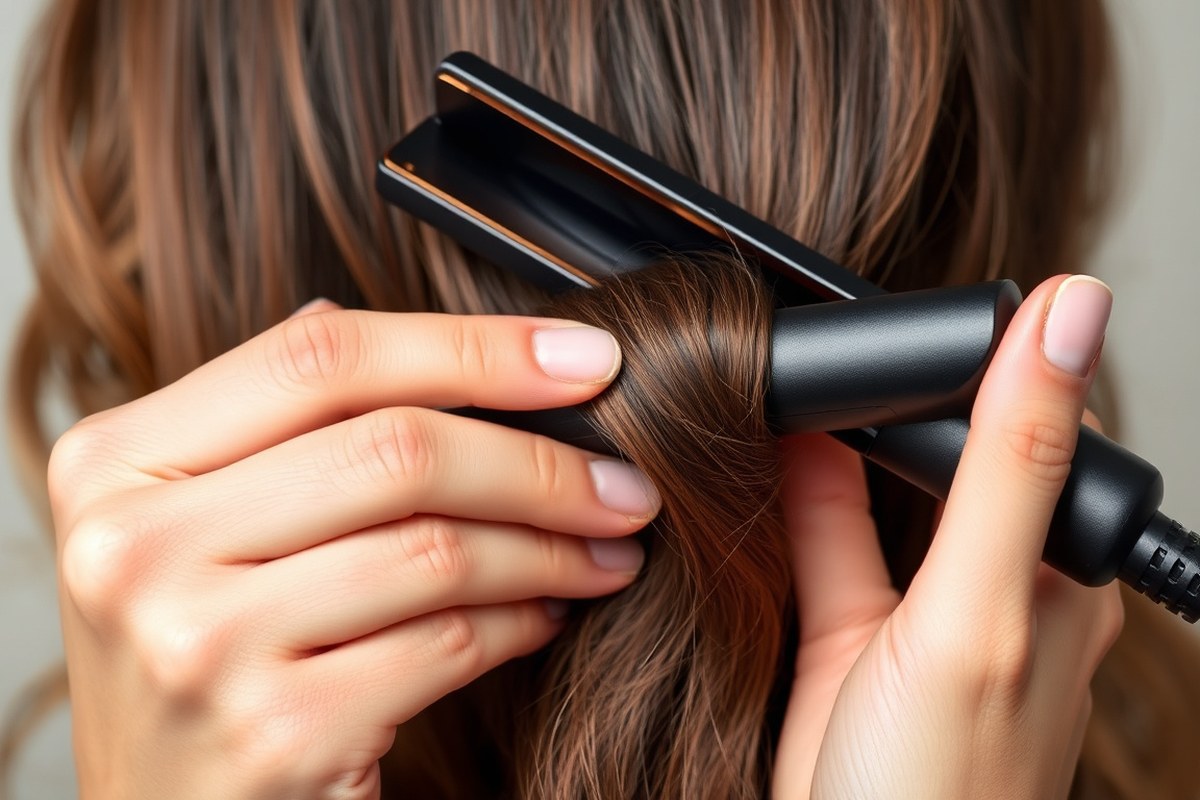
Waving hair with a flat iron is simple once you learn the right technique. You section your hair, clamp small strands, twist the iron, and slide slowly. Leaving the ends straight helps the waves look natural and soft.
Preparing and Sectioning Your Hair
Start with clean, dry hair to get the best waves. Apply heat protectant spray to prevent damage during styling.
Divide your hair into four sections: top, sides, and back. Clip the upper sections out of the way to work on one part at a time.
The Clamping and Twisting Technique for Waves
Take a one-inch strand of hair from your section. Clamp it close to the roots but leave the ends free for a relaxed wave.
Hold the flat iron at your hair’s top, then twist it out and down. Move the iron slowly along the hair strand without stopping. Keep the iron on each spot no longer than 7 to 10 seconds.
Repeat this motion all over your hair. Use a 1 to 1.25-inch flat iron for the best wave size and control.
Finishing Touches to Set Your Waves
Once done, let the waves cool completely before touching them. This helps the waves stay longer and sets the shape.
Shake your hair out gently with fingers for volume. Use a light hairspray to hold the waves without stiffness.
Put some mousse at your hair roots before drying. This adds volume under your waves. It makes your hair look thicker and fuller.
- Apply heat protectant and dry your hair fully.
- Section hair into manageable parts and clip away tops.
- Clamp a 1-inch strand near roots, leaving ends out.
- Turn the flat iron outward as you move it down your hair. Keep twisting while slowly sliding down the strand away from your face.
- Repeat clamp and twist across all sections of hair.
- Allow hair to cool before running fingers through the waves.
- Spray with light hairspray for hold without stiffness.
Choosing the Best Flat Iron for Waves

Picking the right flat iron depends mostly on your hair length and texture. A 1-inch to 1.5-inch plate is best for most waves, especially on medium to long hair.
Narrower plates suit short hair or tighter waves. Wider plates cover more hair, speeding up the process for thick or long hair.
A flat iron with floating plates helps a lot. These plates adjust slightly to your hair’s thickness.
They prevent pinching and reduce hair snags, giving you smoother waves with less damage. Look for beveled edges, which allow the iron to glide easily without catching your hair strands.
Heat settings matter too. Fine or thin hair needs lower heat, around 300°F. Medium hair can usually handle 330°F to 350°F. Thick or coarse hair needs higher heat near 380°F. This helps your waves hold better.
Use heat carefully to avoid damage. Always start with the lowest heat your hair responds to and increase only if needed.
| Hair Type | Recommended Plate Size | Heat Setting Range (°F) | Plate Features |
|---|---|---|---|
| Short or Fine Hair | 0.75 to 1 inch | 270 to 300 | Floating plates, beveled edges |
| Medium Length, Medium Texture | 1 to 1.5 inch | 300 to 350 | Floating plates, beveled edges |
| Long or Thick Hair | 1.5 inch or wider | 350 to 380 | Floating plates, beveled edges |
Choose technologies like ceramic or tourmaline plates that heat evenly. They reduce hot spots, preventing burnt strands and uneven waves. Some advanced irons have smart sensors.
They adjust heat based on your hair’s texture. This makes styling safer.
Prices of good flat irons vary. Basic models with ceramic plates and floating edges start around $30 to $50. Higher-end tools with smart sensors and advanced heat controls can cost $150 or more.
A mid-range flat iron with floating plates works well for beginners. It also has adjustable heat settings.
Always use a heat protectant before styling. Don’t push your flat iron to the highest heat. This avoids damage to your hair.
Essential Hair Prep and Protection Before Waving
Your hair needs the right prep before waving it with a flat iron. Start by brushing it to remove any knots or tangles. This step helps the heat protectant work better and makes styling smoother.
Avoid using a flat iron on hair that is wet or damp. Hair is weaker when wet and breaks easier from heat. Also, heat styling wet hair can ruin your flat iron and cause uneven waves.
Apply heat protectant to clean, dry, brushed hair. Put a little spray on your fingertips first. Spread the product evenly through your hair with your fingers.
Don’t spray the product directly onto your hair. This method helps cover each strand without using too much product.
- Brush your hair thoroughly to detangle it before applying product
- Use a heat protectant spray or serum designed for your hair type
- Thick hair needs sectioning to spread heat protectant evenly. Work on one section at a time for best results.
- Comb through your hair after applying protectant to coat every strand
- Consider using a light volumizing spray if your hair is thin or flat
- Let the protectant dry fully before starting to style
Heat protectant forms a barrier around each hair strand. This guard reduces damage from the flat iron’s high temperature. You can still get the waves you want without frying your hair.
Sectioning thick hair before adding protectant makes sure every part is safe. For thinner hair, volumizing sprays add body and help waves hold longer. Pick a heat protectant made for your hair type.
Read the label carefully before using it. Follow the directions exactly to protect your hair.
Setting the Right Temperature for Your Hair Type
Set your flat iron temperature based on your hair type to avoid damage. Fine hair needs lower heat, usually around 250 to 300 degrees Fahrenheit. Stay on a low heat if your hair is thin or fragile.
This helps avoid burning or breakage. Use higher heat only if needed.
For normal hair, choose a setting between 300 to 380 degrees. This gives enough heat to hold waves without over-stressing your strands. Start with a low heat setting on your flat iron.
Raise heat slightly if waves don’t stay after one try. Avoid too much heat at first.
Thick or coarse hair requires more heat to shape waves. Set the iron between 350 to 400 degrees to get smooth waves.
Using less heat might mean you don’t get the wave. So be ready to use the higher setting carefully.
Don’t keep your flat iron on one spot too long, especially at higher temperatures. Hold the iron on each hair section for about 5 to 7 seconds max. Move steadily while shaping waves to avoid overheating sections and causing damage.
Section your hair into manageable parts around 1 inch wide. Place the iron near the root, then close it and start the wave motion. Tilt your wrist to move hair up with the iron.
Next, tilt down and weave through the hair. Keep going until you reach the ends.
Always test on a small hair section first if you’re unsure about the heat. Adjust the temperature depending on how your hair responds. Lower the temperature if you see dryness or breakage.
You might need to pass the iron over hair more than once. This avoids damage while styling.
Customizing Wave Size and Direction with Your Flat Iron
You control wave shape by how you clamp, twist, and the size of hair sections. Twisting the iron while moving it down creates ‘S’ waves. Using smaller or bigger sections changes wave size and how natural they look.
Creating ‘S’ Waves by Twisting the Iron
Clamp the flat iron at your roots on a 1-inch section of hair. Twist the iron slowly as you slide it down to shape waves. Moving the iron in an “S” pattern creates smooth, flowing waves.
Place your hair over the center of one plate before closing your iron. Rotate your wrist a half turn upward, then clamp again a few inches down. Keep repeating this clamp-twist-slide pattern until you reach the ends.
- Clamp the iron close to your scalp on a 1-inch section.
- Rotate your wrist a half turn upward while pulling the iron down.
- Unclamp, move a few inches down on the same hair section.
- Clamp again and rotate the iron downward for the “S” wave.
- Repeat clamping, twisting, and sliding until the whole section is waved.
Clamp tightly but don’t pinch. Too much pressure can break hair or create kinks.
Adjusting Section Size for Different Wave Textures
Use bigger sections for loose, beachy waves that look natural. Smaller sections make tighter, more defined waves or curls. The size depends on how much texture you want and your hair’s thickness.
For a soft beach look, clamp 1½ to 2 inch sections. Pull the iron about three-quarters down each section for a relaxed wave. Tight 1-inch sections will create more visible waves or coils.
Thick hair usually needs smaller sections to get consistent waves.
Varying Twist Direction for Natural Look
Alternate twisting directions to avoid a uniform pattern. Switch between clockwise and counterclockwise rotation on each section for volume. Waves moving the same way can look stiff or unnatural.
Try twisting one section up, then the next down. This back-and-forth gives your hair a fuller, tousled effect that resembles natural beach waves. The mix of directions adds bounce and movement.
Waving Different Hair Lengths and Textures
You can wave hair with a flat iron no matter its length or texture. The techniques vary to fit short, medium, or long hair. Hair density also changes how you style for waves.
Waving Short and Bob Hair
Short or bob hair needs a smaller flat iron plate. Use about a 1-inch-wide plate. This size lets you wrap your hair around it once.
This helps create defined waves without awkward bends near the roots. Hold a 1- to 2-inch section close to your scalp.
Twist the iron gently. Then slide it down the hair shaft.
Because short hair has less length to form waves, avoid taking too large pieces. Smaller sections of hair create more controlled and visible waves. Move your flat iron smoothly along your hair.
Avoid stopping or dragging sharply. This prevents kinks or flat spots in your waves.
Techniques for Medium and Long Hair
Medium and long hair needs larger sections, about 1.5 to 2 inches wide, to balance the wave size and reduce styling time. Start near the roots with your flat iron. Twist it fully around each section.
Slide it down slowly but without stopping. This creates soft, flowing waves that hold well.
For long hair, working in sections from bottom to top helps to maintain even heat distribution. Take care not to overheat any spot by keeping the flat iron moving constantly.
You may need to repeat the twisting motion twice per section for stronger waves. But avoid extra passes that risk damage.
Adjusting for Fine and Thick Hair Types
Fine hair heats up quickly. So use a lower temperature around 300°F to 350°F and a lighter touch when waving. Use texture spray before styling your fine hair.
It adds grip and volume that lasts. This helps your waves stay without weighing hair down. Avoid using too heavy products afterward to keep waves bouncy.
Thick or coarse hair needs higher heat to style. Use 350°F to 400°F and go slower. This helps create waves that last longer.
You may have to press the flat iron a bit longer on each section. But don’t hold it too long to avoid heat damage. Using a heat protectant is essential, especially with higher temperatures.
Adjust the size of hair sections for texture too. Take smaller strands for thick hair to ensure even heat and wave shape. Fine hair takes larger sections per pass with your iron.
This speeds up styling time significantly. Your wave shape won’t lose its definition.
Common Mistakes and How to Fix Flat Iron Waves
Uneven waves happen when you hold the flat iron at different angles or apply uneven pressure. This makes some sections curl tighter than others.
To fix it, keep your hand steady and move the flat iron smoothly along the hair. Practice on small sections to control the wave size better.
Flat bends or sharp creases form when you clamp the iron too long. Holding the iron in one spot causes these creases. Keep the iron moving to avoid them.
These creases break your waves’ natural curve. They can make hair look bent or damaged. Avoid clamping too long to prevent this.
Slide the iron steadily over each section. Move it about one to two seconds per piece. This creates smooth, natural waves without lines.
Heat damage happens if temperature is too high. Skipping heat protectant also raises the risk. Protecting hair helps avoid damage.
You might spot dry, brittle hair or split ends after styling. Always spray heat protectant before styling.
Set your flat iron between 300°F and 350°F for normal hair. Use the lowest heat that still shapes waves.
- Adjust iron angle for consistent curls and waves
- Slide iron without pausing to avoid creases
- Work in small sections for better control
- Use heat protectant spray every time
- Pick lower heat settings for fine or damaged hair
- Let hair cool fully before touching the waves
- Avoid daily heat styling to reduce damage risk
Waves that look too tight may come from curling tiny sections that are too small. Try using wider sections and wrap your hair less tightly around the iron. This creates looser, more natural waves.
Let your hair cool completely before touching. Running fingers through warm waves can ruin their shape. Cooling keeps your waves soft and lasting.
Check your hair’s condition often. Lower your flat iron’s temperature if hair feels dry. Take breaks between styling sessions to avoid damage.
These steps help protect your hair. Using a deep conditioner once a week helps repair damage. Change the speed you move the iron if waves look flat.
Try using smaller or larger hair sections too. These tweaks can fix uneven waves.
Maintaining and Refreshing Waves After Styling
Waves fade fastest if you don’t use any product to hold them. Light styling sprays or mousse help keep waves without making hair crunchy. Choose a product labelled flexible hold or one for curls to avoid stiffness.
After styling, spray a light mist evenly over your waves from 8 to 12 inches away. Use just enough so waves stay soft and move naturally. Let the product dry fully before touching your hair.
To refresh waves without washing, use a water spray bottle to lightly mist your hair. Next, scrunch your waves gently with your hands to bring back their shape. Avoid wetting your roots heavily to keep volume at the scalp.
- Apply flexible hold mousse before styling for lasting waves
- Use a lightweight hairspray after styling to set waves
- Mist waves lightly with water to revive without shampooing
- Scrunch hair when damp to reactivate wave pattern
- Avoid heavy products that weigh down your waves
- Brush gently with wide-tooth comb when waves loosen
- Re-style waves after 1-2 days if they look flat or messy
When waves lose shape after a day or two, re-style smaller sections quickly. Use the flat iron set at a moderate temperature, around 300°F, to avoid damage. Focus on areas that look flat rather than restyling all over.
Don’t use shampoo to refresh waves too often. It strips natural oils and dries hair.
You can sleep on a silk pillowcase to cut down frizz. Satin pillowcases work well too for smooth waves. This keeps your waves neat overnight.
Sleeping with loose braids can help preserve the wave shape for a more extended time. These small steps save styling time the next day.
Step-by-Step Action Plan for Waving Your Hair with a Flat Iron
Follow this plan to get waves that last and look natural. Take your time to practice each step and adjust as needed.
- Before you start: Wash and dry your hair completely. Your hair should feel smooth but not oily.
- First styling session: Apply heat protectant spray. When your hair feels dry or brittle afterward, try a different product.
- During styling: Set your flat iron to the temperature for your hair type. You’ll see smooth, shiny waves if the heat is right.
- After your first wave: Let your hair cool before touching. Waves will hold better when cooled fully.
- Next day: Refresh waves using a light mist or a bit of curl refill spray. Your waves should still bounce back without frizz.
- Weekly check: Look for heat damage signs like dryness. When you spot any, lower the flat iron temperature next time.
- Ongoing care: Use a deep conditioning mask once a week. You’ll keep your hair healthy and your waves looking good.
Frequently Asked Questions
Can You Use a Flat Iron to Create Beach Waves?
Yes, a flat iron can make delicate beach waves. It heats the hair evenly for longer-lasting waves compared to a curling iron.
How Do You Prevent Frizz When Waving Hair with a Flat Iron?
Use a heat protectant spray before styling to prevent frizz. Also, keep the iron moving to avoid overheating any section.
What Size Flat Iron Plates Work Best for Waving Hair?
Plates around 1 to 1.25 inches wide are ideal for waves. They handle small to medium sections, giving you control over wave shape.
Should You Leave the Ends Out When Making Waves with a Flat Iron?
Yes, leaving the ends out gives a more natural, relaxed wave look. It prevents a tight curl at the hair tips.
Is It Better to Use Dry or Damp Hair When Waving with a Flat Iron?
Use completely dry hair for the best results to avoid damage. Damp hair can cause uneven waves and increase breakage risk.
Can You Wave Your Hair with a Flat Iron If It’s Layered?
Yes, a flat iron works well on layered hair and can add texture. Adjust wave direction to highlight layers and create dimension.
The Bottom Line
Waving your hair with a flat iron takes practice but gives great style results. Keep your hair safe with heat protection and adjust your method as needed. Try making waves today using the temperature and prep tips you learned.