What Size Curling Iron for Beach Waves: Expert Tips and Sizes Explained
For loose, natural-looking beach waves, use a curling iron with a 1 to 1.5-inch barrel. This size creates soft, textured waves without tight curls. A 1.5-inch barrel works best for wider, gentle waves that appear easy.
If your hair is medium to long, a 1-inch curling iron gives waves with just enough bounce. It suits most hair lengths well. For short hair, choose barrels smaller than 1 inch to keep waves defined but not overwhelming.
Pick a barrel size that matches your hair length and the wave style you want. Avoid barrels that are too small or big for your hair. The wrong size can make waves fall out quickly or look uneven.
Key Takeaways
- A 1.5-inch barrel is best for loose, wide beach waves on most hair types.
- Use a 1-inch curling iron for medium to long hair for natural waves.
- Barrels under 1 inch work best for short hair and tight waves.
- Barrel size affects wave size, so match it to your hair length.
- A 1 to 1.5-inch barrel size usually creates the perfect beach wave texture.
- Choosing the right barrel size helps your waves hold longer and look natural.
What Curling Iron Size Creates Perfect Beach Waves?
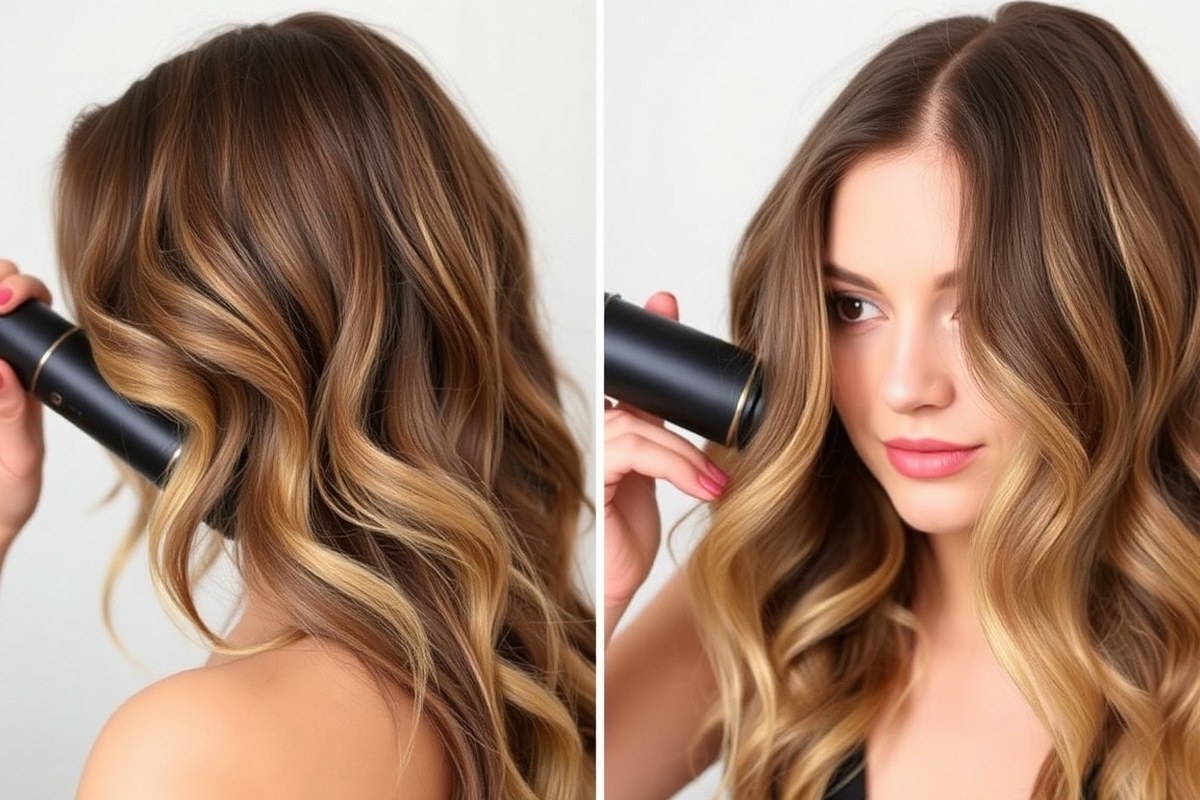
The best curling iron size for beach waves is usually between 1 inch and 1.5 inches. A 1-inch barrel gives you waves with some texture that works well for most hair lengths. To get looser, relaxed waves, use a 1-inch barrel curling iron.5-inch barrel is ideal, especially for medium to long hair.
Barrel size affects how tight or loose your waves look. Smaller barrels around ¾ inch or less create tight curls or defined waves. Larger barrels, like 2 inches, create soft, big curls.
These curls look less like beach waves. Instead, they resemble bouncy curls.
Choosing the right size depends on your wave goal. For natural and easy beach waves, pick a barrel roughly 1.25 to 1.5 inches.
Wrap your hair around the barrel for 5 to 8 seconds, then release. This size produces waves that are neither too tight nor too loose.
How to Match Barrel Size to Your Hair Length for Waves
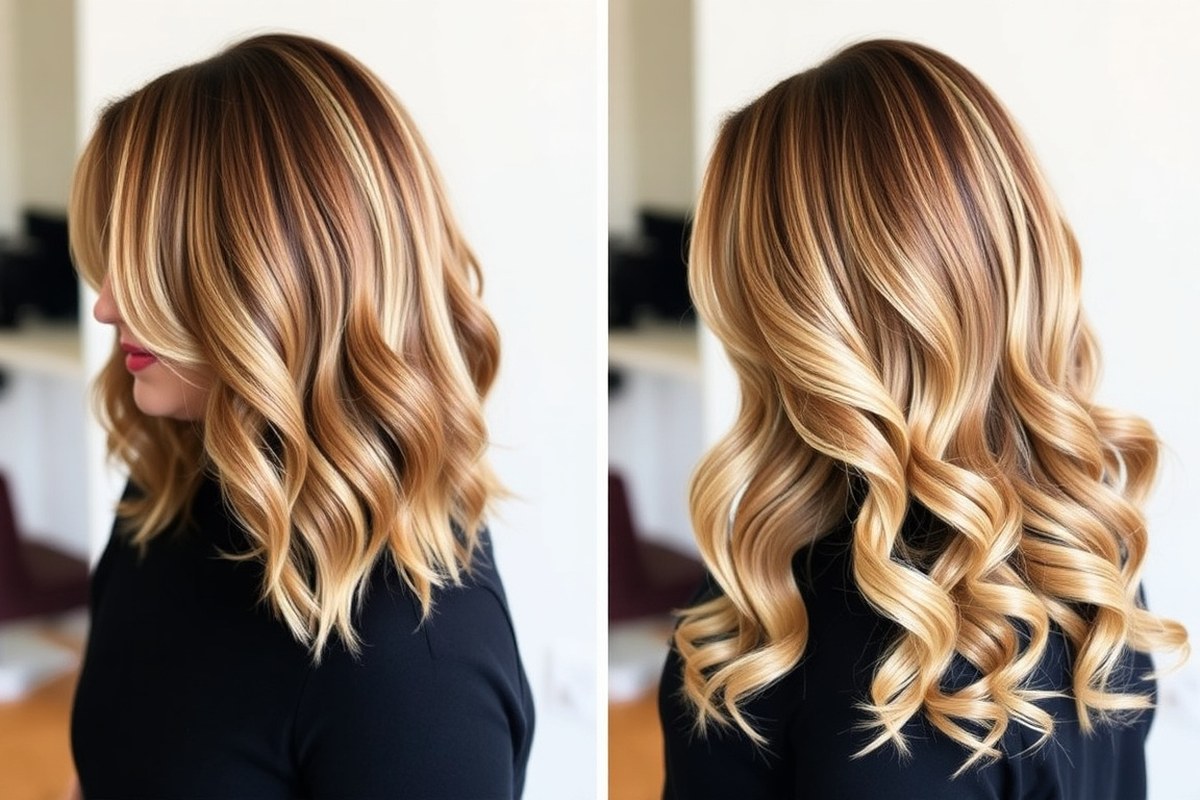
Pick the right curling iron size based on your hair length. This helps waves hold better. It also makes them look more natural.
Smaller barrels suit short hair, while bigger ones work better for long hair. A 1-inch barrel works for many hair lengths.
It might not create the best wave for all. Consider your wave preference too.
Recommended Sizes for Short Hair
Short hair, roughly chin length or above, needs smaller barrels under 1 inch. These let you wrap hair easily without overlapping or bunching, creating soft, beachy waves. A 5/8-inch barrel also works great for tight curls and volume on short to medium hair.
Wrap small sections around the barrel once or twice for loose waves. Too many wraps can give tight curls instead, which aren’t typical of beach waves. Aim for quick curls with higher heat and quick removal to avoid damage.
Ideal Sizes for Medium-Length Hair
Medium hair means from chin to just below shoulders. Use barrels between 1 inch and 1.5 inches for best results.25 inches.
This size forms waves that look natural and last well, balancing curl size and hold. You can wrap larger sections around the barrel once, which saves time.
Wrap a single loop of hair around a 1.25-inch barrel for soft, wide waves. Using a triple barrel curling iron also works well, gliding down sections with little fuss. Medium hair often handles varying barrel sizes, but this range usually looks best.
Best Barrel Diameters for Long Hair
Long hair benefits from larger barrels over 1.25 inches, often 1.25 to 1.5 inches wide. Larger barrels hold thick hair better and create loose, natural waves that last all day. Use wide sections to wrap once around the barrel, avoiding tight loops that cause uneven waves.
Wrapping long hair once keeps the wave open and beachy, not curly or clumped. Hold the barrel on each section for less than 10 seconds to keep hair healthy. Tight curls can weigh down long hair, losing the beach wave effect.
| Hair Length | Recommended Barrel Size | Number of Wraps | Wave Style |
|---|---|---|---|
| Short (Chin length or above) | 5/8 to 1 inch | 1 to 2 wraps | Tight to soft waves with volume |
| Medium (Chin to shoulder) | 1 to 1.25 inches | 1 wrap | Soft, natural waves |
| Long (Below shoulder) | 1.25 to 1.5 inches | 1 wrap | Loose, beachy waves |
A 1-inch barrel is a go-to choice for many. It may not make perfect waves for every length.
It can make small waves on long hair or lose hold on short hair. Pick your size to save effort and get your preferred wave shape.
Use fewer wraps around a larger barrel for long hair to avoid tight curls.
Choosing the Right Curling Iron Size Based on Hair Texture and Thickness
Fine hair needs a smaller barrel, about ¾-inch to 1-inch. These sizes create soft waves without too much heat, which keeps fine strands healthier.
Use a low heat, about 250°F to 300°F. This stops damage to delicate hair. It helps create texture and volume safely.
Medium hair works best with 1 to 1 ½-inch barrels. This size creates defined yet natural-looking waves.
Set the heat between 300°F and 350°F to gently style without drying out the hair. Curl sections for 8 to 10 seconds for lasting waves.
Thick hair deserves a larger barrel, from 1 ½ to 2 inches. Bigger barrels provide looser waves that suit thick strands better. Use higher heat, from 350°F to 400°F, for effective styling.
Keep your hair on the iron for 12 seconds. This helps the waves set properly. Don’t hold too long to avoid damage.
Hair texture also matters. Stick-straight hair may need more heat and a slightly bigger barrel to form waves.
Wavy or curly hair responds well to medium heat and barrel sizes, improving natural patterns. Coarser hair usually handles higher heat and wider barrels without damage but avoid overdoing it.
Using the right heat setting is important. Too hot can fry fine hair, making waves fall fast. Too cool leaves thick hair limp or curly waves loose.
Many irons offer 30 heat levels for precise control. Adjust based on your hair’s thickness and the curling iron’s barrel size for balanced results.
To keep waves healthy and lasting, section hair properly. Avoid wrapping too much hair around a big barrel.
Smaller sections give better pattern and less heat stress. Always use heat protectant spray no matter your hair type or barrel size.
Differences Between Curling Irons, Wands, and Multi-Barrel Tools for Beach Waves
Curling irons, wands, and multi-barrel tools all create waves, but they work differently. Curling irons have a clamp that holds hair in place.
Wands don’t have clamps, letting you wrap hair freely. Multi-barrel irons create uniform waves using several barrels at once.
Barrel size affects the look and ease of getting beach waves. Larger barrels, around 1 to 1.5 inches, create loose, soft waves that mimic ocean waves.
Smaller barrels, under 1 inch, make tighter curls that don’t look as natural for beach waves. Multi-barrel tools usually have barrels around 0.75 to 1 inch and give a more consistent wave pattern.
| Tool Type | Barrel Size Range | Material | Best For | Weight |
|---|---|---|---|---|
| Curling Iron | 0.75 to 2 inches | Stainless Steel, Ceramic | Varied waves from loose to tight | 3.2 ounces (example) |
| Wand | 0.75 to 1.5 inches | Ceramic | Natural, easy waves | Around 12.8 ounces (example) |
| Multi-Barrel Iron | 0.75 to 1 inch | Ceramic | Uniform beach wave pattern | Varies by model |
Curling irons with clamps give you more control at the start. They help create defined waves easily. This is perfect if you’re still learning.
Wands allow faster styling and a more natural look but take practice to avoid burns. Multi-barrel irons speed up styling and give consistent waves. But your waves might look less “lived-in.”
Pick a curling iron or wand with a 1-inch barrel for soft waves. It creates loose beach waves well. This size works best for that look.
For tighter waves that still look easy, a smaller wand or multi-barrel tool works well. Use multi-barrel irons to style thick or long hair faster.
They wave large hair sections all at once. This saves time on your styling routine.
Step-by-Step Process to Create Beach Waves Using Your Curling Iron
Begin by sectioning your hair evenly and use steady wrapping motions around the barrel. Hold each section for the right time based on barrel size to avoid tight curls. Use a relaxed angle and medium tension to get natural, loose beach waves.
Preparing Your Hair for Styling
Divide your hair into manageable sections about 1 to 1.5 inches wide. Use clips to keep the sections separated, starting from the bottom of your head. This makes the curling process smoother and more uniform.
Applying a heat protectant spray before styling helps prevent damage. Let your hair dry completely or use a blow dryer on low heat first. Damp hair won’t hold waves well and risks getting fried.
Wrapping Technique Around the Barrel
Hold the curling iron at a slight downward angle to keep waves loose. Wrap your hair around the barrel just once or twice for a relaxed wave look. Avoid wrapping the hair tightly to stop tight curls from forming.
The amount of time you hold the hair varies with the barrel size:
- For 1-inch barrels, wrap each section for about 8 to 10 seconds.
- For 1.25-inch barrels, hold the hair for 10 to 12 seconds to get relaxed waves.
- For 1.5-inch barrels, 12 to 15 seconds works best for loose, voluminous waves.
Use moderate tension when wrapping; don’t pull the hair too tight. Twisting the hair slightly before wrapping helps create more defined waves without tight curls.
Keep your curling iron moving smoothly around your hair. Don’t stop halfway or you’ll get dents and tight curls. Keep a steady pace for natural beach waves.
Finishing Touches and Setting Waves
After releasing each curl, let it cool in your hand for a few seconds. This helps the wave set and last longer throughout the day. Avoid brushing immediately, or the waves will loosen too much.
Use your fingers to gently separate the waves once all sections are curled. Apply a light hairspray or texturizing spray to hold the waves without stiffness. This will give your hair that easy, beachy texture.
How Heat Settings and Curling Time Affect Beach Wave Results
Smaller barrels, like 1-inch, need higher heat around 350°F to 375°F to shape tight waves quickly. Larger barrels, 1.A 5-inch or bigger curling iron works well at medium heat. Set the heat between 300°F and 325°F. Bigger waves need more time to set right.
Keep the heat right for your barrel size to form lasting waves. This avoids stressing your hair. Proper heat protects your hair better.
Your hair type changes the heat you should use. Fine or damaged hair does best below 300°F. Coarse or thick hair may need 350°F or more for curls to hold. Stick to the lowest effective heat that makes your waves last.
Passing over hair multiple times at moderate heat causes less damage. One quick pass at high heat harms hair more. Go slow and steady for better care.
Hold your hair on the barrel just long enough to set the wave. For small barrels, 8 to 10 seconds is enough. Bigger barrels need around 10 to 15 seconds.
Holding hair too long or using very high heat can cause breakage or frizz. Move slowly but don’t linger; releasing too soon causes limp waves.
Higher heat isn’t always better. It can cause dryness, damage, and frizz even if waves look strong at first. Balancing heat and time avoids this risk.
For example, hotter heat with shorter hold time reduces damage. Use a nano titanium barrel curling iron for even heat spread to protect hair.
Avoid mistakes like using heat that’s too high for your hair. Don’t leave hair on the barrel too long either. Both can cause damage you want to skip.
These hurt hair health and lead to waves that fall quickly. Test a small strand first to find the right heat and timing. Using a heat protectant spray also helps shield hair from damage during curling.
Common Mistakes When Choosing and Using Curling Irons for Beach Waves
Using a barrel that’s too small often creates tight, ringlet-like curls instead of loose beach waves. Those small curls can make your hair look shorter and less natural. A barrel that’s too large won’t form clear waves.
Your hair may look flat or just a bit wavy. It won’t have much body either.
Heat damage is a common problem when trying new barrel sizes. Heat above 400°F can burn your hair strands. Curling each section for more than 10 seconds adds risk.
Keep heat lower to prevent damage. Use heat protectant spray before curling your hair.
Start with a lower heat like 300°F to avoid damage. This helps while you find the right barrel size.
Waves often fall out fast even when you use the correct barrel size. This happens if you skip key styling steps. Hair needs to be fully dry before curling.
Adding a styling product that holds shape is essential. Pinning curls while they cool locks waves in better.
- Using barrels smaller than 1 inch causes tight curls, not waves.
- Barrels larger than 1 ½ inches may not create defined waves.
- Apply heat protectant before curling to prevent damage.
- Set heat clamps between 300°F and 375°F depending on hair thickness.
- Never curl wet or damp hair to avoid breakage and uneven waves.
- Pin curls while cooling to help waves last longer.
- Use light hairspray or texturizing spray after curling.
Watch your curling time carefully. Holding hair on the barrel too long can cause dryness and frizz.
Keep it between 5 and 10 seconds per section for beach waves. Larger barrels need a slightly longer hold for the wave to set but avoid overdoing it.
Using the right barrel size and technique takes minor adjustments and practice. Pay attention to how your hair reacts to heat and curling time.
Adjust heat settings and styling products based on your hair’s texture and thickness. That’s how you avoid unwanted curls, heat damage, and waves that drop too quickly.
How to Choose Curling Iron Accessories and Features for Better Beach Waves
Picking curling iron accessories and features can make a big difference for beach waves. Heat protection, ergonomic design, and the right barrel material all affect your results. These extras help your waves last and keep your hair healthy.
Essential Heat Protection Products
Heat protectant sprays shield your hair from damage by forming a barrier. Choose a spray with at least 450°F heat resistance to handle curling irons well. Apply evenly before you start curling to keep hair smooth and avoid breakage.
Heat-resistant gloves prevent burns while wrapping hair around the barrel. These gloves let you hold the iron confidently for better control. Some curlers include gloves, or you can buy them separately for around $10.
Using lightweight styling products like sea salt spray can hold beach waves without weighing hair down. Spray after curling to add texture and keep waves from falling flat too soon.
Ergonomic Features to Look For
A swivel cord lets the curling iron twist without tangling, making styling easier. This feature reduces wrist strain during longer sessions. Most professional irons offer swivel cords, which cost about $30 to $80 depending on the brand.
Auto shut-off turns the iron off after no use for 30 to 60 minutes. This improves safety by reducing fire risk. It helps you avoid accidents if you forget to switch it off.
This feature prevents accidents and saves energy. Look for irons with adjustable shut-off timers to match your styling pace.
A cool tip is to choose irons with adjustable heat controls. You can set temperatures from 250°F to 410°F depending on your hair type.
Lower heat works for fine hair. Thicker hair needs the higher end for lasting waves.
Barrel Material Pros and Cons
Ceramic barrels distribute heat evenly and reduce hot spots, protecting hair from burning. They release negative ions that smooth hair cuticles for shine. Ceramic irons cost about $25 to $100.
They work well on most hair types. These irons especially suit fine or dry hair.
Titanium barrels heat quickly and stay hot, ideal for thick or coarse hair that resists styling. They also decrease frizz but can get very hot.
So use lower temperatures with delicate hair. Titanium irons often cost between $50 and $120.
Tourmaline-coated barrels combine ceramic with natural minerals for extra frizz control and faster heating. This coating improve shine and leaves waves soft and bouncy. Tourmaline irons usually fall in the $40 to $110 price range.
Choose the lowest heat that curls your hair well to avoid damage while still holding waves.
Step-by-Step Action Plan for Perfect Beach Waves
Follow these steps to pick the right curling iron size and create beach waves that last. Check your progress after each step to make sure your waves look natural.
- Before you start: Choose a curling iron with a 1 to 1.5-inch barrel for most beach waves. It works well on medium-length hair and mimics those loose, natural waves.
- Day 1: Wash and dry your hair completely. Dry hair holds heat better and curls last longer. If hair is damp, waves won’t set properly.
- Day 1: Apply a heat protectant spray to keep hair healthy. Wait until it dries before curling. This prevents damage from heat close to 400°F.
- Day 1: Section your hair in 1-inch parts. Smaller sections create defined waves while bigger ones work for loose waves. Experiment to find your ideal look.
- Day 1: Wrap hair around the barrel, leaving ends out for a natural feel. Curl each section for 8 to 12 seconds on medium heat. Check how the wave holds.
- Day 1: Let curls cool without touching them. This locks in the shape. Once cool, run fingers through hair to loosen the waves.
- After 1 day: Use a light, flexible hairspray to keep waves all day. Avoid stiff sprays for a beachy texture. Spray from 10 to 12 inches away.
- After 1 week: Try different barrel sizes if waves sweep away too fast or look tight. Adjust heat settings based on hair texture and thickness for best results.
Frequently Asked Questions
What Curling Iron Size Works Best for Very Short Hair Beach Waves?
For very short hair, choose a curling iron with a ¾-inch barrel. It creates tighter waves that hold better on short lengths without looking bulky. This size helps add texture without overwhelming your short style.
Can I Use a Curling Wand Instead of an Iron for Beach Waves?
Yes, curling wands work well for beach waves and give a more natural look. Wands give you better control over curl direction. They usually don’t have clamps.
This helps reduce kinks in your waves. Use a 1 to 1.5-inch wand for beachy texture.
Is a Ceramic Barrel Better Than a Metal One for Beach Waves?
Ceramic barrels are better because they distribute heat evenly and reduce damage. Even heat creates smoother, shinier waves and less frizz than metal barrels. This material helps protect your hair’s health during styling.
How Does Curling Iron Material Affect the Look of Beach Waves?
Material affects heat distribution and hair shine while styling waves. Ceramic produces smooth waves, titanium heats quickly and holds heat well, ideal for thick hair. Choose based on your hair type for better wave results.
Can I Get Beach Waves Using a Curling Iron Smaller Than ¾ Inch?
A barrel smaller than ¾ inch usually creates tight curls, not beach waves. They might look more ringlet-like, which differs from loose beach waves. Stick with at least ¾ inch for relaxed, natural waves.
How Often Should I Replace My Curling Iron for Best Beach Waves?
Replace your curling iron every 2 to 3 years or when it heats unevenly. Older irons can damage hair or give inconsistent waves. Regularly check the barrel’s condition to maintain good styling.
Key Points to Remember
The right curling iron size makes all the difference for beach waves. Choose a 1 to 1.5-inch barrel for natural, easy-to-style waves. Grab your curling iron and start practicing today for better, longer-lasting waves.