

Is Dyson Airwrap Worth It? Expert Tips and Honest Review
Is Dyson Airwrap worth it? If you want quick, healthy-looking hair, yes.
This tool styles and dries hair fast while using less heat. You save time and avoid damage compared to traditional tools.
The Airwrap heats up to 302°F, which is lower than many curlers and straighteners. That helps protect your hair’s natural shine and strength. You can start styling once your hair is about 90% dry, cutting your routine short.
The set includes different barrels and brushes for curls, waves, smooth blowouts, and volume. It suits various hair types and styles.
So you get more use out of one tool. The design also reduces hair tangling during styling.
It costs around $550 to $600, which is steep. But, with an average $50 salon blowout cost, using it just 12 times can pay off. Watch for deals like Amazon Prime Day to get a better price.
Key Takeaways
- The Airwrap styles hair while drying for faster results.
- It uses lower heat to keep hair healthier than usual tools.
- Start styling when hair is nearly dry for best performance.
- The high price reflects salon-quality results at home.
- Consider the cost savings if you blowout hair often.
- Look for sales to reduce the sticker shock.
Is the Dyson Airwrap Worth the Price for Your Hair?
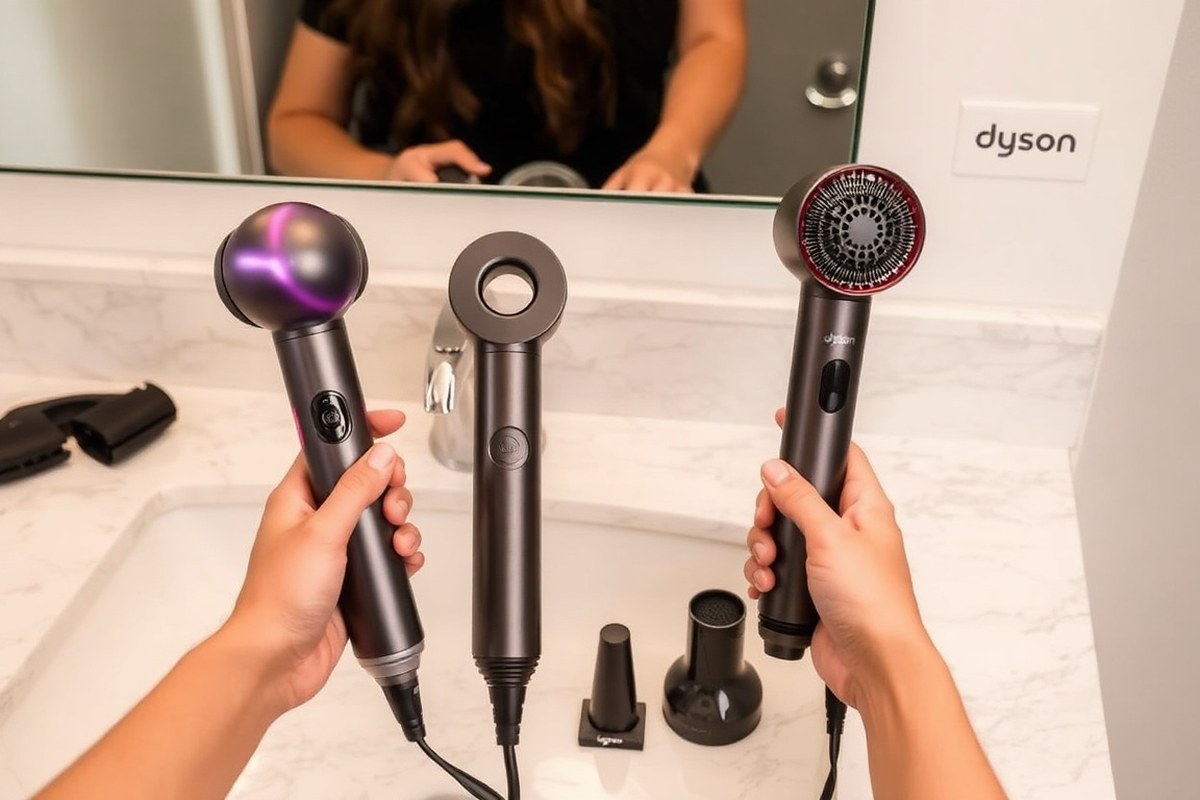
The Dyson Airwrap costs about $599 to $709, depending on the bundle you choose. It offers multiple styling options in one tool, replacing separate curlers, dryers, and straighteners. While pricey, many find it saves money in the long run by cutting salon visits.
A salon blowout costs $50 to $100 each time. The Airwrap pays for itself after 6 to 12 uses. You save money if you style often.
Plus, you get consistent results at home without repeatedly booking appointments. This tool dries and styles hair in under 15 minutes.
Start with damp, mostly dry hair for best results. It saves you time over some routines.
The maximum temperature is 302°F, which is lower than many styling irons. This gentler heat helps protect fragile or textured hair types from damage. Users with fine or type 3 hair see great results.
The technology cuts heat stress on their hair. Hair feels healthier after styling.
Thick, curly, or coarse hair may take extra practice. Heat and airflow work differently on each hair type. You might need more time to get the style.
Some users report a learning curve but say the results improve with experience. Lightweight design and multiple attachments allow styling versatility, from straightening to waves and curls.
Daily or frequent styling and caring for hair health? This tool can be a smart buy for you. It has advanced heat control and airflow tech.
This adapts better to various hair needs. Many basic tools don’t offer this. Those styling only occasionally or on a tight budget may find less expensive options more practical.
The Airwrap costs a lot upfront. It covers many styling tasks in one device. You skip buying many single-use tools.
It also cuts heat damage vs irons hitting 400°F or higher. This tool balances style quality, time saved, and hair care. That often fits the price for regular users.
How the Dyson Airwrap Works to Style Hair Gently

The Dyson Airwrap styles hair differently by using something called the Coanda effect. This happens when high-speed air curves around the barrel. It pulls your damp hair in gently.
The hair then wraps around the barrel. It uses moving air to shape your hair.
Not extreme heat like a curling iron. You get curls, waves, or smooth styles.
The airflow creates a vortex that attracts and holds the hair to the barrel automatically. You don’t need to twist or clamp your hair. This lowers the risk of damage.
The tool styles hair with less heat. As your hair wraps the barrel, heat stays below 302°F (150°C).
This is cooler than irons reaching over 400°F (200°C). The Airwrap controls temperature carefully.
The Airwrap measures heat 40 times per second to avoid overheating your strands. This heat control helps stop your hair from frying. Traditional tools use much higher heat to style.
High heat can damage your hair. You style on damp hair, so airflow dries hair gently.
It combines drying and styling in one step. You save time with this method.
To use it, start with a small section of damp hair near the roots. Turn on the Airwrap and hold the barrel close to the section. The Coanda effect will pull your hair around the barrel by itself.
Hold it in place for about 10-15 seconds. Then release slowly to keep the curl shape. For smooth styles, use the soft smoothing brush.
Work from roots to ends while drying hair. The airflow helps smooth hair as it dries.
Fine or medium hair gets the best results. Their hair wraps gently around the airflow. The Coanda effect works well on this hair type.
Thick or coarse hair needs smaller sections or more time. The Coanda effect works less on dense hair. Be patient when styling thick hair.
The main cost is time and patience. You need to learn how to position hair sections. Proper sectioning helps the styling work well.
Always style damp hair for the Coanda effect. Dry hair won’t wrap properly around the barrel. Dampness is key for good styling results.
Choosing Dyson Airwrap Attachments for Your Hair Type and Style
The Dyson Airwrap comes with different attachments designed for specific hair types and styles. Picking the right tool matters to get the best look with less damage. You can use barrels for curls, smoothing brushes for sleek styles, or volumizing tools for lift.
Curling Barrels: 1.2-inch vs 1.6-inch
The 1.2-inch barrels create tighter curls that hold well. They’re great for short to medium hair.
They also work well for defined curls. The 1.6-inch barrels make looser waves and suit longer hair or soft, flowing curls.
Both barrel sizes use the Coanda effect to wrap hair around the barrel using airflow. For curly or coily hair, a 1.2-inch barrel tightens curls more. Straight to wavy hair works well with the 1.6-inch barrel for gentle waves.
Smoothing Brushes: Firm and Soft Options
Two smoothing brushes come with the Airwrap. The firm brush works best for coarse or thick hair with frizz. It smooths strands and tames flyaways without pulling.
The soft smoothing brush suits fine or thin hair. It gently smooths while preserving hair volume. Using the right brush saves time and avoids damage or flattening your hair.
Volumizing and Pre-Styling Dryer Attachments
The round volumizing brush adds lift and bounce to straight or wavy hair. It’s perfect if you want a blowout look with more body.
For curly to coily hair, use a larger round brush. It adds volume without changing your texture.
The pre-styling dryer is important to get your hair to the right dampness level before styling. It speeds up drying time, which helps the other attachments work better and limits heat exposure.
- Pick 1.2-inch barrels for short or medium hair needing tight curls
- Use 1.6-inch barrels for longer hair or loose waves
- Firm smoothing brush fits thick, coarse, or frizzy hair types
- Soft smoothing brush works best on fine or thin hair
- Round volumizing brush adds lift to straight and wavy hair
- Pre-styling dryer prepares hair evenly for faster styling
- Diffuser and wide-tooth comb are ideal for curly or coily hair
Choosing attachments depends on your hair type and style goal. For curly or coily hair, use the diffuser or wide-tooth comb to preserve curl definition.
Straight hair looks best with smoothing brushes. Use curling barrels sized for your hair length.
How Long Does It Take to Style Hair with the Dyson Airwrap?
Styling with the Dyson Airwrap usually takes about 20 minutes for medium-length hair. This is faster than using a hairdryer and curling iron, which can take around 40 minutes. Timing depends a lot on hair length and type.
It also matters how wet your hair is before you start. These factors change the styling time.
Hair should be damp but not dripping wet before using the Airwrap. Too much water can slow down drying and make styling take longer. Hair that is too dry doesn’t style as well.
The Airwrap uses airflow to shape hair strands. So moist hair holds styles better.
People with shorter or thinner hair often finish quicker, around 15 minutes or less. Thicker, longer, or curly hair needs extra time to dry and hold the style properly. The Airwrap’s attachments work best when following the right drying level for your hair type.
Here’s a step-by-step styling timeline you can follow with the Dyson Airwrap:
- Start with towel-dried hair. Gently blot hair so it’s damp but not wet, about 70% dry.
- Attach the pre-styling dryer. Use it for 3 to 5 minutes to remove most water evenly.
- Switch to curling or smoothing barrels. Style sections by wrapping hair around the barrel or running the brush through.
- Work through hair in small sections. Each section takes about 1 to 3 minutes depending on thickness.
- Use the cold shot feature. It seals the style, usually for 30 seconds per section.
- Finish styling with a smoothing brush or diffuser. This adds shine or defines curls and dries any remaining dampness.
The entire routine from start to finish generally lasts 15 to 25 minutes. Those with fine, straight hair might see times on the lower end. Curly or coily hair can need more patience for full drying and styling.
Keep in mind the Airwrap weighs about 1.3 pounds. So arm fatigue can happen if styling takes longer than usual. Taking breaks or switching hands helps prevent this discomfort with longer sessions.
What Results to Expect Using Dyson Airwrap by Hair Texture
The Dyson Airwrap works well on many hair types, but results vary. Fine hair often styles quickly with soft waves or curls using lower heat and speed. Use the smaller barrels to create natural volume without causing damage or extra dryness.
Thick and coarse hair benefits from the Airwrap because it dries faster than usual. Starting with damp hair is key since the tool uses airflow to style and dry simultaneously. For thick hair, use higher heat and speed settings.
Section hair carefully to style each part evenly. Straightening coarse hair is possible but takes more passes and patience.
Curly and coily hair can be styled with the right Airwrap attachments. Choose them based on your hair type. There are special versions for curly and coily hair.
They help make defined curls or soften waves gently. Work with slightly damp hair on gentle heat settings to avoid frizz. It’s not the best tool for tight coils if you want a sleek, straight look.
Wavy hair styles easily with the Airwrap’s barrels designed for loose curls or beach waves. Use medium heat and speed, and wrap hair around the barrel in sections.
Avoid over-drying or over-styling, as this tends to create frizz or break the wave pattern. The Airwrap helps improve waves while reducing heat damage compared to traditional tools.
Start with slightly damp hair, not soaking wet or dry, for best Airwrap results.
The Airwrap doesn’t hold curls well on hair that’s very resistant or very straight. Your thick, straight hair might lose curls fast without extra product. Use styling products to help hold the curls.
Layer styling spray and finish with cool air to help curls last longer. It’s great for styling but might need touch-ups throughout the day for certain textures.
Comparing Dyson Airwrap to Traditional Styling Tools
Traditional curling irons and flat irons use very high heat, often above 350ºF. This temperature can cause hair damage, especially with daily use. The Dyson Airwrap measures heat 40 times every second.
It keeps temperature under 300ºF. This helps reduce hair damage risk.
The Airwrap uses warm air to dry and style damp hair at the same time. This method means you don’t need to buy separate tools for drying, curling, and smoothing. Most users find it replaces multiple devices under their sink, simplifying their routine.
| Feature | Dyson Airwrap | Traditional Styling Tools |
|---|---|---|
| Maximum Heat | About 158ºF with round brush (varies by attachment) | Typically 350ºF or higher |
| Hair Damage Risk | Lower risk; keeps heat below 300ºF | Higher risk; heat can exceed safe limits |
| Versatility | Multistyler: dries, curls, smooths | Single function per tool (iron, dryer, wand) |
| Styling Time | Slower due to styling damp hair | Faster, works on dry hair directly |
| Price Range | $500 to $600 | $20 to $150 per tool |
The Airwrap often takes longer than traditional tools because you style damp hair. The heat is gentler but the process requires more time per section. But it minimizes heat stress, helping your hair look healthier over time.
Traditional tools heat fast and work well if you need quick results. However, they can cause damage when used frequently. The Airwrap’s lower heat and multi-functionality suits users who want fewer tools and gentler styling.
Common Dyson Airwrap User Mistakes and How to Fix Them
Many Dyson Airwrap users struggle with hair dampness, wrong attachments, or styling techniques. These mistakes lower curl quality and increase styling time. Fixing them improves your results and saves effort.
Incorrect Hair Dampness Levels
Hair should be damp but not dripping when using the Airwrap. Too wet hair takes longer to style and won’t hold curls well. Too dry hair doesn’t curl properly because it lacks moisture for the heat to work on.
Towel dry your hair until it’s slightly moist. Aim for about 70 percent dry. This helps the style work better.
Test by touching strands; they should feel cool but not wet enough to drip. You can mist hair lightly with water if it dries too fast while styling.
Using the Wrong Attachment for Hair Type
The Airwrap has six attachments suited for different hair types and styles. Using the wrong one reduces curl definition and may cause frizz.
For example, thicker hair needs the firmer barrels for better hold. Fine hair does better with gentler brushes.
Follow these tips to pick the right attachment:
- Use the firm barrels for thick, coarse hair.
- Choose softer barrels for fine or thin hair.
- Use the smoothing brush for straightening or frizz control.
- The pre-styling dryer works best on damp hair before curling.
- Use the round volumizing brush to add bounce and body.
This approach helps you avoid frizzy or limp results and improves curl hold.
Improper Sectioning and Styling Technique
Section your hair into small parts for faster and more even styling. Make sure your sections are small enough.
Big sections cause uneven curls and slow you down. Small sections wrap smoothly around the barrel, creating tighter curls.
Start with 1-inch sections, then hold hair so the Airwrap pulls it in gently without forcing. Let the tool do the work. Avoid twisting hair by hand too much, or curls can look messy.
Hold the curl for 10 to 15 seconds. The tool cools it during this time. This helps set your style.
Practical Tips to Get the Best Results with Dyson Airwrap
The Dyson Airwrap works best when your hair starts slightly damp and well sectioned. Preparing your hair right helps keep your style smooth. Clean the tool often to make it last longer.
A few easy tricks speed up styling. They also protect your hair from heat damage.
Prepping and Drying Hair to Ideal Dampness
Use a microfiber towel to gently squeeze excess water from your hair. Avoid rubbing, which causes frizz and breakage. Hair should feel damp but not dripping wet before you start.
The Airwrap requires hair to be about 80% dry for best results. This means your hair feels mostly dry, with slight moisture left.
Hair that’s too wet won’t curl well. The tool takes longer to style damp hair.
- Blot hair with a microfiber or cotton towel until no water drips
- Use the Airwrap’s pre-styling dryer for 3 to 5 minutes on medium heat
- Avoid using a regular, high-heat hair dryer since it can overdry or damage hair
- Spritz hair with heat protectant spray for needed shield
- Comb gently through hair to remove tangles before styling
Aim for damp hair with no wet spots. That balance helps the airflow shape curls without frying strands. Starting with fully wet hair slows your session and may create uneven results.
Sectioning Techniques for Quick Styling
Create four to six sections to style hair evenly and faster. Start by parting from ear to ear across the crown. Then divide hair front to back into two or three vertical sections.
Clip away sections you aren’t working on to keep hair neat. Smaller sections let the Airwrap wrap strands easier and hold curl better. Each section should be about 1 to 1.5 inches wide.
- Part hair horizontally ear-to-ear across crown
- Divide top and bottom halves vertically
- Use sectioning clips to hold hair away
- Work with one small section at a time for even curls
- Wrap hair slowly around the barrel for 8 to 10 seconds
- Release with care to keep curl shape
Using too large a section wastes heat and weakens curls.
Take your time to wrap and hold curls well. Rushing makes hair slip off or undercurl, especially if your hair is thick or coarse.
Cleaning and Maintenance Best Practices
Keep the Airwrap’s barrel and brush attachments clean for smooth styling. Hair and product buildup reduces airflow and performance. After each use, remove hair strands caught around barrels or brushes.
To clean, detach the heads and wipe with a dry or slightly damp cloth. Don’t soak electrical parts or use harsh chemicals. Cleaning every one to two weeks keeps your Airwrap running well.
- Remove all hair strands wrapped on the barrels and brushes
- Wipe attachments with a soft, damp cloth after drying
- Use a small brush or toothpick to remove debris from the air vents
- Store the Airwrap in its case to avoid dust buildup
- Check the power cord for damage regularly
Never use water directly on the main unit to avoid damage.
Proper maintenance extends the life of your $550 to $650 investment. Clean tools give you consistent, salon-quality looks without snags or bad smells.
Your First Week with Dyson Airwrap: A Simple Start-Up Plan
Get familiar with your Dyson Airwrap step by step. This plan helps you style confidently and avoid common mistakes.
- Day 1: Unbox and read the manual fully. Understanding settings ensures safe, effective use.
- Day 2: Wash and towel dry your hair. Try the pre-set mode for your hair type; notice how it feels after drying.
- Day 3: Attach the barrel suitable for your style. Curl one section and check if it holds shape well.
- Day 4: Practice using the brushes for smooth finish. See if your hair feels soft without heat damage.
- Day 5: Experiment with heat and airflow speeds. Find settings that style quickly but gently.
- Day 6: Style your full head with the Airwrap. Time yourself and note the total styling duration.
- Day 7: Review your results and adjust your technique. If curls drop or frizz, tweak your method or attachment.
Frequently Asked Questions
Is the Dyson Airwrap Worth the Investment for Different Hair Types?
Yes, it suits most hair types. Fine or very thick hair takes longer.
You might need extra styling time with those hair types. Adjust attachments and drying time for the best results.
Does the Dyson Airwrap Save Time Compared to Other Tools?
It often shortens styling time. You can style hair when mostly dry.
This cuts the total time to under 15 minutes. This helps if you’re in a rush.
How Does the Dyson Airwrap Affect Hair Health over Time?
It styles with lower heat, peaking at 302°F, which reduces damage risk. Users often notice smoother, less frizzy hair after regular use.
Can the Dyson Airwrap Create Different Hairstyles or Just Curls?
It’s versatile and can curl, wave, smooth, or dry hair. Using specific attachments allows tailored styling for various looks.
Is the Dyson Airwrap Cost-Effective Considering Its Lifespan?
The high upfront cost spreads out if you style often and value hair health. It also replaces multiple tools, saving space and money long term.
What Common Issues Might Reduce Satisfaction with the Dyson Airwrap?
Using it on fully wet hair or wrong attachments can cause poor results. Following drying tips and hair type guidance improves outcomes.
Key Points to Remember
The Dyson Airwrap can save your hair from heat damage while styling effectively. Try one technique from this plan today.
Your hair deserves this gentle touch. So give it a shot and see the difference yourself.


