How to Bleach Hair at Home: Safe Steps, Developer Guide, and Care Tips
How to bleach hair starts with understanding the basics of lifting your natural color. Bleach breaks down your hair’s melanin to make it lighter. You apply bleach with a developer that opens your hair cuticles to let the bleach in.
Start by making sure your hair isn’t freshly washed, wait at least two days. This protects your scalp and keeps natural oils that act as a barrier. Start by mixing bleach powder with developer.
Use exact package instructions. This helps ensure safety and good results.
Apply the mix evenly in small sections to avoid patchy results. Watch your hair closely during bleaching. Check it every 10 to 15 minutes.
Notice the color change as it lifts. Don’t leave the bleach on longer than 45 minutes to prevent damage.
Key Takeaways
- Wait 2-3 days after washing before bleaching to protect your scalp.
- Use a developer strength suitable for your hair and desired lift.
- Mix bleach and developer exactly as the instructions advise.
- Apply bleach in small sections for even color lift.
- Check your hair color every 10 to 15 minutes during processing.
- Stop processing within 30-45 minutes to avoid over-processing.
What Is Hair Bleaching and How Does It Work?
Hair bleaching uses chemicals to strip natural color from your hair. The key ingredient is hydrogen peroxide, which reacts with melanin, the pigment in your hair. This chemical reaction breaks down melanin, causing your hair to lighten in stages.
When bleach contacts your hair, it opens the cuticle layer and oxidizes melanin inside. You’ll notice your hair changes from dark to red, then orange, then yellow. This lift process usually takes 20 to 45 minutes.
Your starting hair color affects the time. The strength of the bleach also changes how long it takes.
The developer’s volume also affects how much lift you get. A 30-volume developer is common for lightening from brunette to blonde. Higher volumes lift more color but can damage hair if left on too long.
Check your hair every 15 to 20 minutes during bleaching. Do not leave bleach on for more than 45 minutes. This helps avoid permanent hair damage.
Hair goes through clear color stages while bleaching. It changes from dark to warm gold first. Then it lightens to pale blonde or platinum last.
Stopping too early can leave brassy, orange tones; too late might cause breakage. When you reach your desired lightness, rinse hair with cool water.
Use toner or similar products afterward. These help fine-tune your blonde shade.
Bleaching lifts your natural hair color by weakening the pigment molecules. The process strips color layer by layer, making hair look lighter. The bleach is not regular household bleach.
It is a chemical mix for hair only. This mix usually contains hydrogen peroxide and bleaching powder.
Which Products and Tools Do I Need to Bleach My Hair at Home?

You need the right hair bleach powder made for your hair type. Pick a quality powder that lifts color well but stays gentle. The bleach powder usually costs around $10 to $20 for a basic kit.
Next, choose a developer in the correct strength. Developer comes in 20, 30, or 40 volumes. A 20-volume bleach lightens hair by a few shades.
It works well for going from dark blonde to light blonde. Use it when you want a gentle lift.
Thirty- or 40-volume developers lift hair more but can cause more damage. For beginners, starting with 20-volume is safer.
Protective products help reduce damage during bleaching. Bond builders strengthen your hair and lower breakage risk. They mix with the bleach and developer.
Toners fix yellow or brassy tones after bleaching. You only need toners if your hair looks too warm or orange after bleaching.
- Hair bleach powder (choose powder suited for your hair)
- Developer, usually 20 to 40 volume (pick strength based on how light you want)
- Protective bond builder (optional but recommended for damage control)
- Toner (optional, to correct brassiness)
- Plastic mixing bowl and brush (for even application)
- Gloves (protect your skin from chemicals)
- Pet clips to section your hair (helps you apply bleach carefully)
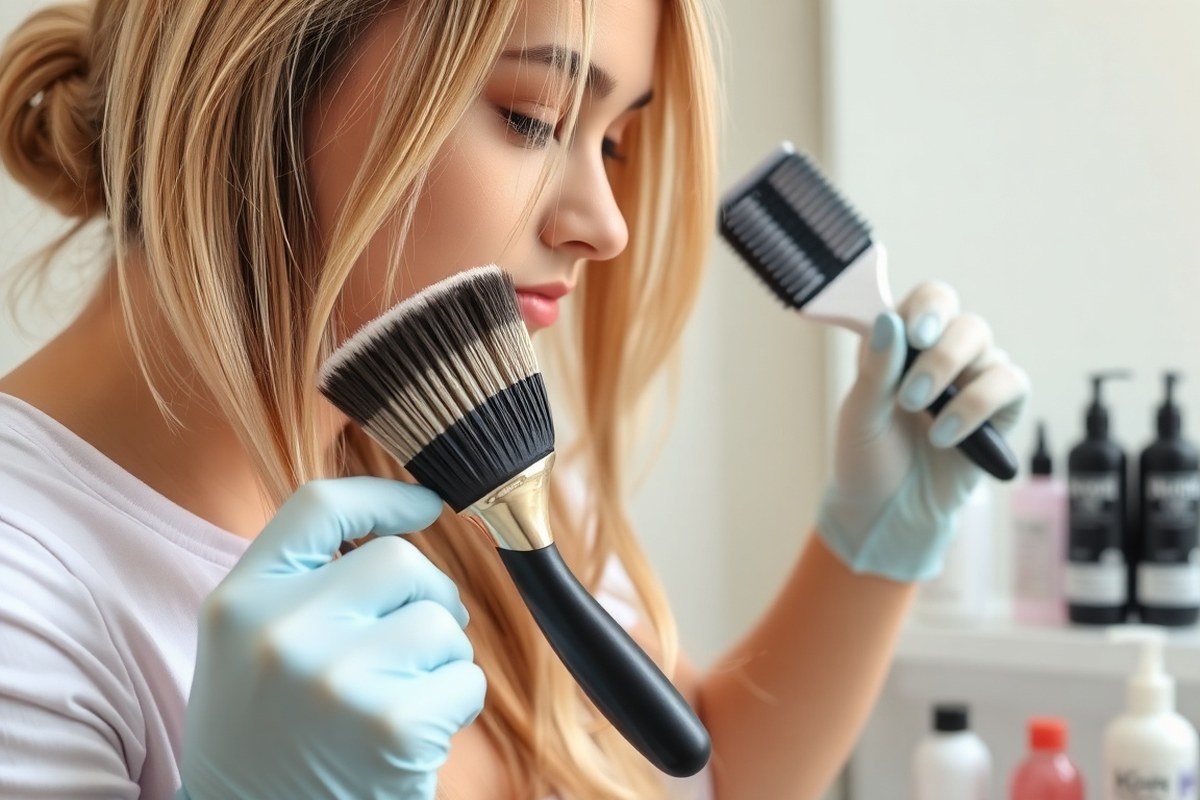
Use a plastic bowl and brush to mix bleach and developer evenly. Metal bowls can react with chemicals, so avoid them. Put on gloves to keep chemicals from burning your hands.
You can clip hair sections with plastic clips to have neat application. This helps avoid uneven or patchy bleaching.
Some kits come with cream formulations instead of powder. Cream bleach is easier to apply, but powder lifts more color deeply. A stronger developer means bleach stays on your hair less time before processing.
Never leave bleach on your hair longer than the instructions say. Overprocessing causes serious damage.
How to Prepare Your Hair and Scalp Before Bleaching
Do not wash your hair on the day you bleach it. Let natural oils build up for 2 to 3 days beforehand.
Check your hair for dryness or damage before bleaching. Prepare your scalp carefully to avoid irritation.
Timing Your Last Wash Before Bleaching
Wash your hair about 2 or 3 days before you plan to bleach it. Natural oils protect your scalp during bleaching and reduce the chance of irritation. Avoid shampooing on the bleaching day; apply bleach to unwashed hair for better safety.
Leaving your hair “lived-in” helps shield the scalp from the bleach’s strong chemicals. Your scalp is super oily or dirty?
Rinse hair the night before without shampoo. That gives some oil but not too much.
Assessing Hair for Damage or Dryness
Look for split ends, frizziness, or dry patches before bleaching. These signs mean your hair could be too weak for bleach.
Lots of breakage or porosity? Skip bleaching or visit a colorist.
Check the feel of your hair. It should feel smooth and springy, not brittle or rough. You can do a strand test by applying bleach on a small piece first.
Hair breaks or feels gummy? Wait before bleaching your hair.
Preparing Scalp to Prevent Chemical Burns
Irregular skin or open sores on your scalp increase risks during bleaching. Carefully check for cuts or irritation.
Put a thin layer of petroleum jelly on your hairline and ears. This protects your skin from irritation.
This barrier helps prevent bleach from touching skin and causing burns. Don’t put petroleum jelly on your scalp itself, only on the edges. Wear gloves and avoid scratching your scalp before bleaching.
Recommended Pre-Bleach Treatments
Use light conditioning treatments two to three days before bleaching to keep hair hydrated. Avoid heavy oils or thick masks before the process; they can block bleach. A mild leave-in conditioner is safer to keep strands flexible.
Do not apply any oils or heavy products on the bleaching day. Clean but unwashed hair holds natural oils that protect both hair and scalp. Skip protein treatments right before bleaching as they might make hair too stiff.
- Stop shampooing at least 48 hours before bleaching.
- Inspect hair for dryness, frizziness, or split ends.
- Perform a strand test with bleach on a hidden section.
- Check scalp for cuts, irritation, or sores.
- Apply a thin layer of petroleum jelly around your hairline.
- Select a light leave-in conditioner for a couple of days before.
- Avoid heavy oils and protein treatments immediately before bleaching.
How to Mix Bleach and Developer Safely and Correctly
Mix bleach and developer by following your kit’s exact ratio instructions to get a yogurt-like consistency. Use developer volume based on your hair condition and color goals. Mix only what you’ll use immediately and avoid storing mixed bleach for long.
Developer Volumes and Their Lifting Power
Developer volume affects how much your hair lightens and how harsh it feels on your scalp. A 20 volume lifts color about 1-2 levels and is gentler on hair. A 30 volume lifts 3-4 levels but can irritate your scalp if left on too long.
Choose 20 volume for fine or previously damaged hair to reduce risk. Use 30 volume if your hair is healthy and you want a bigger lift. Using 20 volume on roots and 30 on mid-lengths helps balance lightening.
This method suits some hair types. It evens out the color from root to tip.
Correct Mixing Ratios for Powder Bleach and Developer
Most bleach kits call for mixing one part powder bleach with two parts developer. This 1:2 ratio creates a thick, spreadable paste that lightens well. Mixing wrong ratios can cause weak lifting or a runny mix that’s hard to apply.
Mix only the amount you need right before application to keep the bleach active. Use a non-metallic bowl and a brush to combine products thoroughly. Stir until the mixture looks smooth and creamy, like yogurt.
- Put one scoop of powder bleach into a non-metallic mixing bowl.
- Add two scoops of developer to the bowl, using the scoop from your kit.
- Use a brush or spatula to mix the two until no lumps remain.
- Check the texture; it should be thick enough to not drip but spread easily.
- Prepare a small test strand with the mix to see how your hair reacts.
- Adjust the amount you mix based on hair length and section size.
- Apply immediately once mixed, without waiting or storing.
Risks of Wrong Developer or Ratio
Using a developer too strong for your hair can cause dryness, breakage, and scalp burns. Low developer volume may give uneven color or no lift. Mixing the wrong powder-to-developer ratio weakens the bleach or causes inconsistent lightening.
Adding extra developer won’t make bleach gentler and only dilutes its strength. Too much powder can make the mix crumbly and hard to spread. Always stick to your kit’s recommended ratios and developer volumes for safer, better results.
First Use and Storage Tips
Make a fresh bleach mix each time to keep it effective. Mixed bleach starts losing power after about 30 to 40 minutes. It’s best to discard leftover bleach after one use instead of storing it.
Store unopened developer and powder in a cool, dry place away from sunlight. Developer bottles often come with expiration dates; don’t use them past that time. Keep your mixing tools clean and dry between uses to avoid contamination.
Step-By-Step Bleaching Process for Even Results
Applying bleach evenly means working in clean sections, starting mid-length first, then roots. Timing is key, keep a close eye on color changes to avoid damage. Check your hair every 5 to 10 minutes as it lightens.
Dividing Hair into Sections for Application
Start by parting dry hair into 4 to 6 clean, manageable sections. This splits your hair evenly and makes the application easier. Use clips to keep each section separate and out of the way.
Smaller sections help you apply bleach fully and avoid missed spots. Divide each of the four main sections further into thin subsections for better coverage. This careful sectioning is essential for even bleaching results.
Starting with Mid-Lengths or Ends, Then Roots
Apply bleach to the mid-lengths and ends first because they take longer to lighten. Leave about one inch from the roots since your scalp heat lifts roots faster. Cover smaller subsections carefully for full saturation.
After processing the mid-lengths and ends, go back and apply bleach to the roots. Use a 20 volume developer for the roots, which lift faster. This step ensures all hair reaches the right lightness at the same time.
Timing Each Bleaching Phase and Visual Checks
Follow the bleach manufacturer’s timing instructions, usually 20 to 45 minutes total. Check your hair every 5 to 10 minutes under natural light. Look for even lifting and avoid over-processing, which causes damage and breakage.
Once the mid-lengths and ends look light enough, apply bleach on roots and watch closely. Roots may need less time, around 15 to 20 minutes, due to scalp heat. Rinse immediately if your scalp feels itchy or hair becomes too brittle.
Rinsing and Final Wash Instructions
Once the desired lightness is reached, rinse thoroughly with lukewarm water. Use a gentle, sulfate-free shampoo to wash out any bleach residue. Avoid hot water, which can dry and damage bleached hair.
Apply a toner to neutralize brassiness if needed and leave it on for about 20 minutes. Finish with a deep conditioner to restore moisture. This helps protect your hair after bleaching and keeps your new color fresh.
- Divide dry hair into 4 to 6 clean sections with clips.
- Start applying bleach to mid-lengths and ends, avoiding roots.
- Cover smaller subsections within each section thoroughly.
- Process mid-lengths and ends for 20 to 30 minutes while checking.
- Apply bleach to roots and leave for 15 to 20 minutes.
- Watch hair color every 5 to 10 minutes to avoid over-processing.
- Rinse with lukewarm water, shampoo gently, and apply toner if needed.
- Condition deeply to restore moisture after bleaching.
Always apply bleach to your roots last because the scalp heat makes them lighten faster.
How to Avoid Brassiness and Achieve the Right Blonde Tone
Brassiness shows as orange or yellow tones after bleaching your hair. Bleach lifts your natural color unevenly. This uneven lift causes the brassy shades to appear.
Darker hair often has red or orange undertones that come through. Skipping toning can leave your hair looking warmer than you want.
Toner helps fix those warm tones by adding violet or blue pigments. These colors cancel out brassy hues, leaving your blonde cooler or more neutral. You usually apply toner right after rinsing out the bleach, when your hair is still damp.
Pick your toner depending on the look you want. Use violet-based toner for yellowish brassy hair to get a cool, icy blonde.
Blue-based toners work better on orange tones for a more neutral shade. For a warm, golden blonde, use a toner with subtle warm tints instead.
Apply toner evenly from roots to ends with a tint brush. Leave it on 10 to 20 minutes, checking the color every few minutes.
Don’t leave it too long; you risk turning your hair purple. After toning, rinse with cool water to lock in the tone.
Toner isn’t as strong as bleach, so it won’t damage your hair as much. It’s a mild chemical that mainly coats your hair to adjust color. Apply toner carefully to avoid damage.
Don’t use it every day. Toner can dry out fragile hair over time.
Purple shampoo helps fight brassiness between toner uses. Purple cancels out yellow tones and keeps blonde fresh. L’Oréal Paris Fèria Power Toner in Pearl or Ice Blonde controls warm hues for longer.
People going from dark brown to very pale blonde often need multiple bleach lifts. That increases brassiness risk, making toner a must after each session. Patience and careful toning keep hair healthy and give you the clean blonde tone you want.
How to Care for and Maintain Bleached Hair Health
Bleached hair needs extra care to stay healthy and strong. Use hydrating conditioners and deep repair masks twice a week. These products help add moisture and fix some bleach damage.
Choose natural or organic hair care products. They don’t add more chemicals to your fragile strands. Look for vegan brands and avoid shampoos with harsh sulfates that strip moisture.
Heat styling can damage bleached hair quickly. Avoid using hot tools for at least a week after bleaching.
When you do style with heat, always apply a heat protectant spray first. This spray helps prevent color fading and breakage.
- Use a bond-building treatment like Olaplex before and after bleaching
- Apply a hydrating hair mask 1-2 times weekly to keep moisture locked in
- Use purple shampoo once a week to counter brassiness
- Avoid daily shampooing; wash hair every 2-3 days instead
- Limit heat styling and sun exposure to protect hair color and texture
- Trim split ends regularly to avoid breakage
Extending the life of your bleach color means treating your hair gently. Don’t wash hair daily, since water and shampoo fade color faster. Instead, wash every two or three days using a mild shampoo designed for color-treated hair.
Bonding treatments like Olaplex rebuild the hair’s inner structure. Use these regularly to reduce breakage and maintain strength. Coconut oil adds softness to your hair.
Don’t use it before bleaching. Oils can block how bleach works.
When to Avoid DIY Bleaching and Call a Professional
Dark, previously dyed, or chemically treated hair should not be bleached at home. Bleaching can easily cause damage or breakage in these cases. Professional hairstylists use products and techniques that protect your hair’s health better than typical home kits.
Check your hair condition before bleaching. Avoid DIY if your hair is very dark, curly, permed, fine, brittle, or overly thick.
These hair types respond unpredictably to bleach and may result in uneven color or damage. Your hair with split ends or weakness can’t handle bleach well.
Roots that need frequent touch-ups also call for professional care. Professionals blend bleach smoothly to avoid sharp lines or damage near your scalp. At-home touch-ups often cause overlapping bleach, leading to serious breakage and scalp irritation.
Immediate burns, redness, or severe itching during bleaching are warning signs to stop right away. Rinse thoroughly and seek medical help if burns worsen. A professional stylist can treat damage and recommend safer options next time.
Test a small skin patch 48 hours before bleaching to check for allergic reactions.
Skip bleaching at home if you see dry or crumbly hair. Also avoid it with scalp sensitivity or chemical damage.
Professional salons use lower strength bleach, heat treatment, and protective products that reduce risks. These services cost $70 to $150 or more, depending on hair length and stylist.
DIY bleaching takes careful timing, product choice, and assessment of hair type. Professionals evaluate your hair and scalp, adjusting bleach strength for the best results.
Professionals train to reduce risks of patchy color and burns. They also prevent extreme dryness better than home bleaching.
Step-by-Step Action Plan for Bleaching Your Hair at Home
Follow these steps to bleach your hair safely and get the blonde tone you want. Check your hair’s condition at each step before moving on.
- Two days before: Deep condition your hair to strengthen it. Your hair should feel soft and healthy.
- The night before: Avoid washing your hair. Natural oils help protect your scalp during bleaching.
- Before you start: Get your bleach powder and developer ready. Grab gloves, a mixing bowl, and a brush. Also, have foil or plastic wrap on hand. Make sure all your supplies are ready and undamaged.
- Mixing phase: Combine bleach powder and developer according to the instructions. The mixture should be smooth and creamy without lumps.
- Application phase: Section your hair and apply bleach evenly from ends to roots. Hair will feel slightly warm but never burn.
- Processing time: Leave bleach on for 20 to 45 minutes, checking every 10 minutes. Stop when hair lifts to a pale yellow.
- Rinsing phase: Rinse thoroughly with cool water, then apply a toner to prevent brassiness. Hair should look closer to your desired blonde.
- After bleaching: Use a deep conditioning mask and avoid heat styling for a week. Your hair should feel hydrated and strong again.
Frequently Asked Questions
What’s the Best Way to Bleach Your Hair?
Start by sectioning your hair into parts. Apply bleach with 30 volume developer.
Keep the bleach two inches away from your scalp. This helps avoid irritation and promotes even lightening, especially over multiple sessions.
How Much Does It Cost to Bleach Hair?
At-home bleach kits usually cost between $15 and $40 depending on brand and quality. Professional salon bleaching typically runs from $50 to $150 or more.
What Volume Developer Should I Use?
Use 20 volume developer for fine or light brown hair. Use 30 volume for darker or healthy hair.
Only use 40 volume if you have experience. Higher volumes lift color faster but risk damage.
Do You Need to Cover Hair When Bleaching?
No, covering your hair isn’t necessary during bleaching. Air exposure helps the bleach work better. But avoid direct sunlight to protect your scalp.
Can Bleaching Cause Scalp Burns or Irritation?
Yes, scalp irritation or burns can happen if bleach stays too long or skin is sensitive. Always do a patch test and follow timing directions carefully.
How Long Should Bleach Stay on Your Hair?
Bleach usually processes between 20 and 45 minutes depending on your hair color and desired lift. Read the product instructions to avoid over-processing.
The Bottom Line
Bleaching your hair at home needs care and patience. Take your time and watch your hair closely during every step. Start with a strand test to see how your hair reacts before the full bleach.