How to Bleach Hair at Home: A Complete Guide for Safe, Flawless Results
Knowing how to bleach hair at home helps you get a fresh look anytime. The best way to do it is with the right supplies and careful timing. Start by choosing a developer volume that matches your hair type and desired lift.
Prepare your hair by avoiding shampoo for at least two days beforehand to prevent irritation. Don’t bleach your hair if you had chemical treatments recently. Avoid bleaching if treatments happened in the past two to three months.
This helps prevent hair damage. These steps protect your scalp and keep your hair healthier during bleaching.
Once you start, keep an eye on the clock. Do not leave bleach on your hair for more than 30 to 45 minutes. This minimizes damage and helps you avoid unwanted brassiness or patchy color.
Key Takeaways
- Wait 48 hours without shampoo before bleaching your hair to reduce irritation.
- Skip chemical treatments for at least 2-3 months before bleaching to protect your hair.
- Use a developer volume suited to your natural hair color and target brightness.
- Don’t bleach hair older than 30-45 minutes to avoid major damage.
- Prep hair with no washing 2-3 days before bleaching for better color uptake.
- Apply intensive conditioner for at least 10 minutes after bleaching to restore moisture.
How to Bleach Hair at Home Step-by-Step

Start by mixing the bleach powder and developer carefully according to the kit’s instructions. Use a 20-volume developer for lengths and 30-volume for roots, as roots lighten faster. Avoid mixing large batches; prepare only what you need to keep it fresh.
Section your hair into four parts: two on each side, dividing from front to back. This makes applying bleach easier and ensures even coverage. Use clips to hold sections firmly out of the way.
- Mix the bleach powder and developer in a non-metallic bowl until smooth. Follow the exact ratios provided in your kit.
- Apply bleach to the back sections first, starting a couple of inches away from the scalp. The back processes slower, so it needs more time.
- Move to the sides, applying bleach similarly away from the scalp to lengths. Ensure even coating but avoid overlapping too much for less damage.
- Apply bleach to the top sections last, keeping away from roots and scalp initially. This keeps all sections processing evenly as the roots lighten faster.
- After working through the lengths and mid-lengths, mix a fresh batch with 30-volume developer for roots. Apply this carefully to the roots only.
- Leave bleach on your hair between 20 and 40 minutes. Check your hair every 5 to 10 minutes. Look for the lightening progress carefully during these checks. Don’t exceed the time recommended in your kit to avoid damage.
- Rinse bleach out thoroughly with cool water once desired lightness is achieved or at max time. Follow with a conditioner or neutralizing treatment supplied in the kit.
Applying bleach to roots and lengths separately helps prevent uneven color and overprocessing. Letting roots wait until lengths are lightened balances timing because scalp heat speeds processing.
Expect your hair to feel dry after bleaching. Using a conditioner or hair mask post-bleach helps bring moisture back quickly. Be gentle when rinsing to avoid breakage and protect your scalp during the process.
What Supplies and Developer Volume Do You Need?

You’ll need a few key supplies to bleach your hair safely. Grab a bleaching powder, developer, mixing bowl, tint brush, gloves, and a timer. These tools keep the process clean, controlled, and protect your skin and clothes.
Choosing the right developer volume is a big deal. Developers come in 20, 30, or 40 volume options.
They control how much your hair lifts or lightens. They also affect how long the bleach stays on your hair.
Low volume developers lift less but are gentler. High volume lifts more but cause more damage. Matching your hair type and goal helps pick the right one.
| Developer Volume | Hair Type | Goal | Notes |
|---|---|---|---|
| 20 Volume | Light Brown or Lighter | Lift 2-3 Levels | Use for gradual lift; less damage; good for 2+ sessions |
| 30 Volume | Darker Brown Hair | Lift 3-4 Levels | More damage risk; careful timing needed |
| 40 Volume | Black Hair or Dark Brown | Lift 4+ Levels Quickly | Highest damage risk; best avoided or used by pros |
Most people find 20 volume developer works well for home bleaching. It lightens enough in two rounds while keeping damage low.
For darker hair, 30 or 40 volume might seem tempting, but they risk breakage. It’s safer to use multiple sessions with 20 volume instead.
Keep bleach on your hair for 20 to 50 minutes depending on strength and hair color. Check every 5 to 10 minutes so you don’t overdo it. Timing and type of developer together control the final shade and hair health.
Gather all materials before starting to avoid interruptions. Mixing bleach and developer in a 1:2 ratio ensures the right consistency. Wear gloves and protect your clothes to avoid stain and irritation.
Never leave bleach on your hair longer than the instructions say to prevent serious damage.
Preparing Your Hair and Scalp Before Bleaching
Preparing your hair and scalp before bleaching helps reduce damage and gives you better results. Skipping washes a few days before and testing hair condition matters a lot. You also want to protect your scalp and moisturize your hair before you start.
Waiting Times and Washing Guidelines
Wait two to three days after washing before you bleach your hair. This lets natural scalp oils build up and protects your skin from irritation. Avoid shampooing right before bleaching because clean hair can get damaged more easily.
On the day of bleaching, dry hair works best. Wet hair can dilute the bleach and make the process uneven. Air-dry your hair naturally to keep it healthy and ready for the bleach.
Testing Hair Porosity and Elasticity
To test porosity, spray water on a strand and watch how much it absorbs. When bleach soaks in quickly, your hair’s highly porous and may process faster. When hair barely absorbs water after five minutes, it has low porosity and may take longer.
Check elasticity by gently stretching a wet strand. Hair that stretches about 20% without breaking has good elasticity. When hair snaps easily, it might be weak and need more conditioning before bleaching.
Pre-Bleach Conditioning and Scalp Protection
Use a deep conditioning treatment 3 to 5 days before bleaching to add moisture and strength. Avoid heavy oils right before bleaching since they can block the bleach from working evenly. Leave-in conditioners with argan or coconut oil protect hair without interference.
Protect your scalp by applying a thin layer of petroleum jelly along your hairline. This helps prevent bleach burns and irritation. Be careful not to apply too much, which could cause uneven bleaching near your roots.
How to Avoid Brassy Tones and Uneven Color
You can avoid brassy tones by choosing the right toner. Apply it at the right time after bleaching. Doing this helps keep your hair color natural.
Uneven color happens from poor bleach application or skipping steps. You correct brassiness with purple shampoo or a toner that cancels orange and yellow shades.
Choosing and Applying Toner Correctly
Pick a toner that matches your hair’s current lightness. Cool or purple-based toners counteract yellow and orange tones best. Dilute the toner with a developer usually 10 or 20 volume for gentle results.
Apply toner evenly to clean, damp hair after rinsing out bleach. Keep toner on your hair only 10 to 20 minutes. Watch the color change, then rinse when it’s the shade you want to avoid over-toning.
Signs You Need Toner and When to Use It
Use toner when your hair looks too yellow, orange, or dull after bleaching. A quick test is if your hair reflects warm, brassy light instead of your desired shade. You should tone hair immediately after bleaching if it feels dry or brittle.
Waiting too long to tone can cause brassiness to settle. Check your color under natural light before toning. Use toner only when bleach makes your hair too light.
Apply it if your hair color looks uneven after bleaching. Don’t use toner for your first lightening step.
Common Causes of Brassiness and How to Fix Them
Brassiness usually happens when bleach doesn’t lift enough, leaving orange or yellow shades behind. Uneven bleach application also causes patchy toner results. To avoid this, section your hair and apply bleach evenly everywhere.
Purple shampoo fixes brassiness easily. Just apply it when you notice unwanted yellow tones. It helps keep your hair color bright.
Use it 2 to 3 times a week in place of regular shampoo. For stronger correction, apply toner or a color-canceling mask according to product instructions.
Caring for Bleached Hair to Maintain Health
After you bleach your hair, keeping it strong and shiny means regular care. Use bond-building products designed for bleached hair to help repair broken bonds. These products usually cost $15 to $30.
Apply them after washing your hair. Leave them in for 5 to 10 minutes.
Moisture is key. Treat your hair to deep conditioning settings once or twice a week. Leave an intensive conditioner on your hair for 10 minutes.
This helps keep it soft. It also prevents breakage. Choose natural hair care products without harsh sulfates or alcohol to avoid drying out your strands.
Adding cannabidiol-infused hair treatments can boost moisture. CBD, CBC, and CBG oils restore natural scalp oils and make hair bouncy and healthy. You can find these treatments for $20 to $35.
Use them weekly or in your regular care. This gives the best results.
Bleached hair can’t handle too much heat. Limit heat styling to protect your color and reduce damage. When styling, use a heat protectant spray.
Keep tools on medium or low heat. That means about 300°F or 150°C.
Avoid washing your hair every day. Washing too often strips oils, drying out bleached hair. Every other day or even every three days works better.
Use cool or lukewarm water for washes. Hot water opens the cuticle and lets moisture escape.
Salon reconstruction treatments once a month can rescue severely damaged hair. These treatments can cost $50 and up but greatly improve strength and shine. Use them if your hair feels brittle or looks dull despite home care.
Repeat bleaching sessions only after at least 6 to 8 weeks. This gives your hair time to recover. Over-bleaching too soon causes breakage and weakens hair permanently.
Notice your hair breaks easily? Skip the bleach. Focus on repair instead.
Skip shampoo every day to keep bleached hair soft. Avoid hot water too. This prevents breakage.
Common Mistakes People Make When Bleaching at Home
Applying bleach too slowly is a big mistake. The bleach can start acting before it’s spread evenly, causing patchy color. You want to move quickly.
Heat from your scalp makes roots lighten faster. Roots lighten faster than your ends.
Start bleach two inches from your scalp. Use 30 volume developer on mid-lengths and ends. This helps the process.
Then apply bleach with 20 volume developer on your roots last. This method avoids hot roots that look much lighter than the rest.
Not avoiding washing your hair before bleaching can cause uneven or weak lift. Wait 2 to 3 days without washing. This keeps your scalp and hair oils safe.
These oils protect your scalp and hair. Washing right before can dry out hair and cause irritation.
- Watch for scalp irritation like burning or itching and rinse bleach immediately.
- Rinse early if you feel intense heat or pain during bleaching.
- Mix bleach according to package instructions to keep the right consistency.
- Work quickly but carefully to cover all strands evenly.
- Apply bleach in sections for better control and uniform lift.
- Don’t leave bleach on longer than your hair type allows, follow timing guidelines.
- Use a deep conditioning mask afterward to fix dryness or breakage.
Scalp irritation means your skin is reacting badly. Rinse with cool water and wait a few days before trying again.
Using a mild, fragrance-free shampoo after can help too. Avoid using more bleach if this happens repeatedly.
Patches usually form from uneven application. Or from waiting too long to finish. Section your hair and apply bleach consistently in parts.
Timing can be 20 to 45 minutes total but always check instructions on your bleach kit. Over-bleaching damages hair and causes breakage.
Bleach overdrying your hair happens easily. Use a rich conditioner or a protein treatment soon after washing out the bleach.
This reduces split ends and dryness, making hair smoother. These steps keep your hair safer for later colouring or styling changes.
When to See a Professional Instead of DIY
Bleaching your hair at home is fine for lighter shades like dark blonde or medium brown. You can safely use kits like L’Oréal Paris Colorista for these tones. But very dark, curly, chemically treated, or brittle hair should be bleached only by a professional.
Dark or previously colored hair reacts differently to bleach. It takes longer and risks uneven color or serious damage. Professionals have tools to test your hair’s strength and protect it during the process.
Your hair is dyed, permed, or fragile. Visit a salon instead. It’s safer for these hair types.
How often you bleach your hair matters for its health. Space bleaching sessions at least 4 to 6 weeks apart. Frequent bleaching can cause dryness, breakage, and scalp irritation.
Overdoing it raises the chance of permanent damage or hair loss. So avoid rushing to bleach again before your hair recovers.
See a professional for big color changes. Also, if your hair is hard to manage. They know how to handle tricky hair.
Professionals charge from $100 to $300 or more depending on hair length and salon. But they provide a safer process and better results than trial-and-error at home. Also, a professional can manage risks and fix mistakes quickly.
When unsure, start by consulting a professional stylist. They can assess your hair type and recommend if home bleaching will work or not.
This step can save you time, money, and hair health. Remember, skipping this advice increases the risk of uneven color and damage.
How to Minimize Damage When Bleaching Hair
Bleaching can dry out and weaken hair if you don’t take care. Use the right bleach mix for your hair. Treat your hair after bleaching.
Avoid harsh styling to keep hair strong. This small extra effort helps your hair stay soft and less prone to breakage.
Low-Damage Developer and Product Choices
Choosing a 20-volume developer is a safer start for home bleaching. It lifts your hair color enough without being too harsh or causing extra damage. Cream developers are easier to handle.
They don’t drip or run much. Liquid ones run more and are messier.
Don’t rush to go very light in one session. Dark or black hair needs more care. Lighten gradually over time.
Gradual lightening over several sessions reduces damage and preserves hair strength. Using high volume developers like 30 or 40 causes more breakage and scalp irritation.
Restorative Treatments and Conditioning
Bleach opens up your hair’s cuticle, which leads to dryness and rough texture. Regular deep conditioning masks help close the cuticle and restore moisture. Try applying a hydrating mask once or twice a week after bleaching for best results.
Leave-in conditioners with moisturizing and heat-protecting properties keep hair soft and nourished. Some products protect hair from heat damage. L’Oréal Paris EverPure Sulfate-Free Moisture 21-in-1 is one example.
It helps keep hair healthy. Avoid skipping conditioning steps as they repair strength over time and reduce brittleness.
Protecting Hair from Heat and Styling Post-Bleach
Heat styling can quickly worsen hair damage after bleaching. Try air drying your hair before styling. Dry hair most of the way first.
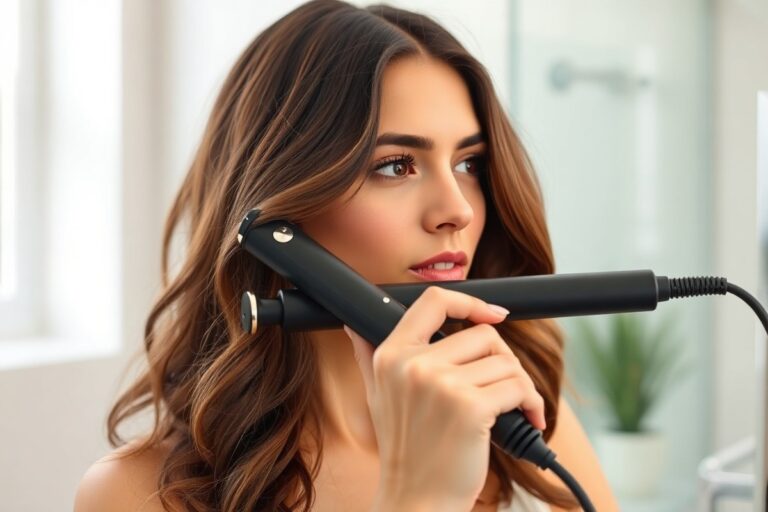
Then use a flat iron or curling wand. This lowers heat exposure and helps retain moisture.
When you do use heat, always apply a good heat protectant spray or cream. Limit styling tools to low or medium heat settings and keep sessions short. Reducing heat use preserves your hair’s strength and keeps your bleach job healthier for longer.
Test bleach on a small strand first. Check how your scalp reacts to it. This helps avoid irritation and surprises.
Step-by-Step Action Plan
Follow this plan to bleach your hair safely at home. Each step shows what to do and how to know it’s working.
- Before you start: Do a strand test on a small hair section. Check the lightening result after 30 minutes. This helps avoid surprises and damage.
- Day 1: Mix bleach powder with 20 or 30 volume developer. Apply evenly on dry hair, avoiding the scalp. Watch for even coverage without clumps.
- During bleaching: Check hair every 10-15 minutes. Stop when hair reaches the pale yellow stage. Going beyond risks more damage and brassiness.
- After bleaching: Rinse with cool water and use a deep conditioner. Your hair should feel softer and not overly dry.
- Day 2 to 7: Use purple shampoo 1-2 times to reduce brassiness. Look for neutral, not grey or purple, hair tones.
- After week 1: Moisturize daily with leave-in conditioner or oils. Healthy hair looks shiny and feels smooth.
- After 2 weeks: Avoid heat styling or use heat protectants. This prevents extra damage while hair recovers.
- Maintenance ongoing: Repeat purple shampoo weekly and deep condition weekly. Your goal is balanced color and strong hair.
Frequently Asked Questions
What Is the Safest Way to Bleach Dark Hair at Home?
Dark hair usually needs several bleach sessions for good results. Use low volumes of developer to protect your hair.
Can I Bleach Only My Roots Without Affecting the Rest?
Yes, you can target roots with a small brush for neat application. Work quickly to avoid overlapping and check the timing carefully.
How Long Should I Wait Between Bleaching Sessions?
Wait about 2 to 4 weeks to let your hair recover. The longer you wait, the less risk of severe damage or breakage.
Can Natural Oils Protect My Scalp During Bleaching?
Slightly oily scalp can help reduce irritation but don’t over-apply oils. Clean and dry scalp works best before applying bleach.
Does Temperature Affect How Bleach Works on Hair?
Warmer ambient temperatures speed up bleaching reactions. Avoid overheating your head to prevent scalp burns or uneven lightening.
How Do I Handle Bleach If I Have Curly or Thick Hair?
Extra care is needed for curly or thick hair types. Consider professional help, as DIY can lead to uneven color and damage.
The Bottom Line
Bleaching hair at home works best with careful steps and good care. Take your time and watch your hair’s response at each stage. Try the strand test first to see what your hair needs.